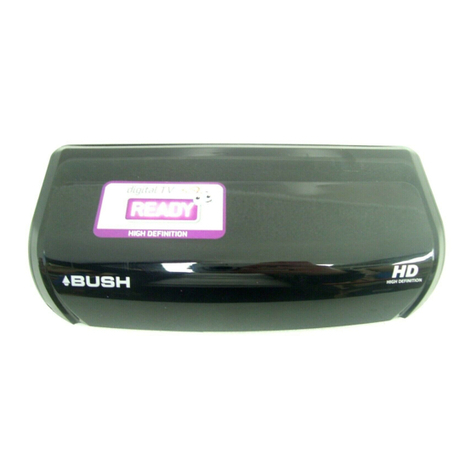
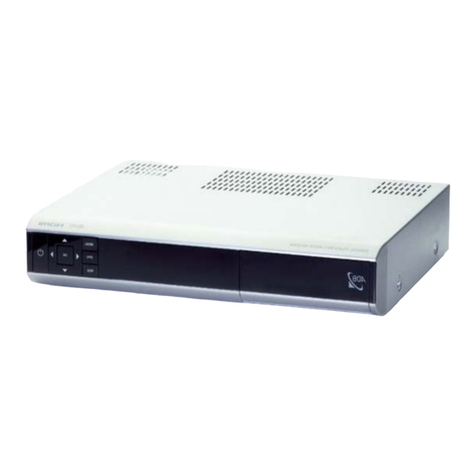
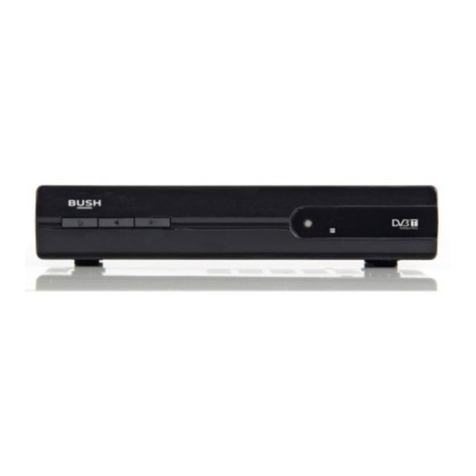
Bush DFTA42FV User manual

INSTRUCTION MANUAL
The Gold Technical Support Line:1902 215 259
(Charges will apply at$2.95 per minute)
DFTA42FV
High Definition
Digital SetTop Box

Safety Instructions
Disclaimer
Information in this document is subject to change without notice.
The manufacturer does not make any representations or warranties
(implied or otherwise) regarding the accuracy and completeness of this
document and shall in no event be liable for any loss of profit or any
commercial damage, including but not limited to special, incidental,
consequential, or other damage.
Always read the safety instructions carefully
Keep this Instruction Manual for future reference
Keep this device away from humidity
Lay this device on a reliable flat surface before setting it up
Do not stand it on soft furnishings
If any of the following situation arises, get the Set Top Box checked by
a service technician:
It has been exposed to moisture
It has been dropped and damaged
It has obvious sign of breakage
It has not been working well or you cannot get it to work according
to the Instruction Manual
Warning
Toprevent the risk of electric shock, do not open the cover or the
back of the receiver.
Do not block the ventilation holes of the device. Leave appropriate
gap above and around it to allow for adequate ventilation.
Do not place the device in an unventilated cabinet or on top of aunit
which emits heat.
Copyright Statement
No part of this publication may be reproduced in any form by any means
without the prior written permission. Other trademarks or brand names
mentioned herein are trademarks or registered trademarks of their
respective companies.

Thank you for buying this Bush product, which is designed to give you many
years of trouble-free service.
You may already be familiar with using a similar unit, but please take time to
read these instructions. They are designed to familiarise you with the unit s
many features and to ensure you get the very best from your purchase.
Safety is important
Your safety and the safety of others is important. Please therefore, ensure you
read the Safety Instructions before you operate this unit.
Warranty
In theunlikely event that your product fails towork normally,please call the
below Bush warranty number for support.
Australia
Bush Warranty: 1800 509 394
New Zealand
Bush Warranty: 0800 450 259
Introduction

About the Set Top Box
This DVB-TTV Receiver allows you to access Freeview Digital TV
Channels and Radio Broadcasts on your TV set. Its digital reception
covers VHF & UHF band. Digital TV eliminates noise and interference
and offers high quality video and audio.
An easy to use on-screen installation guide is provided. In addition,
a fully featured Remote Control is included that offers you access
to every feature with a simple press of abutton.
Main Features
Compliant with both Australian Standard and High Definition Video
Freeview Compliant
Decoding MPEG2 and H264 MPEG4AVC Formats
Upgrade receiver software by over-the-air download
COFDM Demodulator
Automatic/Manual Channel Search
Channel Edit, Moving and Deletion
Parental Lock Control
EPG (Electronic Program Guide) and Teletext Function (where
available)
HDMI 1.3 Output
Multiple-Language OSD
Supports Multi-Subtitle
USB Port for Viewing JPEG Files, Music File and to Upgrade Software
Tuner RF In/LoopThrough
Component /Video/ Digital Audio viaCoaxial Output
Full Function Remote Control
Package Contents
Before installation, please check the items of the package.
The package should contain the following items:
~ DVB-T TV Receiver x1 pc
~ Remote Control x1 pc
~ AAABattery for the Remote Control x1 pair
~ Instruction Manual x1 pc
~ Composite RCACable x1 pc

Table of Contents
Front and Rear Panel ..........................................................................5
Remote Control ................................................................................6-7
Connecting to a Television................................................................... 8
Connecting toan Audio System............................................................. 9
Connecting to a DVD Recorder or VCR.................................................10
11-19
................................................................................19
Technical Specifications..................................................................... 20
Warranty........................................................................................... 21
First Time Installation... ......................................................................11
Basic Operations..........................................................................
Troubleshooting

N14119
POWER SUPPLY: 230V~ 50Hz
MAX POWER CONSUMPTION: 8WATTS
MADE IN PRC
BUSH WARRANTY: 1800 509 394 AUSTRALIA
BUSH WARRANTY: 0800 450 259 NEW ZEALAND
Serial No.:
DFTA42FV
2009/06
INRF LOOPRF
THROUGH
COMPONENT VIDEO /AUDIO OUT
Pb
Pr
YR
VIDEO
L
HDMI OUT
AC 230V
~50Hz
CoaxialCoaxial
Digital
Audio
Digital
Audio
Front and Rear Panel
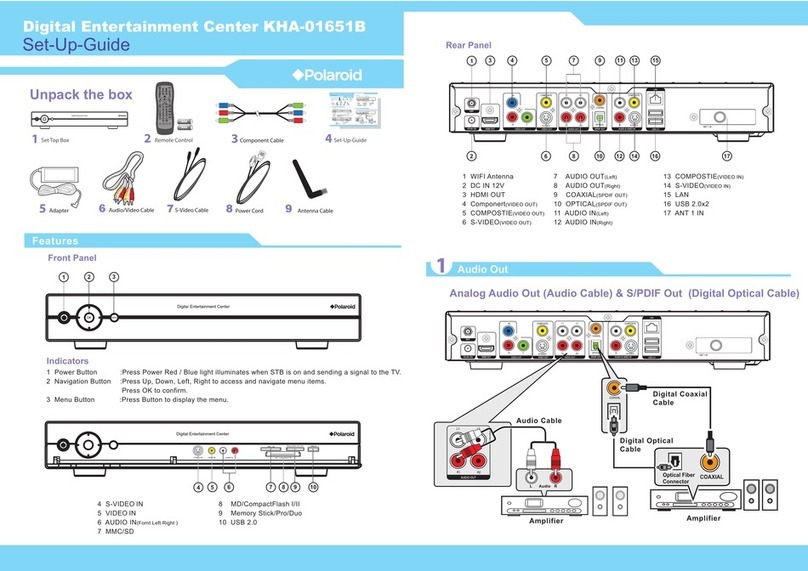
1. Front panel
1 POWER BUTTON: Used to turn on/off the main power supply.
2 STANDBY INDICATOR: Used to visually show power state of the Set Top Box,
the LED will turn red if the Set Top Box enters standby mode.
3 REMOTE CONTROL SENSOR: Used to receive the signal from the Remote Control.
4USB:
5 CHANNEL UP/DOWN: Used to change channels without using the Remote Control.
Data input from USB storage devices.
2. Rear panel
1
2
3
4
5 COMPONENT VIDEO OUT:
6
7
8
RF IN : This socket connects to your external Aerial.
RF LOOP THROUGH: This socket will bypass the RF signal to either your TV or
another video system.
COAXIAL: Thissocket connects to a Coaxial cable on your surround sound system.
These sockets connect to your TV component input
terminals.
HDMI
MAINS CABLE: This is used to connect to your main power supply.
VIDEO: This socket outputs composite video signal.
AUDIO L/R: Thissocket outputs Analog Audio L/R signal.
High definition audio and video output used to connect to a HDMI device
5
1 2 34567 8
345

OK
MUTE
TTX
INFO
FWD
EPG
CH+
CH-
FAVOURITE
GOTO
REV
STANDBY
RECALL
PREV NEXT
TV/RADIO
MENU EXIT
PAUSE STOP REPEAT
SUBTITLE
AUDIO
PLAY
VOL+VOL-
123
456
7890
Remote Control
6
1. MUTE:Mute or RestoreAudio Output.
2. INFO:Displays additional channelinformation.
3. TTX:Displays Teletext Information.
4. SUBTITLE:Selects Subtitles Language.
5. EXIT: Exits the currentMenu or returnsto the
previous Menu.
6. OK:Confirms an entryor selection. Displays
the list ofchannels.
7. RIGHT /LEFT:Navigates through theMenus.
Increases or decreasesvolume.
8. TV/RADIO:Switches fromTV function toRadio
function and fromRadio toTV.
9. RECALL:
10. GOTO:Selects the playtime of media.
11. PREV: Skips to theprevious track during
playing media andskips to theprevious channel
during playing DTV.
12. NEXT: Skips to thenext track duringplaying.
media and skipsto the nextchannel during playing
DTV.
13. REPEAT:Selects Repeat orturn offRepeat
mode.
14. STOP:Stops media play.
15. STANDBY:
16. EPG:(Electronic Program Guide)Turns the
program guide on.
17. AUDIO:Selects anAudio Language orAudio Mode.
18. UP/ DOWN:Navigates through theMenus. Selects thenext or previous
Channel.
19. MENU:Turns onMain Menu.
20. FAVOURITE: Turns onFavourite Menu.
21. 0-9 (NumericButtons): Selects a channelor setting.
22. FWD:Searches forwards duringmedia play.
23. REV:Searches backwards duringmedia play.
24. PLAY:Starts or resumesmedia play.
25. PAUSE: Pauses media play.
26. COLOUR BUTTONS:
Used to switchbetween the last
two viewed channels.
Switch the productto on orstandby.
Operate differentfunction inTEXT screen.
Installing the Batteries
Remove the battery cover from the and put 2xAAA size
batteries inside the compartment.
The diagram inside the Battery Compartment shows the correct way to
install the batteries.
Remote Control
OPEN
CLOSE
1.Open the cover 2.Install batteries 3.Close the cover
Using the Remote Control
Touse the Remote Control, point it towards the front of the Digital Set Top Box.
The Remote Control has a range of up to 7 metres from the Set Top Box at an
angle of up to 60 degrees.
The RemoteControl will not operate if its path isblocked.
Sunlight or very bright light will decrease the sensitivity of the
Remote Control.
7

Connecting to a Television
TVAerial
Cr
Cb
Composite
8
For a basicconnection from yourSet Top Box tothe television,
use the Compositeconnection outlined below.
For a higherquality connection, usethe Component Video
connection outlined belowcombined with theComposite AudioConnection.
HDMI
For the highestquality connection usea direct HDMIconnection, see below.
YELLOW
VIDEO IN
(Audio) (Video)
INRF LOOPRF
THROUGH
COMPONENT VIDEO /AUDIO OUT
Pb
Pr
YR
CVBS
L
HDMI OUT
100-240V~
50/60Hz
Coaxial
Digital
Audio

INRF LOOPRF
THROUGH
COMPONENT VIDEO /AUDIO OUT
Pb
Pr
YR
CVBS
L
HDMI OUT
100-240V~
50/60Hz
Coaxial
Digital
Audio
BASS
TREBLE
ECHO
DOWN UP
VOLUME
INPUT SELECTOR
MUTE
KARAOKE
CHANNEL
TEST
MODE
3 STEREO
PRO LOGIC
BYPASS
EXCITE
POWER
MIC
2
1
1
MIC VOL
2
MIC
Amplifier
Coaxial
Coaxial cable
Connecting toan Audio System
5
9

INRF LOOPRF
THROUGH
COMPONENT VIDEO /AUDIO OUT
Pb
Pr
YR
CVBS
L
HDMI OUT
100-240V~
50/60Hz
Coaxial
Digital
Audio
TVAerial
Connecting to a DVD Recorder or VCR
10

(1) Select [OSD Language] and pressRIGHT/LEFT keyto select an language
(2) Select [Country] and press RIGHT/LEFTkey toselect your country of
residence
(3) Select [Channel Search] and press RIGHTor OK keyto begin Automatic
channel search
(4) Once channel tuning is complete, you are now ready to watch TV
First Time Installation
After all connectionshave been madeproperly,switch onTV and make
sure the receiveris connected tothe Main Power. Press Powerbutton to
switch receiver on.If you areusing the receiverfor the firsttime or
restored to FactoryDefault, the MainMenu will appearon yourTV screen.
Basic Operation
(1) Program ManageSettings
Toaccess the Menu,press the MENUbutton and select[Program]. The
Menu provides optionsto adjust theProgram Manage Settings.Select an
option and pressOK or RIGHTto adjust thatsetting. Press theEXIT button
to exit theMenu.
11

(2) Program Edit
Toedit your programpreferences (lock, skip,favourite, move ordelete), you
will need toenter the ProgramEdit Menu. ThisMenu requires apassword to
access. Enter thedefault password '000000'.
12

Move a TVor Radio Program/s
1. Select thepreferred program thenpress the REDbutton. Amove symbol
will appear
2. Press UP/DOWNto move theprogram
3. Press OKto confirm
4. Repeat theabove steps tomove more channels
Lock Program/s
Youcan lock selectedprograms for restrictedview.
Lock aTV or RadioProgram:
1.Select the preferredprogram then pressthe YELLOWbutton. A lock-shaped
symbol is displayed.The programis now markedas locked
2. Repeat theprevious step toselect more programs
3. To confirm andexit the menu,press the EXITbutton
4. Press theYELLOW buttonto disable thelocked program
5. To view thelocked program, youwill be requireto enter eitherthe default
password '000000' oryour last setpassword.
(3) EPG (Electronicprogram guide)
The EPG isan on-screenTV guide thatshows scheduled programsseven
days in advancefor every tunedchannel. Press theEPG button onthe Remote
Control to accessguide.
Youcan use theUP/DOWN key toselect the preferredprogram. If thereis
more than one pageof information, usethe BLUE buttonfor page upand
the YELLOWbutton for pagedown.
(4) Sort
Sort your channelsfrom the followingoptions:
[LCN] - Sortthe channels inascending order
[Name] - Sortthe channels inalphabetical order
[Service ID] -Sort the channelsaccording to thestation
(5) LCN (Logicalchannel number)
Set LCN onor off.
13

(1). Aspect Ratio
(2). Resolution
(3). TV format
Youmust set thedisplay format toeither 4:3 PanScan,4:3 Letter Box,16:9
Full Screen or Auto toget the maximumdisplay when watchingTV.
If the videodoes not appearcorrectly,change the setting.This settingis to
match the mostcommon setting forHDMI.
[480i]: for NTSCsystem TV.
[480P]: for NTSCsystem TV.
[576i] for PAL systemTV.
[576P]: for PAL systemTV.
[720P]: for NTSCor PAL systemTV.
[1080I]: for NTSCor PAL systemTV.
If the videodoes not appearcorrectly,you need tochange the settings.
This should matchthe most commonsetting forTVs in yourcountry.
[NTSC]: for NTSCsystem TV.
[PAL]:for PAL systemTV.
(6) VideoSetting
To access the Menu,press MENU thenselect [Picture].The Menu
provides options toadjust the videosettings. Press UP/DOWNto select an
option and pressRIGHT/LEFT toadjust that setting.Press EXITto exit the
menu.
14

1 .Auto Search
Search and installall channels automatically. Thisoption overwrites all
preset channels.
1. Select [AutoSearch] and pressOK or RIGHTto start channelsearch.
2. To cancel channelsearch, press EXIT.
2. Manual Search
Install new channelsmanually.This optionadds new channelswithout
changing the currentchannels list.
1. Select [ManualSearch] then press OK or RIGHT. The channel search
screen will appear.
(7) Channel Search and M
SC s
to exit M
To access the menu,press MENU select [Search Channel].The enu
provides options toadjust the earch hannel settings.
Select an optionand press RIGHT/LEFTto adjust thesetting .
Press EXIT the enu
15

2. Press theRIGHT/LEFT keyto select thechannel frequency
'
Enable AntennaPower if anexternal active antennais connected.
(8) TimeSetting
M then M
Press UP/DOWN tos
s .
3. Press OKto start searchingchannels
If a channelis found, itis saved andadded to thechannels list. Ifchannels
can t be found,then exit themenu.
(3) Country
Select your countryof residence.
(4) Antenna power
To access the enu, press MENU select [Time].The enu provides
options to adjustthe time settings.
elect an optionand press RIGHT/LEFTto adjust the
setting . Press EXITto exit themenu
(1) Timeoffset
(2) Country Region
Select the CountryRegion when [Time Offset]is set toAuto.
To access the enu, press MENU select [Option].The menu provides
options to adjustthe
Select an optionand press to adjust thesetting.
Press EXIT the enu
Select auto ormanual for GMToffset adjustments.
(3) TimeZone
Select theTime ZoneOffset when[Time Offset]is set toManual.
(9) Option M and
OSD Language, SubtitleLanguage and AudioLanguage.
RIGHT/LEFT
to exit M
16

(1). OSDLanguage
(2). AudioLanguage
(3). SubtitleLanguage
To access the enu, press MENU select [System].The menu
provides options toadjust the systemsettings.
elect an optionand press RIGHT/LEFTto
adjust the setting.
Press EXITto exit the enu .
Select an OSDlanguage
Select the preferredaudio language forwatching TVchannels.
If the languageis not available,the default programlanguage will beused.
Select the preferredsubtitle language.
(10) System Setting
M and
Press the UP/DOWNkey to s
M
(1) Parental Guidance
Youcan restrict accessto channels thatare unsuitable
for children.Torestrict/lock the channel you will needto enter eitherthe
default password '000000'or your ownpassword.
(2) Set Password
Set or changethe password forlocked programs. Enteryour old
password or thedefault password '000000'.Youwill then beasked to
enter your newpassword. To confirm re-enteryour new password.Once it
is confirmed, pressEXIT toexit the Menu.
17

(3) Restore FactoryDefault
Reset your SetTop Box tothe Default FactorySettings.
In Main Menuselect [Restore FactoryDefault] and pressOK or RIGHTto
select. Enter yourpassword or thedefault password '000000'and press OK
to confirm.This option willdelete all presetchannels and settings.
(4) Information
View model,hardware and softwareinformation.
(5) Software update
If the statusis set ''ON'',it will beginsearching for newsoftware from
broadcast according toyour preferred timein ''StartTime''.
(11)USB
To access the Menu,press the Menubutton and selectUSB.
Multi-Media
Switch to USBmode and plugin USB toview files.
18

The image stopped
suddenly or mosaic
Problem Potential Reasons What to do
No picture Power isn't connected Connect the power
The power switchis not on Switch on thepower
Screen shows
No Signal DVB-T cable notconnected Plug in theDVB-T cable
Incorrect setting Reset setting
No sound from
speaker No or incorrectconnection
with audio cable Connect the audiocable
correctly
Sound on mute Turn off mute function
Incorrect sound track Try anothersound track
Only sound, no
image on the
screen
No or incorrectconnection
with AV cable Make sure cablesare
connected correctly
The program isa radio
program Press <TV/RADIO> keyto
shift intoTV mode
Remote Control
is not responding The battery isexhausted Change battery
Remote Control isnot
facing or closeenough
to the SetTop Box
Adjust the positionof the
Remote Control andmove
closer to theunit
The signal istoo weak Strengthen the signal
Troubleshooting
19
Table of contents
Other Bush Set-top Box manuals

Bush
Bush DFTA60BR User manual

Bush
Bush DFTA2 User manual

Bush
Bush DFTA52DAB User manual

Bush
Bush DFTA13HD User manual

Bush
Bush BU11FVZS2 User manual

Bush
Bush BFSAT01HD User manual

Bush
Bush DVB-T2 PVR MPEG4 User manual

Bush
Bush BHAS02URG User manual

Bush
Bush CDVB52 Assembly Instructions

Bush
Bush DFTA7C User manual