SIGNAL STRENGTH OPERATION
Note: Signal strength can only be accessed when the transmitter is
powered OFF.
Press Menu button multiple times until Signal Scan: Hold SELECT comes
up on the display. Press and hold the SELECT button at this point. The
display will show 3…2…1…START while holding down the button.
ReleaseSELECT button. The transmitter will receive 10 samples and
display “Avg. Signal: 40dB (strongest) to 110dB (weakest)”signal
strength.
If duringsignal scan it receives no response from the receiver,the test will
end, and “Out of Range”will appear on display. Moveto acloser location
and followthe steps above to repeat the test.
If the signal scan ends with the display showing “ERROR”, this typically
means noise or other RF signals are preventingsome of themeasured
signals from reaching the receiver. Try moving to another location or
consult with BWI Eagle for assistance.
MENU SETTINGS
Note: Menu Mode (Menu Button) can only be accessed when transmitter
is powered OFF.
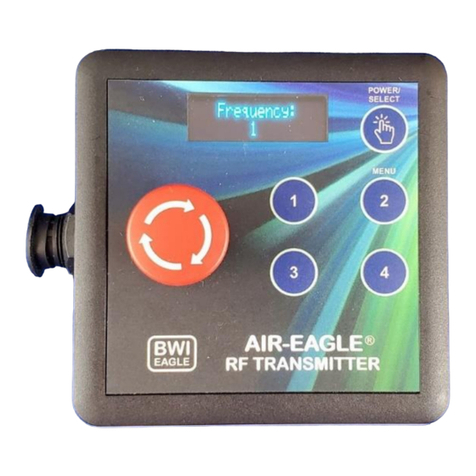
Press the ‘Menu’button to bring up the settings that can be adjusted.
•The first press will bring up a display with the current Frequency, Unit
number and Battery Level. Pressing SELECT in this menu section
will clear the screen and put the unit back to sleep quickly.
•The second press brings up the Frequency selection with the current
frequency showing (from 1-8) on line 2.
•The third press brings up the Power Level menu with its current
selection (either Low,Mid or High).
•The fourth press brings up the Unit numbersetting (either 1 or 2).
•The fifthpress brings up the Signal Strength test. See “Signal
Strength Operation”
When in any of these settings, pressing the Power/Select buttonstarts the
selection changing process. A cursor will start blinking on the selection.
Pressing Power/Select again will now change the setting. Keep pressing
Power/Select until the desired setting is reached, then press the Menu
button for the setting to take effect. The display will show “Saving”….
then “Done”when the setting has been changed.
NOTE 1: Menu mode will stay on for 15seconds after the last button
press. If no button is pressed during this time, the unit will go back to sleep
and any unsaved setting changes will be lost.
NOTE 2 : PressingSELECT while in the first menu (Freq-Unit# Bat) will
exit the menu.
UNIT NUMBER
This model can be used inconjunction with another transmitterthat is
operating the same receiver using different sets of relays. The user must
set up the Unit # under “Menu Settings”. The Unit # transmits signals to
the receiver in the following manner:
Relay logic and operation is set up in the receiver.Please see the model
465-8-STOP product bulletin for instructions.
CHARGING
Charging is accomplished by plugging in any 5V USB charger into the
micro USB connector on the side of the box.
Charging while powered ON - When first plugged in the unit will display
“Charging”with the battery percentage underneath. The characters will
then change to a rotating “+”.
Charging while powered OFF –When first plugged inthe unit will display
“Charging”will the battery percentage underneath, then go blank.
Pressing buttons SELECT or MENU will show Frequency, unit # and
current charge level then turn off
When the micro USB plug is unplugged the display will show ‘Battery”with
the percentage below then turn off. The battery is fully charged when the
percentage gets to 100%.
SPECIFICATIONS

