BWT Bewades LC User manual

Subject to change!
1-511088 / 14277 / 2022-03 / © BWT Wassertechnik GmbH / Printed in Germany
UV disinfection unit
Bewades® LC
Installation and operating manual EN
Draft

DE DE
32
2
DE
Thank you very much for the condence
that you have shown in us by purchasing a
BWT device.
This manual applies only to the product(s) specied on the title page.
Publication details
BWT Holding GmbH
Walter-Simmer-Straße 4
A-5310 Mondsee
Phone: +43 / 6232 / 5011 0
E-Mail: o[email protected]
BWT Wassertechnik GmbH
Industriestraße 7
D-69198 Schriesheim
Phone: +49 / 6203 / 73 0
E-Mail: [email protected]
www.bwt.com
This manual was created, reviewed and approved in German. If there are any discrepancies between
the German edition of the manual and editions in other languages, the information in the German
document should be given preference.
In the event of inconsistencies, contact our customer service; see chapter „Your contact at BWT“ on
page 18“.
All rights reserved (including for the translation). This manual or parts of it are not permitted to be
reproduced, translated or reused in any other way without the written permission of the manufacturer.
In general, the company and product names specied in this manual are registered trademarks of
their respective companies.

DE DE
32
Table of contents
1 Safety Instructions � � � � � � � � 4
1.1 General safety instructions . . . . . . . 4
1.2 Scope of the documentation. . . . . . . 4
1.3 Personnel qualications . . . . . . . . . 4
1.4 Transport and installation . . . . . . . . 4
1.5 Symbols used . . . . . . . . . . . . . . 5
1.6 How warnings are displayed. . . . . . . 5
1.7 Product-specic warnings . . . . . . . . 6
2 Scope of supply � � � � � � � � � � 7
2.1 Acessories . . . . . . . . . . . . . . . . 8
3 Use � � � � � � � � � � � � � � � � � 8
3.1 Intended use. . . . . . . . . . . . . . . 8
3.2 Foreseeable misuse . . . . . . . . . . . 8
3.3 Disclaimer . . . . . . . . . . . . . . . . 8
3.4 Other applicable documentation. . . . . 8
4 Funktion � � � � � � � � � � � � � � 9
4.1 Design of UV units. . . . . . . . . . . . 9
5 Installation conditions � � � � � � 9
5.1 General . . . . . . . . . . . . . . . . . 9
5.2 Installation site and environment . . . . 9
5.3 Feed water. . . . . . . . . . . . . . . . 9
5.4 Installation . . . . . . . . . . . . . . . . 9
5.5 Operation . . . . . . . . . . . . . . . . 9
6 Installation � � � � � � � � � � � � 10
6.1 Installation diagram . . . . . . . . . . 10
7 Start-up � � � � � � � � � � � � � 13
8 Operation � � � � � � � � � � � � 14
8.1 Cleaning the unit. . . . . . . . . . . . 14
8.2 Changing the emitter . . . . . . . . . 15
9 Operator responsibilities � � � � 16
9.1 Inspection . . . . . . . . . . . . . . . 16
9.2 Maintenance . . . . . . . . . . . . . . 17
10 Troubleshooting � � � � � � � � � 17
11 Warranty � � � � � � � � � � � � � 18
11.1 Product returns . . . . . . . . . . . . 18
11.2 Your contact at BWT. . . . . . . . . . 18
12 Decommissioning and disposal 18
12.1 Decommissioning . . . . . . . . . . . 18
12.2 Disposal . . . . . . . . . . . . . . . . 18
13 Technical data � � � � � � � � � � 19
13.1 Dimensions . . . . . . . . . . . . . . 20
14 Standards and legal provisions 22
EU Declaration of Conformity � � � � � 23

DE DE
54
1 Safety Instructions
1�1 General safety instructions
The product was manufactured according to all
recognised regulations and technical standards and
was in compliance with the relevant legal require-
ments when it was put into circulation.
Nevertheless, it can pose a risk of personal injury
or property damage if you do not observe this
chapter and the safety instructions throughout this
documentation.
● Read this documentation thoroughly and in full
before working with the product.
● Retain the documentation in such a way that it is
accessible to all users at all times.
●Always hand over the product to third parties
together with the full documentation.
●Follow all of the instructions in relation to the
proper handling of the product.
● If you detect damage to the product or the mains
supply, stop its operation and notify a service
technician immediately.
●Use only accessories, spare parts and consuma-
ble materials that have been approved by BWT.
● Adhere to the environmental and operating con-
ditions specied in the “Technical data” chapter.
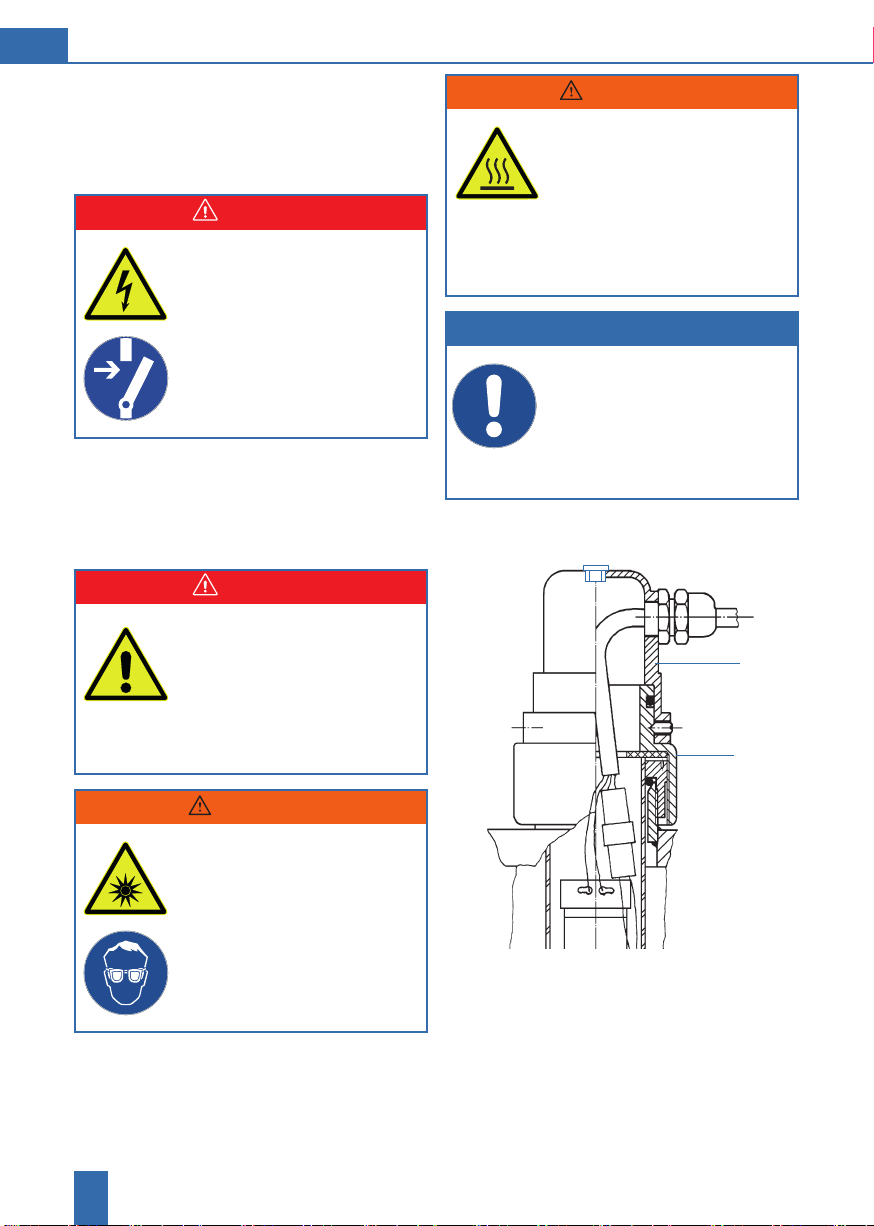
● Use your personal protective equipment. It en-
sures your safety and protects you from injury.
● Only perform tasks that are described in these
operating instructions or if you have been trained
to do so by BWT.
●Perform all tasks in compliance with all applicable
standards and provisions.
●Instruct the operator in the function and operation
of the product.
●Instruct the operator in the maintenance of the
product.
● Instruct the operator in relation to potential dan-
gers that may arise while operating the product.
1�2 Scope of the documentation
This documentation applies exclusively to the
product the production number of which is listed in
chapter 12 “Technical Data”.
This documentation is intended for operators,
installers without training from BWT, installers with
training from BWT (e.g. drinking water specialists),
and BWT service technicians.
This documentation contains important information
for tting the product safely and properly, starting
up, operating, using, maintaining, and disassem-
bling the product, and for correcting simple faults
independently.
Read this documentation in full before working with
the product. Pay particular attention to the chapter
“Safety Instructions”.
1�3 Personnel qualications
The installation work described in these instructions
requires basic knowledge of mechanics, hydraulics
and electrical systems as well as knowledge of the
corresponding specialist terms.
To ensure that the device is installed safely, this work
must be performed only by a qualied specialist or
a trained person under the guidance of a qualied
specialist.
A qualied specialist is anyone who can assess the
work assigned to him or her, identify potential risks,
and take suitable safety measures thanks to his or
her specialist training, knowledge and experience
as well as his or her knowledge of the applicable
regulations. A qualied specialist must comply with
the applicable specialist regulations.
An instructed person is anyone who has been
instructed and, if necessary, trained by a qualied
specialist in the transferred tasks and the potential
risks presented by improper behaviour and who
has been educated about the necessary protective
equipment and measures.
1�4 Transport and installation
To avoid damage during transport to the installation
location, do not remove the BWT product from the
packaging until you have reached the relevant lo-
cation. Then dispose of the packaging in the correct
manner. Check that the delivery is complete.
If there is a risk of frost, drain all components that
convey water.
Lift or transport the product or its components only
from the designated suspension eyes or attachment
points, if present.
The product must be installed or mounted on a suf-
ciently strong and level horizontal surface and must
be adequately secured against falling or tipping.

DE DE
54
1�5 Symbols used
This symbol indicates general
hazards for people, machines or
the environment.
This symbol indicates hazards
due to electric shocks from live
components.
This symbol indicates hazards
for the eyes and skin due to ult-
raviolet rays.
This symbol indicates that this
electrical and electronic equip-
ment must not be disposed of
with household waste at the end
of its life.
This symbol indicates that the
product can be recycled at the
end of its life.
This symbol indicates informati-
on or instructions that you must
observe in order to ensure safe
operation.
This symbol instructs you to dis-
connect the unit’s power supply.
It ensures your safety and pro-
tects you from injury.
Here: Main switch o (0).
This symbol instructs you to use
your personal protective equip-
ment (PPE). It ensures your sa-
fety and protects you from injury.
Here: Wear protective goggles.
1�6 How warnings are displayed
In this document warnings precede any sequence
of actions that could cause harm to persons or da-
mage to property. All hazard prevention measures
must be followed.
Warnings are displayed as follows:
SIGNAL WORD!
Source of hazard
(e.g. electric shock)
Type of hazard (e.g. risk of fatal injury)!
►Escape or prevent hazard
Signal word / colour Indicates the severity
of the hazard
Warning symbol Calls attention to the
hazard
Source / type of
hazard
Indicates the type and
the source of the ha-
zard
Consequences of
hazard
Explains the conse-
quences of not fol-
lowing the warnings
Hazard prevention
measure
Explains how to avoid
the hazard
Signal word Colour Severity of the hazard
DANGER
High-risk hazard.
Indicates a hazardous
situation which, if not
avoided, will result in
death or serious injury.
WARNING
Hazard with a modera-
te degree of risk.
Indicates a hazardous
situation which, if not
avoided, could result in
death or serious injury.
CAUTION
Low-risk hazard.
Indicates a hazardous
situation which, if not
avoided, may result
in minor or moderate
injury.

DE DE
76
1�7 Product-specic warnings
In the following sections, you will nd product-spe-
cic warnings whenever you must perform certain
safety-relevant actions on the device.
DANGER!
Electrical hazard!
Contact with live components will
cause electric shock!
►Unplug device before any service and
repair works.
►Turn the main switch OFF and secure it
against being switched on again.
Bewades 80W80/11 LC and
Bewades 100W100/11 LC
DANGER!
Risk of injury!
The emitter protection tube is forced
upwards by the water pressure.
►Never pressurize unit unless the upper
emitter protection tube lock (5) is in place.
If this is not the case the emitter protection
tube is forced upwards by the water pressure.
WARNING!
Ultraviolet rays!
Burn hazard for eyes and skin!
►Only start up the unit with the protective
cap (8) on.
►Never look into the open sensor socket
whithout integrated glow plug or sensor.
►Wear personal protective equipment
(protective goggles).
WARNING!
Hot surface!
Burn hazard!
►If the ow of water stagnates, the surface
temperature can reach temperatures of up
to 60 °C
►Note on changing the emitters! After you
switch off the unit, allow the water to ow for
approximately 5 minutes to cool the emitters.
NOTICE
Product damage!
Damage to the product due to the
lamp burning for too short a time!
►The minimum burn time before switching
off the heater should not be less than 5
minutes.
5
8

DE DE
76
2 Scope of supply
Bewades 80W80/11LC and 100W100/11LC
- Radiation chamber with built-in agitators in stain-
less steel
- Switchbox with ballast for emitter
1 Emitter protection tube
2O-ring
3Threaded joint
4 Support ring
5 Emitter protection tube lock
6UV low pressure emitter
7Plug
8 Protective cap
10 Operation monitoring window
-Bleed screw
- Drain screw
-Accessory bag with assembly material and
a spanner for the threaded joint
Bewades 70W70/08 LC, 200W200/11LC and
400W200/17LC
- Radiation chamber with built-in agitators in stain-
less steel
- Switchbox with ballast for emitter
1 Emitter protection tube
2O-ring
3 Tensioning screw
4 Support ring
6UVC low pressure emitter
7Plug
8 Blue protective cap
9Bar for equipotential bonding
10 Operation monitoring window
-Bleed screw
- Drain screw
-Accessory bag with assembly material and
a spanner for the threaded joint
1
2
4
6
97
3
8
Bewades 70W70/08LC, 200W200/11LC,
400W200/17LC
10
6
7
1
23
4
5
8
Bewades 80W80/11LC, 100W100/11LC
10

DE DE
98
2�1 Acessories
Order no�
Sampling tap, suitable for ame
sterilization 3/8“, stainless steel
23984
Replacement emitter 70W 23930
Replacement emitter 80W 23986
Replacement emitter 100W 23980
Replacement emitter 200W 23972
3 Use
3�1 Intended use
The Bewades series UV disinfection units are used
to disinfect drinking water. The treated water is low
in germs and free from pathogens. UV disinfection
does not result in any negative changes in the taste
and odor of the treated water.
The principal area of use for the unit is disinfecting
drinking and service water in the private, community
and business sectors.
3�2 Foreseeable misuse
Operating the system with parameters other than
those specied in this documentation and in sec-
tion 3.1.
Non-compliance with the operating and environ-
mental conditions specied in the technical data.
Not adhering to the prescribed maintenance and
service intervals.
Using spare parts and consumables not approved
by BWT.
3�3 Disclaimer
The manufacturer is released from any liability if the
customer intentionally or forcibly removes guards
or safety devices, if the customer wilfully modies
or circumvents the same, or if the customer does
not follow the instructions in this operating manual
or on the system.
3�4 Other applicable documentation
Observe all documents from suppliers that were
included with delivery.These are considered part
of this documentation and must not be changed
or removed.

DE DE
98
4 Function
The water to be treated ows through the stainless
steel radiation chamber, past the UV emitter. The
UV emitter generates UVC rays at a wavelength
of 254nm, which is particularly eective for disin-
fection. This UVC radiation kills the germs in the
water safely.
A agitator is built in to the radiation chamber to
ensure that the radiation spreads equally to all
parts of the water.
The unit is controlled and monitored via an operation
monitoring window (10) and running time meter.
4�1 Design of UV units
UV unit design is primarily based on the following
parameters:
● Maximum ow (m3/h)
● UV absorption of the water to be treated at 254
nm:
Listed as SSK-254 nm (1/m) or UV transmission
based on a dened layer thickness (e.g. %/cm).
5 Installation conditions
5�1 General
Observe all applicable local installation regulations,
general guidelines and technical specications.
The unit must be installed as described in the in-
stallation/operating instructions in compliance with
AVB Wasser V, §12 (general requirements for the
supply of water in Germany) by a qualied water
supply company or by a party registered in the water
supply company’s index of tters.
5�2 Installation site and environment
The installation site must be protected against
frost and kept free of chemicals, paint, solvents
and fumes. Neither the ambient temperature nor
the radiation temperature may exceed 40°C in the
immediate vicinity.
The oor of the installation site must have a suci-
ent load-bearing capacity if the unit is to be installed
on the oor.
There must be a clearance above the unit to facili-
tate emitter replacement (see dimensions).
If the cable length between the UV emitters and the
ballast unit is longer than 6 m, please consult our
technical department.
The emission of interference by the surrounding
electrical systems (voltage peaks, high-frequency
electromagnetic elds, interference voltages, volta-
ge uctuations, etc.) must not exceed the maximum
values specied in EN 61000-6-4.
5�3 Feed water
The hydraulic conditions must be such that a vacu-
um can never form in the UV unit.
The Bewades unit has been designed and built
primarily for static loads.
Avoid pressure surges and uctuating loads (e.g.
from pumps starting, pressure booster pulsation,
quickly closing valves, etc.).
Suitable installations for avoiding pressure surges
or uctuating loads (e.g. expansion vessels, com-
pressed air chambers, slowly closing valves, etc.)
must be installed externally.
5�4 Installation
Use corrosion-resistant pipe materials for installa-
tion. Take corrosion-causing chemical properties
into consideration when dierent pipe materials are
combined (mixed installation).
A protective lter must always be installed upstream
from the unit to protect it from foreign particles.
In certain circumstances, the water must be pre-
treated. Depending on the operating conditions and
water quality, the water may be partially softened
to prevent deposits on the emitter casing tubes.
The emitter connection cable must be made as short
as possible. It may not be laid in loops.
5�5 Operation
In order to guarantee fault-free, safe operation of
the Bewades UV unit, technical consultation is re-
quired before installation. During the consultation,
the rated transmission of the water to be treated
will be determined and the operating parameters
required will be set.

DE DE
1110
6 Installation
6�1 Installation diagram
Electronic
ballasts for
emitters
Sampling
valve
Filter
Sampling
valve
DANGER!
Risk of injury!
The emitter protection tube is forced
upwards by the water pressure.
►Never pressurize unit unless the upper
emitter protection tube lock (5) is in place.
If this is not the case the emitter protection
tube is forced upwards by the water pressure.
WARNING!
Ultraviolet rays!
Burn hazard for eyes and skin!
►Only start up the unit with the protective
cap (8) on.
►Never look into the open sensor socket
whithout integrated glow plug or sensor.
►Wear personal protective equipment
(protective goggles).
Exemplary diagram

DE DE
1110
The unit is attached vertically to the wall using the
assembly material. It is connected to the water
supply via the threaded joints.
►Attach the ballast to the wall.
►Earth the unit using the earthing cable supplied
(welded setscrew on top of Bewades 80W and
100W or on the side of the container of Bewades
70W, 200W, 400W). Also connect the equipo-
tential bonding wire to the metal bar near the
top of the unit.
Bewades 80W80/11LC and 100W100/11LC
►Remove emitter protection tube lock (5) and
threaded joint (3).
►Insert the emitter protection tube (1) (follow the
lower guide in the radiation chamber).
►Rotate the O-ring (2) from the bag of accessories
over the top of the emitter protection tube and
secure the threaded joint (3). While doing so, pull
the emitter protection tube up approx. 1mm (see
drawing) and tighten the threaded joint using the
spanner provided in the accessory bag. Ensure
that the O-ring is in the correct position.
►Attach the emitter protection tube lock (3) and
rubber washer (4) and tighten hand-tight. Do not
tighten fully (the emitter protection tube is pushed
against the support ring when under pressure).
►Insert the emitter (6) carefully and connect with
the plug (7) of the blue protective cap (8). Ensure
that the plug is inserted properly.
►Attach the blue protective cap (8) and secure it
with 2 stud screws.
Bewades 80W80/11LC, 100W100/11LC
ca. 1 mm
6
7
1
23
4
5
8
10

DE DE
1312
Bewades 70W70/08LC, 200W200/11LC,
400W200/17LC
►Unscrew the tensioning screw (3) with the sup-
port ring (4).
►Push the O-ring (2) from the bag of accessories
approx. 25mm over the top of the quartz glass
tube (1).
►Insert the quartz glass tube (1) carefully (follow
the lower guide in the radiation chamber).
►Tighten the tensioning screw (3) and support ring
(4) hand-tight and tighten further using the special
spanner from the bag of accessories if necessary
(a small gap remains between the tensioning
screw and the cover of the UV unit).
►Insert the emitter (6) carefully and connect it to
the plug (7) in the blue protective cap (8). The
alignment of the plug has no eect on the function
of the emitter..
►Attach the blue protective cap (8) and secure it
with 2 stud screws.
1
3
4
6
7
8
2
9
Bewades 70W70/08LC, 200W200/11LC,
400W200/17LC
Bewades 70W70/08LC, 200W200/11LC,
400W200/17LC
approx. 25 mm
Emitter protection
tube
O-ring

DE DE
1312
►Check system for leaks. If there is a leak at the
clamping screw, close the water supply again
and carefully tighten the clamping screw with the
special wrench from the accessory bag.
NOTICE
Product damage!
Damage to the product due to the
lamp burning for too short a time!
►The minimum burn time before switching
off the heater should not be less than 5
minutes.
►Switch on the unit at the main switch on the
control.
7 Start-up
DANGER!
Risk of injury!
The emitter protection tube is forced
upwards by the water pressure.
►Never pressurize unit unless the upper
emitter protection tube lock (5) is in place.
If this is not the case the emitter protection
tube is forced upwards by the water pressure.
WARNING!
Ultraviolet rays!
Burn hazard for eyes and skin!
►Only start up the unit with the protective
cap (8) on.
►Never look into the open sensor socket
whithout integrated glow plug or sensor.
►Wear personal protective equipment
(protective goggles).
WARNING!
Hot surface!
Burn hazard!
►If the ow of water stagnates, the surface
temperature can reach temperatures of up
to 60 °C
►Note on changing the emitters! After you
switch off the unit, allow the water to ow for
approximately 5 minutes to cool the emitters.
►Open the water supply.
►Loosen the bleed screw on the upper part of the
radiation chamber until the water comes out.
The radiation chamber is vented.
►Close the radiation chamber again with the bleed
screw.

DE DE
1514
8 Operation
8�1 Cleaning the unit
The emitter protection tube and the radiation
chamber must be cleaned each time an emitter
is changed. Depending on the water quality and
operating conditions, it may also be necessary to
clean the unit between the emitter change intervals.
When cleaning the unit, lime, iron and manganese
deposits are removed from the emitter protection
tubes.
►Remove the mains plug
►Close the shut-o valves.
►Drain the unit via the drain tap.
►Loosen the 2 screws of the blue protective cap
(8).
►Remove the protective cap and pull the plug (7)
from the UV emitter (Caution! Do not pull the
cable).
►Remove the UVC emitter (6).
Bewades 80W80/11LC and 100W100/11LC
►Open the emitter protection tube lock (5).
►Undo the threaded joint (3) and remove the
emitter protection tube (1).
►Clean the emitter protection tube with a soft cloth.
If required, an acid (e.g. citric acid) or a solvent
(e.g. alcohol) can be used.
►Insert the emitter protection tube (1) (follow the
lower guide in the radiation chamber).
►Push the O-ring (2) over the emitter protection
tube and secure the threaded joint (3) and tigh-
ten it using the spanner from the accessory bag.
Ensure that the O-ring is in the correct position
and that the emitter protection tube is slightly
loose (approx. 1mm play) at the bottom of the unit.
►Attach the emitter protection tube lock (5) and
rubber washer (4) and tighten hand-tight. Do not
tighten fully (the emitter protection tube is pushed
against the support ring when under pressure).
►Insert the emitter (6) and plug (7) it into the blue
protective cap (8). Ensure that the plug is inserted
properly. Attach the blue protective cap (8) and
secure it with the screws.
►Open the shut-o valves and bleed the unit.
►The unit is now ready for use.
Bewades 80W80/11LC, 100W100/11LC
ca. 1 mm
6
7
1
23
4
5
8
10

DE DE
1514
Bewades 70W70/08LC, 200W200/11LC,
400W200/17LC
►Unscrew the tensioning screw (3) with the sup-
port ring (4).
►Remove the quartz glass tube (1).
►Clean the emitter protection tube with a soft cloth.
If required, an acid (e.g. citric acid) or a solvent
(e.g. alcohol) can be used.
►Push the O-ring (2) approx. 25mm over the top
of the quartz glass tube (1) and insert the quartz
glass tube (1) again carefully (follow the lower
guide in the radiation chamber).
►Tighten the tensioning screw (3) and support ring
(4) hand-tight and tighten further using the special
spanner from the bag of accessories if necessary
(a small gap should remain between the tensio-
ning screw and the cover of the UV unit).
►Insert the emitter (6) carefully and connect with
the plug (7) of the blue protective cap (8). Attach
the blue protective cap (8) and secure it with
2 stud screws.
►Open shut-o valves up- and downstream of
the unit.
The unit is now ready for use.
8�2 Changing the emitter
WARNING!
Ultraviolet rays!
Burn hazard for eyes and skin!
►Only start up the unit with the protective
cap (8) on.
►Never look into the open sensor socket
whithout integrated glow plug or sensor.
►Wear personal protective equipment
(protective goggles).
The expected service life of the UV emitters see
„Operator responsibilities“ on page 16“.
►Switch o the master switch and pull out the
mains plug.
►Close the shut-o valves.
►Loosen the 2 screws of the blue protective cap
(8).
►Remove the protective cap and pull the plug (7)
from the UVC emitter.
►Remove the UVC emitter (6).
1
3
4
6
7
8
2
9
Bewades 70W70/08LC, 200W200/11LC,
400W200/17LC
Bewades 80W80/11LC, 100W100/11LC
ca. 1 mm
6
7
1
23
4
5
8
10

DE DE
1716
►Insert and connect a new emitter. Ensure that the
plug is inserted properly (7).
►Attach the blue protective cap (8) and secure it
with the screws.
►Open shut-o valves up- and downstream of
the unit.
The unit is now ready for use.
9 Operator responsibilities
You have purchased a product that is durable and
easy to service. However, all technical equipment
requires regular servicing in order to guarantee
optimal functionality.
Keep yourself up to date with regard to the quality
and pressure ratio of the water which is to be trea-
ted. If the water quality changes, the settings may
need to be changed. Consult a specialist if this is
the case.
The prerequisite for proper function and the warran-
ty are a regular inspection by the operator (every
2 months) and routine maintenance (EN 806-5)
by the BWT after-sales service sta or an installer
authorised by BWT to carry out maintenance (every
6 months).
Wearing parts must also be replaced within the
prescribed maintenance intervals in order to ensure
functionality and full the warranty conditions.
9�1 Inspection
The operator must carry out the following inspec-
tions regularly:
●Check the nitrite content for max. stagnation
time in operation
●Check emitter casing tube for scratches while
cleaning; replace as required
●Check that the blue cap is rmly in place during
each cleaning
●Replace the O-rings in the drain valve and in the
bleed screws if they show signs of wear
1
3
4
6
7
8
2
9
Bewades 70W70/08LC, 200W200/11LC,
400W200/17LC

DE DE
1716
9�2 Maintenance
DANGER!
Electrical hazard!
Contact with live components will
cause electric shock!
►Unplug device before any service and
repair works.
►Turn the main switch OFF and secure it
against being switched on again.
The BWT after-sales service sta or an installer
authorised by BWT must carry out the following
maintenance work regularly�
We recommend that you enter into a maintenance
agreement with your installer or the after-sales
service team.
Clean the emitter casing tube + sensors
for the following substance concentrations in the
drinking water:
Fe+Mn < 0,05 mg/l one every year
Mn+Fe < 0,1 mg/l every 6 month
Mn + Fe < 0,2 mg/l every 3 months
Mn+Fe > 0,2 mg/l one every month
Replace wear parts
Filter pads every 6 months
Emitters 70W + 200 W every 10000 h
Emitters 80 W + 100 W every 8000 h
O-ring blue protective cap every 8000 h
Single/multi-emitter O-ring every 8000 h
Emitter casing tube every 8000 h
Support ring every 8000 h
Starter (only 80 W emitter) every 10000 starts
Functional tests
● Check connection line and housing for damage
● Check the wiring
● Check the PE conductor connections
●Measure current consumption of entire unit
●Measure the voltage
● Functional test of the control unit, ow monitor,
pressure switch and solenoid valves
In Germany only:
According to BVG A2 (VBG4), the unit must be
tested for electrical safety every 4 years.
10 Troubleshooting
Fault Possible source of the fault Steps to resolve the fault
There ist water in the emitter
casing tubes.
If the blue protective cap is not
properly attached, condensation
may form when the device is in
operation.
Check the installation of the emit-
ter casing tubes and the seals.
Check the t of the blue protec-
tive cap and change the O-ring
if necessary.
The emitter is defective. Check or change the emitter.
The ballast in the switchbox is
too hot.
Insucient air circulation in the
switchbox. Retrot the switchbox fan.
The ambient temperature is too
high.

DE DE
1918
11 Warranty
If the product malfunctions during the warranty pe-
riod, contact your contract partner, the installation
company, and quote the unit type and production
number (see Technical specications or the type
plate on the unit).
Non-compliance with the installation conditions and
the operator responsibilities voids the warranty and
disclaims liability.
The wearing parts dened in the “Operator respon-
sibilities” section and the consequences of failing to
replace these parts on time are not covered by the
2-year legal warranty.
BWT assumes no liability in the event that the unit
fails or if the capacity becomes decient due to
incorrect material selection/combination, oating
corrosion products or iron and manganese deposits,
or any resulting damage thereof.
11�1 Product returns
Product returns will not be processed without a
return number (RMA no.). In Germany, call our
after-sales service in Schriesheim to receive a
return number. Unauthorised returns of goods will
not be accepted by BWT. Please always contact
your contract partner rst.
11�2 Your contact at BWT
You can reach us at the following number:
Service acceptance +49 6203 7373
Monday to Thursday 06:30 a.m. to 6:00 p.m.
Friday: 06:30 a.m. to 4:00 p.m.
12 Decommissioning and dis-
posal
12�1 Decommissioning
The product may only be shut down and dismantled
by qualied specialists.
Observe all applicable safety regulations when
dismantling the system.
12�2 Disposal
NOTICE
►The product must not be disposed of with
household waste.
►At the end of the product's life cycle, ensu-
re that it is properly disposed of or recycled.
►Observe the legal disposal guidelines for
the country in which the product is used.
►The following materials are used in
the product: metal, quartz glass, plastic,
electronic components. The UV emitter is
lled with gas.
WEEE-Reg.-NR. DE 80428986
Disposal of transport packaging
Returning the packaging into the material cycle
saves raw materials and reduces the amount of
waste. Your dealer will take the packaging back.
Disposal of the old device
Do not dispose of your old appliance with household
waste. Use the ocial collection and return points
for the return and recycling of electrical and elect-
ronic equipment at local authorities or dealers. The
UV emitter can be sent to BWT for disposal.
Disposing of electric discharge lamps
The products we deliver to you (Bewades electric
discharge lamps) are classied at the registration
department as B2B products. You are responsible
for proper disposal at the end of the lamps’ service
life.
Ensure environmentally sound disposal in ac-
cordance with the Electrical and Electronic Equip-
ment Act (ElektroG) (WEEE reg. no. DE 80428986).

DE DE
1918
13 Technical data
Bewades Type 70W70/08 LC 80W80/11 LC
Nominal connection width DN R 3/4“ 32 (1 1/4“ IG)
Volume ow at T100 = 70 % (400 J/m2)m³/h 2,4 4,2
Operating pressure, max. bar 10
Water temperature, min./max. °C 5/30
Ambient temperature, min./max. °C 5/40
Emitter power per unit 70 80
Expected emitter service life (dependent on number of
times emitter is switched on/o and on operating conditions)
h 10000 8000
UVC power W 16 21
Mains supply V/Hz 230N/PE/50/60
Protection class IP 54
Power in watts W 75 90
Number of emitters 1
For the production number, see the label on the title page of this manual and the type plate of
the product�
Bewades Type 100W100/11 LC 200W200/11 LC 400W200/17 LC
Nominal connection width DN 50 (2“ IG) 50 (2“ IG) 80
Volume ow at T100 = 70 % (400 J/m2)m³/h 6,8 13 38
Operating pressure, max. bar 10
Water temperature, min./max. °C 5/30
Ambient temperature, min./max. °C 5/40
Emitter power per unit 100 200 400
Expected emitter service life (de-
pendent on number of times emitter
is switched on/o and on operating
conditions)
h 8000 10000 10000
UVC power W 34 76 152
Mains supply V/Hz 230N/PE/50/60
Protection class IP 54
Power in watts W 110 220 450
Number of emitters 1 1 2
For the production number, see the label on the title page of this manual and the type plate of
the product�

DE DE
2120
13�1 Dimensions
F clearance for emitter
replacement
Bewades 80W80/11 LC
B
A
D
E
F clearance for emitter
replacement
B
A
D
E
Bewades 70W70/08 LC
G
P
K
Bewades
A B C D E F G K P
70W70/08 LC 76,1 68 – 316 410 380 400 200 120
80W80/11 LC 128 114 – 909 1013 1000 400 200 120
Table of contents
Other BWT Water Filtration System manuals

BWT
BWT MINISTIL 1iD User manual

BWT
BWT water + more bestmin M User manual

BWT
BWT E1 HWS 3/4" User manual

BWT
BWT BWT Multi HM User manual

BWT
BWT Infinity A User manual

BWT
BWT 1000 User manual

BWT
BWT Diago HWS-A User manual

BWT
BWT Infinity A User manual

BWT
BWT Rondomat Duo 6 User manual

BWT
BWT AQA drink TC200 User manual

BWT
BWT Planmeca ClinicPatrol User manual

BWT
BWT Bewades MQ-LC User manual

BWT
BWT DWFKIT User manual

BWT
BWT AQA drink Pure User manual

BWT
BWT AQA nano User manual

BWT
BWT AQA nano Manual

BWT
BWT Multipur AP Series User manual

BWT
BWT PERMAQ compact 4 Manual

BWT
BWT Bolero RF Series User manual

BWT
BWT AQA Detector User manual