manuals.online logo
Brands
  1. Home
  2. •
  3. Brands
  4. •
  5. Canon
  6. •
  7. Printer Accessories
  8. •
  9. Canon imagePROGRAF SS-41 User manual

Canon imagePROGRAF SS-41 User manual

Other manuals for imagePROGRAF SS-41

1

This manual suits for next models

2

Other Canon Printer Accessories manuals

Canon Additional Finisher Tray-C1 User manual

Canon

Canon Additional Finisher Tray-C1 User manual

Canon Buffer Pass Unit-N1 User manual

Canon

Canon Buffer Pass Unit-N1 User manual

Canon Printer Accessories User manual

Canon

Canon Printer Accessories User manual

Canon TonerRobot EP-27 User manual

Canon

Canon TonerRobot EP-27 User manual

Canon PCL Printer Kit-AE1 User manual

Canon

Canon PCL Printer Kit-AE1 User manual

Canon Multi-PDL Printer Kit-E1 User manual

Canon

Canon Multi-PDL Printer Kit-E1 User manual

Canon imagePROGRAF RU-61 User manual

Canon

Canon imagePROGRAF RU-61 User manual

Canon CLI-521BK User manual

Canon

Canon CLI-521BK User manual

Canon BS1 User manual

Canon

Canon BS1 User manual

Canon Saddle Finisher-T2 Service manual

Canon

Canon Saddle Finisher-T2 Service manual

Canon Finisher-R1 Service manual

Canon

Canon Finisher-R1 Service manual

Canon Puncher Unit-BF1 User manual

Canon

Canon Puncher Unit-BF1 User manual

Canon Super G3 FAX Board-T1 Operating and maintenance manual

Canon

Canon Super G3 FAX Board-T1 Operating and maintenance manual

Canon Duplex Unit-A1 User manual

Canon

Canon Duplex Unit-A1 User manual

Canon imagePROGRAF RU-63 User manual

Canon

Canon imagePROGRAF RU-63 User manual

Canon NP6218 How to use

Canon

Canon NP6218 How to use

Canon INNER 2-WAY TRAY-E1 Operating and maintenance manual

Canon

Canon INNER 2-WAY TRAY-E1 Operating and maintenance manual

Canon Color iR Security Kit-A1P User manual

Canon

Canon Color iR Security Kit-A1P User manual

Canon imagePROGRAF SD-21 User manual

Canon

Canon imagePROGRAF SD-21 User manual

Canon imageRUNNER ADVANCE 6055 User manual

Canon

Canon imageRUNNER ADVANCE 6055 User manual

Canon FY8-13HR-000 User manual

Canon

Canon FY8-13HR-000 User manual

Canon Finisher-R1 Service manual

Canon

Canon Finisher-R1 Service manual

Canon INNER 2-WAY TRAY-E1 Operating and maintenance manual

Canon

Canon INNER 2-WAY TRAY-E1 Operating and maintenance manual

Canon iR Security Kit-A2 Operating and maintenance manual

Canon

Canon iR Security Kit-A2 Operating and maintenance manual

Popular Printer Accessories manuals by other brands

Epson T078620 Product information sheet

Epson

Epson T078620 Product information sheet

Brother TN630 instructions

Brother

Brother TN630 instructions

Formax 6204 Series Maintenance manual

Formax

Formax 6204 Series Maintenance manual

Xerox C11 - DocuPrint Color Inkjet Printer user manual

Xerox

Xerox C11 - DocuPrint Color Inkjet Printer user manual

REA JET HR pro 2K user manual

REA

REA JET HR pro 2K user manual

HP Laserjet,Color Laserjet 4si user guide

HP

HP Laserjet,Color Laserjet 4si user guide

oliser MS 45 instructions

oliser

oliser MS 45 instructions

Xerox EFI EXP6000 Specification sheet

Xerox

Xerox EFI EXP6000 Specification sheet

Epson T6248 Product information sheet

Epson

Epson T6248 Product information sheet

Kyocera KM-6230 Instruction handbook

Kyocera

Kyocera KM-6230 Instruction handbook

Triumph Adler DF-710 Instruction handbook

Triumph Adler

Triumph Adler DF-710 Instruction handbook

Star Micronics TSP800 Series install guide

Star Micronics

Star Micronics TSP800 Series install guide

Citizen CBM-202PC Series user manual

Citizen

Citizen CBM-202PC Series user manual

Codonics Virtua 1VCX-LR833 Technical brief

Codonics

Codonics Virtua 1VCX-LR833 Technical brief

Roland DU2-64 Supplementary manual

Roland

Roland DU2-64 Supplementary manual

TonerRefillKits ReChargX RX126 instructions

TonerRefillKits

TonerRefillKits ReChargX RX126 instructions

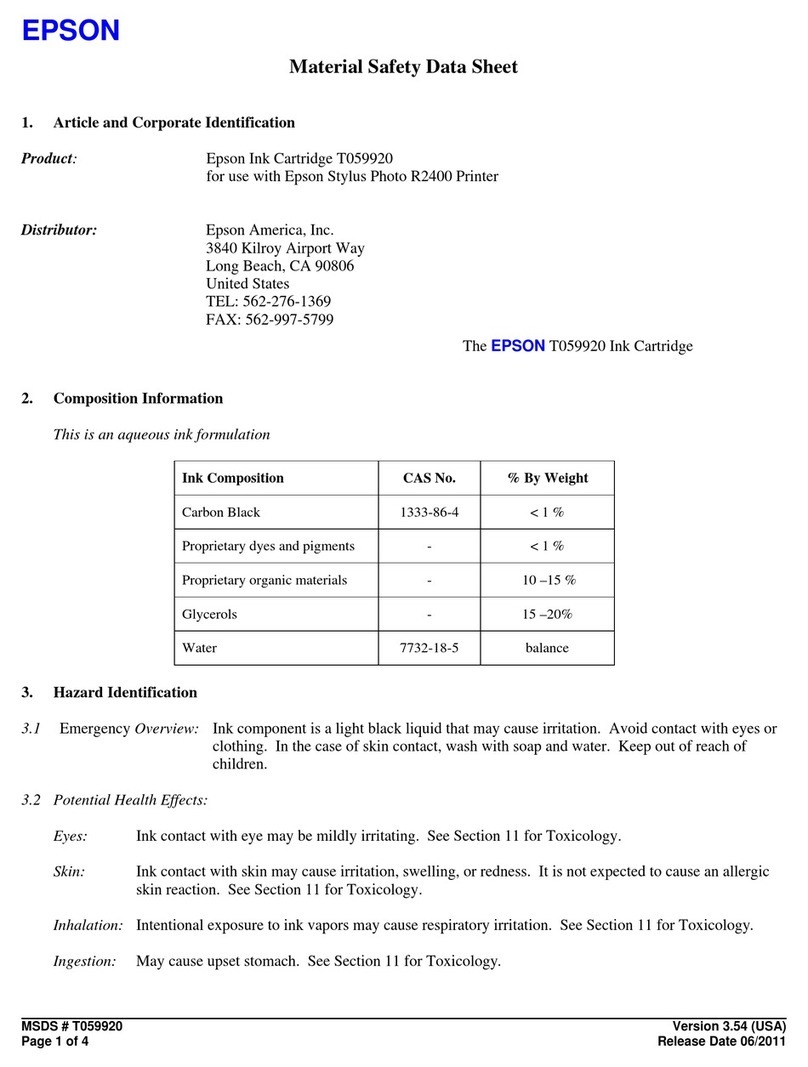
Epson T059920 Material safety data sheet

Epson

Epson T059920 Material safety data sheet

Sharp FO-1MK Service manual

Sharp

Sharp FO-1MK Service manual

manuals.online logo
manuals.online logoBrands
  • About & Mission
  • Contact us
  • Privacy Policy
  • Terms and Conditions

Copyright 2025 Manuals.Online. All Rights Reserved.

目次
同梱品一覧.....................................................................................1
スタッカーを組み立てる.......................................................2
スタッカーをプリンターに取り付ける...................... 11
スタッカーのポジション例............................................... 12
Contents
Package Contents ........................................................................1
Assemble the Stacker.................................................................2
Attach the Stacker to the Printer .....................................11
Example Stacker Positions ...................................................12
Sommaire
Contenu du colis...........................................................................1
Assemblage de l'empileur......................................................2
Montage de l'empileur sur l'imprimante....................11
Exemple de positions de l'empileur..............................12
Índice
Contenido de la caja...................................................................1
Montaje del apilador..................................................................2
Conexión del apilador a la impresora...........................11
Ejemplos de posiciones del apilador ............................12
Conteúdo
Conteúdos da embalagem....................................................1
Montagem do empilhador.....................................................2
Anexar o empilhador à impressora................................11
Exemplos de posições do empilhador ........................12
Inhalt
Paketinhalt........................................................................................1
Aufbau des Staplers....................................................................2
Befestigung des Staplers am Drucker........................... 11
Beispielstaplerpositionen.....................................................12
Sommario
Contenuto della confezione..................................................1
Assemblaggio dell'impilatrice..............................................2
Fissaggio dell'impilatrice sulla stampante.................11
Esempi di posizioni dell'impilatrice................................12
Inhoud
Inhoud van de verpakking .....................................................1
De stapelaar in elkaar zetten.................................................2
Bevestig de stapelaar aan de printer.............................11
Voorbeeld van stapelaarposities......................................12
Spis treści
Zawartość zestawu......................................................................1
Montaż układarki ..........................................................................2
Dołączanie układarki do drukarki....................................11
Przykładowe konfiguracje układarki.............................. 12
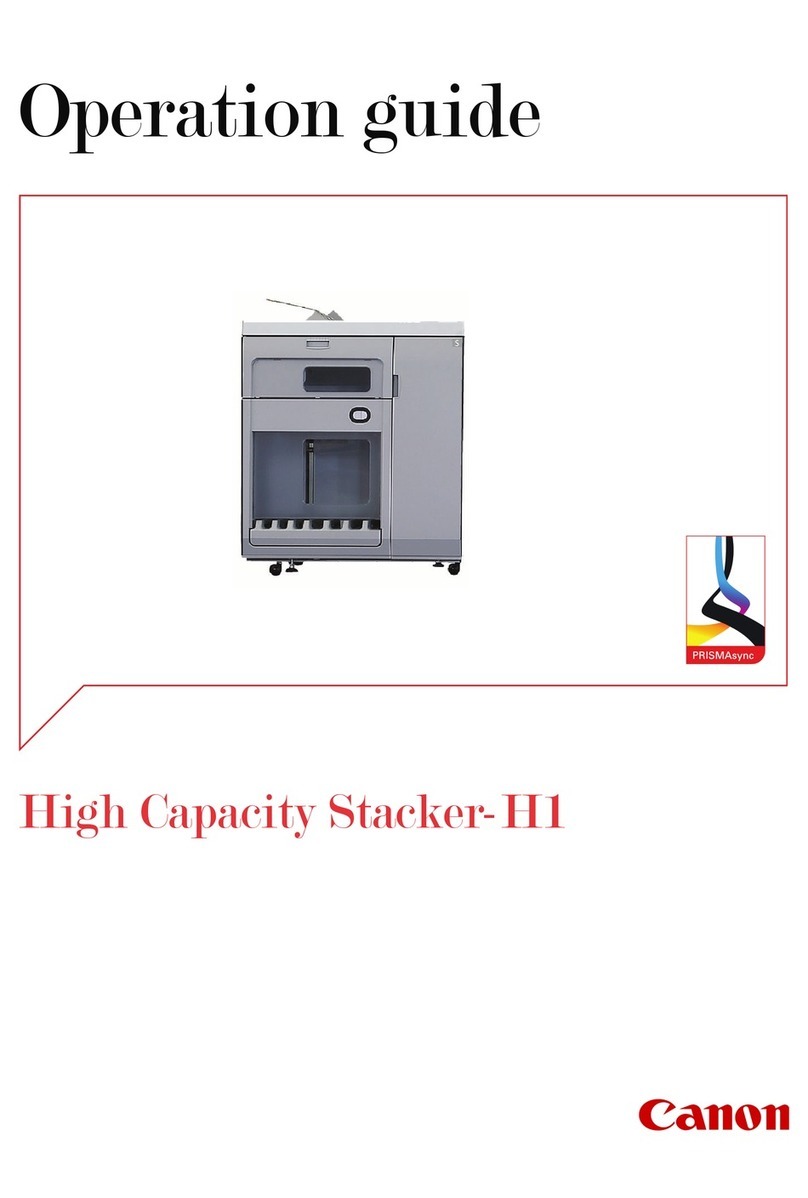
SS-41
SS-31
SS-21
スタッカー セットアップガイド
Stacker Setup Guide
Guide de conguration de l'empileur
Guía de instalación del apilador
Guia de conguração do empilhador
Stapler Einrichtungshandbuch
Guida all'installazione dell'impilatrice
Installatiehandleiding stapelaar
Przewodnik konguracji układarki
スタッカーの組み立ては本書をお読みください。ご使用の機種とイラストが異なる場合がありま
すが、基本的な手順は同じです。あらかじめご了承ください。
ご使用前に必ず本書をお読みください。
将来いつでも使用できるように大切に保管してください。
Read this manual for details on assembling the stacker. Although the illustrations may differ from
the model you are using, the basic procedure is the same. We thank you for understanding.
Be sure to read this manual before use.
Keep this manual in a handy location for future reference.
Lisez ce manuel pour plus de détails sur l'assemblage de l'empileur. Bien que les illustrations
puissent être différentes du modèle que vous utilisez, la procédure de base est identique. Nous
vous remercions de votre compréhension.
Assurez-vous de lire ce manuel avant d'utiliser le matériel.
Conservez ce manuel en lieu sûr pour pouvoir aisément vous y référer en cas de besoin.
Lea este manual donde encontrará detalles sobre el montaje del apilador. Aunque las
ilustraciones podrían diferir del modelo que está utilizando, el procedimiento básico es el mismo.
Gracias por su comprensión.
Asegúrese de leer este manual antes de usarlo.
Mantenga este manual a mano para futuras referencias.
Consulte este manual para obter informações sobre a montagem do empilhador. As ilustrações
podem ser diferentes do modelo que você estiver usando, mas o processo básico é o mesmo.
Agradecemos sua compreensão.
Não deixe de ler o manual antes de usar o equipamento.
Mantenha este manual à mão para referências futuras.
Lesen Sie dieses Handbuch, um Details zum Aufbau des Staplers zu erhalten. Auch wenn sich die
Abbildungen von dem von Ihnen verwendeten Modell möglicherweise unterscheiden, ist die
grundlegende Vorgehensweise identisch. Wir danken für Ihr Verständnis.
Lesen Sie dieses Handbuch unbedingt vor dem Gebrauch.
Bewahren Sie dieses Anleitung zum späteren Nachschlagen griffbereit auf.
Leggere questo manuale per conoscere i dettagli relativi al montaggio dell'impilatrice. Anche se
le figure possono essere diverse rispetto al modello effettivamente utilizzato, la procedura di base
è la stessa. Grazie per la comprensione.
Leggere il presente manuale prima dell'uso.
Mantenete quindi il manuale a portata di mano per future necessità di consultazione.
Lees deze handleiding voor nadere bijzonderheden over het in elkaar zetten van de stapelaar. De
illustraties zullen misschien niet het model dat u gebruikt, weergeven maar de basisprocedure is
hetzelfde. Wij danken u voor uw begrip.
Lees voorafgaand aan ingebruikname deze handleiding door.
Bewaar deze handleiding op een handige plaats zodat u de handleiding later gemakkelijk kunt
raadplegen.
Przed zmontowaniem układarki należy zapoznać się z niniejszym podręcznikiem. Zamieszczone
w nim ilustracje mogą różnić się od rzeczywistego wyglądu używanego modelu urządzenia,
procedura jednak pozostaje taka sama. Dziękujemy za zrozumienie.
Przed rozpoczęciem korzystania z urządzenia należy zapoznać się z niniejszym przewodnikiem.
Niniejszy przewodnik należy przechowywać w łatwo dostępnym miejscu, aby można było z
niego skorzystać w przyszłości.

1
フット L
Foot L
Pied L
Pata L
Perna L
Fuß L
Piede L
Voet L
Stopka L
フット R
Foot R
Pied R
Pata R
Perna R
Fuß R
Piede R
Voet R
Stopka R
ボトムステー
Bottom stay
Étai inférieur
Travesaño inferior
Suporte inferior
Untere Stütze
Tirante inferiore
Onderste steun
Dolna poprzeczka
トップステー
Top stay
Étai supérieur
Travesaño superior
Suporte superior
Obere Stütze
Tirante superiore
Bovenste steun
Górna poprzeczka
紙止めロッド
Paper stopper rod
Tige du butoir du papier
Varilla del tope de papel
Haste do xador de papel
Papieranschlagstange
Asta dell'arresto carta
Papierstopstang
Pręt stopera papieru
SS-41/31 SS-21
ロッド 1
Rod 1
Tige1
Varilla 1
Haste 1
Stange 1
Asta 1
Stang 1
Pręt 1
ロッド 2
Rod 2
Tige2
Varilla 2
Haste 2
Stange 2
Asta 2
Stang 2
Pręt 2
バスケット布/ロッド 3
Basket cloth/Rod 3
Tissu du panier/tige 3
Tela de la cesta/Varilla 3
Tecido da cesta/Haste 3
Korbtuch/Stange 3
Tessuto del raccoglitore/Asta 3
Opvangmanddoek/Stang 3
Materiał kosza/pręt 3
用紙ガイド(SS-41、SS-31:× 3 SS-21:× 2)
Paper guide (SS-41 and SS-31: x 3, SS-21: x 2)
Guide papier (SS-41 et SS-31: x 3, SS-21: x 2)
Guía del papel (SS-41 y SS-31: x 3, SS-21: x 2)
Guia do papel (SS-41 e SS-31: x 3, SS-21: x 2)
Papierführung (SS-41 und SS-31: x 3, SS-21: x 2)
Guida della carta (SS-41 e SS-31: x 3, SS-21: x 2)
Papiergeleider (SS-41 en SS-31: x 3, SS-21: x 2)
Prowadnica papieru (SS-41 oraz SS-31: x 3, SS-21: x 2)
用紙ストッパーベース
Paper stopper base
Base du butoir du papier
Base del tope de papel
Base do xador de papel
Papieranschlagbasis
Base dell'arresto carta
Papierstopbasis
Podstawa stopera papieru
用紙ストッパーワイヤー
Paper stopper wire
Fil du butoir du papier
Cable del tope de papel
Fio do xador de papel
Papieranschlagdraht
Filo metallico dell'arresto carta
Papierstopdraad
Drucik stopera papieru
M4 六角ビス(× 10)
M4 hex screw (x 10)
Vis hexagonale M4 (x 10)
Tornillo hexagonal M4 (x 10)
Parafuso sextavado M4 (x 10)
M4-Sechskantschraube (x 10)
Vite esagonale M4 (x 10)
M4 zeskantschroef (x 10)
Śruba sześciokątna M4 (x 10)
M4 六角レンチ
M4 Allen wrench
Clé Allen M4
Llave Allen M4
Chave allen M4
M4-Inbus-Schlüssel
Chiave a brugola M4
M4-inbussleutel
Klucz imbusowy M4
ロッド 2は、プリンター本体をスタンドに載せる際に位置合わせのために使用する場合があります。
ロッド 3はバスケット布に取り付け済です。
この他にも、各種ご案内が同梱されている場合があります。
Rod 2 may be used for alignment when placing the printer on the stand.
Rod 3 is already attached to the basket cloth.
Other documentation may also be included in the package.
Il est possible d'utiliser la tige 2 pour l'alignement lors de la mise en place de l'imprimante sur le
socle.
La tige 3 est déjà montée sur le tissu du panier.
L'autre documentation pourra aussi être incluse dans le paquet.
La varilla 2 podrá usarse para alineación cuando se coloca la impresora en el soporte.
La varilla 3 ya está conectada a la tela de la cesta.
El paquete puede también contener otras guías.
A haste 2 pode ser usada para fazer o alinhamento ao posicionar a impressora no suporte.
A haste 3 já foi instalada no tecido da cesta.
Pode estar incluída no pacote outra documentação.
Die Stange 2 kann zur Ausrichtung verwendet werden, wenn der Drucker auf das Gestell gesetzt
wird.
Die Stange 3 ist bereits am Korbtuch befestigt.
Es sind ggf. weitere Dokumentationen in der Packung enthalten.
L'asta 2 può essere utilizzata per l'allineamento quando si posiziona la stampante sul supporto.
L'asta 3 è già montata sul tessuto del raccoglitore.
È possibile che la confezione includa altre guide.
Stang 2 kan worden gebruikt voor uitlijning wanneer de printer op de standaard wordt geplaatst.
Stang 3 is al op de opvangmanddoek bevestigd.
De verpakking kan ook nog andere documentatie bevatten.
Pręt 2 może zostać użyty do wyrównywania podczas umieszczania drukarki na podstawce.
Pręt 3 jest już przymocowany do materiału kosza.
W zestawie może znajdować się również inna dokumentacja.
同梱品一覧 Contenido de la caja Contenuto della confezione
Package Contents Conteúdos da embalagem Inhoud van de verpakking
Contenu du colis Paketinhalt Zawartość zestawu
2
1テープや梱包材を取り除きます。ただし、Aのテープはここでは取り除かないでください。
Remove tape and packing material. However, do not remove tape A at this stage.
Ôtez la bande et le matériau d'emballage. Fois, n'ôtez pas la bande A à ce stade.
Retire la cinta y el material de embalaje. Sin embargo, en esta etapa no debe retirar la cinta A.
Remova a fita e o material da embalagem. Contudo, não remova a fita A ainda.
Entfernen Sie das Klebeband und das Verpackungsmaterial. Entfernen Sie zum jetzigen Zeitpunkt
jedoch nicht das Klebeband A.
Rimuovere il nastro e il materiale d'imballaggio. Ma in questa fase non rimuovere il nastro A.
Verwijder tape en verpakkingsmateriaal. Maar verwijder in dit stadium niet tape A.
Usuń taśmę i materiały opakowaniowe. Na tym etapie nie należy jednak usuwać taśmy A.
A
注意

●スタッカーは、必ず2人以上で組み立ててください。1人で作業すると、けがの原因になっ
たり、スタッカーの歪みの原因になります。
Caution

●Always use 2 or more people when assembling the stacker. Performing the work using
only 1 person may cause injuries or deformation of the stacker.
Attention

●Ayez toujours recours à 2 personnes au minimum lors de l'assemblage de l'empileur.
Le fait de recourir à 1 personne seulement pourrait provoquer des blessures ou une
déformation de l'empileur.
Precaución

●Siempre haga que 2 o más personas monten el apilador. Si solo una persona realiza el
trabajo, podría sufrir lesiones o el apilador podría deformarse.
Cuidado

●É necessário que duas ou mais pessoas participem da montagem do empilhador. Realizar
o trabalho sozinho pode causar lesões ou deformar o empilhador.
Vorsicht

●Der Stapler sollte grundsätzlich von mindestens 2 Personen aufgebaut werden. Wenn
der Stapler von einer Person allein aufgebaut wird, kann es zu Verletzungen oder zur
Verformung des Staplers kommen.
Avvertenza

●Assicurarsi che al montaggio dell'impilatrice partecipino sempre almeno 2 persone. Se
il lavoro viene eseguito da una sola persona possono verificarsi infortuni alla persona e
l'impilatrice potrebbe deformarsi.
Let op

●Werk altijd met 2 of meer mensen aan het in elkaar zetten van de stapelaar. Wanneer
dit werk door slechts 1 persoon wordt uitgevoerd, kan dat leiden tot letsels of tot
vervorming van de stapelaar.
Przestroga

●Do zmontowania układarki potrzebne są dwie osoby lub więcej. Wykonywanie czynności
przez tylko jedną osobę może doprowadzić do kontuzji lub zniekształcenia układarki.
重要

●プリンタースタンドにプリンタースタンド付属のバスケットが取り付けられている場合は、
先にバスケットをバスケットアームごと取り外してください。バスケットが取り付けられ
た状態では、スタッカーを使用することはできません。

●スタッカーを使用する場合は、プリンターの前方にスタッカーを取り外しできるだけの十
分なスペースを、あらかじめ確保しておいてください。
Important

●When the basket that is included with the printer stand is already attached to the printer
stand, first remove the basket together with the basket arms. The stacker cannot be used
while the basket is attached.

●When using the stacker, ensure in advance that there is sufficient space for removing the
stacker in front of the printer.
Important

●Si le panier fourni avec le socle de l'imprimante est déjà monté sur celui-ci, commencez
par retirer le panier avec les bras de panier. L'empileur ne peut pas être utilisé lorsque le
panier est monté.

●Lors de l'utilisation de l'empileur, assurez-vous à l'avance qu'il existe un espace suffisant
en face de l'imprimante pour enlever l'empileur.
Importante

●Cuando la cesta que se incluye con el soporte de la impresora ya esté conectada al
soporte de la impresora, primero retire la cesta junto con los brazos del cesto. El apilador
no puede usarse si la cesta está conectada.

●Cuando use el apilador, antes asegúrese de que haya suficiente espacio para retirar el
apilador delante de la impresora.
Importante

●Quando a cesta que acompanha o suporte da impressora estiver instalada no suporte da
impressora, remova a cesta e os braços da cesta. O empilhador não pode ser usado com
a cesta instalada.

●Ao usar o empilhador, certifique-se antecipadamente de que há espaço suficiente para
remover o empilhador na frenda da impressora.
Wichtig

●Wenn der im Druckergestell enthaltene Korb bereits am Druckergestell befestigt ist,
entfernen Sie zunächst den Korb gemeinsam mit den Korbarmen. Der Stapler kann nicht
verwendet werden, während der Korb befestigt ist.

●Wenn Sie den Stapler verwenden, stellen Sie vorab sicher, dass vor dem Drucker
ausreichend Platz zum Entfernen des Staplers vorhanden ist.
Importante

●Quando il raccoglitore incluso con il supporto della stampante è già montato sul
supporto della stampante, rimuovere prima il raccoglitore insieme ai bracci del
raccoglitore. L'impilatrice non può essere utilizzata mentre è montato il raccoglitore.

●Quando si utilizza l'impilatrice, assicurarsi prima che vi sia spazio sufficiente per rimuovere
l'impilatrice davanti alla stampante.
Belangrijk

●Wanneer de opvangmand die bij de printerstandaard wordt geleverd, al aan de
printerstandaard is bevestigd, verwijder dan de opvangmand samen met de armen van
de opvangmand. De stapelaar kan niet worden gebruikt wanneer de opvangmand is
bevestigd.

●Let er vooraf op, wanneer u de stapelaar gebruikt, dat er voor de printer voldoende
ruimte is voor het verwijderen van de stapelaar.
Ważne

●Jeżeli kosz dołączony do podstawki drukarki został już zamocowany do podstawki
drukarki, należy najpierw zdemontować kosz wraz z ramionami kosza. Z układarki nie
można korzystać, jeżeli dołączony został kosz.

●W przypadku korzystania z układarki należy wcześniej upewnić się, że przed drukarką jest
wystarczająco dużo miejsca na zdemontowanie układarki.
スタッカーを組み立てる Montaje del apilador Assemblaggio dell'impilatrice
Assemble the Stacker Montagem do empilhador De stapelaar in elkaar zetten
Assemblage de l'empileur Aufbau des Staplers Montaż układarki
3
2フット Lとフット Rに付いている計 4個のキャスターのロックがすべてオンになっていることを確認し
ます。
Check that locks on a total of 4 casters on both foot L and foot R are engaged.
Vérifiez que les verrous des 4 roulettes des pieds L et R sont en place.
Revise que los bloqueos de las 4 ruedecitas de ambas patas, la pata L y la pata R, estén enganchados.
Verifique se os bloqueios em todas as quatro rodinhas, tanto na perna L quanto na perna R, foram
engatados.
Vergewissern Sie sich, dass die Sperren an insgesamt 4 Rollen am Fuß L sowie am Fuß R aktiviert sind.
Verificare che i blocchi siano innestati su tutte e 4 le rotelle sia sul piede L che sul piede R.
Controleer dat de vergrendeling op totaal 4 wielen, op zowel voet L als voet R, is vastgezet.
Sprawdź, czy blokady na wszystkich czterech kółkach stopki L oraz stopki R zostały włączone.
3フット Lとフット Rを図のように並べます。
Arrange foot L and foot R as shown in the illustration.
Disposez les pieds L et R comme indiqué sur l'illustration.
Disponga la pata L y la pata R tal como se observa en la ilustración.
Deixe a perna L e a perna R conforme exibido na ilustração.
Ordnen Sie den Fuß L und den Fuß R wie in der Abbildung dargestellt an.
Disporre il piede L e il piede R come mostrato in figura.
Plaats voet L en voet R zoals wordt getoond in de illustratie.
Ułóż stopkę L oraz stopkę R w sposób pokazany na rysunku.
4フット L、フット Rを起こして、ボトムステーを重ねます。ボトムステーのビス穴(A)とフットのビス穴(B)
の位置が合うように重ねてください。
Stand up foot L and foot R, and place the bottom stay on top. Arrange the parts so that the positions of
the screw holes in the bottom stay (A) and screw holes in the feet (B) are aligned.
Levez les pieds L et R et posez l'étai inférieur dessus. Disposez les pièces afin que les positions des
orifices des vis de l'étai inférieur (A) et des pieds (B) soient alignées.
Pare la pata L y la pata R, y coloque el travesaño inferior arriba. Coloque las piezas de modo que las
posiciones de los orificios de los tornillos del travesaño inferior (A) y los orificios de los tornillos de las
patas (B) queden alineados.
Levante a perna L e a perna R e posicione o suporte inferior sobre elas. Disponha as peças de forma que
as posições dos orifícios para parafusos no suporte inferior (A) e os orifícios para parafusos nas pernas (B)
fiquem alinhados.
Richten Sie den Fuß L und den Fuß R auf, und setzen Sie die untere Stütze darauf ab. Ordnen Sie die
Teile so an, dass die Positionen der Schraubenlöcher in der unteren Stütze (A) und der Schraubenlöcher
in den Füßen (B) aneinander ausgerichtet sind.
Alzare il piede L e il piede R e appoggiarvi sopra il tirante inferiore. Disporre le parti in modo che le
posizioni dei fori per le viti nel tirante inferiore rimangano allineate (A) ai fori per le viti nei piedini (B).
Plaats voet L en voet R, en de onderste steun erboven. Plaats de onderdelen zodanig dat de posities
van schroefgaten in de onderste steun (A) en in de voeten (B) tegenover elkaar uitkomen.
Ustaw stopkę L oraz stopkę R, a następnie umieść na nich dolną poprzeczkę. Ułóż części w taki sposób,
aby dopasować położenie otworów na śruby w dolnej poprzeczce (A) i otwory na śruby w stopach (B).
A
B
4
5ボトムステーとフット L、フット RをM4 六角ビスで固定します。M4 六角レンチを使って C、Dの順に
しっかりと固定します。
Affix the bottom stay, foot L, and foot R using M4 hex screws. Securely tighten the screws using the M4
Allen wrench in the order C then D.
Fixez l'étai inférieur et les pieds L et R à l'aide des vis hexagonales M4. Serrez fermement les vis à l'aide
de la clé Allen M4 dans l'ordre C puis D.
Fije el travesaño inferior, la pata L y la pata R con los tornillos hexagonales M4. Apriete de forma segura
los tornillos con una llave Allen M4 en el orden C y luego D.
Afixe o suporte inferior, a perna L e a perna R usando parafusos sextavados M4. Aperte bem os
parafusos usando a chave allen M4 respeitando a ordem C e D.
Befestigen Sie die untere Stütze, den Fuß L und den Fuß R mit den M4-Sechskantschrauben. Ziehen Sie
die Schrauben mit dem M4-Inbus-Schlüssel in der Reihenfolge C dann D fest an.
Fissare il tirante inferiore, il piede L e il piede R utilizzando le viti esagonali M4. Serrare saldamente le viti
utilizzando la chiave a brugola M4, avvitando prima la C, poi la D.
Zet de onderste steun, voet L en voet R vast met de M4-zeskantschroeven. Zet de schroeven stevig vast
met de M4-inbussleutel in de volgorde C en dan D.
Zamocuj dolną poprzeczkę, stopkę L oraz stopkę R śrubami sześciokątnymi M4. Dokręć śruby kluczem
imbusowym M4, najpierw C, następnie D.
C
D
メモ これ以降、右のイラストで矢印の方向を、「前」と表現します。
Note Note that in the remainder of this procedure, the direction of the arrow on the right of
the illustration is referred to as "front".
Remarque Veuillez noter que dans le reste de cette procédure, la direction de la flèche à droite
de l'illustration est appelée "avant".
Nota Tenga presente que en lo que resta de este procedimiento, la dirección de la flecha de
la parte derecha de la ilustración se denomina "parte frontal".
Nota Perceba que, no restante deste procedimento, a direção da seta no lado direito da
ilustração é considerada a "frente".
Hinweis Beachten Sie, dass im übrigen Teil dieser Vorgehensweise die Richtung des Pfeils
rechts in der Abbildung mit "vorne" bezeichnet wird.
Nota Si noti che nella parte successiva di questa procedura, la direzione della freccia sulla
destra dell'illustrazione è definita "davanti".
Opmerking NB. In de rest van deze procedure wordt de richting van de pijl aan de rechterkant in
de illustratie de "voorzijde" genoemd.
Uwaga W pozostałej części procedury kierunek strzałki po prawej stronie rysunku jest
określany jako "przód".
6トップステーの L、Rの刻印とフット L、フット Rが合う向きでトップステーを持ち、トップステーの左
右の底部(A)に、ボトムステーを挿し込みます。
Hold the top stay such that the L and R markings on the top stay are aligned with foot L and foot R, and
insert the bottom stay into the left and right base parts (A) of the top stay.
Tenez l'étai supérieur de telle manière que les repères L et R qui s'y trouvent soit alignés avec les pieds L
et R, et insérez l'étai inférieur dans les parties gauche et droite de la base (A) de l'étai supérieur.
Sostenga el travesaño superior de forma tal que las marcas L (izquierda) y R (derecha) del travesaño
superior estén alineadas con la pata L y la pata R, e inserte el travesaño inferior en las partes base
izquierda y derecha (A) del travesaño superior.
Segure o suporte superior de forma que as marcações L e R no suporte superior estejam alinhadas com
a perna L e a perna R, então insira o suporte inferior nas peças da base esquerda e direita (A) do suporte
superior.
Halten Sie die obere Stütze so, dass die Markierungen L und R an der oberen Stütze am Fuß L und Fuß
R ausgerichtet sind, und führen Sie die untere Stütze in den linken und rechten Basisteil (A) der oberen
Stütze ein.
Tenere il tirante superiore in modo che i contrassegni L e R sul tirante superiore siano allineati al piede
L e al piede R, quindi inserire il tirante inferiore nelle parti della base sinistra e destra (A) del tirante
superiore.
Houd de bovenste steun zo dat de markeringen L en R op de bovenste steun uitkomen tegenover
voet L en voet R en steek de onderste steun in de linker en rechter basisgedeelten (A) van de bovenste
steun.
Przytrzymaj górną poprzeczkę tak, aby znaczniki L i R na górnej poprzeczce były dopasowane do stopki
L oraz stopki R, następnie wsuń dolną poprzeczkę w lewą i prawą podstawę (A) górnej poprzeczki.
A
5
7トップステーをボトムステーへ M4 六角ビスで固定します。M4 六角レンチを使って A、Bの順にしっか
りと固定します。
Affix the top stay to the bottom stay using M4 hex screws. Securely tighten the screws using the M4
Allen wrench in the order A then B.
Fixez l'étai supérieur à l'étai inférieur à l'aide de vis hexagonales M4. Serrez fermement les vis à l'aide de
la clé Allen M4 en respectant l'ordre A, puis B.
Fije el travesaño superior al travesaño inferior utilizando tornillos hexagonales M4. Apriete firmemente
los tornillos con la llave Allen M4 en orden: primero A, después B.
Fixe o suporte superior ao suporte inferior usando parafusos sextavados M4. Aperte bem os parafusos
usando a chave allen M4 respeitando a ordem A e B.
Befestigen Sie die obere Stütze mit M4-Sechskantschrauben an der unteren Stütze. Ziehen Sie die
Schrauben mit dem M4-Inbus-Schlüssel in der Reihenfolge A dann B fest an.
Fissare il tirante superiore al tirante inferiore per mezzo di viti esagonali M4. Serrare le viti utilizzando la
chiave a brugola M4, in ordine prima A e poi B.
Zet de bovenste steun aan de onderste steun vast met de M4-zeskantschroeven. Zet de schroeven
stevig vast met de M4-inbussleutel in de volgorde A en dan B.
Zamocuj górną poprzeczkę do dolnej poprzeczki śrubami sześciokątnymi M4. Dokręć śruby kluczem
imbusowym M4, najpierw A, następnie B.
A AB B
8フラッパーを固定しているテープを取り外します。
Remove the tape that is securing the flapper.
Ôtez la bande qui maintient le tambour.
Retire la cinta que asegura el juego de pestañas.
Remova a fita que prende o direcionador.
Entfernen Sie das Klebeband, mit dem die Lasche gesichert ist.
Rimuovere il nastro che assicura la linguetta.
Verwijder de tape die de flap vasthoudt.
Usuń taśmę zabezpieczającą flapper.
6
9紙止めロッドの先端(A)を前に向け、紙止めロッドの両端(B)をフット L、フット RのCの位置に押
し込み、取り付けます。
Attach the paper stopper rod by inserting both ends (B) into the C positions on the foot L and foot R
with the tip of the paper stopper rod (A) facing the front.
Fixez la tige du butoir du papier en insérant les deux extrémités (B) dans les positions C des pieds L et R
avec l'extrémité de la tige du butoir du papier (A) dirigée vers l'avant.
Conecte la varilla del tope de papel insertando ambos extremos (B) en las posiciones C de la pata L y la
pata R con la punta de la varilla del tope de papel (A) mirando hacia la parte frontal.
Anexe a haste do fixador de papel inserindo ambas as extremidades (B) nas posições C da perna L e da
perna R com a ponta da haste do fixador de papel (A) virada para frente.
Befestigen Sie die Papieranschlagstange, indem Sie beide Enden (B) in die Positionen C am Fuß L und
Fuß R einführen, während die Spitze der Papieranschlagstange (A) nach vorne zeigt.
Fissare l'asta dell'arresto carta inserendo entrambe le estremità (B) nelle posizioni C sul piede L e sul
piede R con la punta dell'asta dell'arresto carta (A) rivolta verso il davanti.
Bevestig de papierstopstang door beide uiteinden (B) in de posities C op voet L en voet R te steken,
met de punt van de papierstofstang (A) naar de voorzijde gericht.
Zamocuj pręt stopera papieru, wsuwając oba końce (B) w położenia C na stopce L oraz na stopce R
z końcówkami pręt stopera papieru (A) skierowanymi do przodu.
C
C
A
B
B
注意 取り付けたロッドを持ってスタッカーを持ち上げないでください。ロッドが外れてスタッカーが落下し、けがをするおそれがあります。
Caution Do not lift up the stacker by grabbing the attached rod. If the rod detaches, the stacker will fall and may cause injuries.
Attention Ne soulevez pas l'empileur en le tenant par la tige montée. Si la tige devait se détacher, l'empileur tomberait et pourrait provoquer des blessures.
Precaución No levante el apilador sujetando la varilla conectada. Si la varilla se separa, el apilador caerá y podría provocar lesiones.
Cuidado Não levante o empilhador segurando pela haste anexada. Se a haste se soltar, o empilhador cairá e poderá causar lesões.
Vorsicht Heben Sie den Stapler nicht an der befestigten Stange hoch. Wenn sich die Stange löst, fällt der Stapler herunter, was zu Verletzungen führen kann.
Avvertenza Non sollevare l'impilatrice prendendola dall'asta montata. Se l'asta si stacca, l'impilatrice cadrà e ferirà l'utente.
Let op Til de stapelaar niet op aan de bevestigde stang. Als de stang losraakt, dan valt de stapelaar en dat kan letsel veroorzaken.
Przestroga Nie należy podnosić układarki, chwytając za zamocowany pręt. Jeśli pręt odłączy się, układarka upadnie i może spowodować obrażenia.
メモ 取り付ける場所、方向を間違ってしまった場合は、ロッドを取り付けたパーツ(A)とロッドを引き離すよう
にイラストの方向に力を入れて、片側ずつ外してください。
A
Note If you get the attachment location or the orientation wrong, remove one end at a time by applying force in
the direction shown in the illustration to remove the rod from the parts (A) attached to the rod.
Remarque Si la position de montage ou l'orientation est mauvaise, ôtez une extrémité à la fois en appliquant une force
dans le sens indiqué sur l'illustration pour ôter la tige des parties (A) montées sur la tige.
Nota Si la ubicación de conexión o la orientación no es correcta, retire un extremo a la vez aplicando fuerza en la
dirección que se observa en la ilustración para retirar la varilla de las partes (A) conectadas a la varilla.
Nota Se você errar o local de fixação ou a orientação, remova uma extremidade por vez aplicando força na direção
exibida na ilustração para remover a haste das partes (A) fixadas à haste.
Hinweis Wenn Sie bei der Befestigung die falsche Position oder Ausrichtung gewählt haben, entfernen Sie jeweils ein
Ende, indem Sie in der Richtung, die in der Abbildung dargestellt ist, Kraft anwenden, um die Stange aus den
an der Stange befestigten Teilen (A) zu entfernen.
Nota Se la posizione di montaggio e l'orientamento sono errati, rimuovere un'estremità alla volta applicando una
forza nella direzione mostrata in figura per rimuovere l'asta dalle parti (A) fissate all'asta.
Opmerking Als u zich hebt vergist bij het plaatsen, verwijder dan eerst het ene uiteinde en daarna het andere door kracht
uit te oefenen in richting die in de illustratie wordt getoond en verwijder de stang van de onderdelen (A) die
aan de stang zijn bevestigd.
Uwaga W przypadku zamocowania w błędnym położeniu lub kierunku, należy odłączyć po jednym końcu,
popychając w kierunku wskazanym na rysunku w celu wyjęcia pręta z części (A) dołączonej do pręta.
7
10 バスケット布/ロッド 3を、白タグ(A、B)が付いた面を下にして広げます。
Spread out the basket cloth/rod 3 with the surface that the white tags (A and B) are attached to facing
down.
Étalez le tissu du panier/la tige 3 avec la surface portant les étiquettes blanches (A et B) dirigée vers le
bas.
Extienda la tela de la cesta/varilla 3 con la superficie a la que están conectadas las etiquetas blancas (A
y B) hacia abajo.
Estique o tecido da cesta/haste 3 com a superfície que contém as marcas brancas (A e B) voltadas para
baixo.
Breiten Sie das Korbtuch/Stange 3 mit der Oberfläche, an der die weißen Marken (A und B) befestigt
sind, nach unten weisend aus.
Stendere il tessuto del raccoglitore/asta 3 con la superficie a cui sono attaccate le etichette bianche (A e
B) rivolta verso il basso.
Spreid het opvangmanddoek/stang 3 uit met het oppervlak waar de witte labels (A en B) op zijn
bevestigd, naar beneden.
Rozłóż materiał kosza/pręt 3 powierzchnią z białymi znacznikami (A i B) skierowaną w dół.
A
B
11 ロッド 1を、Aの白タグが取り付けられた筒状の部分に通します。
Feed rod 1 through the tubular part where white tag A is attached.
Introduisez la tige 1 dans la parti tubulaire portant l'étiquette blanche A.
Inserte la varilla 1 a través de la parte tubular donde se conecta la etiqueta blanca A.
Passe a haste 1 pela parte tubular a que a marca branca A está afixada.
Führen Sie die Stange 1 durch den röhrenförmigen Teil, an dem die weiße Marke A befestigt ist.
Passare l'asta 1 attraverso la parte tubolare dove è attaccata l'etichetta bianca A.
Voer stang 1 door het buisvormige gedeelte waar het witte label A is bevestigd.
Wsuń pręt 1 do rurki z białym znacznikiem A.
A
12 ロッド 2を、Bの白タグが取り付けられた筒状の部分に通します。
Feed rod 2 through the tubular part where white tag B is attached.
Introduisez la tige 2 dans la parti tubulaire portant l'étiquette blanche B.
Inserte la varilla 2 a través de la parte tubular donde se conecta la etiqueta blanca B.
Passe a haste 2 pela parte tubular a que a marca branca B está afixada.
Führen Sie die Stange 2 durch den röhrenförmigen Teil, an dem die weiße Marke B befestigt ist.
Passare l'asta 2 attraverso la parte tubolare dove è attaccata l'etichetta bianca B.
Voer stang 2 door het buisvormige gedeelte waar het witte label B is bevestigd.
Wsuń pręt 2 do rurki z białym znacznikiem B. B
13 白タグ(A)がイラストと同じ位置になる向きで、ロッド 1の左右にある差し込み口(C)をフット Lと
Rに付いているアームの先端(B)へ押し込みます。
Insert the tips (B) of the arms attached to the foot L and foot R into the left and right insert slots (C) of
rod 1 such that the white tag (A) is oriented in the position shown in the illustration.
Insérez les extrémités (B) des bras fixés au pied L et R dans les fentes d'insertion (C) de la tige 1, de telle
manière que l'étiquette blanche (A) soit orientée dans la position indiquée sur l'illustration.
Inserte las puntas (B) de los brazos acoplados a la pata L y a la pata R en las ranuras de inserción
izquierda y derecha (C) de la varilla 1 de manera tal que la etiqueta blanca (A) quede orientada en la
posición mostrada en la ilustración.
Insira as pontas (B) dos braços anexados à perna L e à perna R nas aberturas esquerda e direita (C) da
haste 1 de forma que a marca branca (A) esteja orientada na posição exibida na ilustração.
Führen Sie die Spitzen (B) der Arme, die an Fuß L und Fuß R angebracht sind, in die linken und rechten
Einführnuten (C) der Stange 1 so ein, dass die weiße Marke (A) in der Position ausgerichtet ist, die in der
Abbildung dargestellt ist.
Inserire le punte (B) delle braccia fissate al piede L e al piede R nei fori di inserimento sinistro e destro (C)
dell'asta 1 in modo che l'etichetta bianca (A) sia orientata nella posizione mostrata nella figura.
Steek de punten (B) van de armen die aan voet L en voet R bevestigd zijn in de linker en rechter
insteeksleuven (C) van stang 1, zodat het witte label (A) is gericht naar de positie die in de illustratie
wordt getoond.
Wsuń końcówki (B) ramion zamocowanych do stopki L i stopki R w lewym i prawym gnieździe (C) pręta
1, tak aby biały znacznik (A) znajdował się w położeniu przedstawionym na rysunku.
A
B
C
8
14 ロッド 1と左右のアームを M4 六角ビスで固定します。M4 六角レンチを使ってしっかりと固定します。
Affix rod 1 and the left and right arms using M4 hex screws. Securely tighten the screws using the M4
Allen wrench.
Fixez la tige 1 et les bras gauche et droit à l'aide de vis hexagonales M4. Serrez fermement les vis à l'aide
de la Clé Allen M4.
Fija la varilla 1 y los brazos izquierdo y derecho utilizando tornillos hexagonales M4. Apriete bien los
tornillos con la llave Allen M4.
Fixe a haste 1 e os braços esquerdo e direito usando parafusos sextavados M4. Aperte bem os parafusos
usando a chave allen M4.
Befestigen Sie die Stange 1 und den linken und rechten Arm mit M4-Sechskantschrauben. Ziehen Sie
die Schrauben mit dem M4-Inbus-Schlüssel fest an.
Fissare l'asta 1 e i bracci sinistro e destro per mezzo di viti esagonali M4. Serrare saldamente le viti
utilizzando la chiave a brugola M4.
Zet stang 1 en de linker- en rechterarm vast met de M4-zeskantschroeven. Zet de schroeven stevig vast
met de M4-inbussleutel.
Zamocuj pręt 1 oraz lewe i prawe ramię za pomocą śrub sześciokątnych M4. Dokręć śruby kluczem
imbusowym M4.
15 ロッド 2(A)を左右のアームの Bの部分に掛けるようにして置きます。
Place rod 2 (A) such that it hooks onto the left and right arms of the B parts.
Placez la tige 2 (A) de telle manière qu'elle s'accroche sur les bras gauche et droit des parties B.
Coloque la varilla 2 (A) de manera tal que se enganche en los brazos izquierdo y derecho de las partes B.
Posicione a haste 2 (A) de forma que ela enganche nos braços direito e esquerdo das peças B.
Platzieren Sie die Stange 2 (A) so, dass sie an dem linken und rechten Arm der Teile B eingehängt ist.
Posizionare l'asta 2 (A) in modo che si agganci ai bracci sinistro e destro delle parti B.
Plaats stang 2 (A) zo dat deze vast komt te zitten aan de linker en rechter arm van de onderdelen B.
Umieść pręt 2 (A) tak, aby zaczepił się o lewe i prawe ramię części B.
BB
AA
16 バスケット布にあらかじめ取り付けられていたロッド 3を、紙止めロッドの手前の溝(A)に押し込み、
取り付けます。
Insert and attach rod 3 which is pre-attached to the basket cloth into the grooves (A) in the front of the
paper stopper rod.
Insérez et montez la tige 3, qui est pré-montée sur le tissu du panier, dans les rainures (A) à l'avant de la
tige du butoir du papier.
Inserte y conecte la varilla 3 preacoplada a la tela de la cesta en las ranuras (A) de la parte frontal de la
varilla del tope de papel.
Insira e fixe a haste 3, que está pré-anexada ao tecido da cesta, nos sulcos (A) na parte dianteira da haste
do fixador de papel.
Befestigen Sie die Stange 3, die am Korbtuch vormontiert ist, indem Sie sie in die Nuten (A) vor der
Papieranschlagstange einführen.
Inserire e fissare l'asta 3 pre-montata nel tessuto del raccoglitore nelle scanalature (A), davanti all'asta
dell'arresto carta.
Plaats en bevestig stang 3 die vooraf aan het opvangmanddoek is bevestigd, in de groeven (A) in de
voorzijde van de papierstopstang.
Wsuń i zamocuj pręt 3, który pierwotnie był dołączony do materiału kosza, w rowkach (A) przed prętem
stopera papieru.
A
A
メモ 間違って取り付けてしまった場合は、紙止めロッドと同じ方法(P. 6 参照)で取り外してください。
Note If you attach it incorrectly, remove by using the same method as the paper stopper rod (refer to p.6).
Remarque Si vous la montez de manière incorrecte, ôtez-la selon la même méthode que la tige du butoir du papier (reportez-vous à la p. 6).
Nota Si la conecta incorrectamente, retírela aplicando el mismo método que para la varilla del tope de papel (consulte la página 6).
Nota Caso afixá-la incorretamente, remova-a usando o mesmo método usado para a haste do fixador de papel (consulte a p. 6).
Hinweis Wenn Sie sie falsch befestigen, entfernen Sie sie mit derselben Methode wie bei der Papieranschlagstange (siehe S. 6).
Nota Se si fissa male il componente, rimuoverlo con lo stesso metodo dell'asta dell'arresto carta (vedere pag. 6).
Opmerking Heeft u de stang niet goed bevestigd, verwijder deze dan volgens dezelfde methode als bij de papierstopstang (raadpleeg pag. 6).
Uwaga W przypadku nieprawidłowego zamocowania odłącz go, korzystając z tej samej metody, co w przypadku pręta stopera papieru (patrz str. 6).
9
17 トップステーの状態を確認します。トップステーの可動部が手前に倒れている場合は Aの部分を持ち上
げ、起こしてください。
Check the condition of the top stay. If the movable part of the top stay is tilted over, stand it up by
lifting up the A part.
Vérifiez l'état de l'étai supérieur. Si la partie mobile de l'étai supérieur est penchée, redressez-la en
soulevant la partie A.
Revise la condición del travesaño superior. Si la parte móvil del travesaño superior está inclinada, párela
levantando la parte A.
Verifique a condição do suporte superior. Se a parte móvel do suporte superior estiver inclinada,
levante-a elevando a parte A.
Überprüfen Sie den Zustand der oberen Stütze. Wenn der bewegliche Teil der oberen Stütze
umgekippt ist, richten Sie ihn auf, indem Sie den Teil A anheben.
Controllare la condizione del tirante superiore. Se la parte semovente del tirante superiore è troppo
inclinato, rimetterla in posizione eretta sollevando la parte A.
Controleer de staat van de bovenste steun. Als het beweegbare deel van de bovenste steun is
gekanteld, zet het dan overeind door onderdeel A op te tillen.
Sprawdź stan górnej poprzeczki. Jeżeli ruchoma część górnej poprzeczki przechyliła się, podnieś ją,
podnosząc część A.
A
18 トップステーの Aのパーツの位置に合わせ、用紙ガイド(B)の上部先端をトップステーの溝(C)に引っ
掛けます。
Hook the upper tip of the paper guide (B) into the groove (C) in the top stay such that it is aligned with
the position of the A part of the top stay.
Accrochez l'extrémité supérieure du guide papier (B) dans la rainure (C) de l'étai supérieur pour l'aligner
sur la position de la partie A de l'étai supérieur.
Enganche la punta superior de la guía del papel (B) en la ranura (C) del travesaño superior de manera
tal que se alinee con la posición de la parte A del travesaño superior.
Enganche a ponta superior da guia do papel (B) no sulco (C) do suporte superior de forma que fique
alinhado com a posição da parte A do suporte superior.
Haken Sie die obere Spitze der Papierführung (B) so in die Nut (C) in der oberen Stütze, dass sie an der
Position des Teils A der oberen Stütze ausgerichtet ist.
Agganciare la punta superiore della guida della carta (B) nella scanalatura (C) nel tirante superiore in
modo che si allinei con la posizione della parte A del tirante superiore.
Haak de bovenste punt van de papiergeleider (B) in groef (C) in de bovenste steun, zo dat deze uitkomt
tegenover de positie van onderdeel A van de bovenste steun.
Zaczep górną końcówkę prowadnicy papieru (B) w rowku (C) w górnej poprzeczce, tak aby dopasować
jej położenie do położenia części A górnej poprzeczki.
A
B
C
19 用紙ガイドの Aの部分を押し込み、取り付けます。
Push in and attach the A part of the paper guide.
Poussez et fixez la partie A du guide papier.
Empuje y conecte la parte A de la guía del papel.
Empurre e anexe a parte A da guia do papel.
Befestigen Sie den Teil A der Papierführung, indem Sie ihn hineindrücken.
Spingere e fissare la parte A della guida della carta.
Duw en bevestig onderdeel A van de papiergeleider.
Wciśnij i zamocuj część A prowadnicy papieru.
A
20 Aで示す 2か所(SS-21 の場合は一番左の 1か所のみ)でも手順 18、19 と同じ操作を行い、残りの用
紙ガイドを取り付けます。
Attach the remaining paper guides by repeating steps 18 and 19 in the two locations indicated by A(only
the leftmost one position for the SS-21).
Montez les guides papiers restant en répétant les étapes 18 et 19 dans les deux emplacements indiqués
par A (uniquement la position à l'extrême gauche pour le SS-21).
Conecte las guías del papel restantes repitiendo los pasos 18 y 19 en las dos ubicaciones que se indican
con A (solo la posición que está más a la izquierda en el caso de SS-21).
Anexe as guias do papel restantes repetindo as etapas 18 e 19 nos dois locais indicados pela letra A
(apenas a posição à extrema esquerda para o SS-21).
Befestigen Sie die übrigen Papierführungen, indem Sie die Schritte 18 und 19 an den beiden mit A
gekennzeichneten Positionen (nur an der einen Position ganz links für den SS-21) wiederholen.
Fissare le altre guide della carta ripetendo i passaggi 18 e 19 nelle due posizioni indicate da A (solo la
posizione più a sinistra per l'SS-21).
Bevestig de overige papiergeleiders door de stappen 18 en 19 te herhalen in de twee locaties die
worden aangeduid door A (alleen de meest linkse positie voor de SS-21).
Zamocuj pozostałe prowadnice papieru, powtarzając kroki 18 i 19 w dwóch miejscach, wskazanych
symbolem (A) (tylko w skrajnej lewej pozycji w przypadku modelu SS-21).
A