XXXXXXXX ©CANON INC.2011
(Color/Black)
tape
FINE
(FINE Cartridges)
USB
(Setup CD-ROM)
USB
:USB
USB
•
•
USB
.(ON
Windows
Microsoft Corporation
Windows Vista
Microsoft Corporation
AirPortMac OSMacMacintosh
Apple Inc.Bonjour
•
•
•
K10372 (MG3140)
LAN
Front Cover
.(Paper Output Tray
.(orange tape
Paper
.(Output Cover
Paper
.(Output Cover
LED0< 4< E
(ON
.2
Retirez les feuilles de protection ainsi que la bande.
Cartouches FINE
Câble USB
Connexion réseau :
Si nécessaire, préparez
les périphériques réseau
Le câble USB fourni est
pour la configuration sans
fil.
Connexion USB :
Utilisez le câble USB fourni.
•
•
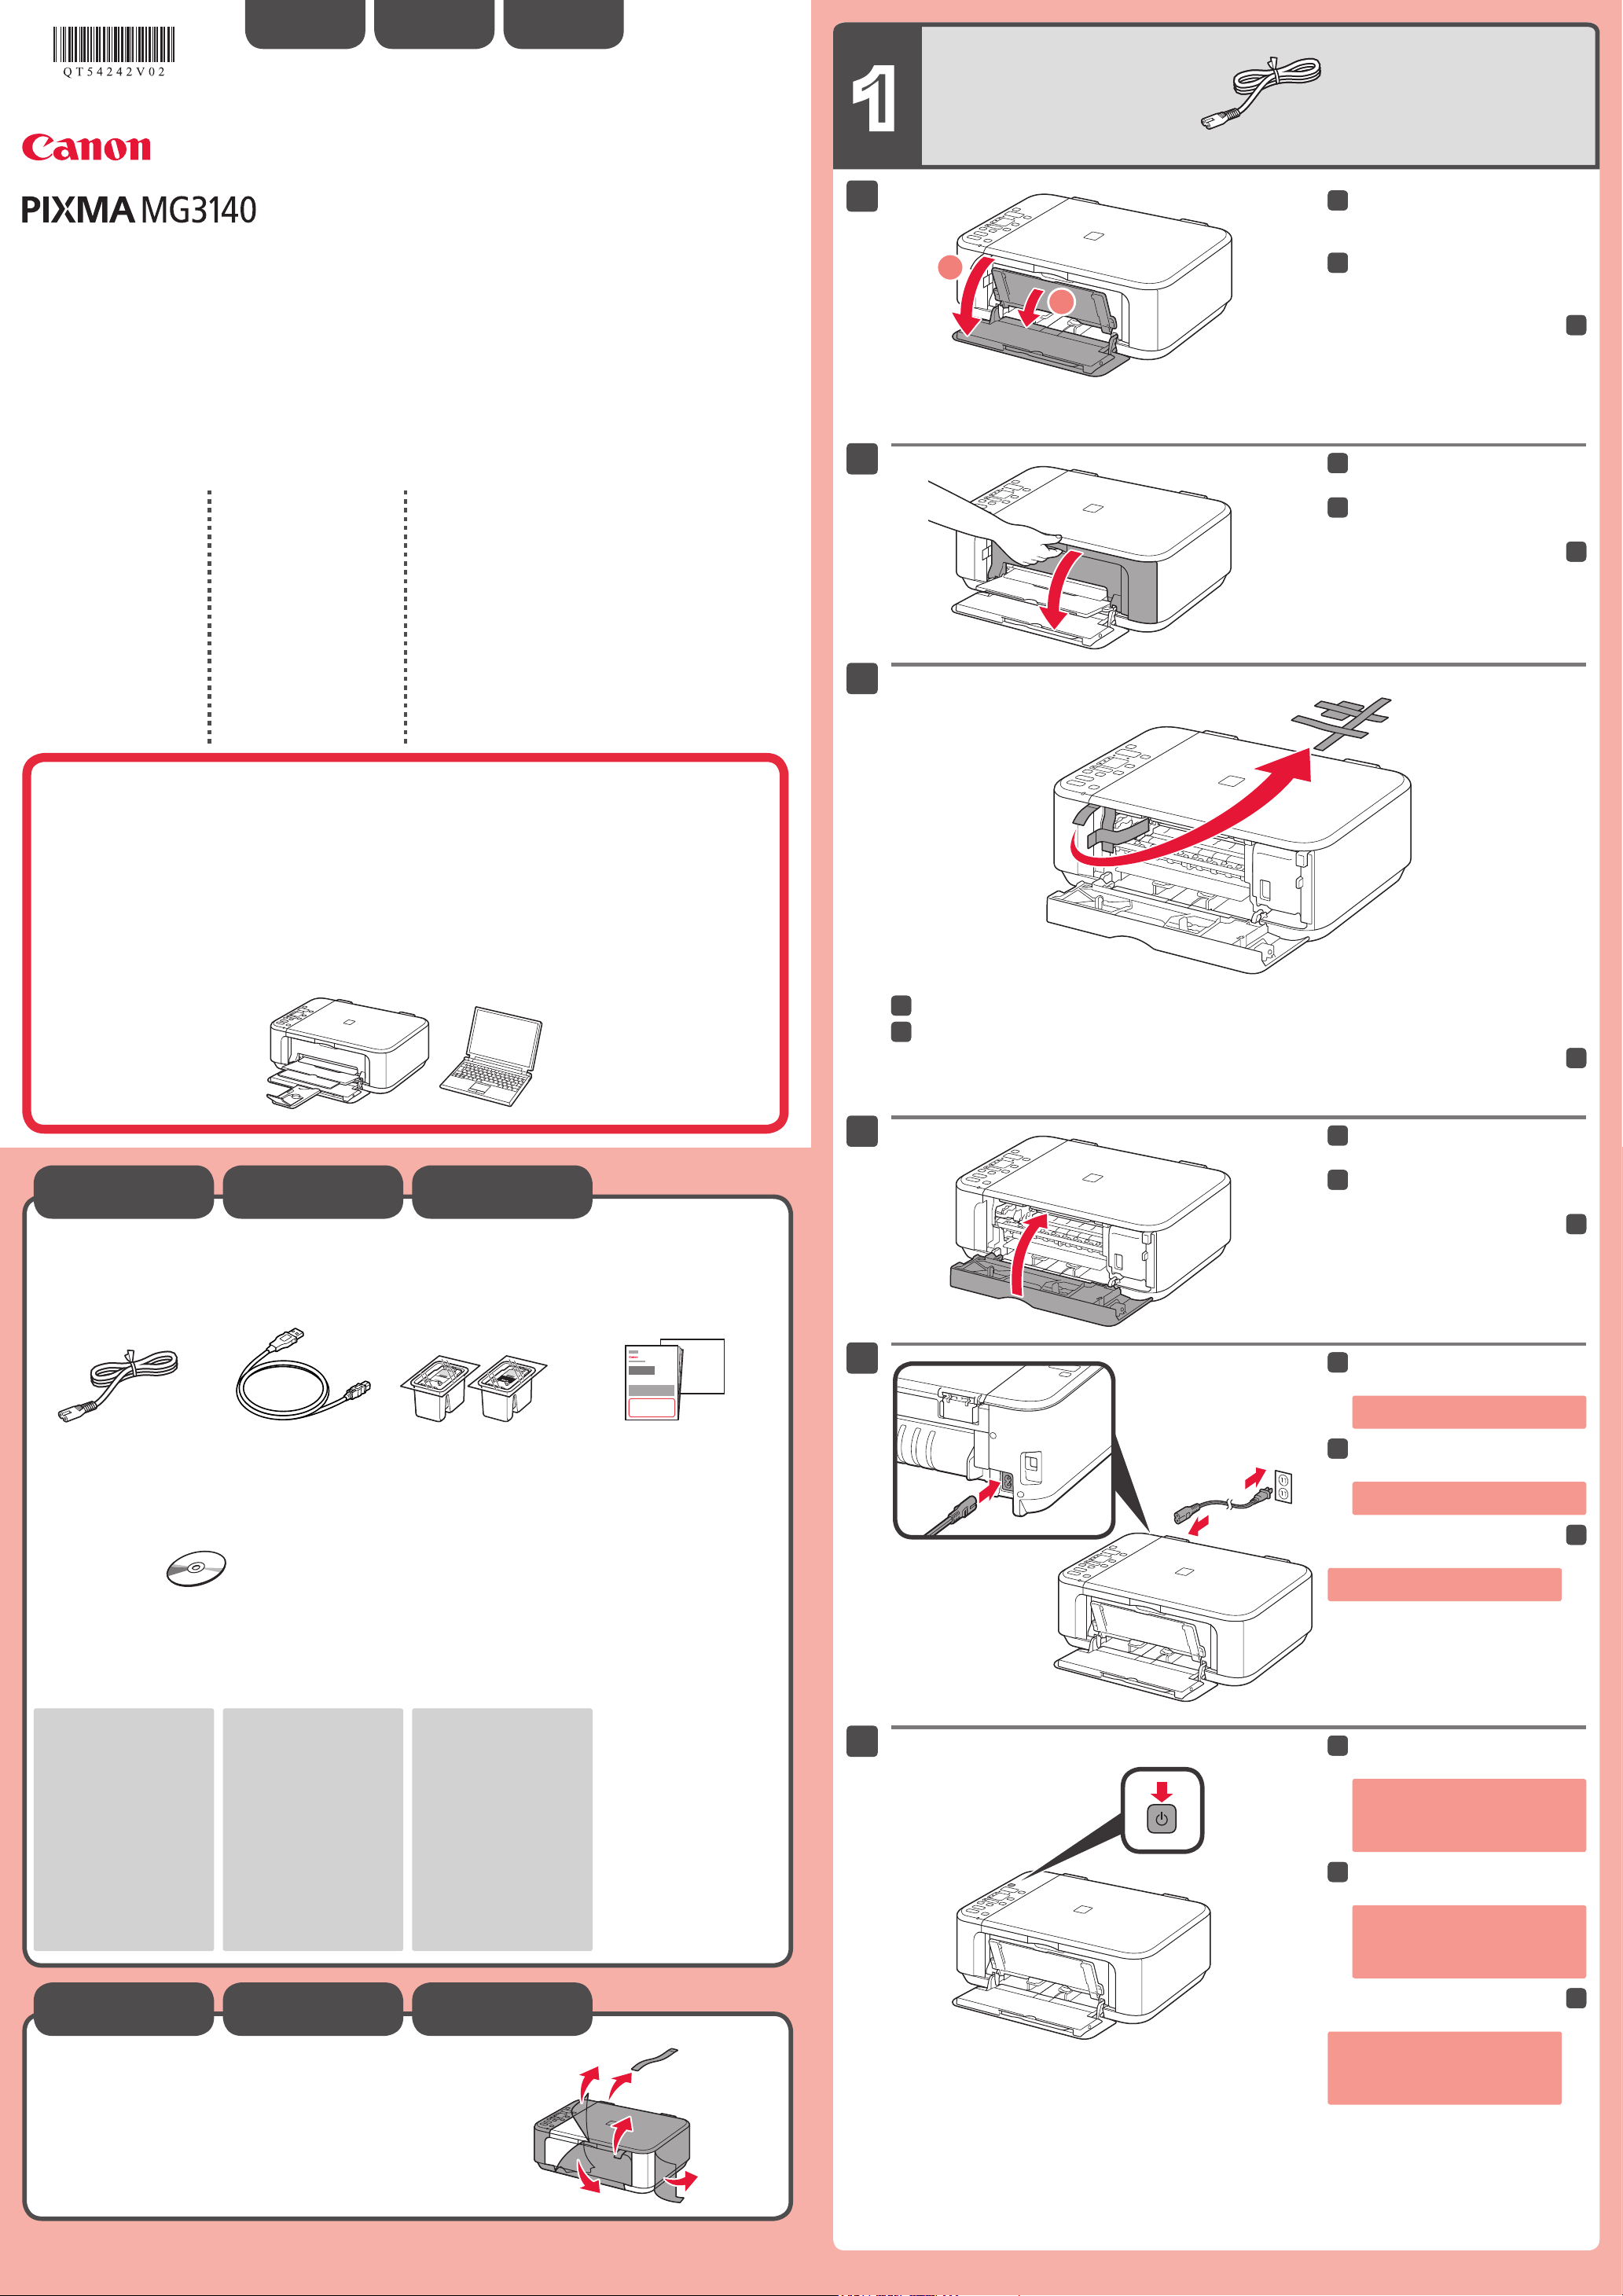
Ne branchez pas encore le câble USB.
Appuyez sur le bouton MARCHE
(ON).
Démarrage À lire en premier !
Conservez ce document à portée de
ultérieurement.
Corporation aux États-Unis et/ou dans
Corporation aux États-Unis et/ou dans
Macintosh, Mac, Mac OS, AirPort et
Inc., déposées aux États-Unis et dans
•
•
•
Pour procéder à la configuration, placez la machine à proximité
du point d'accès (réseau local sans fil) et de l'ordinateur.
FRANÇAIS
Ouvrez le panneau avant et le bac
de sortie papier.
Retirez la bande orange.
papier.
Ouvrez le couvercle de sortie
papier.
Si E> 4> 0écran LED,
appuyez sur le bouton MARCHE
(ON)
Network connection:
Prepare network devices
such as a router or an
access point as necessary.
The supplied USB cable
wireless setup.
USB connection:
Use the supplied USB cable.
•
•
Power cord FINE Cartridges
Setup CD-ROM
USB cable
Do not connect the USB cable yet.
Connect the power cord.
Press the ON button.
Getting Started
U.S. and/or other countries.
Corporation in the U.S. and/or other
countries.
Macintosh, Mac, Mac OS, AirPort
Inc., registered in the U.S. and other
countries.
•
•
•
To perform setup, place the machine near the access point
(wireless LAN) and computer.
ENGLISH
Open the Front Cover and the
Paper Output Tray.
Close the Paper Output Cover.
Open the Paper Output Cover.
If E> 4> 0are displayed on the LED,
press the ON button to turn OFF the
QT5-4242-V02 PRINTED IN XXXXXXXX
IMPRIME XX XXXXXXXX


