manuals.online logo
Brands
  1. Home
  2. •
  3. Brands
  4. •
  5. Canon
  6. •
  7. Printer
  8. •
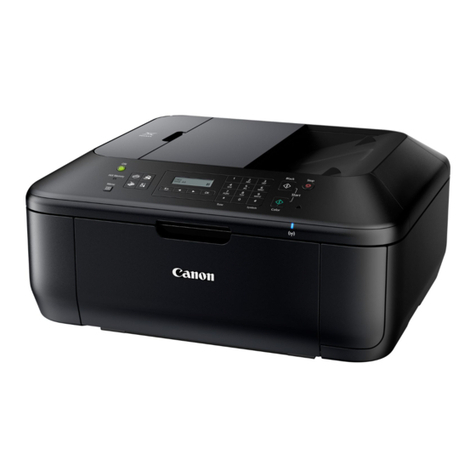
  9. Canon PIXMA MG5270 User manual

Canon PIXMA MG5270 User manual

Other Canon Printer manuals

Canon GX7000 Series User manual

Canon

Canon GX7000 Series User manual

Canon Color imageCLASS 8180c User manual

Canon

Canon Color imageCLASS 8180c User manual

Canon imageRUNNER 3245 Series User manual

Canon

Canon imageRUNNER 3245 Series User manual

Canon iP3600 - PIXMA Color Inkjet Printer User manual

Canon

Canon iP3600 - PIXMA Color Inkjet Printer User manual

Canon BJC 210 User manual

Canon

Canon BJC 210 User manual

Canon imageCLASS MF5770 Manual

Canon

Canon imageCLASS MF5770 Manual

Canon i470D Series User manual

Canon

Canon i470D Series User manual

Canon Pixma G1000 series Setup guide

Canon

Canon Pixma G1000 series Setup guide

Canon 2161B002 User manual

Canon

Canon 2161B002 User manual

Canon ImagePrograf GP-2000 Setup guide

Canon

Canon ImagePrograf GP-2000 Setup guide

Canon Printer User manual

Canon

Canon Printer User manual

Canon image Prograf iPF 685 Series User manual

Canon

Canon image Prograf iPF 685 Series User manual

Canon i9100 Series User manual

Canon

Canon i9100 Series User manual

Canon PIXMA MG5350 User manual

Canon

Canon PIXMA MG5350 User manual

Canon imageCLASS MF6540 Assembly instructions

Canon

Canon imageCLASS MF6540 Assembly instructions

Canon IPF850 User manual

Canon

Canon IPF850 User manual

Canon MG6600 Series Setup guide

Canon

Canon MG6600 Series Setup guide

Canon i350 - Color Bubble Jet Printer User manual

Canon

Canon i350 - Color Bubble Jet Printer User manual

Canon PIXMA IP1000 Instructions for use

Canon

Canon PIXMA IP1000 Instructions for use

Canon iX6560 User manual

Canon

Canon iX6560 User manual

Canon PIXMA IP5300 User manual

Canon

Canon PIXMA IP5300 User manual

Canon LBP-3260 Installation instructions

Canon

Canon LBP-3260 Installation instructions

Canon E 400 Setup guide

Canon

Canon E 400 Setup guide

Canon TS9500 Series Setup guide

Canon

Canon TS9500 Series Setup guide

Popular Printer manuals by other brands

Evolis Elypso user guide

Evolis

Evolis Elypso user guide

Lexmark 522n - C Color Laser Printer Service manual

Lexmark

Lexmark 522n - C Color Laser Printer Service manual

Panduit COUGAR LS9Q Operator's manual

Panduit

Panduit COUGAR LS9Q Operator's manual

Olivetti PG L2140 Operation guide

Olivetti

Olivetti PG L2140 Operation guide

Samsung SL-M2820DW user manual

Samsung

Samsung SL-M2820DW user manual

Kyocera FS-9530DN specification

Kyocera

Kyocera FS-9530DN specification

Lexmark Infoprint 1332 user manual

Lexmark

Lexmark Infoprint 1332 user manual

Epson M1120 user guide

Epson

Epson M1120 user guide

TransAct POSJET 1500 Spare parts

TransAct

TransAct POSJET 1500 Spare parts

Telpar MTP-1500 user manual

Telpar

Telpar MTP-1500 user manual

Star DP8340 SERIES user manual

Star

Star DP8340 SERIES user manual

MGI JETVARNISH 3DS user manual

MGI

MGI JETVARNISH 3DS user manual

Kyocera TASKalfa PA4500ci Operation guide

Kyocera

Kyocera TASKalfa PA4500ci Operation guide

Emaar EP-360 user manual

Emaar

Emaar EP-360 user manual

Fujitsu DL7400 user manual

Fujitsu

Fujitsu DL7400 user manual

Centronics 101A Technical manual

Centronics

Centronics 101A Technical manual

Logic Controls LR1100 user manual

Logic Controls

Logic Controls LR1100 user manual

Epson ActionLaser Plus user manual

Epson

Epson ActionLaser Plus user manual

manuals.online logo
manuals.online logoBrands
  • About & Mission
  • Contact us
  • Privacy Policy
  • Terms and Conditions

Copyright 2025 Manuals.Online. All Rights Reserved.

繁體中文
ENGLISH

한국어


입문 가이드
기기를 사용하기 전에 이설명서를 읽도록 하십시오. 나중에 참고할 수있도록 이를 가까운 곳에 보관해 두십시오.
入門指南
確保在使用本機之前閱讀本手冊。請妥善保管以便日後使用。
Getting Started
Make sure to read this manual before using the machine. Please keep it in hand for future reference.


















•
•
•
•
•
•







•
•
■

중요한 정보를 포함한 지침입니
다.
금지된 작업입니다.
Microsoft는Microsoft Corporation의등록 상표
입니다.
Windows는미국 및/또는 기타 국가에서 Microsoft
Corporation의상표 또는 등록 상표입니다.
Windows Vista는미국 및/또는 기타 국가에서
Microsoft Corporation의상표 또는 등록 상표입
니다.
Internet Explorer는미국 및/또는 기타 국가에서
Microsoft Corporation의상표 또는 등록 상표입
니다.
Macintosh, Mac 및AirPort는미국 및기타 국가에
서등록된 Apple Inc.의상표입니다.
Bonjour는미국 및기타 국가에서 등록된 Apple
Inc.의상표입니다.
•
•
•
•
•
•
이가이드에서 Windows 7 운영 체제는 Windows
7로, Windows Vista 운영 체제는 Windows Vista로
표시합니다.
이가이드에서 화면은 Windows 7 Home Premium
및Mac OS X v.10.6.x를기준으로 합니다. (특별
히명시하지 않은 한, 화면은 Windows 7의화면
입니다.)
•
•
이문서에서 사용되는 기호■
모델 번호: K10359(MG5270)
包含重要資訊的說明。
禁止的操作。
Microsoft為Microsoft Corporation的註冊商標。
Windows為Microsoft Corporation在美國和/或其他
國家/地區的商標或註冊商標。
Windows Vista為Microsoft Corporation在美國和/或
其他國家/地區的商標或註冊商標。
Internet Explorer為Microsoft Corporation在美國和/
或其他國家/地區的商標或註冊商標。
Macintosh、Mac和AirPort為Apple Inc.在美國和/或
其他國家/地區註冊的商標。
Bonjour為Apple Inc.在美國和/或其他國家/地區註
冊的的商標。
•
•
•
•
•
•
本指南中,Windows 7作業系統簡稱為Windows
7以及Windows Vista作業系統簡稱為Windows
Vista。
本指南中的螢幕基於Windows 7 Home Premium和
Mac OS X v.10.6.x。(除非另有說明,否則這些螢
幕均為Windows 7環境下的螢幕。)
•
•
本文件中使用的符號■
型號:K10359(MG5270)
Instructions including important
information.
Prohibited actions.
Microsoft is a registered trademark of Microsoft
Corporation.
Windows is a trademark or registered trademark
of Microsoft Corporation in the U.S. and/or other
countries.
Windows Vista is a trademark or registered
trademark of Microsoft Corporation in the U.S.
and/or other countries.
Internet Explorer is a trademark or registered
trademark of Microsoft Corporation in the U.S.
and/or other countries.
Macintosh, Mac, and AirPort are trademarks
of Apple Inc., registered in the U.S. and other
countries.
Bonjour is a trademark of Apple Inc., registered
in the U.S. and other countries.
•
•
•
•
•
•
In this guide, Windows 7 operating system is
referred to as Windows 7 and Windows Vista
operating system as Windows Vista.
In this guide, the screens are based on
Windows 7 Home Premium and Mac OS X
v.10.6.x. (Unless noted otherwise, the screens
are those of Windows 7.)
•
•
Symbols Used in This
Document
■
Model Number: K10359 (MG5270)
1


•





 


•
입문 가이드
(본설명서)
•
전자 안내서는 컴퓨터에서 볼수있습니다. 이는 Setup CD-ROM에포함되어 있으며 소프트웨어 설치 중에 설치됩니다. 일부 언어의 경우, 설명서의 일부분 내용이 영어로 표시될 수있습니다. 전자 안내서를 여는 데대한
자세한 내용은 64페이지를 참조하십시오.
기기 설치 및사용 방법에 대해 설명합니다.
다양한 조작 절차를 설명하여 기기를 충분
히사용할 수있도록 합니다.
기기를 사용할 때발생할 수있는 문제에
대한 해결 정보를 설명합니다.
고급 가이드 문제 해결기본 가이드
기본 조작 및용지에 대해 설명하고 사용
가능한 다른 기능에 대해 소개합니다.
네트워크 설치 문제 해결•
入門指南
(本手冊)
•
可以在電腦上檢視電子手冊。它們包含在安裝光碟中,在軟體安裝過程中安裝。對於某些語言,手冊部分內容可能以英文顯示。關於開啟電子手冊的詳細資訊,請參閱第64頁。
描述如何安裝並使用本機。
描述各種操作步驟以充分地使用本機。 描述使用本機時可能會遇到的問題的疑難
排解提示資訊。
進階指南基本指南 疑難排解
描述基本操作和媒體,並介紹其他可用
的功能。
網路安裝疑難排解•
Getting Started
(this manual)
•
Describes various operating procedures
to make full use of machine.
Describes troubleshooting tips for
problems you may encounter when using
the machine.
Advanced Guide TroubleshootingBasic Guide
Describes basic operations and media,
and gives an introduction to other
functions available.
On-screen manuals can be viewed on a computer. They are included on the Setup CD-ROM and are installed during the software installation. For some languages parts of the manual may be displayed in
English. For details on opening the on-screen manuals, refer to page 64.
Describes how to set up and use your machine.
Network Setup Troubleshooting•
2
■
  
  
  
  
  
  
 
 

 

  
 
 
 
 
  
 
 
 
 
 
  
목차■
7 소프트웨어 설치(USB 연결) P.26
6 연결 방법 선택 P.24
5 용지 로드 P.20
3 잉크 탱크 설치 P.14
2 프린트 헤드 설치 P.10
1 준비 P.5
쉬운 설정(Easy Setup)을사용한 무선 설정
P.37
WPS(Wi-Fi Protected Setup)를사용한 무선 설
정P.42
WCN(Windows Connect Now)을사용한 무선
설정 P.45
8 무선 설정 P.35
메모리 카드에서 사진 인쇄 P.66
복사해 보기 P.69
컴퓨터에서 사진 인쇄 P.71
11 기기 사용해 보기 P.64
9 소프트웨어 설치(네트워크 연결) P.47
소프트웨어 설치 P.48
등록(Macintosh) P.55
정보 P.59
10 추가된 컴퓨터에서 사용 P.63
12 사양 P.75
4 프린트 헤드 정렬 P.18
目錄■
1 準備工作 P.5
2 安裝列印頭 P.10
6 選擇連接方法 P.24
5 載入紙張 P.20
3 安裝墨水盒 P.14
4 校準列印頭 P.18
7 安裝軟體(USB連接) P.26
使用簡易設定(Easy Setup)進行無線設定 P.37
使用WPS (Wi-Fi Protected Setup)進行無線設
定P.42
使用WCN (Windows Connect Now)進行無線
設定 P.45
8 無線設定 P.35
10 在其他的電腦上使用 P.63
9 安裝軟體(網路連接) P.47
安裝軟體 P.48
註冊(Macintosh) P.55
資訊 P.59
從記憶卡列印相片 P.66
嘗試影印 P.69
從電腦列印相片 P.71
11 嘗試使用本機 P.64
12 規格 P.74
Contents■
7 Install the Software (USB Connection)
P.26
6 Select Connection Method P.24
5 Load Paper P.20
3 Install the Ink Tanks P.14
2 Install the Print Head P.10
1 Preparation P.5
Wireless Setup Using Easy Setup P.37
Wireless Setup Using WPS (Wi-Fi Protected
Setup) P.42
Wireless Setup Using WCN (Windows
Connect Now) P.45
8 Wireless Setup P.35
10 Use from Additional Computers P.63
12 SpecicationsP.73
Print Photos from a Memory Card P.66
Try Copying P.69
Print Photos from a Computer P.71
11 Try Using the Machine P.64
4 Align the Print Head P.18
9 Install the Software (Network
Connection) P.47
Install the Software P.48
Registration (Macintosh) P.55
Information P.59
3
P.64 - 72
P.24 - 34 P.47 - 62 P.63, 47 - 62
P.24 - 25, 35 - 46
P.4 - 23

■



  







기기 설치 흐름■USB 연결
설치 완료 기기 사용해 보기
네트워크 연결
소프트웨어 설치 소프트웨어 설치 소프트웨어 설치
무선 연결
기기 준비
기기 무선 설정
추가된 컴퓨터에서 사용하기
(기기가 이미 네트워크에 연결되어 있고 기기를
사용할 컴퓨터를 추가하려는 경우)
本機安裝流程■
USB連接
安裝完成 嘗試使用本機
網路連接
軟體安裝 軟體安裝 軟體安裝
無線連接
本機準備
本機無線設定
在其他的電腦上使用
(本機已連接至網路並且想要添加使用本機的
電腦時)
Network Connection
Wireless Connection
USB Connection
Using from Additional Computers
Machine Preparation
Software Installation
Installation Complete
Machine Installation
Flow
■
Machine Wireless Setup
Try Using the Machine
Software Installation Software Installation
(when the machine is already connected to
the network and you want to add computers
from which to use the machine)
4

■


IEEE802.11b/g/n을지원하는 상용 액세스 포인트 또는 라우터가 필요합니다.
무선 연결에 필요한 장치■
무선 연결을 통하여 기기를 사용하는 경우, 다음 장치가 필요합니다.
액세스 포인트 또는 무선 라
우터
需要購買支援IEEE802.11b/g/n的存取點或路由器。
無線連接所需裝置■
透過無線連接使用本機時,需要如下裝置。
存取點或無線路由器
Devices Required for Wireless Connection■
When using the machine over a wireless connection, the following devices are required.
A commercial access point or router that supports IEEE802.11b/g/n is required.
Access point or wireless router
11
5




•
준비
기기 위로 물건이 떨어질 수있는 장소에는 기기를 설치하지 마십시오.
또한 기기 위에 어떠한 물건도 올려 놓지 마십시오. 커버를 열때기기에
떨어져 기기가 고장날 수있습니다.
•기기의 내부 및외부에서 모든 오렌지색 테이프와 보호재를 제거합니다.
準備工作
請勿將本機安裝在物件可能掉落在其上的位置。此外,請勿將任何物品
置放於本機頂部上。開啟蓋板時物件可能會掉落到本機中,導致故障。
•從本機內部和外部取下全部橙色膠帶和保護材料。
Preparation
Do not install the machine where an object may fall on it. In addition,
do not place any object on the top of the machine. It may fall into the
machine when opening covers, resulting in malfunction.
•Remove all orange tape and protective materials from the inside and
outside of the machine.
A
2
6


•


 
 
 
 
 
 
 
 
 


기기를 컴퓨터에 연결하려면 USB 케이블이 필요합니다
(USB 연결만 해당).
•
일부 부속품(1)은용지 출력 트레이(A)에보관되어 있습니다. 용지 출력 트레이를 열어 해당 부속품을 꺼냅니다.
다음 품목이 모두 동봉되어 있는지 확인하십시오.
1. 프린트 헤드
2. 잉크 탱크(5: BK, M, C, PGBK, Y)
3. 설명서
4. 8cm 디스크 어댑터
5. 디스크 트레이
6. 전원 코드
7. Setup CD-ROM(드라이버, 어플리케이션 및전자 안내서 포함)
8. 무광택 포토 용지 MP-101(자동 프린트 헤드 정렬용)
9. 기타 문서
USB電纜線是連接本機和電腦所必需的(僅適用於USB連
接)。
•
一些附件(1)存放在出紙托盤(A)內。開啟出紙托盤將其取出。
確認已提供所有以下項目。
1. 列印頭
2. 墨水盒(5個︰BK、M、C、PGBK、Y)
3. 手冊
4. 8cm光碟轉接器
5. 光碟托盤
6. 電源線
7. 安裝光碟(包含驅動程式、應用程式和電子手冊)
8. 霧面相片紙MP-101(用於自動列印頭校準)
9. 其他文件
A USB cable is necessary to connect the machine with
your computer (USB connection only).
•
Some accessories (1) are stored within the Paper Output Tray (A). Open the Paper Output Tray to remove them.
Make sure all the following items are supplied.
1. Print Head
2. Ink tanks (5: BK, M, C, PGBK, Y)
3. Manuals
4. 8 cm disc adapter
5. Disc tray
6. Power cord
7. Setup CD-ROM (containing the drivers, applications and on-screen manuals)
8. Matte Photo Paper MP-101 (for Automatic Print Head Alignment)
9. Other documents
3 4
B
C
7

•



•
전원 코드를 기기의 커넥터 및콘센트에 확실하게 삽입합니다.
이단계에서는 USB 케이블을 연결하지 마십시오.•
전원 버튼(B)을누른 다음 LCD(액정 표시 장치)(C)를편안한 시야 각도로 조절합니다.
전원 코드를 연결한 후전원 버튼이 켜질 때까지 약4초정도 소요됩니다.
•
將電源線緊緊地插入本機的連接器,然後將另一端緊緊地插入壁裝插座。
請勿在此步驟連接USB電纜線。•
按電源按鈕(B),然後將LCD(液晶顯示器)(C)調整至舒適的觀看角度。
插入電源線插頭後電源按鈕大約需要4秒鐘才能工作。
•
Insert the power cord into the connector on the machine and into the wall outlet
firmly.
Do NOT connect the USB cable at this stage.•
Press the ON button (B), then adjust the LCD (Liquid Crystal Display) (C) to a
comfortable viewing angle.
It takes about 4 seconds for the ON button to work after the power cord is plugged in.
•
5 6
E
D
8
{}

•

조작판의 {또는 }버튼(D)을사용하여 LCD의언어를 선택한 다음 OK 버튼을 누릅니
다.
LCD에원하지 않는 언어가 표시된 경우, 뒤로 버튼(E)을눌러 언어 선택(Language selection) 화면으로 돌아갑니다.•
위화면이 표시되면 OK 버튼을 누르고 다음 단계로 이동합니다.
使用操作面板上的{或}按鈕(D)為LCD選擇語言,然後按OK按鈕。
如果LCD螢幕上顯示的不是所需的語言,按返回按鈕(E)返回至語言選擇(Language selection)螢幕。•
顯示以上螢幕時,按OK按鈕並轉至下一步。
Use the {or }button (D) on the Operation Panel to select the language for the
LCD, then press the OK button.
When the above screen is displayed, press the OK button and go to the next step.
If an unintended language is displayed on the LCD, press the Back button (E) to return to the Language selection screen.•