manuals.online logo
Brands
  1. Home
  2. •
  3. Brands
  4. •
  5. Caple
  6. •
  7. Ventilation Hood
  8. •
  9. Caple BU520 User manual

Caple BU520 User manual

Other manuals for BU520

1

Other Caple Ventilation Hood manuals

Caple DD810BK User manual

Caple

Caple DD810BK User manual

Caple INCHW3 User manual

Caple

Caple INCHW3 User manual

Caple ZC622 User manual

Caple

Caple ZC622 User manual

Caple CHIMNEY FGC600SS User manual

Caple

Caple CHIMNEY FGC600SS User manual

Caple Ceramica CR700 User manual

Caple

Caple Ceramica CR700 User manual

Caple F Series Chimney User manual

Caple

Caple F Series Chimney User manual

Caple AS600BK User manual

Caple

Caple AS600BK User manual

Caple ZEL900GM User manual

Caple

Caple ZEL900GM User manual

Caple Zi900SS Technical manual

Caple

Caple Zi900SS Technical manual

Caple BXC910 Manual

Caple

Caple BXC910 Manual

Caple CE1121 User manual

Caple

Caple CE1121 User manual

Caple CE902SS User manual

Caple

Caple CE902SS User manual

Caple BXI900SS User manual

Caple

Caple BXI900SS User manual

Caple DD925CO User manual

Caple

Caple DD925CO User manual

Caple 2MBUCH2 User manual

Caple

Caple 2MBUCH2 User manual

Caple CHIMNEY FGC700SS User manual

Caple

Caple CHIMNEY FGC700SS User manual

Caple DD910SS User manual

Caple

Caple DD910SS User manual

Caple FSCHSS9 User manual

Caple

Caple FSCHSS9 User manual

Caple Pi401 User manual

Caple

Caple Pi401 User manual

Caple MOT901 User manual

Caple

Caple MOT901 User manual

Caple SP612 User manual

Caple

Caple SP612 User manual

Caple ZI920 User manual

Caple

Caple ZI920 User manual

Caple ST523 User manual

Caple

Caple ST523 User manual

Caple FSCHSS8 User manual

Caple

Caple FSCHSS8 User manual

Popular Ventilation Hood manuals by other brands

Gorenje S3 IHGC963S4X manual

Gorenje

Gorenje S3 IHGC963S4X manual

KOBE ISX2136SQB-1 Installation instructions and operation manual

KOBE

KOBE ISX2136SQB-1 Installation instructions and operation manual

U.S. Products ADVANTAGE-100H Information & operating instructions

U.S. Products

U.S. Products ADVANTAGE-100H Information & operating instructions

Kuppersberg DUDL 4 LX Technical Passport

Kuppersberg

Kuppersberg DUDL 4 LX Technical Passport

Framtid HW280 manual

Framtid

Framtid HW280 manual

Thermador HGEW 36 FS installation manual

Thermador

Thermador HGEW 36 FS installation manual

Electrolux LFT769X user manual

Electrolux

Electrolux LFT769X user manual

AEG X69453MVO UK user manual

AEG

AEG X69453MVO UK user manual

Broan B5836SS manual

Broan

Broan B5836SS manual

Heinner HDCH-6060RGBK quick start guide

Heinner

Heinner HDCH-6060RGBK quick start guide

Baumatic AS35SS instruction manual

Baumatic

Baumatic AS35SS instruction manual

Franke FTF 604 XS V2 Instructions for use and installation

Franke

Franke FTF 604 XS V2 Instructions for use and installation

Best UCB3I30SBW installation instructions

Best

Best UCB3I30SBW installation instructions

Gram EFU 503-90 X instruction manual

Gram

Gram EFU 503-90 X instruction manual

CIARRA CBCS6803 Installation and user manual

CIARRA

CIARRA CBCS6803 Installation and user manual

sauter SHG501 Instructions for installation and use

sauter

sauter SHG501 Instructions for installation and use

Franke 392-17 User instructions

Franke

Franke 392-17 User instructions

FALMEC Polar Black 35 Instruction booklet

FALMEC

FALMEC Polar Black 35 Instruction booklet

manuals.online logo
manuals.online logoBrands
  • About & Mission
  • Contact us
  • Privacy Policy
  • Terms and Conditions

Copyright 2025 Manuals.Online. All Rights Reserved.

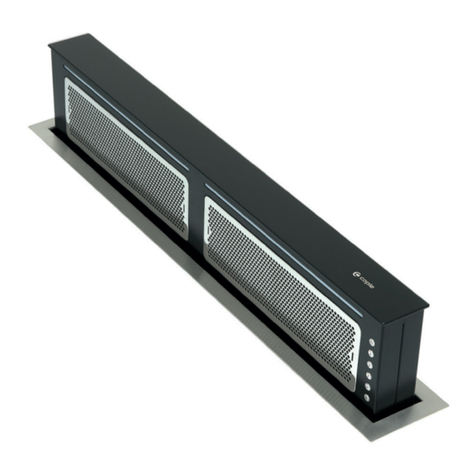
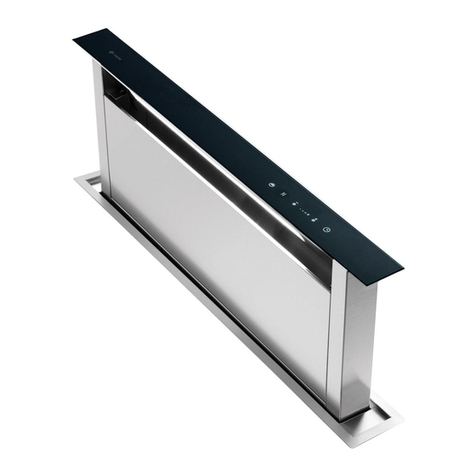
Model code: DD520BK
Instruction manual for downdraft hood
Contact Caple on 0844 800 3830 or for spare parts www.4caple.co.uk
Instruction manual for built-under hood
Model code: BU520
Contact Caple on 0844 800 3830 or for spare parts www.caple.co.uk
2
3
Environmental protection
The symbol on the product or on its packaging indicates that this product may not be treated as
household waste. Instead it shall be handed over to the applicable collection point for the
recycling of electrical and electronic equipment. By ensuring this product is disposed of correctly,
you will help prevent potential negative consequences for the environment and human health,
which could otherwise be caused by inappropriate waste handling of this product. For more
detailed information about recycling of this product, please contact your local city office, your
household waste disposal service or the shop where you purchased the product. This appliance is
marked according to the European directive 2002/96/EC on waste electrical and electronic
equipment (WEEE).
CE Declarations of Conformity
This appliance has been manufactured to the strictest standards and complies with all applicable
legislation, Low Voltage Directive (LVD) and Electromagnetic Compatibility Directive (EMC).
GB
CONTENTS
Warnings 5
Installation 6
Control panel 7
Maintenance 7
4
GB
5
*Before carrying out any cleaning or maintenance
operations, the appliance needs to be removed from
the electric grid. If the appliance is not provided
with a non-separable flexible cable and plug, or with
another device ensuring omnipolar disconnections
from the grid, with an opening distance between
the contacts of at least 3 mm, then such
disconnecting devices must be supplied within the
fixed installation.
If the fixed appliance is RTOOKHDC with a supply cord
and a plug, the appliance has to be put in a place
where the plug can be reached easily.
*The use of materials which can burst into
flames should be avoided in close proxi-mity of the
appliance. When frying, please pay particular
attention to fire risk due to oil grease. Being highly
inflammable, fried oil is especially dangerous. Do
not use uncovered electric grills. In order to avoid
possible fire risk, all instructions for grase-filter
cleaning and for removing eventual grease deposits
should be strictly followed.
Warnings
*The appliance is not intended for use by
young children or infirm persons without
supervision. Young children should be supervised
to ensure they do not play with the appliance.
*The hob surface and the lower part of the cooker
hood must be at a minimun distance of 65cm, 76cm
if installed above a gas hob. Always refer to the
guidelines stated in the hob installation guide. If a
greater distance is stated follow the hob details.
*The air extracted cannot be conveyed through
or into a duct used to let out fumes from appliances
powered by energy other than electricity (eg. gas,
central heating, radiators, water heaters, etc.).
*To evacuate
6
Installation
Before installing the appliance, make sure that
none of the parts is damaged in any way. In case of
damaged parts, contact your retai-ler and do not
proceed with installation. Read all of the
following instructions with care before installing
the appliance.
- Use an air outlet pipe of the shortest pos-sible
length.
- Limit the number of pipe bends.
- Use a material approved by standards and
regulations.
- Avoid any sudden changes in pipe section
(recommended constant diameter: 150 mm or
equal surface area).
*Before installing the appliance, in order not
to damage the appliance itself, the metal gra-se
filter should be removed. Such filter can be
removed by pushing the special filter handle
toward the back side of the cooker hood and
turning it downwards so to unfasten it from its slot
(Fig.3).
Essential precautions to respect before in-
stalling the appliance are the following:
To have made a cut-out on the bottom of the
cabinet which is suitable to hold the applian-ce in
position (fig.4).
* prepare the power supply.
* prepare a hole for the exhaust of the air
both in the filtering and in the exhauting ver-sion.
To install the appliance, adjust the position of the
stop side-springs using the appropria-te screws
(fig.5), according to the thickness of the board
previously drilled, on which the appliance will be
fixed.
Insert the built-in unit in the hole made in the
cabinet until the stop click of the side- sprin-gs is
heard and the built-in unit is blocked. Insert the
screws provided in the holes inside the appliance
(fig.6) to block it completely.
Blocking of the stop valve
Warning!
Before connecting the flexible exhausting pipe to
the motor, make sure the stop valve, which is on
the air outlet of the motor, can swing.
Exausting version
Connect the flange to the exhausting hole with an
appropriate pipe. Connect the ap-pliance with the
electrical mains through the supply cord.
Filtering version
Connect the flange with a pipe suitable to convey
the air to the top of the cabinet. Con-nect the
appliance with the electrical mains through the
supply cord.
7
Control panel
Refer to (Fig. 9) :
A: Light switch on/off
B: Motor switch on speed 1/off
C: Motor switch on speed 2
D: Motor switch on speed 3
E: Warning light
Maintenance
*An accurate maintenance guarantees good
functioning and long-lasting performance.
*Particular care is due to the grease filter pa-
nel. It can be removed by pushing its special
handle toward the back-side of the cooker hood
and turning the filter downwards so to unfasten it
from its slot (Fig.3).
To insert the filter just perform the opposite
operation.
The grease filter needs cleaning by regular
hand-washing or in dishwashers every two
months at least or depending on its use.
*In case the appliance is used in its filtering
version, the active coal filter (Fig.7) needs to be
periodically replaced. The coal filter can be
removed by removing the grease filter first (Fig.3),
and by pulling its special plastic tongue until it is
unfastened from its slot. Re-insert the coal filter by
operating in the opposite way. The coal filter needs
replacing depending on the use, but however every
six months at least.
*To clean the appliance itself tepid water and
neutral detergent are recommended, whi-le
abrasive products should be avoided. For steel
appliances specialized detergents are
recommended (please follow the instructions
indicated o the product itself to obtain the desired
results).
* To replace the halogen lamps, remove first
the glass-blocking ring (Fig.8A), by levering with a
screw-driver and thus removing the opaque glass
(Fig.8B) - when performing this operation hold the
opaque glass carefully. Remove the lamp (Fig.8C)
without touching it with uncovered hands. Replace
it with ano-ther lamp of the same kind. After the
repla-cement, re-insert the glass-blocking ring and
fasten it.
* Warning! To take down the appliance from
the cabinet, remove the definitive fixing screws (fig.
6) using a screw-driver, get off the grease filters
(fig.3B) and the active car-bon filters, if they are
inserted (fig. 7A). Act on the small handle of the
springs, which are inside the built-in unit, with the
necessary strength to unhook the appliance from
the cabinet.
*If the supply cord is damaged, it must be
replaced by the manufacturer or its sevice agent or
a similarly qualified person in order to avoid a
hazard.
8
12
4
3
5
FIG.3
FIG.6
FIG.7
FIG.8
5
13
12
3
4
FIG.3
FIG.6
FIG.7
FIG.8
S
SSMM90
502mm
O
Only one filter fitted to the BU520
265mm
9
7
6
8
FIG.3
FIG.6
FIG.7
FIG.8
FIG.3
FIG.6
FIG.7
FIG.8
NOTE: Only one filter required for BU520
10
910
11