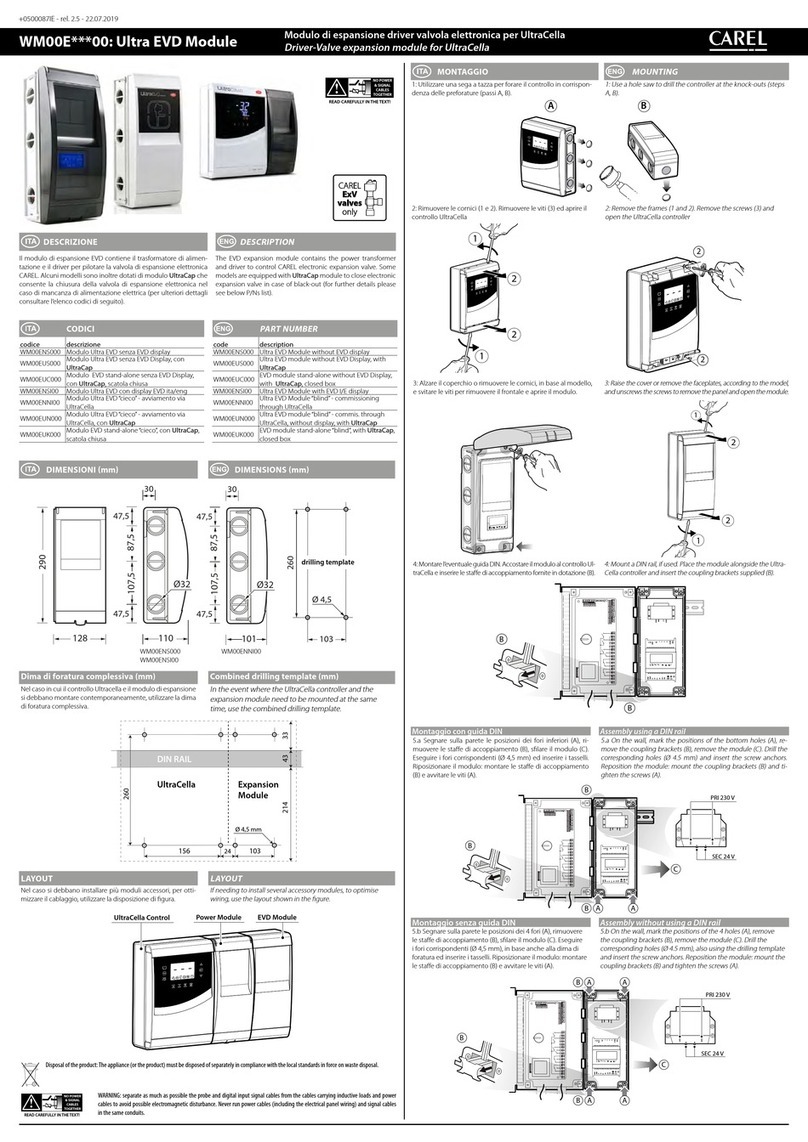
Carel infrared IR32CE Series User manual

Technology & Evolution
Serie Infrared per Refrigerazione
/ Infrared Series for Refrigeration
Manuale d’uso
User manual
refrigeration

Indice:
1. Caratteristiche generali 1
1.1 L’impiego dei modelli IR32*E 1
1.2 Le principali caratteristiche della serie Infrared 2
2. Codici degli strumenti e accessori 4
2.1 IR32*E per montaggio a pannello 4
2.2 Sonde NTC 5
2.3 Accessori 5
3. Installazione 6
3.1 Montaggio dello strumento 6
3.2 Collegamenti elettrici 6
3.3 Tabella riassuntiva dei parametri da verificare 8
prima dell’installazione
4. Tasti e visualizzazioni 9
4.1 Il display a LED 9
4.2 Le indicazioni di funzionamento 9
4.3 La tastiera 10
5. Funzioni 11
6. Programmazione e configurazione 12
6.1 La configurazione standard 12
6.2 L’inizializzazione degli strumenti IR32*E 12
6.3 La programmazione degli strumenti IR32*E 13
6.4 Procedura di reset 15
6.5 Il telecomando 16
6.6 Caratteristiche tecniche 16
6.7 Descrizione della tastiera 16
6.8 Utilizzo del Telecomando 18
6.9 Come impostare il codice di accesso 19
7. Spiegazione dei parametri 20
7.1 Stati di funzionamento della macchina 20
7.2 Classificazione dei parametri 21
7.3 = Parametri relativi alla gestione delle sonde 22
di temperatura
7.4 r=Parametri relativi alla regolazione della 24
temperatura
7.5 c=Parametri per la gestione del compressore 27
7.6 d=parametri per la gestione dello sbrinamento 30
7.7 A=Parametri per la gestione degli allarmi 34
7.8 F=Parametri per la gestione delle Ventole 41
dell’Evaporatore (solo per IR32CE)
7.9 H=Parametri generali di configurazione 44
8. Tabella riassuntiva dei parametri 46
9. Allarmi 48
9.1 Funzionamenti anomali o particolari 48
9.2 Descrizione delle principali segnalazioni di allarme 49
10. Ricerca ed eliminazione dei guasti 50
10.1 IR32ME 50
10.2 IIR32SE 50
10.3 IR32YE e IR32XE 52
10.4 IR32CE 53
11. Caratteristiche tecniche 55
11.1 Caratteristiche tecniche della serie IR32*E 55
11.2 Brevi note descrittive sulle sonde 57
con termistori tipo NTC
11.3 Corrispondenza temperatura/resistenza 57
per i termistori NTC
12. Schemi elettrici 58
12.1 Schemi elettrici per unità multiple 58
12.2 Connessioni per montaggio dell’IR32*E 58
13. Dimensioni 61
Index:
1. General fetures 1
1.1 User of models IR32*E 1
1.2 Main features of the Infrared series 2
2. Instrument and accessory code number 4
2.1 Panel mounting IR32*E 4
2.2 NTC probes 5
2.3 Accessory 5
3. Installation 6
3.1 Mounting yhe instrument 6
3.2 Electrical connection 6
3.3 List of the operating parameters to be checked 8
before starting the unit
4. Front panel and buttons 9
4.1 LED display 9
4.2 Operating indicators 9
4.3 Keypad 10
5. Functions 11
6. Programming and configuration 12
6.1 Standard configuration 12
6.2 Initialising the IR32*E instruments 12
6.3 Programming the IR32*E instruments 13
6.4 Reset procedure 15
6.5 Remote control unit 16
6.6 Technical characteristics 16
6.7 Keypad description 16
6.8 Use of the Remote Control unit 18
6.9 How to select the access code 19
7. Explanation of parameters 20
7.1 Operating states of the machine 20
7.2 Classification of parameters 21
7.3 = Parameters for temperature probe 22
management
7.4 r=Parameters for temperature management 24
7.5 c=Parameters for compressor management 27
7.6 d=Parameters for defrost management 30
7.7 A=Parameters for alarm management 34
7.8 F=Parameters for fan management 41
(only IR32CE)
7.9 H=General configuration parameters 44
8. Table of parameters 46
9. Alarms 48
9.1 Incorrect or specific functioning 48
9.2 Description of the main alarm signals 49
10. Troubleshooting 50
10.1 IR32ME 50
10.2 IIR32SE 50
10.3 IR32YE and IR32XE 52
10.4 IR32CE 53
11. Technical specifications 55
11.1 Technical specifications of the IR32*E series 55
11.2 Brief notes describing the NTC-thermistor probes 57
11.3 Temperature/resistance relationship for NTC 57
thermistors
12. Wiring diagrams 58
12.1 Wiring diagrams for multiple units 58
12.2 Connections for mounting the IR32*E 58
13. Dimensions 61

ATTENZIONE
Dal numero di serie 200.000, nei modelli della serie IR32SE* ed IR32SR* cambiano i valori di fabbrica
(default) dei parametri H1 e dI:
• H1=1: termostato + sbrinamento;
• dI=0: sbrinamento automatico non eseguito.
Nei modelli della serie IR32CE* e IR32CR*, quando F0=2, la temperatura di spegnimento ventole F1 è
assoluta (non è più un valore relativo al SET-POINT) cioè:
• ventole OFF per T evap >F1;
• ventole ON per T evap < F1 - A0.
Attenzione: quando si varia il parametro /5 (°C o °F) è necessario reimpostare il parametro F1.
WARNING
The models of the IR32SE* and IR32SR* series with the serial number greater than 200.000 have changed
their H1 and dI parameters default values.
• H1=1: thermostat + defrosting
• dI=0: defrosting not performed automatically.
In IR32CE* and IR32CR* models, if F0=2, the fan stop temperature at F1 is absolute (it is not a value
depending on the SET-POINT) that is:
• the fans are OFF when evapor.T >F1;
• the fans are ON when evapor.T < F1 - A0.
Note: when you change /5 parameter (°C or °F), it is necessary to reset F1 parameter.
19/02/98 Allegato al
/ Attached to:
cod. Carel +030220170 - Rel. 2.0 - 11/06/98

1. Caratteristiche generali
1.1 L’impiego dei modelli IR32*E
La serie Infrared per refrigerazione è costituita da regolatori
elettronici a microprocessore con visualizzazione a LED,
studiati appositamente per la gestione di unità frigorifere.
Sono a disposizione numerosi modelli che vi permetteranno
di trovare la soluzione migliore per la vostra applicazione
al prezzo più competitivo. Per consentire una rapida pano-
ramica della serie viene riportata di seguito una descrizio-
ne delle versioni disponibili della famiglia IR32*E (dove
l’asterisco * sta per M, S,Y, X, C, a seconda dei modelli).
IR32ME: termometro elettronico digitale con possibilità di
gestire una o due sonde. Rappresenta la scelta più
appropriata quando vi sia da monitorare la temperatura.
Collegando un interruttore al termometro è possibile
commutare la visualizzazione dalla prima alla seconda
sonda, mentre modificando un parametro interno si può
ottenere la media pesata delle due sonde.
IR32SE: si rivela la soluzione ideale per la gestione di
unità refrigerate statiche (prive cioè di ventilatore sull’eva-
poratore) funzionanti a temperatura normale (sopra 0°C).
Questo strumento assolve quindi le funzioni di termometro,
visualizzando la temperatura dell’unità, e di termostato
elettronico, attivando il compressore (o l’elettrovalvola nel
caso di unità canalizzata) in modo da mantenere la
temperatura richiesta. Provvede inoltre allo sbrinamento
automatico tramite lo spegnimento forzato del compressore.
Può essere utilizzato anche come semplice termostato;
in questo caso il controllo può essere utilizzato sia nella
termoregolazione di attuatori per generare freddo
(compressori, ecc.) sia per il caldo (resistenze, ecc.):
è possibile, infatti, selezionare il funzionamento “Direct”
(freddo) o “Reverse” (caldo) modificando un parametro
oppure agendo su ingresso digitale.
IR32YE e IR32XE: sono stati progettati per la gestione di
unità statiche funzionanti in bassa temperatura (sotto 0 °C),
che richiedono uno sbrinamento attivo tramite resistenza
elettrica o iniezione di gas caldo.
Oltre alle funzioni di termometro e di termostato (presenti
nell’IR32SE) provvedono alla gestione dell’attuatore di
sbrinamento (defrost). La frequenza e la durata dello
sbrinamento sono impostabili. La fine dello sbrinamento
può avvenire per raggiunta temperatura (collegando una
sonda all’evaporatore) o a tempo (se non viene raggiunta
la temperatura di defrost). Quest’ultima opzione è inclusa
come standard. La selezione di uno dei due modi è
possibile variando un semplice parametro.
Mentre la serie IR32YE presenta un solo contatto di
sbrinamento (normalmente aperto) la serie IR32XE
presenta un contatto in scambio (normalmente chiuso e
normalmente aperto).
IR32CE: rappresenta la soluzione più completa per le
unità ventilate in bassa temperatura. Grazie all’utilizzo
delle più sofisticate tecnologie produttive è stato possibile
integrare quattro relè da 2000VA all’interno di un contenitore
di 75 mm di larghezza, 72 mm di profondità e 33 mm di
altezza, tutto ciò senza compromettere le prestazioni o
l’affidabilità del prodotto.
Assolve alle funzioni di: termometro e di termostato.
Provvede, inoltre, alla gestione dell’attuatore di sbrinamento
(defrost, in temperatura o a tempo); alla gestione delle
ventole dell’evaporatore, le quali possono essere gestite
con vari algoritmi; alla gestione degli allarmi, con la
possibilità di diseccitare il relè quando l’allarme è attivo.
1. General features
1.1 Uses of models IR32*E
The Infrared series for refrigeration is made up of electronic
microprocessor-controlled regulators with LED display,
which have been especially designed for the control of
refrigeration units. A number of different models are
available, allowing you to find the best possible solution
for your application at an extremely competitive price. In
order to provide a quick overview of the series we have
presented the following description of the different
versions of the IR32*E family (where an asterisk * stands
for M, S,Y, X or C, according to the model).
IR32ME: An electronic digital thermometer, capable of
managing one or two probes.The ideal solution for
applications requiring temperature monitoring.
It is possible to display the temperature of either the first
or the second probe by the use of a switch connected to
the thermometer. In addition, the modification of a specific
parameter will allow the display of the weighted average
of the two probes.
IR32SE: The ideal solution for regulation of static
refrigeration units (without evaporator fans) which work in
normal temperature ranges (above 0°C).This instrument
works both as a thermometer it displays the temperature
and as an electronic thermostat: it activates the compressor
(or the solenoid valve in multiplexed systems) to keep the
temperature at the set value.The unit also controls
automatic defrosting by switching off the compressor.
The IR32SE can be used simply as a thermostat. In this
case it proves to be extremely useful in cooling applications
(activating compressors, etc) and heating applications
(activating elements, etc.). It is possible, in fact, to work
either in “Direct” (cooling) or “Reverse” (heating)
functioning mode, by simply modifying the specific
parameter or acting on the digital input.
IR32YE and IR32XE: Specifically designed for the control
of static refrigeration units working at low temperature
ranges (below 0°C), requiring active defrost using electrical
elements or hot gas. As well as the thermometer and
thermostat functions (present in the IR32SE), these units
also control the defrosting actuator. The duration of and
time-interval between successive defrost cycles can be
set. Defrosting will stop when the defrost end temperature
is reached (by connecting a probe to the evaporator), or
after a set time interval (if the defrost end temperature is
not reached).The latter option is included as standard.
The two modes can be selected by varying a specific.
While the IR32YE series has only one defrost contact
(normally open), the IR32XE series has an exchange
contact (normally closed and normally open).
IR32CE: A complete solution for the control of ventilated
units working at low temperatures.Thanks to the very latest
technology, we have achieved a unique product that
integrates 4 relays (2000 VA) into a case just 74mm wide,
72mm deep and 33mm in height, without sacrificing
performance and reliability. It performs the functions of:
thermometer and thermostat.
The unit also controls defrost actuators (timed
or temperature defrost); evaporator fans, which can be
controlled by various algorithms; alarms, with the possibility
to de-energise the relay when the alarm is active.
1
1.2 Le principali caratteristiche della serie Infrared
Alimentazione
I modelli della serie IR32*E sono disponibili con
alimentazione di 12 Vac; è disponibile anche la versione a
24 Vac/dc; inoltre, per il modello IR32SE è presente la
versione con alimentazione di 110/240 Vac/dc.
Tutti i modelli presentano, inoltre, uno stato a basso
consumo per aumentare l’immunità ai buchi della tensione
di alimentazione. Quando, internamente allo strumento, la
tensione scende al di sotto di una certa soglia, la
macchina spegne il display per ridurre il consumo,
continuando comunque a funzionare normalmente: i relè
restano eccitati e, non appena la tensione torna a livello
normale, si riaccende il display.
Estetica ed ergonomia
L’estetica della serie Infrared è curata in modo da adattar-
si armoniosamente alle nuove linee delle unità frigorifere;
inoltre è stata posta particolare attenzione all’aspetto
“ergonomico”: per la variazione dei parametri e l’impostazione
delle funzioni più frequenti basta premere un solo tasto
alla volta, semplificando quindi l’utilizzo degli strumenti.
Display a LED
Sul display a LED vengono visualizzate due cifre e
mezzo; la temperatura è mostrata con un decimale, esclu-
dibile tramite un parametro, nel range compreso tra
-19.9 e +19.9; fuori da questo range, la temperatura viene
visualizzata con due cifre. Sono presenti, inoltre,
a seconda del modello, fino a 4 LED per la segnalazione
degli “attuatori” attivi. I LED di segnalazione si accendono
se il corrispondente attuatore è inserito e lampeggiano
quando l’inserimento è impedito da inibizioni esterne
(si veda Ingresso Multifunzione) o da procedure in atto.
Cicalino di segnalazione allarme
I controlli possono montare opzionalmente un cicalino
(buzzer) per la segnalazione di allarmi.
Telecomando
Per facilitare l’impostazione e la visualizzazione dei
parametri, lo strumento può essere ordinato con il ricevitore
infrarosso per consentire l’utilizzo del telecomando:
questo può essere utilizzato su più controlli Infrared posti
nello stesso locale senza problemi di interferenza. Esiste
infatti la possibilità di identificare ogni controllo con un
diverso codice di accesso.
Duty setting
Questa funzione permette il funzionamento del compres-
sore anche quando la sonda di regolazione (sonda
ambiente) è guasta. Se la sonda è interrotta o in cortocir-
cuito, il compressore viene fatto funzionare ad intervalli,
con tempo di funzionamento (in minuti) pari al valore
assegnato al parametro duty setting (parametro c4) e
tempo di spegnimento della durata fissa di 15 minuti.
1.2 Main features of the Infrared series
Power supply
All the instruments of the IR32*E series are available with
12Vac power supply; 24Vac/dc versions are also available;
furthermore, the IR32SE model is available in a
110/240Vac/dc version. All models also feature low power
consumption operation, enabling increased immunity to
drops in power voltage.When the voltage drops within
the instrument below a certain threshold, the machine
switches off the display to reduce power consumption,
continuing all other normal functions: the relays remain
energised and as soon as the voltage returns to the
normal value, the display is switched on again.
Aesthetics and ergonomics
The aesthetic aspects of the Infrared series have been
designed in such a way as to match the new line of
refrigeration units; in addition, special attention has been
paid to the “ergonomics”: modification and setting of the
more frequent parameters and functions require the
pressing of just one button at a time, simplifying the use
of the instruments.
LED Display
The LED display shows two and half digits; the
temperature value appears with one decimal point (you
can omit this by modifying the relative parameter) and has
a range of from -19.9 to +19.9. In addition, there are up to
4 LED indicators (depending on the model) that light up
when the output they represent is ON.They will flash in
case of external problems relative to the output (see
Multifunction input) or during active/current procedures.
Buzzer
All controllers come complete with an alarm buzzer upon
request.
Remote control
To make it easier to set and display the working parameters,
you can request your controller complete with the Infrared
receiver. In this case you will be able to use the remote
control unit to perform any operation. One remote control
unit can be used for several Infrared controllers placed
within the same room, with no interference since each
controller can be identified by a specific access code.
Duty setting
This function allows the compressor to run even if the
regulation probe (room probe) is damaged. In case of
short-circuit or open-circuit probe, the compressor is
instructed to start on the basis of time-intervals (minutes)
selected through the duty setting parameter (“c4”) and to
turn OFF every 15 minutes (fixed time-interval).
2

Ingresso Multifunzione
Gli strumenti Infrared della famiglia IR32*E, tranne
l’IR32CE e l’IR32XE che li hanno di serie, possono
montare, opzionalmente, due ingressi digitali che possono
essere utilizzati in diversi modi, in relazione al valore dato
ai parametri di “configurazione di ingresso digitale”
(parametri A4 e A5). Questi ingressi possono essere
utilizzati per abilitare/disabilitare lo sbrinamento, per
gestire allarmi gravi che necessitino del blocco dell’unità
con azione immediata (ad esempio alta pressione)
o ritardata (es. bassa pressione).
Uscita Multifunzione
Sul modello IR32CE è presente un quarto relè per la
remotazione del segnale di allarme o per comandare
organi ausiliari con azionamento On/Off (acceso/spento).
Protezione tastiera
La tastiera e/o il telecomando possono essere disabilitati
per evitare manomissioni da parte di persone non
autorizzate, soprattutto nel caso in cui il controllo sia
esposto in una zona aperta al pubblico.
Ciclo continuo
La funzione “ciclo continuo” consente il funzionamento del
compressore per il tempo impostato nel relativo parametro.
Tale funzione è utile qualora sia richiesta una riduzione
rapida della temperatura.
Connessione seriale
Per tutta la gamma di modelli della serie IR32*E, con la
sola eccezione del modello IR32SE*H, è possibile avere,
in dotazione allo strumento, un’uscita seriale. Questa deve
essere specificata al momento dell’ordine. La seriale è
disponibile nella versione RS485 a due fili più schermo:
questa versione permette di collegare fino a 199 macchine
sulla stessa linea seriale. Ricordiamo che il sistema di
supervisione, monitoraggio e teleassistenza MasterPlant
Carel permette di gestire fino a 4 linee seriali.
Sonda virtuale
Nei modelli che gestiscono due sonde, è possibile regolare
l’unità sulla media delle temperature rilevate dalle due
sonde. La media delle sonde è pesata, ovvero è possibile
dare più importanza (peso) ad una delle due sonde. Il
valore calcolato per la sonda virtuale è visualizzato sul
display. Per maggiori dettagli si veda la descrizione del
parametro 4.
Dimensioni
Anche per il controllo più completo sono state rispettate le
dimensioni solitamente standard per questa famiglia di
strumenti. La dima di foratura richiesta sul pannello è infatti
71x29 mm; ciò consente di rimpiazzare vecchi controlli
CAREL o della concorrenza con i più moderni Infrared.
Grado di protezione
Nella serie IR32*E la guarnizione all’interno del frontale e
il materiale con cui è realizzata la tastiera garantiscono al
controllo un grado di protezione IP65 sul frontale. Inoltre,
di serie, viene fornita una guarnizione piana per aumentare
il grado di protezione del pannello su cui è montato lo
strumento.
Fissaggio
Il fissaggio, per quanto riguarda la serie IR32*E, è ottenuto
per mezzo di una staffa di fissaggio rapido, di ingombro
minimo, realizzata in materiale plastico. Questo consente
di montare lo strumento sul pannello senza uso di viti.
Multifunction input
The Infrared instruments of the IR*32E family, with the
exception of the IR32CE and the IR32XE which have this
option as standard, can be fitted with two digital inputs
which can be used in different ways, depending on the
values given to the “digital input configuration” parameters
(A4 and A5).These inputs can be used to enable/disable
defrost, to act on serious alarm conditions requiring either
the immediate (for example, high pressure alarms) or
delayed lockout of the unit (low pressure alarms).
Multifunction output
The IR32CE model comes complete with a fourth relay for
the remote alarm signal or to drive auxiliary ON/OFF
devices.
Keypad protection
The keypad and/or the remote control unit can be
inhibited to prevent unauthorised personnel from
modifying settings (especially when the controller is
located in a public area).
Continuous cycle
The “continuous cycle” function allows the compressor to
operate for a set time using a dedicated parameter.This is
particularly useful when a rapid fall of temperature is
required.
Serial connection
All series IR32*E instruments, with the exception of the
IR32SE*H models, can be equipped with a serial card.
This option must be specified when ordering.The serial
output is available in RS485 standard with 2-leads plus
shield: this allows up to 199 machines to be connected to
the same serial line. Please remember that the Carel
MasterPlant supervision, monitoring and telemaintenance
system can manage up to 4 serial lines.
Virtual probe
All models equipped with two probes may be adjusted to
regulate the unit on the basis of the weighted average
temperature or the two probes. It is also possible to choo-
se which probe either the first or the second will be the
most important in the determination of the final value.The
value relative to the virtual probe will appear on the
display. For more details see parameter 4.
Dimensions
Even the most sophisticated model has standard
dimensions. Panel mountings usually require a 71x29mm
drilling template thus making it extremely simple and fast
to replace older CAREL controllers with newer Infrared
instruments.
Index of protection
The O-RING inside the front panel of the instrument and
the material of the keypad ensure a very high index of
protection, IP65. All controllers come complete with a flat
gasket that contributes to increase the protection index of
the panel housing the controller.
Fastening the controller
Fastening the IR33*E controllers is done using a small
clamp made of plastic. No screws are required to mount
the instrument on panel.
3

Test-in-circuit
The instruments of the Infrared series are the result of the
most advanced SMD technology. Quality control includes
a rigorous “TEST-IN-CIRCUIT” electrical test on each
single component to ensure that your controller is entirely
reliable.The tests are carried out on 100% of production.
NTC probe
The instruments have been designed to be connected to
Carel NTC probes, as these provide greater precision in
the required operating range.
Watch dog
This is a special device that will protect the microprocessor
of the controller even in the event of strong electromagnetic
noises. In case of abnormal conditions the watch dog
restores the initial functioning status of your unit. Carel’s
competitors do not all fit their controllers with this type of
safety device.
Electromagnetic compatibility
The Infrared series conforms to EU standards on
electromagnetic compatibility.
Quality and safety of the Infrared series are ensured by
CAREL’s ISO 9001-cerified design and production system
and the CE mark on the products.
2. Instrument and accessory code numbers
2.1 Panel mounting IR32*E
IR32*E Refrigeration Controls, 12Vac
IR32*E Refrigeration Controls, 110/230Vac/dc
Test in circuit
La serie Infrared è realizzata con la più avanzata tecnologia
SMD.Tutti i controlli sono sottoposti ad un “TEST IN CIR-
CUIT”, ovvero alla verifica elettrica di tutti i componenti
montati. Il test è realizzato sul 100% della produzione.
Sonda NTC
Gli strumenti sono predisposti per lavorare con le sonde
NTC Carel in quanto offrono una maggiore precisione nel
campo di lavoro previsto.
Watch dog (dispositivo di sicurezza)
Si tratta di un dispositivo che impedisce al microprocessore
di perdere il controllo dell’unita anche in presenza di grossi
disturbi elettromagnetici. In caso di funzionamento anomalo,
il watch dog (letteralmente “cane da guardia”) provvede a
ristabilire la stato di funzionamento iniziale. Non tutti
i concorrenti provvedono i propri prodotti di tale
dispositivo di sicurezza.
Compatibilità elettromagnetica
La serie Infrared è conforme alle normative UE di
compatibilità elettromagnetica. La Qualità e la sicurezza
della serie Infrared sono assicurate dal sistema
di progettazione e produzione CAREL certificato
ISO 9001 e dal marchio CE sul prodotto.
2. Codici degli strumenti e accessori
2.1 IR32*E per montaggio a pannello
Controlli per refrigerazione IR32*E, 12 Vac
Controlli per refrigerazione IR32*E, 110/230 Vac/dc
4
Descrizione /
Description
Codice /
Code
Termometro /
Thermometer
IR32ME: senza opzioni /
no options
IR32ME0000
IR32MER: con ricevitore IR /
with IR receiver
IR32MER000
IR32MEM: con uscita seriale RS485 /
with RS485 serial output
IR32MEM000
Termostato con sbrinamento a fermata compressore per unità a temperatura normale
Thermostat with defrost for compressor shut down only (passive defrost)
IR32SE: senza opzioni /
no options
IR32SE0000
IR32SEA: con buzzer e ricevitore IR /
with buzzer and IR receiver
IR32SEA000
IR32SEF: con relè di allarme /
with alarm relay
IR32SEF000
IR32SEG: con relè di allarme e ricevitore IR /
with alarm relay and IR receiver
IR32SEG000
IR32SEM: con uscita seriale RS485 /
with RS485 serial output
IR32SEM000
Termostato con uscita per controllo sbrinamento per unità statiche in bassa temperatura
Thermostat with defrost control for static units at low temperature
IR32YE: senza opzioni /
no options
IR32YE0000
IR32YEA: con buzzer e ricevitore IR /
with buzzer and IR receiver
IR32YEA000
IR32YEM: con uscita seriale RS485 /
with RS485 serial output
IR32YEM000
Termostato con uscita per controllo sbrinamento (relè in scambio) per unità statiche in bassa temperatura
Panel mounting thermostat with defrost control for static units at low temperature with changeover relay
IR32XE: senza opzioni /
no options
IR32XE0000
IR32XEA: con buzzer e ricevitore IR /
with buzzer and IR receiver
IR32XEA000
IR32XEM: con uscita seriale RS485 /
with RS485 serial output
IR32XEM000
Termostato con uscita per controllo sbrinamento per unità ventilate in b.t. e due ingressi digitali
Thermostat with defrost control for ventilated unit at low temperature, provided with two digital inputs
IR32CE: senza opzioni /
no options
IR32CE0000
IR32CEA: con buzzer e ricevitore IR /
with buzzer and IR receiver
IR32CEA000
IR32CEM: con uscita seriale RS485 /
with RS485 serial output
IR32CEM000
Descrizione /
Description
Codice /
Code
Termostato con sbrinamento a fermata compressore per unità a temperatura normale
Thermostat with compressor stopped-defrost for normal temperature units
IR32SE0H: senza opzioni /
no options
IR32SE0H00
IR32SEAH: con buzzer e ricevitore IR /
with buzzer and IR receiver
IR32SEAH00

Controlli per refrigerazione IR32*E, 24 Vac/dc
2.2 Sonde NTC
2.3 Accessori
IR32*E Refrigeration Controls, 24Vac/dc
2.2 NTC Probes
2.3 Accessories
5
Descrizione Campo di lavoro Grado di protezione Codice
Description Operating range Index of Protection Code
NTC, bulbo/
bulb
6x15mm -50÷50 °C IP67 NTC0**HP00
NTC, bulbo/
bulb
6x40mm -50÷100 °C IP67 NTC0**W*00
NTC da infilzaggio /
NTC for insertion
-50÷110 °C IP67 NTCINF0600
NTC da parete /
NTC for wall mounting
-10÷70 °C IP30 ASWT011000
NTC da condotta /
NTC for duct mounting
-10÷70 °C IP55 (*) ASDT011000
NTC da parete /
NTC for wall mounting
0÷50 °C / 10÷90% rH IP30 ASWC111000
(temperatura + umidità /
temperature + humidity
)
NTC da condotta /
NTC for duct mounting
0÷50 °C / 10÷90% rH IP55 (*) ASDC111000
(temperatura + umidità /
temperature + humidity
)
(*) il grado di protezione riportato si riferisce al contenitore: per l’elemento sensibile si ha IP40.
(*) the index of protection above mentioned refers to the case: IP40 refers to the sensor.
Telecomando /
Remote control
Codice /
Code
Italiano /
Italian
IRTRRI0000
Inglese /
English
IRTRRE0000
Francese /
French
IRTRRF0000
Spagnolo /
Spanish
IRTRRS0000
Tedesco /
German
IRTRRG0000
Trasformatori /
Transformers
Codice /
Code
TRA 12: 3 VA, 240/12Vac senza termofusibile sul primario TRA12VDE00
TRA 12: 3 VA, 240/12Vac without thermofuse on primary
TRA 12: 3 VA, 240/12Vac con termofusibile sul primario TRA12VDE01
TRA 12: 3 VA, 240/12Vac with thermofuse on primary
TRA 24: 3 VA, 240/24Vac senza termofusibile sul primario TRA2400001
TRA 24: 3 VA, 240/24Vac without thermofuse on primary
Descrizione /
Description
Codice /
Code
Termometro /
Thermometer
IR32ME: senza opzioni /
no options
IR32ME0100
IR32MER: con ricevitore IR /
with IR receiver
IR32MER100
IR32MEM: con uscita seriale RS485 /
with RS485 serial output
IR32MEM100
Termostato con sbrinamento a fermata compressore per unità a temperatura normale
Thermostat with compressor stopped-defrost for normal temperature units
IR32SE: senza opzioni /
no options
IR32SE0100
IR32SEA: con ricevitore IR /
with IR receiver
IR32SEA100
IR32SEF: con relè di allarme /
with alarm relay
IR32SEF100
IR32SEG: con relè di allarme e ricevitore IR/
with alarm relay and IR receiver
IR32SEG100
IR32SEM: con uscita seriale RS485 /
with RS485 serial output
IR32SEM100
Termostato con uscita per controllo sbrinamento per unità statiche in bassa temperatura
Thermostat with defrost control for static unit at low temperature with SPST output for defrost
IR32YE: senza opzioni /
no options
IR32YE0100
IR32YEA: con ricevitore IR /
with IR receiver
IR32YEA100
IR32YEM: con uscita seriale RS485 /
with RS485 serial output
IR32YEM100
Termostato con uscita per controllo sbrinamento (relè in scambio) per unità statiche in bassa temperatura
Panel mounting thermostat with defrost control for static unit at low temperature with SPDT output for defrost
IR32XE: senza opzioni /
no options
IR32XE0100
IR32XEA: con ricevitore IR /
with IR receiver
IR32XEA100
IR32XEM: con uscita seriale RS485 /
with RS485 serial output
IR32XEM100
Termostato con uscita per controllo sbrinamento per unità ventilate in b.t. e due ingressi digitali
Thermostat with defrost control for ventilated unit at low temperature, provided with two digital inputs
IR32CE: senza opzioni /
no options
IR32CE0100
IR32CEA: con ricevitore IR /
with IR receiver
IR32CEA100
IR32CEM: con uscita seriale RS485 /
with RS485 serial output
IR32CEM100

3. Installazione
Le operazioni per procedere all’installazione dei controlli
Infrared possono essere così raggruppate:
- installazione;
- collegamenti a sonde;
- selezione dei parametri di lavoro.
3.1 Montaggio dello strumento
Per montare lo strumento, devono essere eseguite le
seguenti operazioni:
-inserire lo strumento nel foro precedentemente realizzato
(vedi dima di foratura a pag. 61);
-fissare lo strumento al pannello, facendo scorrere
l’apposita staffa di fissaggio.
3.2 Collegamenti elettrici
Prima di eseguire ogni collegamento elettrico è necessario
leggere i consigli e osservare attentamente gli schemi
riportati nelle pagine successive (e da pag. 58). Si ricordi
inoltre che l’unità deve essere predisposta di tutte le sicu-
rezze elettromeccaniche necessarie a garantire la comple-
ta sicurezza dell’operatore.
AVVERTENZE
È indispensabile adoperare un trasformatore di sicurezza
(Cod. Carel TRA12VDE00, TRA12VDE01 o TRA2400001).
Inserire in serie al primario del trasformatore di
alimentazione della macchina un fusibile di valore
uguale a quello riportato dal costruttore sull’etichetta
del trasformatore. Nel caso di trasformatori Carel il valo-
re del fusibile è di 32 mA ritardato (32 mA T) per il trasfor-
matore a 12 V TRA12VDE00 e per quello a 24 V
TRA2400001, mentre per il trasformatore a 12 V
TRA12VDE01 non serve alcun fusibile, in quanto è già
protetto internamente da un termofusibile sul primario.
Evitare il montaggio dei controlli negli ambienti che
presentino le seguenti caratteristiche:
- Umidità relativa maggiore dell’90% non condensante.
- Forti vibrazioni o urti.
- Esposizione a continui getti d’acqua.
- Esposizione ad atmosfere aggressive ed inquinanti
(ad es. gas solforici e ammoniacali, nebbie saline, fumi)
per evitare corrosione e/o ossidazione.
- Elevate interferenze magnetiche e/o radiofrequenze
(evitare quindi l’installazione delle macchine vicino
ad antenne trasmittenti).
- Esposizione dei controlli all’irraggiamento solare diretto
e agli agenti atmosferici in genere.
Nel collegamento dei regolatori è necessario rispettare
le seguenti AVVERTENZE:
- Il non corretto allacciamento della tensione
di alimentazione può danneggiare seriamente il sistema.
- Utilizzare capicorda adatti per i morsetti in uso. Allentare
ciascuna vite ed inserirvi i capicorda, quindi serrare le viti.
Ad operazione ultimata tirare leggermente i cavi per
verificarne il corretto serraggio. Per serrare le viti, non
utilizzare avvitatori automatici, oppure regolarli per una
coppia minore di 50 Ncm.
- Separare quanto più possibile (almeno 3 cm) la parte
inferiore del dispositivo, i cavi dei segnali delle sonde e
degli ingressi digitali dai cavi dei carichi induttivi e di
potenza per evitare possibili disturbi elettromagnetici.
Non inserire mai nelle stesse canaline (comprese
quelle dei quadri elettrici) cavi di potenza e i cavi
delle sonde. Evitare inoltre che i cavi delle sonde siano
installati nelle immediate vicinanze di dispositivi di potenza
(contattori automatici magnetotermici o altro).
3. Installation
The following operations should be performed to ensure
trouble-free operation of the Infrared unit:
- installation;
- connection to probes;
- working parameters selection.
3.1 Mounting the panel mount instrument
Mounting the instrument must be carried out as follows:
- insert the instrument into the previously bored hole (see
he drilling template on page 61);
- fasten the instrument to the panel by means of the
dedicated clamp.
3.2 Electrical connection
Before making any electrical installation read the
instructions and take careful note of the diagrams on the
following pages (and from page 58). Remember that all
safety devices necessary to correct operation must be fit-
ted in advance.
WARNING
The use of a safety transformer is essential (Code Carel
TRA12VDE00, TRA12VDE01 or TRA2400001).
A fuse of value equal to that written by the
manufacturer on the transformer label must be inserted
in series with the power transformer primary.
If a Carel transformer is used, the value of the fuse is 32
mA slow-blow (T32mA) for the TRA12VDE00 12V
transformer and the TRA2400001 24V transformer, while
no fuse is required for the TRA12VDE01 12V transformer
as it is already internally-protected by a thermofuse
on the primary.
Installation should be avoided in the following
circumstances:
- Relative humidity greater than 90% non-condensing.
- Heavy vibration or shocks.
- Exposure to continuous water sprays.
- Exposure to corrosive or pollutant gases
(e.g. sulphurous or ammonia fumes, saline mist, smoke)
so as to avoid corrosion and oxidisation.
- Strong magnetic and/or radio interference (therefore
installation of the equipment near transmitter aerials
should be avoided).
- Exposure of controls to direct solar radiation and other
climatic influences.
The following WARNINGS must be observed when
connecting the controllers:
- Connecting a power supply of the incorrect voltage can
seriously damage the system.
- Use the correct type of connectors. Slacken each screw,
insert the lead and then tighten the screws. Finally, tug
gently to make sure there is a secure grip. When tightening
the screws, do not use a torque wrench, or if used,
adjust it to a torque less than 50Ncm.
- Separate as much as possible (at least 3cm) the lower
part of the device, the signal leads from the probes
and the digital inputs from the induction and power
leads in order to avoid electromagnetic disturbance. Do
not place power leads and probe leads in the same
channels (including those of the electrical panel).
Furthermore, avoid placing probe leads in the immediate
vicinity of powered components (thermo-magnetic
contactors or others).
6

-Ridurre il più possibile il percorso dei cavi dei sensori ed
evitare che compiano percorsi che racchiudano
dispositivi di potenza.
- Utilizzare come sonda di fine sbrinamento solo sonde
garantite IP67; posizionare le sonde con il bulbo verticale
in modo da favorire il drenaggio dell’eventuale condensa.
Si ricorda che le sonde di temperatura a termistore (NTC)
non hanno polarità, per cui è indifferente l’ordine di
collegamento degli estremi.
- Le sonde possono essere remotate (posizionate) fino
ad una distanza massima di 100 m dal controllo. Per
prolungare le sonde si utilizzino cavi con sezione
minima di 1 mm2, possibilmente schermati. In questo
caso la calza dovrà essere collegata al comune
(morsetto 6) delle due sonde; non collegare a terra o su
altri riferimenti l’altra estremità della calza (ovvero la
parte verso il sensore).
Pulizia dello strumento
Pulizia dello strumento: non utilizzare per la pulizia alcol
etilico, idrocarburi (benzina), ammoniaca e derivati. È con-
sigliabile usare detergenti neutri ed acqua.
Collegamenti in rete e connessioni seriali
Tutte le macchine della famiglia IR32*E hanno il doppio
isolamento (tranne l’IR32SE*H) tra parti in bassissima
tensione (ad es. contatto sonde), parti in bassa tensione
(220 V) e contatti relè a patto di usare un trasformatore di
sicurezza (Cod. Carel TRA12VDE00 eTRA12VDE01 per
i 12 V, oppureTRA2400001 per i 24 V).
Tra contatti di relè diversi ed adiacenti, invece, l’isolamento
è principale; ciò vale per i contatti AUX e DEFROST
nell’IR32CE. È necessario, quindi, fare attenzione a non
alimentare uno dei contatti relè AUX con il secondario a
12 oppure 24 V del trasformatore di sicurezza, quando i
contatti di DEFROST lavorano a 220 V, pena la perdita del
doppio isolamento.
Tutti i modelli presentano, inoltre, uno stato a basso
consumo per aumentare l’immunità ai buchi della tensione
di alimentazione. Quando, internamente allo strumento, la
tensione scende al di sotto di una certa soglia, la macchina
spegne i display per ridurre il consumo, continuando
comunque a funzionare normalmente: i relè restano
eccitati e, non appena la tensione torna a livello normale,
si riaccende il display.
A causa di questa caratteristica, qualora la tensione di
alimentazione sia inferiore al 15% del valore nominale,
nei modelli a 12 V, si può notare un tremolio del display.
Nota importante: tutte le opzioni, compresa la scheda
seriale 485, sono fisse: vanno, quindi, precisate al
momento dell’ordine.
Qualora sia previsto l’allacciamento alla rete di super-
visione è necessario curare la messa a terra del sistema.
In particolare:
- non dovrà essere collegato a terra il secondario dei
trasformatori che alimentano gli strumenti. Nel caso sia
necessario collegarsi ad un trasformatore con secondario
a terra, dovrà essere interposto un trasformatore di
isolamento con le seguenti caratteristiche: trasformatore
da 24 Vac a 24 Vac, 20 VA cod. 0907651AXX;
- si sconsiglia di collegare più controlli allo stesso trasfor-
matore; nel caso sia necessario si dovrà prestare atten-
zione alla polarità del cablaggio: i morsetti ”4” di tutti i
controlli dovranno essere tutti collegati ad uno stesso
morsetto del trasformatore, mentre i morsetti “5” di tutti i
controlli dovranno essere collegati all’altro morsetto del
trasformatore. Per maggiori dettagli, si veda la figura
riportata di seguito.
- Keep the probe leads as short as possible and avoid
their sharing routes with power leads.
- As defrost probes use only guaranteed IP67 probes;
place the probes with the bulb upright in a position to
assist drainage of any condensation which may occur.
Note that thermistor temperature probes (NTC) have
no polarity and the terminals may therefore be
connected either way.
- Probes can be remoted at distances of up to a
maximum of 100m from the control.To connect
probes, leads with a minimum cross-section of 1mm
2
should be used, and may be screened. In this case the
screening should be connected to terminal 6 on the
control; it should not be connected to earth or to any
shield at the other end of the screening (i.e. the end
nearer to the probe).
Cleaning the instrument
Cleaning the instrument: when cleaning do not use ethylic
alcohol, hydrocarbons (petroleum), ammonia and its
derivates. Only use water and neutral detergent when
cleaning display.
Serial and network connections
All the machines in the IR32*E family feature double
insulation (except for the IR32SE*H) between the
very low voltage parts (e.g. probe contacts), low voltage
parts (220V) and relay contacts when using a safety
transformer (Code Carel TRA12VDE00 and
TRA12VDE01 for 12V, or TRA2400001 for 24V).
Between the contacts of different and neighbouring relays,
on the other hand, insulation is principal; i.e. is valid for
the AUX and DEFROST contacts on the IR32CE.
It is necessary therefore to take care to not power one of
the AUX relay contacts with the 12 or 24V secondary of
the safety transformer while the DEFROST contacts are
working at 220V, or else the double insulation is lost.
All models also feature low power consumption operation
enabling increased immunity to drops in power voltage.
When the voltage drops within the instrument below a
certain threshold, the machine switches off the display to
reduce power consumption, continuing all other normal
functions: the relays remain energised and as soon as the
voltage returns to the normal value, the display switches
on again.
This feature may lead, when the power voltage is 15%
below rating in the 12V models, to the flickering of the
display.
Important: all options, including the 485 serial card, are
fixed: that is, they must be specified at the time of order.
Where connection is provided to a supervisory network,
it is necessary to take care when earthing the system.
In particular:
- the secondary side of transformers supplying the
equipment must not be earthed. If it should be necessary
to connect to a transformer which has a secondary
earth, an insulating transformer must be inserted with
the following characteristics: 24Vac to 24Vac, 20VA,
transformer, code 0907651AXX;
-please, avoid to connect more than one control to the
same transformer; if necessary, care must be taken with
polarity when wiring: terminals “4” of all controls must all
be connected to the same terminal on the transformer;
terminals “5” of the controls must all be connected to
the other transformer terminal.
See diagram for further details.
7

Esempio di cablaggio nel caso di collegamento in seriale
degli strumenti, qualora si voglia collegare più controlli allo
stesso trasfotmatore:
Main = alimentazione principale
TRF = trasformatore
INS TRF = trasformatore di isolamento
= messa a terra
SER = collegamento seriale al sistema di supervisione
Tutti i parametri sono già configurati: si consiglia tuttavia di
verificare, prima dell’installazione, i parametri riportati
nella seguente tabella, per vedere se sono rispondenti alle
esigenze dell’applicazione:
3.3 Tabella riassuntiva dei parametri da verificare
prima dell’installazione
Nota: per il significato dei parametri indicati in tabella, si
veda il capitolo “Spiegazione dei parametri”.
Wiring example for serial connection of the instruments,
when connecting more than one control to the same
transformer:
Main = mains power
TRF = transformer
INS TRF = insulating transformer
= earth
SER = serial connection to supervisory system
All parameters have already been configured: it is however
recommended, before installation, to check the parameters
described in the following table to see if they correspond
to the needs of the application:
3.3 List of the operating parameters to be
checked before starting the unit
Note: for the meaning of the parameters indicated in the
table, see chapter “List of parameters”.
8
ir32
ir32
ir32
ir32
5
4
5
4
5
4
5
4
MAIN
trasformatore
transformer
trasformatore
transformer
trasformatore
transformer
trasformatore
di isolamento
insulation
transformer
Codice Parametro Tipo Min Max U.M. Def Nuovo
Code Parameter Type Min Max U.M. Def New
PARAMETRI REGOLATORE /
CONTROL PARAMETERS
rd Differenziale regolatore /
Control differential
F 0.1 +19.9 °C/°F 2
PARAMETRI SBRINAMENTO /
DEFROST PARAMETERS
d0 Tipo di sbrinamento (0=resistenza, 1=gas caldo C 0 1 flag 0 dI
2=resistenza a tempo, 3 = gas caldo a tempo)
Type of defrost (0=electric, 1=hot gas,
2=electric by time, 3=hot gas by time)
dP Durata massima di sbrinamento o durata effettiva per d0=2 o d0=3 F 1 199 min 30
Maximum duration of defrost or effective duration for d0=2 or d0=3
dI Intervallo tra gli sbrin. /
Time-intervals between defrost cycles
F 0 199 hours 8
dt Set point temperatura di fine sbrinamento F -40 +199 °C/°F 4
Defrost end set-point
PARAMETRI DI ALLARME /
ALARM PARAMETERS
Ad Ritardo allarme di temperatura /
Temperature alarm delay
F 0 199 min 120
PARAMETRI GENERALI DI CONFIGURAZIONE
GENERAL CONFIGURATION PARAMETERS
H1 Modalità funzion. (IR32YE: 0=1 sonda; 1=2 sonde) C 0 1 flag 0
(IR32SE: 0=termostato; 1=termostato+sbrinamento)
Mode
(IR32YE: 0=1 probe; 1=2 probes)
(IR32SE: 0=thermostat; 1=thermostat+defrost)

4. Front panel and buttons
The base model comes complete with:
• 12Vac power supply;
• 2 and 1/2 digit display;
• temperature decimal point between -19.9 and +19.9;
• LEDs indicating the output status (the number of LEDs
depends on the model);
• 4 buttons for programming the unit (except IR32M);
•two standard digital inputs in the IR32XE and IR32CE
models; optional digital inputs in the other models.
The following options are also available upon request
(see “Instrument and accessory codes number on p.4”):
•24Vac/dc power supply for all models,
110÷240Vac/dc only in the IR32SE model;
• alarm buzzer;
• infrared receiver for programming the unit via remote
control;
•two digital inputs only in the I
IR32ME, IR32SE, IR32YE
models;
•serial card for connection to a supervisory and/or
telemaintenance system such as Carel MasterPlant for
the control and regulation of refrigeration units.
Important: please, specify the optional functions you
need when placing your order.
4.1 LED display
The display shows the temperature
values in a range form -50 to 50°C.
The temperature measured by the
probe is displayed to a 10th of a
degree resolution between -19.9 to
+19.9.
It is possible to exclude the
decimal point by modifying the
value of the 6 parameter.
The display will show one of the following values/codes,
depending on the function being performed.
•normal functioning: value measured by the room probe;
•parameter selection stage: code of the parameter or its
value;
• when an alarm condition occurs: the code of the alarm
flashes alternatively to the value of the temperature.
4.2 Operating indicators
On the display there are some luminous indicators (see
3,
4, 4b, 5, 6, 7 and 8
in the figure above).They indicate:
3current transmission via remote unit (the controller
must be equipped with IR receiver);
4compressor ON routine (for all models except IR32ME);
if the IR32SE model as been set to work as the “T”
model (see parameter H1=0), this LED indicates the
status (ON or OFF), of the controlled output, which
may also be a device other than a compressor;
4b continuous cycle ON routine (all models except IR32ME);
5fan ON routine (model IR32CE);
second probe reading (model IR32ME);
Reverse function mode (heating) - model IR32SE -
configured to work as thermostats (H1=0);
6fourth relay active (IR32CE only);
7defrost ON routine (all models except IR32ME);
8decimal point.
4.Tasti e visualizzazioni
La versione base è dotata di:
• alimentazione a 12 Vac;
• display a 2 cifre e mezzo;
•visualizzazione della temperatura con il decimo nel
range tra - 19.9 e +19.9;
• LED indicanti lo stato delle uscite (il loro numero varia
in funzione del modello);
• 4 tasti per la programmazione;
•due ingressi digitali standard per i modelli IR32XE e
IR32CE; opzionali per gli altri modelli.
A richiesta sono disponibili altre versioni (si veda il
capitolo “Codici degli strumenti e accessori” a pag. 4):
•alimentazione a 24 Vac/dc per tutti i modelli,
110÷240 Vac/dc solo per il modello IR32SE;
• segnalatore acustico di allarme;
• ricevitore infrarosso per permettere la programmazione
da telecomando;
•due ingressi digitali per i mod. IR32ME, IR32SE, IR32YE;
•scheda seriale per la connessione ad un sistema di
supervisione o teleassistenza, come ad esempio il sistema
MasterPlant Carel per la gestione di impianti frigoriferi.
Nota importante: tutte le opzioni devono essere previste
al momento dell’ordine.
4.1 Il display a LED
Il display visualizza la temperatura
nel range compreso tra
-50 e 50°C. La temperatura rilevata
dalla sonda viene visualizzata con la
risoluzione del decimo tra
-19.9 e +19.9.
È possibile escludere il punto
decimale del grado modificando
il valore del parametro 6.
A seconda della funzione in corso, il display mostra una
delle seguenti informazioni:
• in funzionamento normale: valore rilevato dalla sonda
ambiente;
• in fase di impostazione parametri: codice del parametro
o il valore ad esso associato;
• in presenza di una situazione di allarme: codice
lampeggiante dell’allarme rilevato, alternato al valore
della temperatura rilevata.
4.2 Le indicazioni di funzionamento
Sul display sono presenti dei punti luminosi di segnalazione
(vedi 3, 4, 4b, 5, 6, 7 e 8 in figura). Essi indicano:
3trasmissione con telecomando in corso
(nei controlli dotati di ricevitori IR);
4compressore in funzione (per tutti i modelli tranne
IR32ME); se il modello IR32SE è stato configurato per
funzionare come termostato (si veda parametro H1=0),
questo LED indica lo stato (acceso o spento) dell’at-
tuatore controllato, che può non essere un compressore;
4b ciclo continuo inserito (per tutti i modelli tranne IR32ME);
5ventilatore in funzione nel modello IR32CE;
lettura della seconda sonda nel modello IR32ME;
funzionamento in Reverse (per caldo) nel modello
IR32SE configurato come termostato (H1=0);
6quarto relè attivo (solo per l’IR32CE);
7sbrinamento in corso (per tutti i modelli tranne l’IR32ME);
8punto decimale.
9
comp.
PRG
mute
SEL
10
9
4b
321
5
fan
def.
al. aux
4
8
6
7

4.3 La tastiera
I tasti presenti sul frontale permettono le seguenti funzioni:
• passa da un parametro al successivo;
• incrementa il valore associato al parametro;
-nel modello IR32CE:
• attiva/disattiva l’uscita ausiliaria;
-se premuto insieme con (*):
• attiva/disattiva il ciclo continuo (tranne per l’IR32ME);
• tacita l’allarme acustico (solo se previsto);
-se premuto per più di 5 secondi:
• dà accesso al menù di predisposizione dei parametri
di tipo “F” (frequenti);
-se premuto per più di 5 s insieme con il tasto :
• dà accesso al menù dei parametri di tipo “C”
(configurazione);
-se premuto all’accensione dello strumento:
• attiva la procedura di RESET.
• visualizza e/o imposta il Set-Point;
• visualizza il valore associato al param. selezionato;
-se premuto per più di 5 s insieme con :
• dà accesso al menù dei parametri di tipo “C”
(configurazione).
• passa da un parametro al precedente;
• diminuisce il valore associato al parametro;
-se premuto per più di 5 secondi:
• attiva uno sbrinamento manuale
(sono esclusi i modelli IR32ME e IR32SE con H1=0);
-se premuto insieme con (*):
• attiva/disattiva il ciclo continuo.
(*) AVVERTENZE: per attivare il ciclo continuo premere
,subito dopo e tenerli premuti per più di 5
secondi.
aux
def
aux
mute
PRG
SEL
def
4.3 Keypad
Buttons on the front panel performs the following functions:
• goes to the next parameter;
• increases the value of the parameter;
-in the IR32CE model:
• activates/deactivates the auxiliary output;
-if pressed together with the (*) button:
• enables/inhibits the continuous cycle (except IR32ME);
• silences the buzzer (if present);
-if pressed for more than 5 seconds:
• allows you to enter the “F” param. section (Frequent);
-if pressed for more than 5 seconds together with
the button :
• allows you to enter the “C” parameter section
(Configuration);
-if pressed when turning ON the instrument:
• activates the RESET procedure
• displays and/or selects the set-point;
• displays the value of the selected parameter;
-if pressed for more than 5 seconds together with
the button :
• allows you to enter type “C” param. (Configuration);
• goes to the previous parameter;
• decreases the value of the parameter;
-if pressed for more than 5 seconds:
• activates a manual defrosting cycle (except
IR32ME and IR32SE versions with parameter H1=0);
-if pressed together with the button (*):
• activates/deactivates the continuous cycle.
(*) WARNING: in order to activate a continuous cycle,
press the button first and then the button
and keep them pressed for more than 5 seconds.
aux
def
aux
mute
PRG
SEL
def
10
aux
mute
PRG
SEL
def
aux
mute
PRG
SEL
def

5. Funzioni
In base alla programmazione realizzata in fabbrica, le
principali funzioni previste sono:
IR32ME è programmato per il monitoraggio di due diverse
temperature. È possibile la visualizzazione della seconda
sonda in tre modi diversi:
• utilizzando la tastiera,
•collegando un interruttore all’ingresso digitale
(nel modello con opzione ingressi digitali)
• utilizzando il telecomando (nel modello con opzione
infrarosso).
IR32SE è configurato come termostato con funzionamento
Direct (ovvero per comandare generatori di freddo), set-
point pari a 0°C e differenziale di 2°C.
Gli allarmi di alta e bassa temperatura sono disabilitati.
Nel caso di funzionamento in ciclo continuo, questo ha
una durata di 4 ore e l’allarme di temperatura è annullato
per due ore dalla fine del ciclo stesso.
IR32YE, IR32XE hanno tutte le funzioni dell’IR32SE.
Il modello IR32YE è configurato per controllare lo
sbrinamento a resistenza con funzionamento a tempo (la
durata prevista è di circa 30 minuti), l’intervallo tra gli
sbrinamenti è pari a 8 ore. Il modello IR32XE, invece, è
configurato per controllare lo sbrinamento a resistenza in
temperatura. La visualizzazione della temperatura durante
lo sbrinamento rimane bloccata sull’ultimo valore acquisito
prima dell’inizio dello sbrinamento stesso. È previsto un
tempo di gocciolamento dell’evaporatore di due minuti
dopo lo sbrinamento e l’allarme di alta temperatura viene
annullato per un’ora dalla fine dello sbrinamento.
IR32CE alle funzioni dell’IR32YE aggiunge la gestione
delle ventole dell’evaporatore, le quali vengono spente a
compressore fermo e durante lo sbrinamento. È prevista
inoltre una pausa di 3 minuti per i ventilatori, successiva al
gocciolamento, per consentire all’evaporatore di tornare in
temperatura prima di iniziare la ventilazione forzata.
Lo sbrinamento è interrotto quando la sonda posta
sull’evaporatore rileva 4°C (sbrinamento in temperatura).
In ogni caso è prevista una durata massima dello
sbrinamento pari a 30 minuti. Il quarto relè permette di
comandare un dispositivo per la segnalazione di situazioni
di allarme.
5. Functions
The factory-set program makes your unit perform the
following main functions:
IR32ME specifically programmed for the detection of two
different temperature values. It is possible to display the
probe in three different ways:
• using the keyboard,
• connecting a switch to the digital input
(in the model with digital input option),
• using the remote control (in the model with infrared
option).
IR32SE configured as a thermostat with Direct functioning
mode (to control cooling),
set-point = 0°C and differential = 2°C.
High and low temperature alarms are inhibited.
When the continuous cycle functioning mode is ON, it will
last 4 hours. After this cycle the temperature alarm will be
delayed for two hours.
IR32YE, IR32XE features the same functions as IR32SE.
IR32YE is configured to control timed electric defrost
(duration = 30 minutes) and 8-hour intervals between
successive defrost cycles.While IR32XE is configured to
control electrical temperature defrost.
The temperature displayed during the defrost cycle will be
that acquired before the beginning of the cycle. At the end
of the defrost cycle the evaporator will drain down for 2
minutes and the high temperature alarm will be inhibited
for 1 hour.
IR32CE performs the same functions as IR32YE plus the
control and regulation of the evaporator fans: these will be
stopped when the compressor is off and during each
defrost cycle. At the end of the dripping time, the fans will
remain off for 3 minutes; this time-delay is necessary to
restore the normal temperature of the evaporator before
re-starting the fans.The defrost cycle will be interrupted
as soon as the evaporator probe measures a temperature
corresponding to 4°C (defrost based on temperature).
The defrost cycle, however, will last max. 30 minutes.
The fourth relay will change state thus indicating an alarm
condition.
11

6. Programmazione e configurazione
6.1 La configurazione standard
Gli strumenti della serie Infrared vengono forniti già pronti
per l’utilizzo: sono, infatti, programmati in fabbrica in modo
da soddisfare le esigenze più comuni. La programmazione
è realizzata assegnando a tutti i parametri il valore che
viene più frequentemente richiesto. Se si desidera ottene-
re il massimo dai controlli o se si hanno esigenze partico-
lari di regolazione, è possibile comunque modificare il
valore dei parametri di funzionamento. Nella sezione
“Funzioni” si è già visto il funzionamento previsto in fabbri-
ca; nelle note che seguono vengono indicati i parametri
che più
comunemente devono essere modificati (punto di lavoro o
set-point, differenziale, ecc.). Inoltre, per comodità, sono
indicati tutti quei parametri che è buona norma verificare
prima di mettere in funzione l’unità (si veda tabella a pag. 8).
6.2 L’inizializzazione degli strumenti IR32*E
Come impostare il set-point
Sullo strumento è previsto un set-point di 0°C.
Nel caso in cui questo valore non sia compatibile con l’ap-
plicazione, si può modificarlo agendo nel seguente modo:
• premere per un secondo il tasto per visualizzare
il valore del set-point;
• dopo un istante, inizia a lampeggiare il valore
precedentemente impostato;
• incrementare o decrementare il valore del set-point con
i tasti e/o fino a visualizzare il valore desiderato;
•premere di nuovo per confermare il nuovo valore.
Come impostare il differenziale (isteresi regolatore)
Nello strumento è pre-programmato un differenziale
di 2°C. Nel caso in cui questo non sia compatibile con
l’applicazione lo si può modificare agendo nel seguente
modo:
• premere il tasto per più di 5 secondi (in caso di
allarme, tacitare prima il buzzer, se previsto);
• nel display compare il codice del primo parametro
modificabile C;
• premere il tasto o il tasto fino a visualizzare
il codice “rd”;
• premere il tasto per visualizzare il valore associato;
• incrementare o decrementare il valore con i tasti
e/o fino a visualizzare il valore desiderato;
•premere di nuovo per confermare temporaneamente
il nuovo valore e passare alla visualizzazione del codice
del parametro;
• premere il tasto per memorizzare il nuovo valore
ed uscire dalla procedura di modifica dei parametri.
mute
PRG
SEL
def
aux
SEL
def
aux
mute
PRG
SEL
def
aux
SEL
6. Programming and configuration
6.1 Standard configuration
All Infrared controllers are supplied ready to use.The
values of the main working parameters have been factory-set
on the basis of the most frequent and common
requirements to meet the greatest number of application
needs. It is always possible to change the pre-set values
to get the maximum from the controls or personalise the
unit according to your requirements. In the “Functions”
section we explain the factory set operation; in the notes
below we show the default values as well as the parame-
ters that can be modified in relation to the type of refrige-
ration unit to be controlled (set-point, differential, etc.).
We will also list all the parameters whose values should
always be carefully checked before starting the unit
(see table on page 8).
6.2 Initialising the IR32*E instruments
Setting the set-point
The factory set-point is 0°C. Should you need a different
value, more suitable to your specific application require-
ments, observe the following instructions:
• press for 1 second: the set-point value will appear
on the display;
• after a while, the value will begin to flash;
• increase or decrease the set-point using the
and/or buttons until you reach the required
value;
• press again to confirm the new value;
Setting the differential (regulator hysteresis)
The factory-set differential is 2°C. Should you need a
different value, more suitable to your specific application
requirements, operate as follows:
• press for more than 5 seconds (in case of active
alarm, silence the buzzer first);
• the code of the first modifiable parameter ( C)
appears on the display;
• press either or until the code “rd” appears;
• press to display the relative value;
•increase or decrease the value using either the
and/or buttons until you reach the requested
value;
• press again to confirm temporarily the new value
and display the code of the parameter;
• press to memorise the new value and exit the
procedure.
mute
PRG
SEL
def
aux
SEL
def
aux
mute
PRG
SEL
def
aux
SEL
12

6.3 Programming the IR32*E instruments
The Infrared series instruments are controlled by a
microprocessor which allows you to configure the functions
of your controller according to the application requirements.
To simplify this operation, the relevant working parameters
have been divided into two groups:
• frequently used parameters (indicated as “F” parameters
in the tables below);
• configuration parameters (“C”), protected by a code or
password to prevent unauthorised access to the data.
All parameters can be modified via keypad as well as via
remote control unit or serial line (if present). In order to
modify the parameters via front panel keypad, observe the
following instructions.
Password
This is a protective device which intentionally “complicates”
access to Configuration parameters in order to prevent
accidental changes or any that might be made by
unauthorised persons.Type “C” parameters are those
which alter the control configuration. Once the
configuration parameters have been entered by use of the
password, the system allows the user to alter type “F”
parameters as requested.
The password request (flashing 00) appears when the
two buttons and are pressed at the same time.
Access to type C parameters is gained as follows:
•press or to produce 22 or the correct password;
•confirm with ;
•the code of the first modifiable parameter is displayed,
that is “ C”.
To gain access to the “F” parameters:
• press the for more than 5 seconds (in case of
alarm condition, silence the buzzer first);
• the display shows the code of the first modifiable
parameter ( C);
To gain access to the “C” parameters:
• press the and buttons simultaneously for more
than 5 seconds;
• the display shows 00;
• press either the or button until “22” (the pass-
word) appears;
• confirm pressing ;
• the display shows the code of the first modifiable
parameter, that is “ C”.
SEL
def
aux
SEL
mute
PRG
mute
PRG
SEL
def
aux
SEL
mute
PRG
6.3 La programmazione degli strumenti IR32*E
Gli strumenti della serie Infrared sono gestiti da un
microprocessore che permette di adattare il funzionamento
del controllo alle effettive esigenze di regolazione. A tale
scopo sono previsti opportuni parametri di funzionamento.
I parametri sono stati raggruppati in due famiglie:
• parametri di uso frequente (indicati con il tipo “F” nelle
tabelle seguenti);
• parametri di configurazione (tipo “C”) la cui selezione è
protetta da un opportuno codice, detto “password”, per
impedire manomissioni indesiderate.
I parametri sono modificabili tramite la tastiera frontale e,
nel caso siano previste le opportune opzioni,
da telecomando e/o da seriale.
Per modificare i parametri dalla tastiera frontale, si proceda
come nel modo di seguito descritto.
La password
È una protezione che volutamente “complica” l’accesso ai
parametri “C” per impedire modifiche casuali o da parte di
persone non autorizzate.
I parametri di tipo “C” sono, infatti, quelli che modificano la
configurazione del controllo. Una volta entrati nei parametri
di configurazione tramite la PASSWORD, il controllo per-
mette, per comodità, di modificare anche i parametri “F”.
La richiesta della password (00 lampeggiante) appare
premendo contemporaneamente i tasti e per più
di 5 secondi. Per accedere ai parametri di tipo “C” proce-
dere nel seguente modo:
• premere il tasto o fino a visualizzare 22,
ovvero la password corretta;
• confermare con ;
• sul display compare il codice del primo parametro
modificabile, ovvero “ C”.
Come accedere ai parametri di tipo “F”
• premere il tasto per più di 5 secondi (in caso di
allarme, tacitare prima il buzzer, se previsto);
• sul display compare il codice del primo parametro
modificabile ( C).
Come accedere ai parametri di tipo “C”
• premere contemporaneamente i tasti e per più
di 5 secondi;
• sul display compare 00;
• premere il tasto o fino a visualizzare 22
(codice della password);
• confermare con il tasto ;
• sul display compare il codice del primo parametro
modificabile “ C”.
SEL
def
aux
SEL
mute
PRG
mute
PRG
SEL
def
aux
SEL
mute
PRG
13

How to modify the parameters
After having displayed the first parameter, either “C”or “F”,
follow these instructions:
• press either or until you reach the parameter
whose value needs to be changed;
• press to display its current value;
• increase of decrease its value using the or
button until you reach the requested value;
• press to memorise temporarily the new value and
display the code of the parameter again;
•press again or either to go to the next parameter
you want to change; then repeat the operations as
indicated above, starting from “press ”
How to memorise the new set values
Press to save the new values and exit the procedure.
Important: it is necessary to press to save the new
values. In case of power failure before has been
pressed, all modifications will be lost.Whenever you
modify the value of a parameter, we strongly recommend
writing it down in the dedicated column situated on page
46 of this guide (see column “New”).
To exit the procedure without saving the modified
parameters:
do not press any button for at least 60 seconds (TIME
OUT).The instrument will return to its normal functioning
mode without any modification to the parameters.
mute
PRG
mute
PRG
SEL
def
aux
SEL
def
aux
SEL
def
aux
La modifica dei parametri
Dopo aver visualizzato il primo parametro, sia esso di tipo
“C” o di tipo “F”, si proceda nel seguente modo:
•premere i tasti o fino a raggiungere il parametro
di cui si vuole modificare il valore;
• premere per visualizzare il valore associato;
• incrementare o decrementare il valore con i tasti o
fino a visualizzare il valore desiderato;
• premere per memorizzare temporaneamente il
nuovo valore e tornare alla visualizzazione del codice
del parametro;
• premere nuovamente o per raggiungere il
successivo parametro di cui si vuole modificare il valore;
ripetere le operazioni dal punto “premere ”.
Memorizzazione dei nuovi valori assegnati ai parametri
Per memorizzare definitivamente i nuovi valori premere il
tasto , uscendo così dalla procedura di modifica dei
parametri.
Nota importante: solo premendo il tasto si passa
dalla memorizzazione temporanea delle modifiche a quella
definitiva. Se quindi viene tolta tensione allo strumento
prima della pressione di questo tasto, tutte le modifiche
realizzate e temporaneamente memorizzate vengono
perse. In caso di modifica si raccomanda inoltre di segnare
il nuovo valore al parametro nella colonna “Nuovo”
riportata nelle tabelle di pag. 46.
Per uscire dalla procedura senza modificare i parametri:
non premere nessun tasto per almeno 60 secondi (uscita
per TIME OUT). In questo modo lo strumento ritorna al
funzionamento normale senza apportare alcuna modifica
ai parametri.
mute
PRG
mute
PRG
SEL
def
aux
SEL
def
aux
SEL
def
aux
14

6.4 Procedura di reset
In situazione di funzionamento molto particolari (forti
disturbi impulsivi di origine elettromagnetica) può succedere
che lo strumento rilevi errori nella memorizzazione interna
dei dati. Questi errori potrebbero compromettere il corretto
funzionamento dello strumento. Nel caso il microprocessore
individui un errore nella memorizzazione dei dati, viene
visualizzata sul display una delle seguenti sigle:
EA, EB, EE
Per ripristinare il corretto funzionamento è necessario
seguire una procedura particolare detta di RESET.
Questa procedura è assolutamente eccezionale, come
sono eccezionali le cause che la possono richiedere.
Nella maggior parte degli strumenti della concorrenza, in
situazioni analoghe, è necessario sostituire il controllo.
Con la serie Infrared, grazie alla procedura di RESET,
è invece quasi sempre possibile ripristinare il corretto
funzionamento. è comunque buona regola indagare sulle
cause che hanno generato questo tipo di errore in modo
da evitarne il ripetersi. In particolare si invita a leggere con
attenzione il capitolo “Installazione” e le relative
“AVVERTENZE” a pag. 6.
Per resettare il controllo, si proceda nel modo seguente:
• togliere tensione allo strumento;
•tenendo premuto il tasto dare tensione allo strumento;
•sul display compare la scritta “ “;
• dopo qualche secondo lo strumento accede automatica-
mente ai parametri di configurazione, in modo da
consentire l’aggiornamento dei parametri eventualmente
modificati rispetto alla configurazione di fabbrica. In
particolare viene visualizzato il parametro “H4” che
permette di abilitare/disabilitare il buzzer.
Nota importante: la procedura di RESET ripristina lo
strumento assegnando ai parametri il valore previsto in
fabbrica (detto valore di default).Si perdono quindi tutte le
modifiche eventualmente apportate ai param. di lavoro.
Nel caso si stia lavorando con i valori di default, si può
tornare al funzionamento normale premendo il tasto .
Se, invece, si sta lavorando con una configurazione
speciale, è necessario modificare tutti i parametri che
hanno un valore diverso da quello previsto nella
configurazione di fabbrica.Terminata la modifica si prema
il tasto per tornare al funzionamento normale.
Nota importante: vista la delicatezza della manovra, la
procedura di RESET deve essere eseguita da personale
specializzato.Tale procedura comunque non danneggia
lo strumento, bensì lo riporta alla configurazione con cui è
stato acquistato. Se, quindi, si sono modificati i parametri
di funzionamento in modo disordinato, al punto di perdere
il controllo del regolatore, si può resettare il controllo per
riportarsi alla configurazione iniziale.
Se dopo la procedura sopra indicata persiste l’indicazione
EE, premere il tasto fino a che l’indicazione non
scompare. Se l’errore EE rimane, è necessario sostituire
lo strumento.Se invece l’indicazione scompare, è possibile
continuarne l’utilizzo. Quando l’errore EE si presenta con
frequenza e/o scompare con difficoltà si suggerisce
comunque di far verificare il controllo in quanto potrebbe
non essere garantita la precisione originaria.
def
mute
PRG
mute
PRG
mute
PRG
6.4 Reset procedure
In case of abnormal conditions (strong electromagnetic
noises), for example there might be errors when storing
data. Consequently the unit might not work correctly.
When the microprocessor identifies an error in the process
of storing data, one of the following groups of letters will
be displayed: EA, EB or EE
In order to restore normal working conditions, it is necessary
to RESET the instrument. Please note that resetting the
instrument is quite an unusual procedure, as well as the
causes that can make it necessary. We would also point
out that competitive controllers are not capable of dealing
with such serious conditions which would normally lead to
inevitable damages to the instrument.This is the reason
why Carel have implemented the RESET function in all
the controllers of the Infrared series, thus providing safer
and more reliable instruments, always capable of restoring
their normal functions without any problem. Should this
error message appear without any apparent reason, we
strongly recommend inspecting the unit carefully and
finding out the causes that generated it. Please also find
useful information in the “Installation” chapter and in the
WARNINGS, both on page 6.
To reset the controller proceed as follows:
• turn off the instrument;
•press and, keeping it pressed, turn on the controller;
•the display shows “ ”;
• after a few seconds, the instrument automatically allows
you to gain access to the ‘C’ parameters where you can
modify the default values according to your specific
requirements. Also the H4 parameter will be displayed
thus allowing you to enable/disable the buzzer.
Important: after the RESET procedure the values of each
single parameter will be exactly the factory-set ones
(default values). Any modification made before the
reset procedure will therefore be lost.
If your instrument requires default values, normal working
conditions will be restored by simply pressing .
If the instrument requires a special configuration, it is
necessary to modify all parameters whose values are
different from the factory-settings.
After having modified the parameters, press to exit
the procedure and come back to the normal working mode.
Important: the reset procedure should be carried out by
expert personnel only. We would like to point out, however,
that such a procedure does not damage the instrument
but it simply restores its factory-set configuration. As a
result, you can resort to this in the event of confused or
incorrect modification of the working parameters. In this
cas, resetting the controller will allow you to recover the
factory-set configuration and restart the modification
procedure, without any problem.
Should EE persist, even after the above procedure has
been carried out, press until the message disap-
pears. If you do not manage to clear the EE error, it will be
necessary to replace the controller. If the EE message
occurs frequently or disappears with difficulty, it is better
to get in contact with the nearest service centre to check
the precision of the instrument.
def
mute
PRG
mute
PRG
mute
PRG
15

6.5 Il telecomando
Il telecomando della serie Infrared è stato progettato per
facilitare la programmazione: sino ad oggi, infatti, la
complessità di programmazione degli strumenti multifun-
zione per refrigerazione ne ha limitato l’utilizzo. Carel, per
rendere più semplice la programmazione dei propri
controlli propone il TELECOMANDO, non solo per
programmare a distanza, ma soprattutto per consentire
una veloce e semplice impostazione dei parametri più
comuni e maggiormente utilizzati.
Un’interessante caratteristica della serie Infrared è la
possibilità di selezionare su ogni regolatore un codice
d’accesso (parametro H3) che estende l’utilizzo del
telecomando.
Nel caso, infatti, vi siano più controlli installati sullo stesso
pannello, è possibile modificare con il telecomando i para-
metri di un solo controllo senza il pericolo di interferenze
con gli altri. È sufficiente associare un codice diverso ad
ogni controllo e selezionare il codice del controllo deside-
rato prima delle modifiche.
La sicurezza del sistema è poi garantita da una particolare
procedura che permette l’inizio delle modifiche solo dopo
aver premuto il tasto INIZIO. Ciò impedisce variazioni
casuali dei parametri dovute alla pressione involontaria di
qualche tasto e ciò senza complicare l’utilizzo del
telecomando. Inoltre è possibile inibire l’utilizzo del
telecomando ad estranei sfruttando il parametro H2.
6.6 Caratteristiche tecniche
6.7 Descrizione della tastiera
I tasti, in base alla loro funzionalità,
possono essere suddivisi in tre gruppi:
• tasti per attivare/disattivare l’uso
del telecomando;
• tasti pre-programmati per la modifica
dei principali parametri;
•tasti per il controllo remoto della tastiera
dello strumento.
Tasti per attivare/disattivare l’uso del
telecomando
Consentono di attivare l’uso del telecomando
nonché di disattivarlo memorizzando o
meno i nuovi valori associati ai parametri.
6.5 Remote control unit
The remote control of the Infrared series can be easily
and quickly programmed: until now programming
Multifunction instruments dedicated to refrigeration was a
very complex procedure.
This is why Carel, in order to simplify programming of its
controllers, offers the REMOTE CONTROL UNIT, used
not only to program the controller from a remote position
but also to allow the End-User to set the main working
parameters easily and fast.
An interesting feature of the Infrared series is the
possibility of selecting the access code (H3 parameter)
for each controller to further simplify the use of the remote
control. In fact, if your installation includes several controllers,
selecting a specific access code will allow you to modify
only the parameters of the unit the code refers to, without
interfering with the other controllers.
It is sufficient to give a different code to each regulator
and select desired control code before modifications.
Changing the value of a parameter requires a special
procedure (see “START” button).This prevents accidental
modifications of parameters due to the unwanted pressing
of a button without complicating the use of the remote
control. Further safety is also provided by the “H2” parameter
that allows you to protect your system from unwilling or
unauthorised access or modification of all set data.
6.6 Technical specifications
6.7 Keypad description
On the basis of the function performed, the
buttons on the remote control unit, have
been grouped as follows:
• buttons to activate/deactivate the use of
the remote control unit;
• pre-programmed buttons for the modifica-
tion of the values of the main parameters;
• buttons for the remote control of the
keypad.
Buttons used to activate/deactivate the
use of the remote control unit
The buttons shown on the left are the remote
control unit ON/OFF buttons.They also
allow you to memorise any new parameter
value.
16
Alimentazione n.2 batterie alkaline ministilo da 1.5V (tipo UM-4 AAA, IEC R03)
Power supply no.2 - 1.5V alkaline batteries (type UM-4 AAA, IEC R03)
Contenitore
/ Case
plastico /
plastic
Dimensioni
/ Dimensions
60x160x18mm
Immagazzinamento /
Storage
-25÷70°C
Temperatura di lavoro /
Operating temperature
0÷50°C
Tipo di trasmissione /
Transmission
Infrarosso /
Infrared
Peso
/ Weight
80 g (privo di batterie) /
80g (without batteries)
ENABLE
1 2 3 4
5 6 7 8
9 0
ESC
PRG
irsetting

Per l’utilizzo dei tasti si veda il paragrafo “Utilizzo del
telecomando” e “Selezione della password”
Tasti per la modifica dei principali
parametri (tasti ad accesso diretto)
I parametri di uso più frequente sono stati
riportati direttamente sul telecomando. Sono
individuabili tre zone con sfondo grigio chiaro:
•parametri relativi alla temperatura;
•parametri relativi allo sbrinamento;
• parametri relativi al ciclo continuo.
Per l’utilizzo dei tasti si veda la sezione
“Utilizzo del telecomando”.
Tasti per il controllo remoto della tastiera
dello strumento:
La parte evidenziata in verde sul telecomando
riproduce la tastiera dello strumento e
permette le stesse operazioni. Per comodità
si riassumono le principali funzioni:
SEL visualizza il valore del parametro
selezionato;
- consente di passare da un
parametro al successivo;
-aumenta il dato sul display,
durante l’impostazione del valore
dei parametri;
AUX attiva/disattiva l’uscita ausiliaria;
- consente di passare da un
parametro al precedente;
- diminuisce il dato sul display,
durante l’impostazione del valore
dei parametri.
17
For the use of the buttons, see paragraphs “Use of the
remote control” and “Selecting the password”
Buttons used to modify the main
parameters (directly accessible buttons)
The most frequently used parameters are
indicated on the remote control unit.They
are grouped in three light-grey zones:
• temperature parameters;
• defrost parameters;
• continuous cycle parameters.
For the correct use of the buttons see
“Use of the remote control unit”.
Buttons for the remote control of the
instrument keypad
The green zone of the remote control unit
reproduces exactly the keypad of the
instrument and allows you to perform the
same operations, as you would perform if
you were using the keypad. Here are the
main functions of the buttons:
SEL displays the value of the selected
parameter;
- goes to the next parameter;
- increases the displayed data
during parameters selection
phase;
AUX activates/deactivates the auxiliary
output;
- goes to the previous parameter;
- decreases the displayed value
during the parameters selection
phase.
Tasti /
Buttons
Descrizione /
Description
Inizio /
Enable
per abilitare l’uso del telecomando /
enables the use of the remote control unit;
Memo / Prg per terminare la programmazione memorizzando i nuovi valori attribuiti ai parametri;
per tacitare l’allarme sonoro se il buzzer interviene durante la programmazione con telecomando
ends the programming procedure and memorises the new values given to the parameters;
silences the buzzer when programming the controller via remote control unit;
Annulla /
Esc
per terminare la programmazione senza memorizzare le eventuali modifiche;
interrupts the transmission without memorising the modifications;
Tastiera numerica per impostare il codice di accesso ai parametri;
Numeric keypad
l’utilizzo del codice è consigliato quando più controlli si trovano nel raggio d’azione del
telecomando, come nel caso di più controlli posizionati su un quadro elettrico;
selezionando un codice diverso per ogni strumento, la modifica dei parametri tramite
telecomando sarà selettiva ovvero avverrà solo sul controllo desiderato.
allows you to select the access code to the parameters; we advise you to give each controller
a specific access code, especially when your control panel includes several instruments or
when all of them are exposed to the beam of the remote control unit;
in this way you will be able to modify exactly the parameters you want to change,
without interfering with the data of the other controllers.
irsetting
– set point +
– differential +
– calibration +
– high alarm +
–
low alarm
+
– alarm delay +
C.cycle
– duration +
– fan delay +
– dripping time +
– time duration +
– temp. termin +
– interval +
start evap.temp
SBRINAMENTOTEMPERATURE
sel
AUX
irsetting
Table of contents
Other Carel Control System manuals

Carel
Carel PlantVisorPRO Manual

Carel
Carel Heez Manual

Carel
Carel WM00E 00 Series User manual

Carel
Carel humiFog User manual

Carel
Carel m chiller User manual

Carel
Carel Hecu CO2 User manual

Carel
Carel DPWL Series User manual

Carel
Carel IROPZ48500 User manual

Carel
Carel FLSTDMAHUE User manual

Carel
Carel MPXone series User manual
Popular Control System manuals by other brands

Rotel
Rotel RR-700 owner's manual

Turnigy
Turnigy Evolution instruction manual

John Crane
John Crane API PLAN 74 STEAM Installation, operation & maintenance instructions

Raven
Raven SCS 340 Installation and service manual

Hurco
Hurco Autobend 6 installation manual

Watts
Watts Isomix-HC Installation and operating manual