Carena GILLOGA User manual
GILLÖGA
HIGH CHAIR

@
@ @
@
●The figures in the instruction are to illustrate the right operation and product
structure.When there is a small difference between the real and the picture, pls
refer to real one.
●In order to improve the quality of products. We may have improved the quality
without Informing you in advance. Pls forgive us.
●Read the instruction manual before using this product.
●If not operate according to instruction, it may dangerous for children.
●When the children are sitting in the chair. Don’t leave him unattached.
●This product is suitable for children who are 6-36 months old.
●Don’t use when the chair parts are broken, tearing or missing.
●Be sure all users are familiar with operation and the chair can be
opened and closed easily.
●If not. don’t operate forcibly and read the instruction to
do it in right way.
●Please carefully check all parts can be normally installed and adjusted.
Be sure all the locks are locked in a state.
●Children must be use safety belt when sit in the chair, in order to
prevent them fall or slide out from the chair, and seriously hurt.
●Please do not use this product when your baby is unable to sit
independently.
●Don't let your child play or climbing alone, hanging on the chair.
●The product can only be used on flat、stable ground. Avoid the chair
trun over, don’t put overweight goods on the tray.
●Avoid placing the chair near the heat source, such as electric heater, gas
heater, or any places that are dangerous for children.
WARNING:
This product complies with EN14988:2006
2

@
@ @
@
Step 1: Insert left and right foot tube(L.R) into chair body separately
according to arrow direction.
Step 2: Insert front and rear foot tube(A.B) into foot tube support.
( A:front foot tube. B: rear foot tube)
Make sure the shrapnel of the foot tube is completely locked tube support
before next operation. According to chair safety test. Make sure fixed and
non-slip foot tube A is installed at the front of chair. And foot tube B which
with wheels are installed at rear.
WARNING:
LR
B
AA
B
L
R
Assembly
3
@
@ @
@
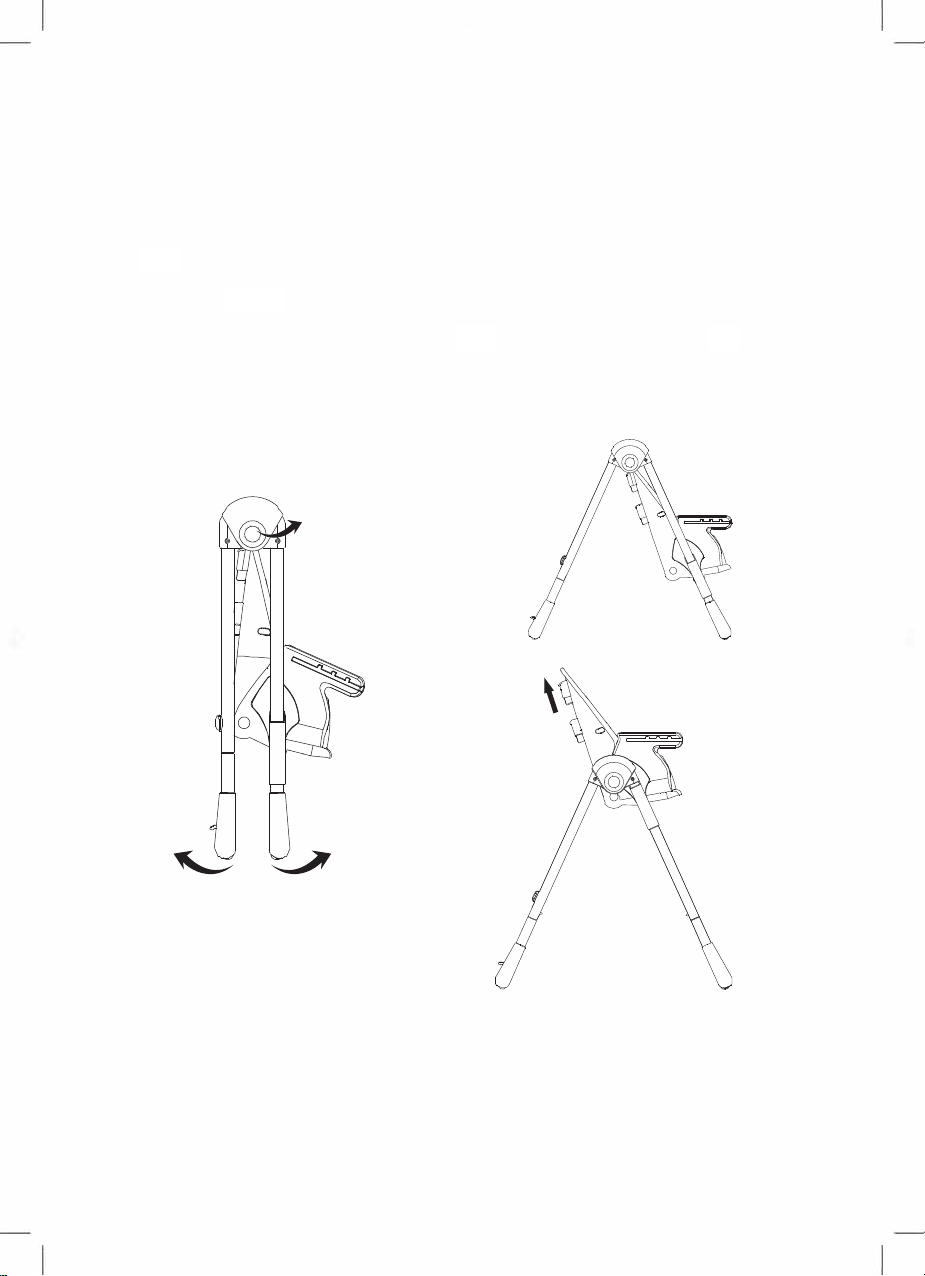
Opening of Chair stand
( pic 1)
Press the button on both sides, open front and rear tube to maximum 1.
Loose the button,Try to fold two foot tubes and confirm they are locked. Then
pull the chair upward to highest position 2. Make sure the whole chair is in
stable state.
②
②
① ①
fold button
4
@
@ @
@
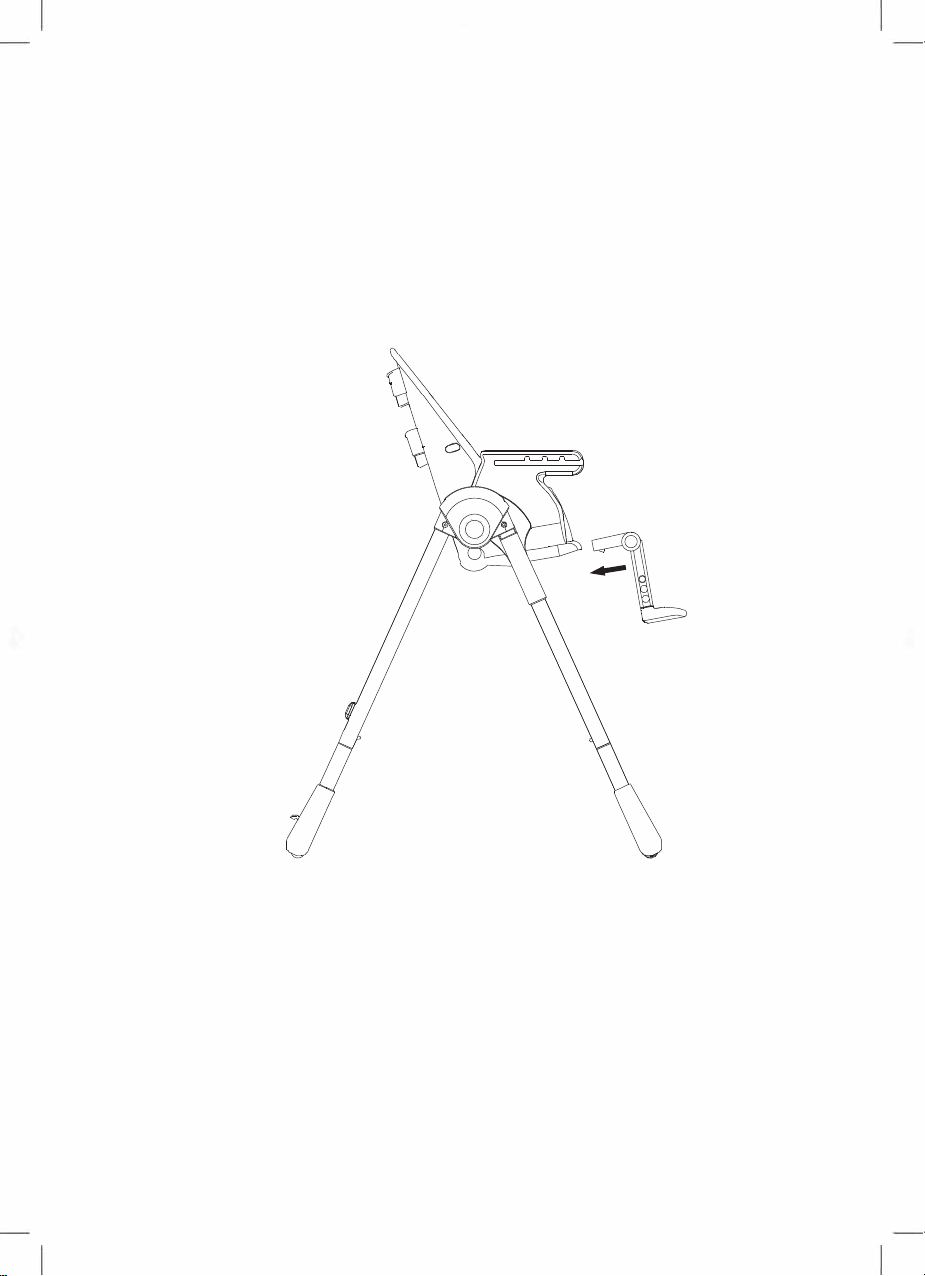
( pic 2)
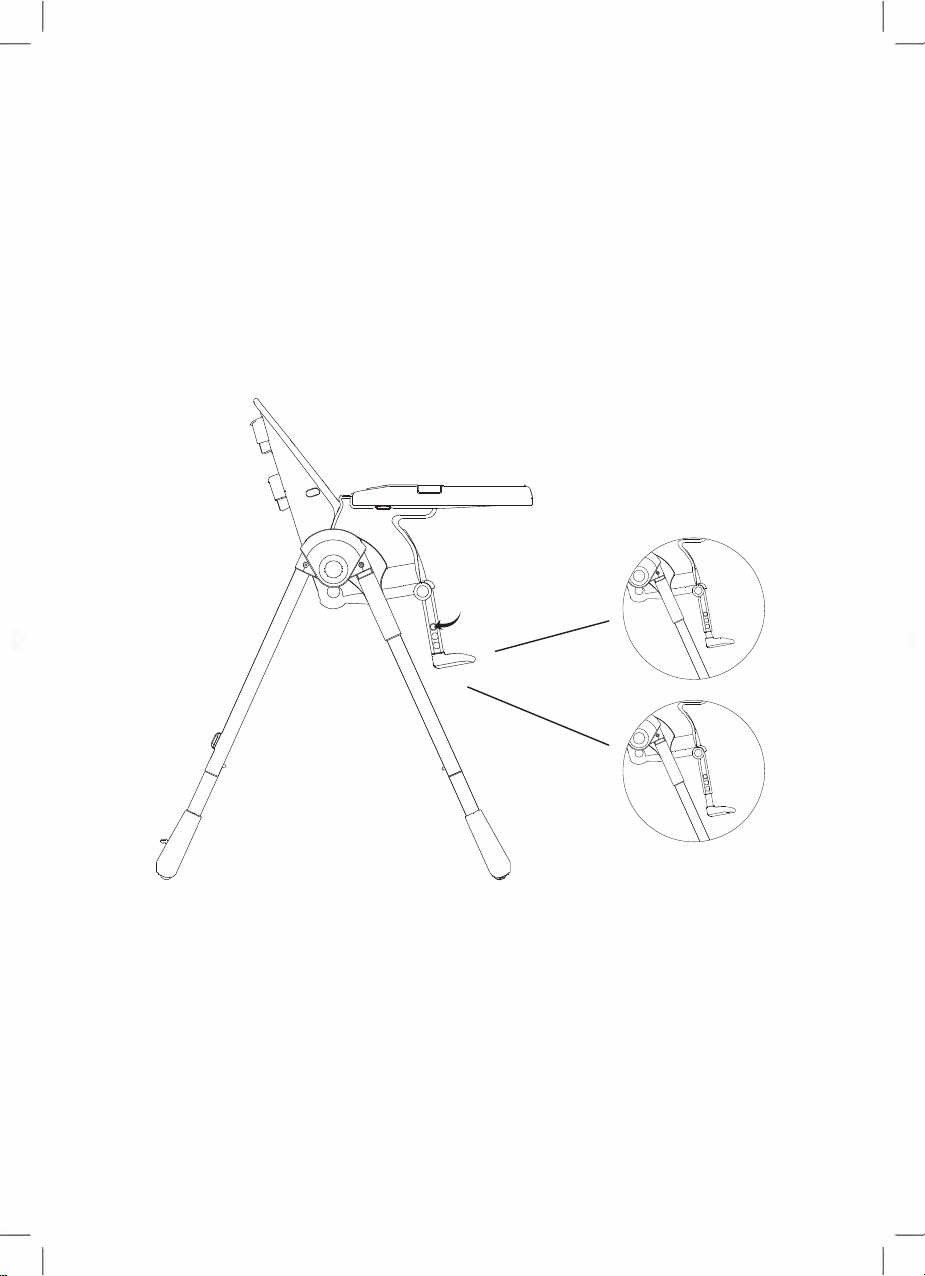
As shown by the arrow, put the foot pedal set into chair body square hole.
Foot pedal installation
5
@
@ @
@
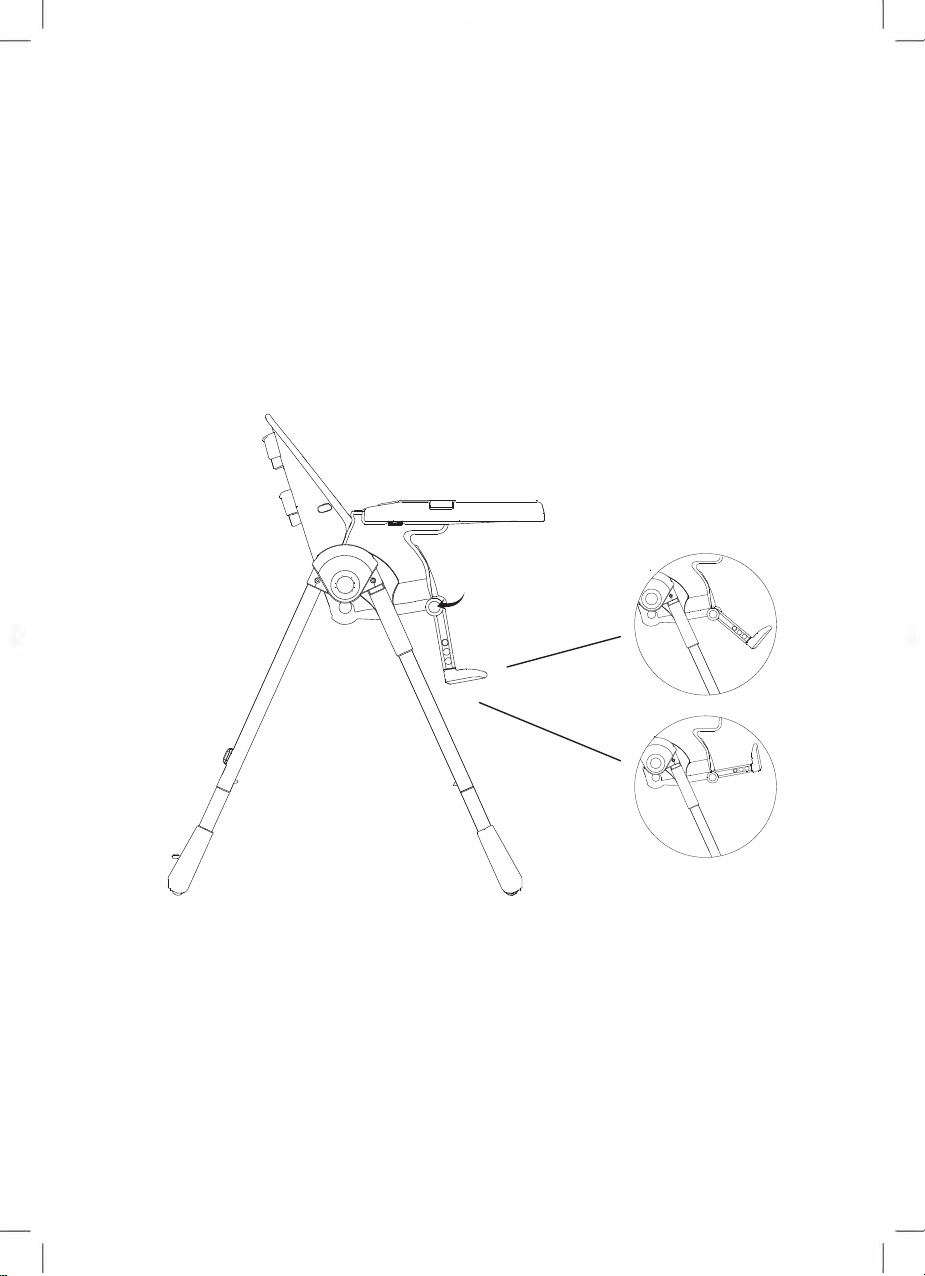
Press the round adjustable button on both pedal sides. Rotate the pedal
up and down with the button as axis. Pedal can be adjusted with three
positions.
( pic 3)
press three position
adjustable button
Foot pedal angle adjustment
6
@
@ @
@
( pic 4)
press three position
adjustable button
Hold the height adjusting button in 3 holes of pedal two sides, Push the
lower part of the foot pedal downwards, make it locked in the lower hole,
This is lowering the pedal.. Otherwise, push the pedal upwards to make it
lock in above holes. This is rise the pedal. Pedal can be adjusted
With three position.
Pedal height adjustment
7

@
@ @
@
( pic 5)
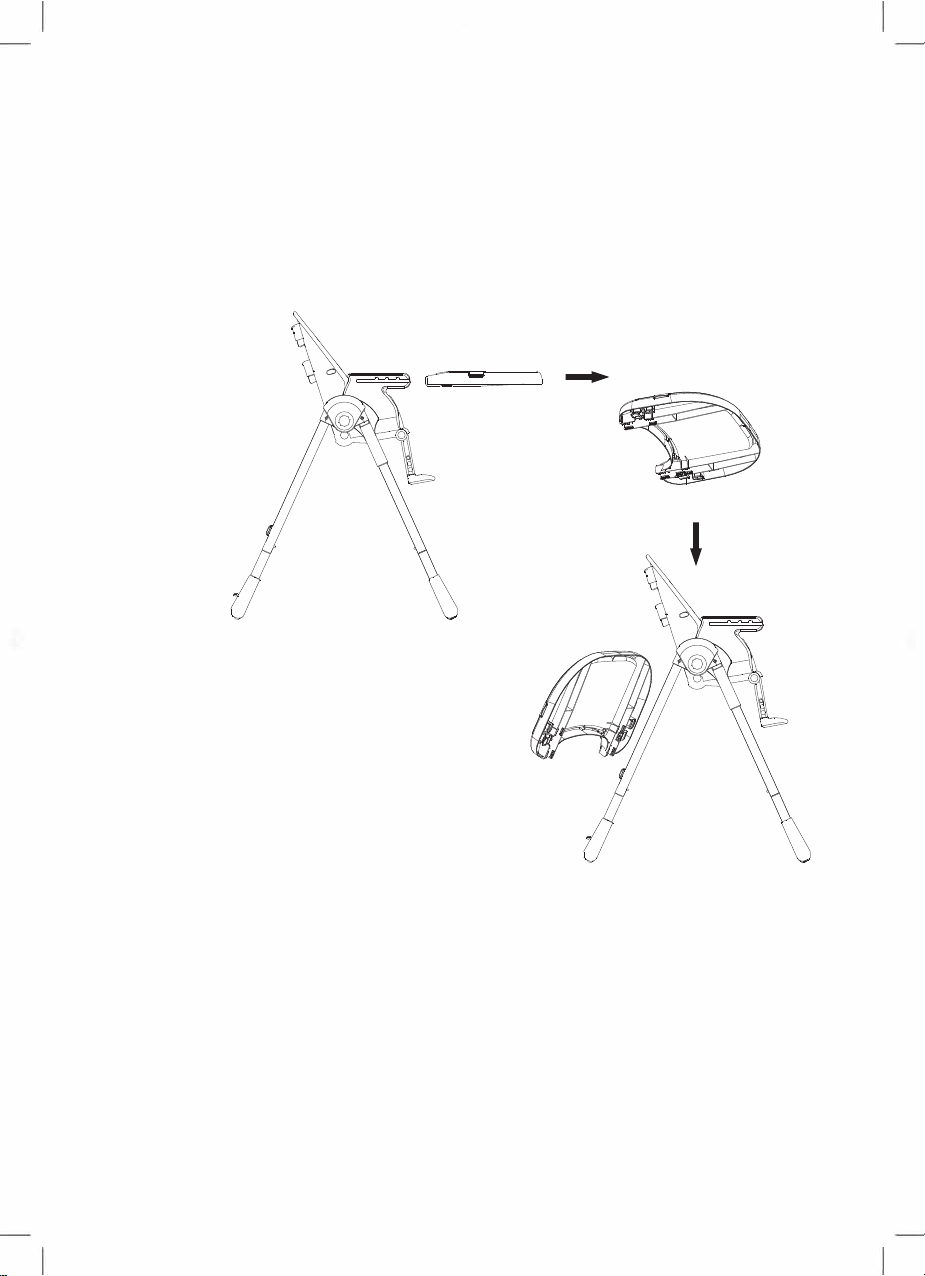
Tray assembly instruction
Put tray directly to the both armrest of main body and press bilateral
button under the tray.
The tray has three optional position, can be moved forward or backward.
8
@
@ @
@
Tray removed instruction
2、To fix the removed tray, hooking
the tray on the back of legs as the
arrow direction in figure 6.
( pic 6)
1、Press bilateral button under the tray, and pull it out.
9

@
@ @
@
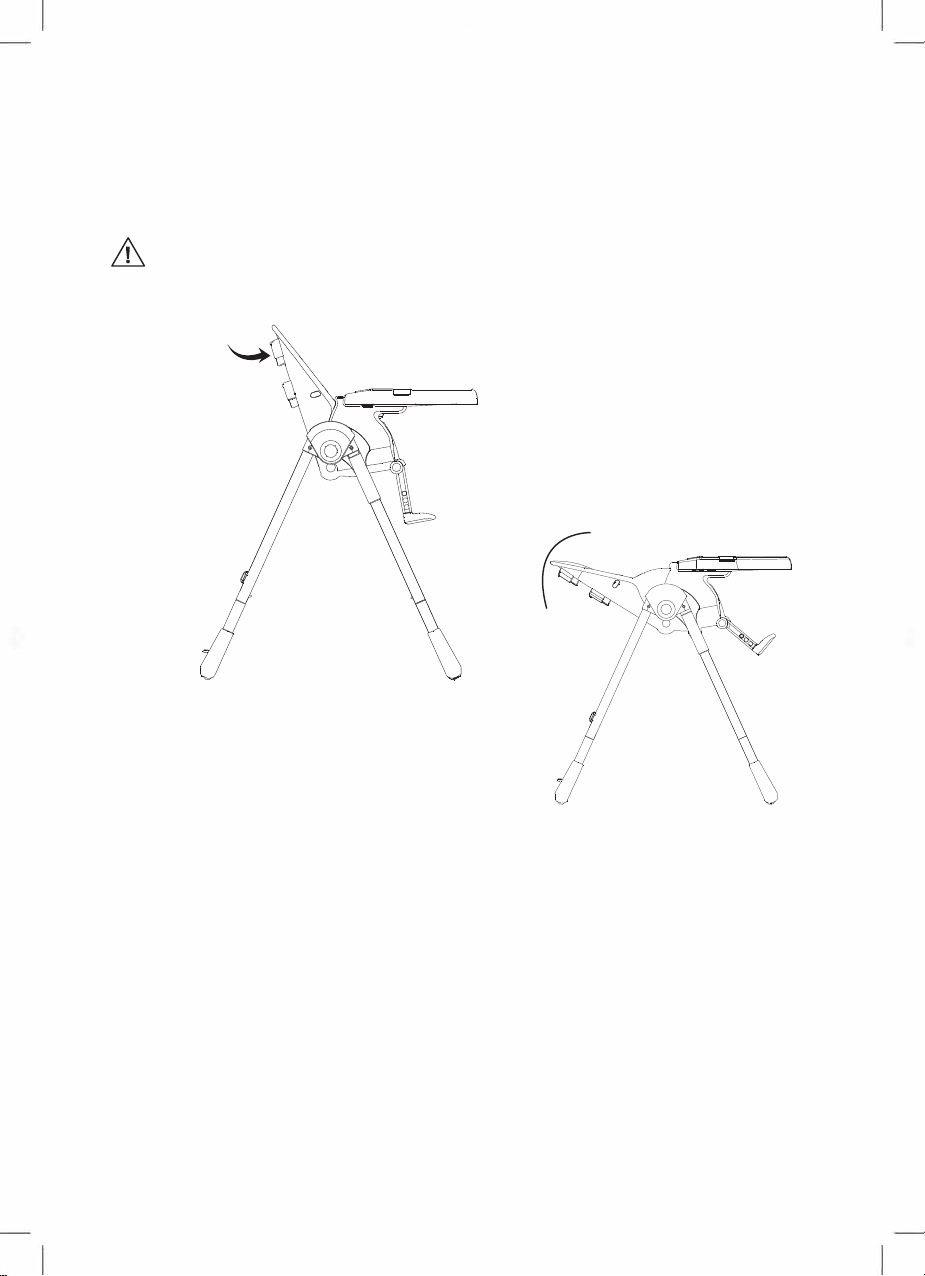
( pic 7)
Lift the up and down button at the backrest to adjust needful position
of chair body.
WARNING: Prohibit to adjust up and down when child in
the chair to avoid any injury!
WARNING: This product uses the brake friction plate to control
up and down of chair body. Pls keep the foot pipe support clean when
in the use and preservation process. Avoid oil stain, water and drink
liquid stains. In order to avoid friction piece anti-slip failure.
If meet above phenomenon, pls clean up in time. Completely dry before
you can continue to use.
use hand pull
Chair height adjustment
10
@
@ @
@
Pull the adjusting button at the back of backrest and force on front and
back direction. The backrest can be adjusted to your needed angle.
It can be adjusted with six positions
( pic 8)
when the backrest is in perpendicular state, It is only
suitable for child who are 6 months old.
use hand pull
WARNING:
Backrest angle adjustment
11

@
@ @
@
( pic 9)
Safety harness
WARNING:Must always use the restraint system!
Harness using
Release all the buckles on the restraint, place the baby in the seat and
bring the safety strap up between baby’s legs and the harness over the
baby’s shoulders. Fasten each buckle and pull the straps to tighten
until comfortable.
press
open locked
Insert the plug into the buckles, until hear “click”; press the
buckles of harness to open it.
12

@
@ @
@
( pic 10)
Folding and unfolding instruction
1、Press the lift button at the backrest and
adjust the seat to the lowest position①
2、Press the bilateral folded buttons and close
the front and rear legs together②( figure 10)
3、Hook the tray on the back legs before folding
the high chair③
①
②③
press to the middle
press fold button
13

@
@ @
@
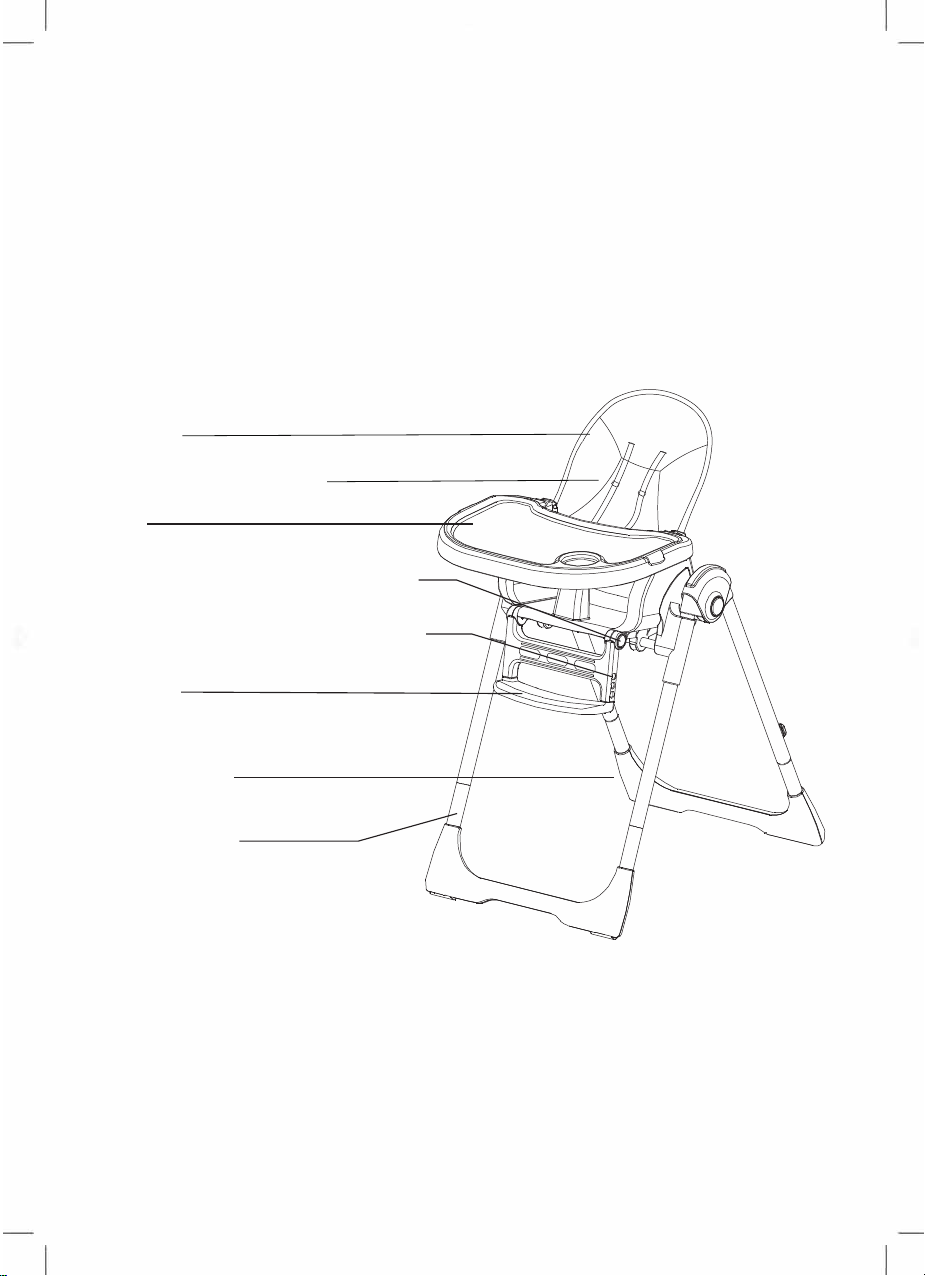
( pic 11)
Adjustable button for backrest angel
Adjustable button for backrest height
Cushion fixed hook
Fold button
Tray hook
Shrapnel
Hind foot tube
Brake
Parts
14
@
@ @
@
( pic 12)
●Use soft cloth to clean the smudge.
●Please clean the chair, dry the water when not use it, and store in a
dry, cool environment.
●Please maintain in time when shrapnel , screw loose or lost.
Parts
Cushion
Five point safety harness
Tray
Adjustable button for footrest angle
Adjustable button for footrest height
Footrest
Hind foot tube
Front foot tube
15
Designed in Sweden.
Made in China for Scandinavian Kids Group AB, Valhallavägen 177F, SE-115 31, Stockholm, Sweden
www.carenababy.com [email protected]
Table of contents
Other Carena High Chair manuals


