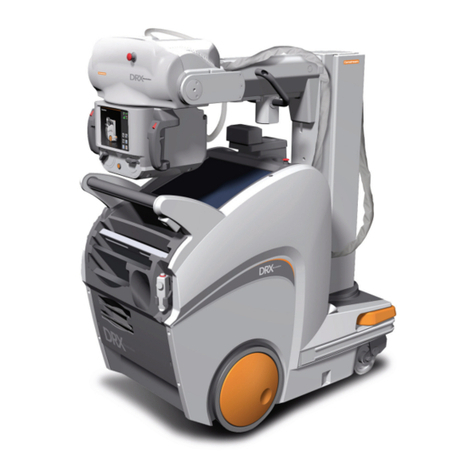
Carestream DRX-Revolution Installation instructions

Hardware Guide for the
DRX-Revolution Nano Mobile X-ray System
Publication No. AF0118
2018-03-27
Supersedes:
2018-01-22

All rights reserved. No part of this manual may be reproduced or copied in any form by
any means—graphic, electronic, or mechanical, including photocopying, typing, or
information retrieval systems—without written permission.

AF0118 | 2018-03-27 i
Contents
1Overview ............................................................................................................ 1-1
Preface ......................................................................................................................................... 1-1
About this Guide ......................................................................................................................... 1-1
Related Documentation .............................................................................................................. 1-2
Intended Audience ...................................................................................................................... 1-2
Indications for Use....................................................................................................................... 1-2
Usability ....................................................................................................................................... 1-2
Training........................................................................................................................................ 1-2
Safe Operation Precautions......................................................................................................... 1-3
Safety and Warning Symbols ...................................................................................................... 1-3
2Product Description ........................................................................................... 2-1
Features and Functions................................................................................................................ 2-1
3Operation and Use ............................................................................................. 3-1
Operation and Use ...................................................................................................................... 3-1
Cart............................................................................................................................................... 3-2
Cart Maneuverability and Positioning ........................................................................................ 3-4
Environmental Requirements and Infection Control ................................................................. 3-6
Acoustic Noise Emission............................................................................................................... 3-6
Product Classification per IEC 60601-1........................................................................................ 3-6
Arm and Tube Head Assembly .................................................................................................... 3-7
Exposure Factors and the X-ray Tube ....................................................................................... 3-13
Time Cycle between Exposures ................................................................................................. 3-15
Component Descriptions ........................................................................................................... 3-16
4Operating the System........................................................................................ 4-1
Drive the Cart............................................................................................................................... 4-1
Dock and Deploy the Arm........................................................................................................... 4-2
Operating the Machine ............................................................................................................... 4-2
Power Button Operation............................................................................................................. 4-3
5Maintenance and Safety Information .............................................................. 5-1
Cleaning Instructions................................................................................................................... 5-1
With Each Occurrence of Patient Contact .................................................................................. 5-1
Cleaning the Monitor .................................................................................................................. 5-2
Cleaning the Hardware ............................................................................................................... 5-3
Cleaning the Detector ................................................................................................................. 5-4
Cleaning the Plastic Components................................................................................................ 5-4
Cleaning the Arm ........................................................................................................................ 5-5

System Maintenance.................................................................................................................... 5-5


ii AF0118 | 2018-03-27
Reporting Unusual Conditions .................................................................................................... 5-6
Replacing the Batteries................................................................................................................ 5-6
General Safety Information......................................................................................................... 5-7
6Technical Specifications .................................................................................... 6-1
7Troubleshooting................................................................................................. 7-1
Service and Support..................................................................................................................... 7-2
Device Identification.................................................................................................................... 7-2
Procedure for Firmware Upgrade ............................................................................................... 7-2
8Appendix A......................................................................................................... 8-1
Optional Parts.............................................................................................................................. 8-1
Publication History .......................................................................................................

AF0118 | 2018-03-27 1-1
1Overview
Preface
The information contained herein is based on the experience and knowledge relating
to the subject matter gained by Carestream Health prior to publication.
No patent license is granted by this information.
Carestream Health reserves the right to change this information without notice, and
makes no warranty, express or implied, with respect to this information. Carestream
Health shall not be liable for any loss or damage, including consequential or special
damages, resulting from any use of this information, even if loss or damage is caused
by Carestream Health’s negligence or other fault.
About this Guide
Note
The original documentation is written in English.
This manual uses three types of messages to emphasize information or potential risks
to personnel or equipment: Note, Important and Caution.
Note
Notes provide additional information, such as expanded explanations, hints, or reminders.
Important
Important highlights critical policy information that affects how you use this manual and this
product.
Caution
Cautions point out procedures that you must follow precisely to avoid injury to yourself, others,
damage to the System or any of its components, loss of data, or corruption of files in software
applications. Disregarding the caution statement may lead to abnormal use.

Overview
1-2 AF0118 | 2018-03-27
Related Documentation
•DRX-Revolution Nano Mobile X-ray System Safety and Regulatory Information
•DirectView Online Help Topics and DirectView Software User Release Notes
•DRX-Revolution Nano Mobile X-ray System User Release Notes
•DRX-Revolution Nano Mobile X-ray System Installation Guide
•DRX-Revolution Nano Mobile X-ray System Preventative Maintenance Guide
•DRX-Revolution Nano Mobile X-ray System Site Specification Guide
•User Guide for Remote Exposure Switches for Mobile X-ray Systems
Intended Audience
The audience for this guide includes technologists, radiologists, service engineers, and
quality assurance technicians.
Indications for Use
The device is designed to perform radiographic X-ray examinations on pediatric and
adult patients, in all treatment areas. Mammography examinations are excluded.
Usability
The design and development of this diagnostic X-ray system incorporated a usability
engineering process in accordance with IEC 60601-1-6: Medical Electrical
Equipment, Part 1-6: General requirements for safety. Collateral Standard:
Usability
Training
This equipment is intended for use by appropriately educated and skilled radiological
health care professionals who have received specific training on the operation and use
of this equipment.
Caution
Only qualified, trained X-ray personnel should operate the System. Operation of the equipment
by persons who have not been trained or who are unfamiliar with the functions and controls of
the System may cause serious injury to the patient, serious injury to the operator, or equipment
damage.
Caution
Federal law restricts this device to sale by or on the order of a physician.

Overview
AF0118 | 2018-03-27 1-3
Safe Operation Precautions
Personnel operating and maintaining this equipment should be familiar with all aspects
of operation and maintenance. To ensure safety, read the DRX-Revolution Nano
Mobile X-ray System Safety and Regulatory Information carefully before using the
system and observe all Cautions, Importants, and Notes located throughout the
manual.
Important
For continued safe use of this equipment, follow the instructions contained in this operating
manual.
Important
Study this manual carefully before using the equipment and keep it at hand for quick reference.
The equipment must be used only by qualified personnel and only after training in the
specific operations. It is the operator's responsibility to ensure the patient's safety by
visual observation, audio communication, proper patient positioning, and use of the
protective devices.
Thoroughly check that there is no interference or possibility of collision between the
patient and other equipment.
Maintain the equipment periodically to ensure continued safe use of the equipment.
See “Chapter 5 Maintenance and Safety Information” for periodic maintenance
recommendations.
The equipment must be installed and repaired only by authorized service personnel.
For more information, see: DRX-Revolution Nano Mobile X-ray System Safety and
Regulatory Information, DRX-Revolution Nano Mobile X-ray System Installation Guide,
DRX-Revolution Nano Mobile X-ray System Preventative Maintenance Guide, and
DRX-Revolution Nano Mobile X-ray System Site Specification Guide.
Safety and Warning Symbols
For symbols that may be used for marking on this equipment, see DRX-Revolution
Nano Mobile X-ray System Safety and Regulatory Information.


AF0118 | 2018-03-27 2-1
2Product Description
The DRX-Revolution Nano Mobile X-ray System is designed specifically for Digital
Radiography (DR) with Carestream-supported detectors (see Section 2.1.10). The DRX-
Revolution Nano Mobile X-ray System incorporates the tools required for acquiring
medical diagnostic images outside of a standard X-ray room.
The DRX-Revolution Nano Mobile X-ray System is an all-inclusive mobile X-ray system,
providing:
•A high power generator (maximum 5.3 kW @ 100 msec and 7.7 kW @ 13 msec).
•A user-friendly X-ray tube head, enabling positioning in five axes of motion.
•A low-profile, ultra-lightweight arm assembly for ease of patient positioning and
better visibility while driving.
•Safe storage for detectors and supplies.
•Carestream's proven user interface and image editing and processing tools.
Features and Functions
The DRX-Revolution Nano Mobile X-ray System is an ultra-lightweight mobile X-ray
system providing multiple features and functions.
Image Capture
The system provides:
•Easy maneuverability
•Five axes of motion of the tube head
The tube has a nominal IEC focal spot size range of 0.9 to 1.9 equivalent at 0.1
increments.
The generator provides:
•Maximum 5.3 kW @ 100 msec and 7.7 kW @ 13 msec of power
•40 – 110 kV
•0.2 – 20.0 mAs
•30 – 80 mA
Normal operation of the system is considered to be 60 exposures in a 24-hour period.
Power
The system operates on a bank of internal rechargeable batteries mounted in an easily-
removable tray, as the system is designed to be used independently of a mains power

Product Description
2-2 AF0118 | 2018-03-27
source. The battery drawer is field-removable with the use of a tool. Only trained
service personnel are to remove the battery tray
The battery life allows for taking up to 40 exposures without charging. This assumes
fully-charged batteries and various techniques.
Note
In order to ensure that the cart is always ready to take images, it should be placed on charge
whenever it is not in use.
Note
Shutting down the system using the power button conserves system batteries.
Mobility
The low profile arm allows for:
•Visibility while driving.
•Access to confined spaces.
•The transport system is designed for movement and maneuverability. It can be
driven on surfaces typical to hospital environments at safe walking speed (around
1.5 m/s) with the tube head docked.
Caution
The system should not be operated at speeds above safe walking speed (around 1.5 m/s).
The brakes are electronically released by the brake release buttons integrated in the
handles. In case of no power, a lever situated near the kickplate allows for manually
disengaging the brakes.
An “inch” feature allows the position of the system to be adjusted while the tube head
is deployed.
Main Battery Charging
The main battery bank is designed to charge from a normal domestic power supply,
i.e., 100 – 240 V, 50/60 Hz, 11– 5.5 A mains power supply.
Charge time to fully charge a battery tray is typically less than two hours and at most
four hours. Battery charging status is indicated via an LED array on the monitor
assembly frame.

Product Description
AF0118 | 2018-03-27 2-3
Charge level LEDs
Battery symbol LED
Mains supply plugged LED
Charging LED Behavior
Charge
Level
LED Bar Behavior
Battery
Symbol LED
Mains Supply
Plugged LED
<20%
Bar 1 FLASH
OFF
ON
[20% –35%)
Bar 1 ON, Bar 2
FLASH OFF ON
[35% –50%)
Bar 1,2 ON, Bar 3
FLASH
OFF ON
[50% –65%)
Bar 1-3 ON, Bar 4
FLASH
OFF ON
[65% –80%)
Bar 1-4 ON, Bar 5
FLASH
OFF ON
[80% –95%)
Bar 1,5 ON, Bar 6
FLASH
OFF ON
[95% –100%)
Bar 1,6 ON, Bar 7
FLASH
OFF ON
100%
Bar 1-7 ON
OFF
ON

Product Description
2-4 AF0118 | 2018-03-27
Discharging LED Behavior
Charge
Level
LED Bar
Behavior
Battery
Symbol LED
[95% –100%) Bar 1-7 ON ON
[80% –95%) Bar 1-6 ON ON
[65% –80%) Bar 1-5 ON ON
[50% –65%) Bar 1-4 ON ON
[35% –50%) Bar 1-3 ON ON
[20% –35%) Bar 1-2 ON ON
[12% –20%) Bar 1 ON FLASH
[10% –12%)
Bar 1 ON
FLASH
<10%
All Bars OFF
FLASH
The cart will provide a warning when the batteries have nearly depleted. Up to three
exposures can be made after this alert.
Prep/expose light
Green indicates
Ready
Yellow indicates X-
Ray Exposure
Cart battery status
and mains
connected
indicator
Detector battery
charge indicator
Detector battery charging station
Communications
Communications are provided through an Ethernet connection or wireless local area
network (WLAN) to:
•Hospital network
•RIS
•PACS

Product Description
AF0118 | 2018-03-27 2-5
Operator Interface
The system includes:
•Primary touchscreen monitor on the cart – 39.6 cm (15.6 in.).
•Barcode scanner – this is an option.
•Proximity card reader that scans a radio frequency identification (RFID) badge to
identify the operator for logon security – this is an option.
Diagnostics
The system includes diagnostics screens that display the status of sensors, boards,
brakes, releases, and other values for:
•Tube head
•Cart braking
•Battery status
•Power control board
•Interface
•Temperature
A full Service History File is also logged continuously, for diagnostic and fault finding
use.
PC Controller
The PC controller includes:
•Microsoft WINDOWS
•Intel® Core™ i5 or higher
•Random access memory (RAM): 8 GB.
•1 x Gigabit ETHERNET port
•WLAN dual band 802.11 b/g/n

Product Description
2-6 AF0118 | 2018-03-27
Detector Battery Charging and Storage Bins
The system includes:
•Storage and charging for one removable battery of either size (25 x 30 or 35 x 43) –
only one battery can charge at a time.
•Storage bin for detectors, grids, and miscellaneous supplies (disinfectant wipes,
gloves, patient requisition forms, etc.).
Detector battery charger
Important
Only charge Carestream detector batteries in the battery charging area. In order to charge a
detector battery, insert it into the charging slot so that the battery connectors are facing
downwards.
Battery symbol LED
Spare battery status indicator

Product Description
AF0118 | 2018-03-27 2-7
Important
The system must be plugged into mains power to enable detector battery charging. Shutting
down the system using the power button disables detector battery charging.
Detector Battery Charging LED Behavior
Charge Level
Charging
LED Bar Behavior
<20%
No
No bars on
<20%
Yes
First bar flashing
[20% –40%)
No First bar on
[20% –40%)
Yes
First bar on, second bar flashing
[40%
–
60%)
No
First two bars on
[40% –60%)
Yes
First two bars on, third bar flashing
[60% –80%)
No First three bars on
[60% –80%)
Yes
First three bars on, fourth bar flashing
[80%
–
100%
1
)
No
First four bars on
[80% –100%1)
Yes
First four bars on, fifth bar flashing
100%
N/A
All bars on
1. Wipes storage
2. Wired exposure switch
3. Detector and grid storage
4. IR remote
5. Detector contamination control
bags

Product Description
2-8 AF0118 | 2018-03-27
Supported Detectors
•CARESTREAM DRX-1 System Detector
•CARESTREAM DRX-1C System Detector
•DRX Plus 3543 Detector, DRX Plus 3543C Detector, DRX Plus 4343 Detector and DRX
Plus 4343C Detector
•DRX Core 3543 Detector, DRX Core 3543C Detector, DRX Core 4343 Detector, and
DRX Core 4343C Detector
•DRX 2530C
Flat Panel Detectors (FPDs) can only be paired to one cart at a time as long as
Carestream-nominated procedures are followed. Refer to the instructions for use for
the particular detector being utilized.
Accessories
•Dose Area Product Meter
•Wired Exposure Switch
•Wireless infrared remote exposure switch –allowing the user to expose the patient
from up to 10 meters away
•DRX Tether Cable
•RFID Proximity Badge Reader
•Pediatric Filter
Caution
Please refer to instructions for use of the wireless infrared remote exposure switch.
Caution
Please refer to the individual specific manuals of the optional accessories for their instructions
for use.

AF0118 | 2018-03-27 3-1
3Operation and Use
Caution
Do not use the system in proximity to uncontrolled volumes of liquid, spills, etc.
Operation and Use
While most of the components will be intuitive to an experienced radiographer, please
review the parts diagrams in this document so you become familiar with the naming
conventions used by Carestream Health, which are standardized throughout all of the
documentation.

Operation and Use
3-2 AF0118 | 2018-03-27
Cart
1. Detector battery charging and
storage module
7. Arm docking receiver
2. Detector storage bins
8. Docking release button and inch
feature nudge buttons
3. Collimator handles (“tusks”) and
collimator light button
9. Cart handles and brake release
buttons
4. Barcode reader
5. Storage for lead markers, papers,
tape, paperclips and gloves
6. Touchscreen assembly
With the arm docked, the DRX-Revolution Nano Mobile X-ray System has dimensions of 1276 mm
height x 583 mm width x 1371 mm length. Undocked, the arm has a reach of 2123 mm, with an
axial reach of 758 mm.

Operation and Use
AF0118 | 2018-03-27 3-3

Operation and Use
3-4 AF0118 | 2018-03-27
Cart Maneuverability and Positioning
The extreme lightweight design of the DRX-Revolution Nano Mobile X-ray System
makes it simple and easy to position and treat patients at the bedside. “Deadman”
brakes, released via a streamlined switch on each cart handle, mean the cart is always
braked unless the user pushes on the cart handles.
Streamlined
“deadman”
brake buttons on
cart handles
There is also a brake release switch (“inch” feature) on the head handle, which allows
the user to disengage braking to make fine positioning changes of the cart while the
head is deployed.
Press buttons
on the head
handle to use
the “inch”
feature.
Other manuals for DRX-Revolution
2
Table of contents
Other Carestream Medical Equipment manuals

Carestream
Carestream Kodak DirectView CR 500 SYSTEM Instructions for use

Carestream
Carestream Focus HD 35 User manual

Carestream
Carestream DRX-Revolution Installation instructions

Carestream
Carestream CS 9300C User manual

Carestream
Carestream Vue PACS MR Diffusion User manual

Carestream
Carestream Carestream Vita Flex CR System User manual

Carestream
Carestream DRX-Revolution Owner's manual

Carestream
Carestream Quantum Odyssey HF Series User manual

Carestream
Carestream Kodak DirectView CR 500 SYSTEM Setup guide

Carestream
Carestream CS 7600 User manual