CAS CI-1580A User manual

2

3
Contents
1. Introduction........................................................
4
2. Specifications.....................................................
6
3. Front Panel Descriptions..................................
8
4. Rear Panel Descriptions................................ 10
5. Installation ........................................................
11
6. Calibration ....................................................... 12
7. Set-up............................................................... 19
8. Interface ........................................................... 36

4
1.Introduction
■Introduction
This product as an indicator for weighing instruction and control is designed for the most
suitable use of any meters (packer, weigh separator, platform scale, various tensile and
compression test equipment)that can be applied in the widest way throughout industries.
This product ensures communications with external devices such as computers as it basically
installs an RS-232C port.
In addition, this product can be conveniently used for the weighing control as it basically has
three relay outputs necessary for control (applicableonly if there is relay out).
Please utilize all the functions in this product sufficiently as you can use the device properly
with good knowledge of this manual before you use this product.
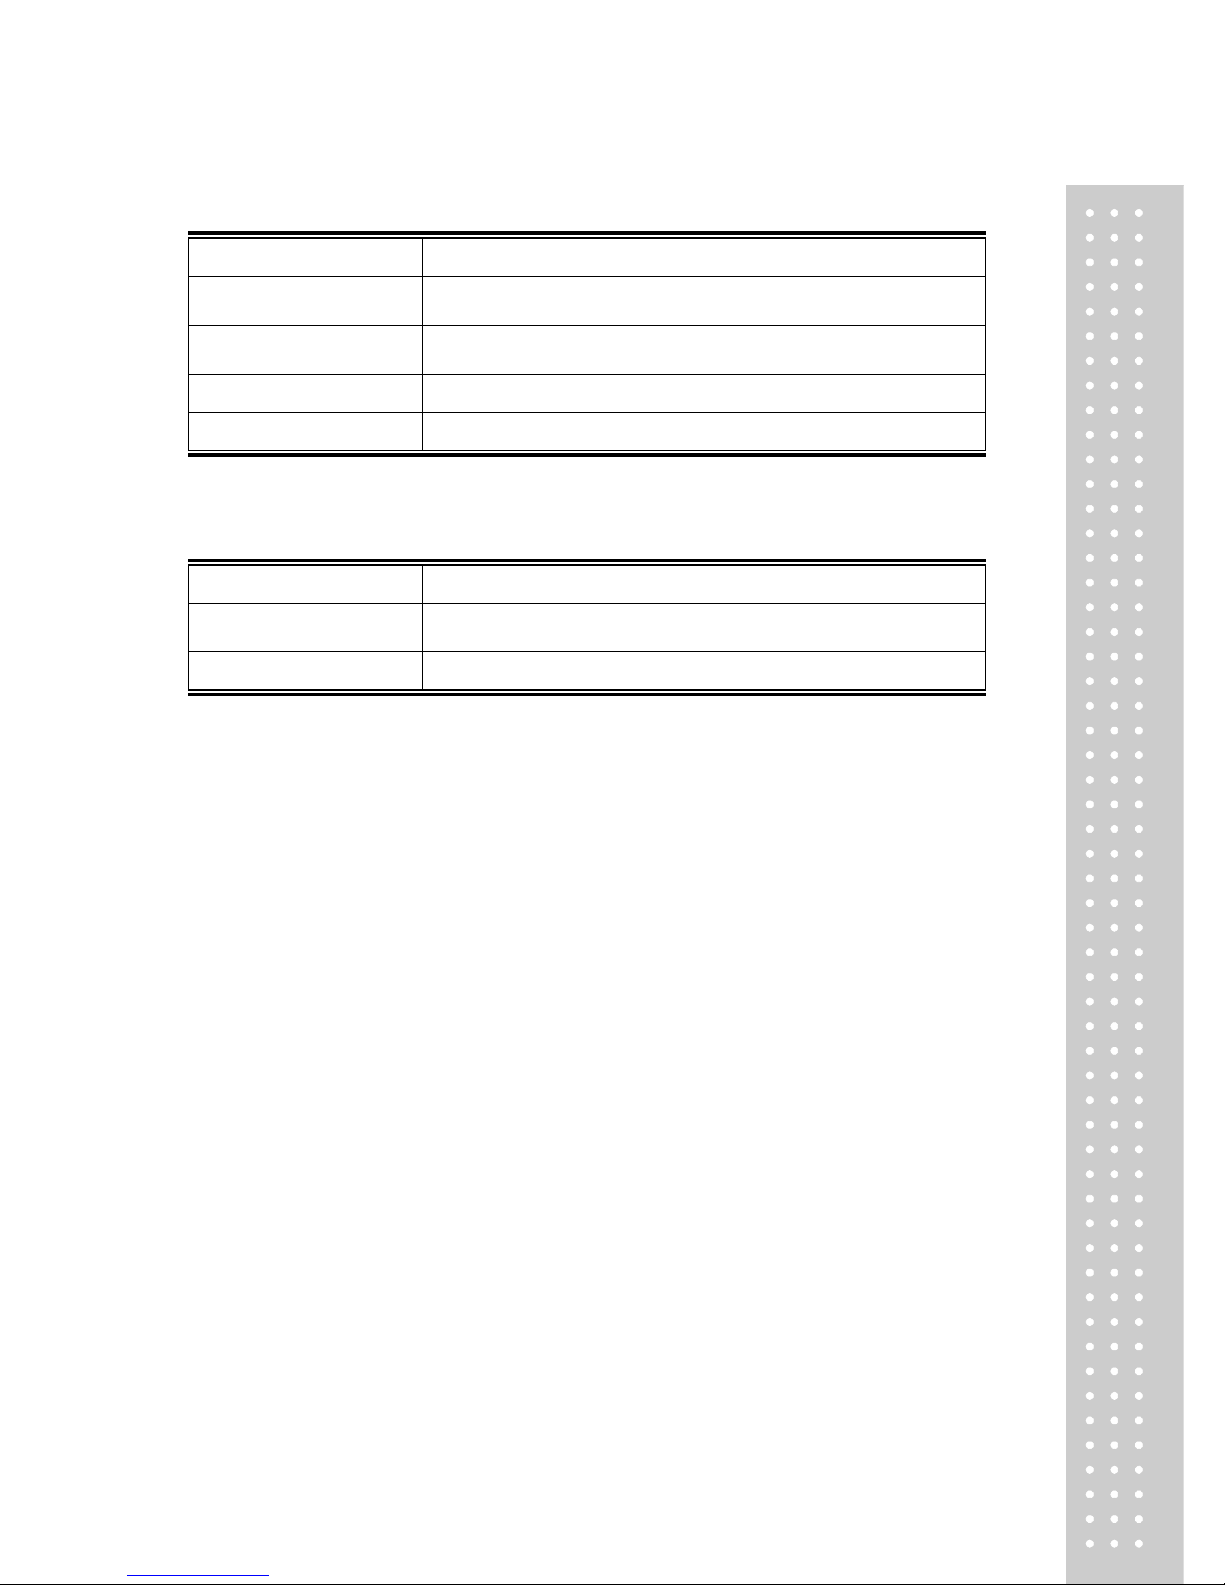
■Features
·Measurestoscreenoffexternalnoises
·Built-inself-diagnosisandself-recoveryfunctionsfromfailure
·Externalresolution:1/20,000
·Electrostaticdatamemory
·2built-inexternalrelayinputterminals(zero,tare/tareremoval)
·Datamemory
·24VofinputpowersupplycanbeusedwiththeuseofDCpowersupplyregardlessof
polarity(500mA<TransType>ormoreisrecommended)
·FAC(FullAutoCalibration)methodforcalibration
·EquivalentinputmethodforCalibration
·BasicinstallationofRS-232C
·Option:RS-422/485
·Option:I/V-OUT

5
■Cautions
·Donotdroporapplysevereshockstotheproduct.
·Do not install the product with high voltage or severe electric noises.
·Do not install the produce with direct sunlight or severe vibrations.
·Connect the product with external peripheral devices after turning off the power switch.
·Keep theproduct fromwateror rain.
■Accessories
·Productmanual
·Option(separateoptionforanyaddition):1EAofadaptor(DC24V/500mA)

6
2. Specifications
■Analog Part & A/D Conversion
Inputsensitivity
0.3㎶/D
Adjustmentrangeof Zero
-0.6mV∼+1.5mV
LoadCellExcitationVoltage
DC10V(±5V)
TemperatureCoefficient
Zero : ±10 PPM / ℃
SPAN:±10PPM/℃
Input Noise
±0.6㎶P.P
InputImpedance
Over10㏁
A/Dconversionmethod
∆∑
A/DInternalResolution
520,000Count(19bit)
A/DConversionRate
200times/Sec
Non-linearity
0.01%FS
■Digital Part
Display
7-Segment,5digitREDFND
Charactersize:12.7(H)×7.3(W)mm
Division
×1,×2,×5,×10,×20,×50
BelowZeroIndication
“-“ MinusSign
DecimalPoint
0,0.0,0.00,0.000
Status Lamp
Stable,Zero,High,Low,OK, Hold, Comm
FunctionKey
ZERO,TARE,SET,ENTER

7
■General Specification
Power
DC24V/About500mA(TransType)
OperatingTemperature
Range
-5℃~+40℃
OperatingHumidity
Range
Under85% Rh (Non-condensing)
ProductSize
(W)100 X(H)52X(D)125 (mm)
ProductWeight
About 450g
■Options
Option-1
RS-422/485
Option–2
I-OUT(4~20mA)
Option-3
V-OUT(0~10V)

8
3. Front Panel Descriptions
■DISPLAY (CI-1580A)
■Display
·Weight:Thecurrentweightattheindicatorisdisplayed.
- Wheneverthesetkeyispressed,thevalueforhighlimit,lowlimitordifferencesis
displayed.
■Display of Status
·STABLE:Itisdisplayedwhentheweightisstable.
·ZERO: It is displayed when the weight is “0”.
·LOW:Itisdisplayedwhentheweightisthelowlimitorless.
·HIGH:Itisdisplayedwhentheweightisthehighlimitormore.
·OK:Itisdisplayedwhentheweighingiscompleted.
·HOLD:Itisdisplayedwhiletheweightisbeingheld.
·COMM(RTxD):Itisdisplayedwhiletheproductiscommunicatingwithotherdevices.

9
■Key Operations
Key
Descriptions
It is used to set the weight display to „0‟ within a range of maximum weight
(CAPA)defined bytheuser.
(However, it is operated within the input range by the user to „Equipment Set‟ „08‟
(Set forZeroRange).
It is used to set the tare to „0‟ after a container is put on the weighing tray.
(However, it is operated within the input range by the user to „Equipment Set‟ „09‟
(Set forTareRange)
It is usedfor the input of lowlimit (SP1) and highlimit (SP2).
It isused toenterthesetvalue.
■Special Key Operations
Key
Descriptions
①It is used to increasethenumeric value.
②It isused tofinishthesettingundertheSET,CALstatus.
①It is usedtomove the positionof anumeric value.
②It is usedtomove to TEST MODE underthe SET, CAL status.
①It is used to increase the unique number (F XX) in „Equipment Set‟.
②When it is pressed under the „SET, CAL‟ status, it moves to „Equipment Set‟
(SETUP).
①It is used to enter (save) the set value by the user in the „Weight Calibration‟
function.
②When it is pressed under the „SET, CAL‟ status, it moves to „Weight Calibration‟
(Calibration).

10
4. Rear Panel Descriptions
①POWER
-DC IN:AsthisproductusesDCpowersupply,DC 24V
(500mATransType) canbe usedfor thisproduct.
②OPTION
-RS-232C(3PConnecterI/FCommunications)(BasicSpecifications)
-RS-422/485(4PConnecterI/FCommunications)(SeparateOption)
-4~20mA(0~10V)(2PConnecterI/F)(SeparateOption)
③EXTERNAL
INPUT
1+EXC - Loadcellconnectionterminal
2 -EXC - Loadcellconnectionterminal
3+SIG - Loadcellconnectionterminal
4 –SIG - Loadcellconnectionterminal
5SHIELD - Loadcellconnectionterminal
6F.G - Grounding
7PWR - DC IN 24V (input regardless of polarity)
8PWR -
9,10,11 ICOM,IN1~2(INPUT)–RefertoF11setforF-FunctionMode
12,13,14,15 0COM, OUT1~3(OUTPUT) –Refer to F21 set for F-Function
Mode
②
③

11
5. Installation
■External Dimension & Panel Cutting Size
(External Dimension Xmm)

12
6. Calibration
■Whatiscalibration?
Calibration refers to the adjustment to make the displayed value consistent with the
actual weight on the display of weight.
■Definitionofeachmode
☞Ifthepowerisappliedwhileanykeyisbeingpressedonthefront,youmayenterthetestscreen
mode.
- Press KeytoreturntoTEST1afterthesequentialincreaseinTEST1~9.
- Press Keytoenter theTestMode as desired.Pleaserefertothefollowing
descriptions foreachmode.
- Press Key againaftersettingorconfirmingeachmodetoreturntoTEST1.
(TEST3isexceptional).
- Press KeytoenterST.CAL.
TEST 1
Zeroweightvalue(A/D)canbeconfirmed.
TEST 2
Operationsofeachkeycanbeconfirmed.
TEST 3
ModeforthespancalibrationandequipmentsetundertheSET,CALmode.
☞Press Keytoreturntoeachmodeselectionfromthisstatus.
TEST 4
ItisDisplayTestMode.Press KeytoreturntoTEST.
TEST 5
ItisRelayOutputTestMode.Press KeytoreturntoTEST.
TEST 6
ItisInputTestMode.Press KeytoreturntoTEST.
TEST 7
Itistoselecttheanalogamplificationratio.Press KeytoreturntoTEST.

13
■Span Calibration
Thespancalibrationreferstotheadjustmentoflinearitytosettheactualweightconsistentwith
the displayed value from “0” to the maximumweightasthestandardsindisplayingtheweighton
theindicator.
▶Enter Span Calibration
- Apply the power supply while is beingpressed on thefront
-TESTappears onthedisplay.
-Press todisplayST.CAL
- Press todisplayCAL._1 and then enters the generalweight mode.
▶Span Calibration Method
Use Key fortheprogressivemove
Use Key forthereversemove

14
▶General Weight Calibration Mode (CAL 1 Mode)
I. Step 1
It is a stepto set the value of adivision
(minimum division ofa scale tobedisplayed).
Inthis,itisanabbreviationofdivisionmeaning“the
value for a division of a scale (minimum division of a
scaleto be displayed)”.
Whenever Key is pressed,
the value increases in the order of
“01 -> 02 -> 05 -> 10 -> 20 -> 50”.
Whenever Key is pressed, the value decreases in
the reverse order of the above values.
Press Key to escape from ST.CAL.
Press Key to remember “the value for a division” and then
movetothenext step.
Ⅱ.Step2 It is a stepto set the maximum displayweight
Inthis,“CAPA” is an abbreviation, which means
themaximumdisplayweightthatcanbeweighted
intheindicator.
Enterthemaximumdisplayweightastheuser
desireinsteadofarandomvaluethatiscurrently
displayed.
Whenever Key is pressed, the number increases in
0 -> 9
Whenever Key is pressed, it moves to the left
Press Key to move the setting of a division value
Press Keytostore thecurrentlydesignated valuetothe
maximum display weight. Move on thenext step.
※Donot set (a valuefor adivision ofa scale/maximum display weight)tomorethan(1/30,000). Morethan
(1/30,000)cannotbeset.Theproductcanbeappliedtoatmaximum1/30,000.

15
Ⅲ. Step3 Itisasteptocheck zerostatusin the current
indicator.
ArandomvalueA/Disshownonthedisplay,
whichmeanszeroforcalibration.
Key is not used.
Key is not used.
Press Key tomovetothesettingforthemaximum
displayweight
Press Keytostorethecurrentlydisplayed
zeroing value. Move onto the next step.
Ⅳ. Step4 Itisasteptoloadthe preparedstandard
counterweights onthe indicator.
Inthis,preparestandardcounterweightsfor
10%ormoreofthemaximumweight(CAPA)
Whenever Key is pressed, the number increases in
0 -> 9
Whenever Key is pressed, it moves to the left
Press Key to check zero statusand move
Press Keytostorethe currentlydisplayedvaluefor
counterweights Moveontothenextstep.
Proceed to Step5as it moves ontoStep 3of gagebar.
Ⅴ.Step5 Aspanconstantisshownonthe display
It enters theweight mode as C.EnD. is
blinking andthen reset.

16
▶Equivalent Input Mode (CAL 2 Mode)
▶Enter Span Calibration
- Apply the power supply while is being pressedonthefront
-TESTappears on the display.
-Press to displayST.CAL
-Press to display CAL._2and then entersthe general weightmode.
I. Step 1
Itisastep toset the valueofadivision
(minimum divisionofascale tobedisplayed).
Inthis,itisanabbreviationofdivisionmeaning“the
valueforadivisionofascale(minimumdivisionofascaleto
be displayed)”.
Whenever Key is pressed,
the value increases in the order of
“01 -> 02 -> 05 -> 10 -> 20 -> 50”.
Whenever Key is pressed, the value decreases in
the reverse order of the above values.
Press Key to escape from ST.CAL.
Press Key to remember “the value for a division” and then
movetothenext step.
Ⅱ.Step2 It is a stepto set the maximum displayweight
writtenintheloadcell
Inthis,“CAPA” is anabbreviation,whichmeans
themaximumdisplayweightthatcanbeweighted
intheindicator.
Justenterthemaximumweightdisplayedontheloadcell
insteadofthecurrentlydisplayedrandomvalue.
Whenever Key is pressed, the number increases in
0 -> 9
Whenever Key is pressed, it moves to the left
Press Key to move the setting of a division value
Press Keytostore thecurrentlydesignated valuetothe
maximum display weight.
Moveonthe nextstep.

17
Ⅲ. Step3 Itisasteptocheck zerostatusin the current
indicator.
ArandomvalueA/Disshownonthedisplay,
whichmeanszeroforcalibration.
Key is not used.
Key is not used.
Press Key tomovetothesettingforthemaximum
displayweight
Press Keytostorethecurrentlydisplayed
zeroingvalue.
Moveontothe nextstep.
Ⅳ. Step4 It is a stepto entermV/V displayed on the loadcell.
Ex)Enter 2.0000if 2mV/Vis displayedontheloadcell.
Whenever Key is pressed, the number increases in
0 -> 9
Whenever Key is pressed, it moves to the left
Press Key to check zero statusand move
Press Keytostorethe currentlydisplayedvaluefor
counterweights Moveontothenextstep.
Proceed to Step5as it moves ontoStep 3 of gagebar.
Ⅴ.Step5 Aspanconstantisshownonthe display
It enters theweight mode as C.EnD. is
blinking andthen reset.
※While settingthe weightofcounterweights;
Thespancanbemoreaccuratelyadjusted;if(avalueforadivision)is1/5,000orless,preparecounterweights
in10%ormoreofthemaximumdisplaydivisionandsetthevalue;ifitis1/5,000ormore, prepare
counterweightsin20%ormoreofthemaximumdisplaydivisionandset thevalue.
- If the weight of counterweights for not less than the maximum display division is set, Error 04 Message is
displayed.
- If the weight of counterweights for10% or less of themaximum display division is set, Error 05 Message is
displayed.

18
■Error Display Status and Measures in Detail
Seq
Division
Causes
MeasuresinDetail
1
Err 01
Themaximumdisplaydivision/
the value ofadivisionis 20,000
ormore.
Enter againthemaximum display
division/thevalueofadivisionto
become20,000orless
3
Err 04
Thesettingof standard
counterweightsissettomore
thanthemaximum display
division.
Enteragainthesettingofstandard
counterweightstobecomelessthan
themaximumdisplaydivision.
4
Err 05
Thesettingof standard
counterweightsissetto10%or
lessofthemaximumdisplay
division.
Enteragainthesettingofstandard
counterweightstobecome10% or
moreofthedivision.
5
Err 06
The output value for the load cell
istoolarge.
Checkiftheweightisloadedas
muchas it isset withthestandard
counterweights.Ifthestandard
counterweightsgreaterthanthe
settingvalueareloaded,setthem to
thesettingvalue.
6
Err 07
The output value for the load cell
istoosmall.
Checkiftheweightisloadedas
muchas itisset withthestandard
counterweights.Ifthestandard
counterweightssmallerthanthe
settingvalueareloaded,setthem to
thesettingvalue.
7
Err A
Calibration judgment cannot be
done due to the continuous
shakingontheweight.
Checkout thesurrounding
environmentandseparateany
vibratingsourceforthestable
weighingwhilepreventingthe
indicatorfromanygreat vibration.
- Check out any defect in the load
cell
- Check out any electric leak in the
connectingwiretotheloadcell.
- Check out the insulation resistance
intheloadcell.
8
Err _8
Avaluethat shouldnotbe
enteredtoF-Functionis entered.
Checkoutthevalueandenterthe
propervalueagain.
9
Err _9
WhenaconstantY.YXXXX YYis
avaluebetween3.9~9.9>the
resolvingpoweris1/20000and
smallcounterweightsareplaced.
Lowertheresolvingpower.
(Ex:valueforadivision 1->5)

19
7. Set-up
■Set-up
- Overview
It means the setting works to ensure the indicator to be operated under the optimal conditions by
settingF-FUNCTIONproperlytotheoperatingdevicesandsurroundingenvironment.
- How to enter Set-up
“TEST” is displayed when the power is turned on while any key is being pressed.
At this time, press Key to display ST.CAL on the main display.
At this state, press Key to display 01-XX.
EX) While the power is turned off;
①Press "3" Key and turn on the power for “TEST___”
②Press "3" Key for “SET. CAL”
③Press “CLEAR” Key for “F01-XX”
“Χ” is a random number.
- How to change the unique number for F-FUNCTION
To change the unique number for F-Function, the unique number increases whenever
Key is pressed once.
It increases to 01-53 and then returns to 01.
Whenever Key is pressed, the number increases in 0 -> 9.
Whenever key is pressed, it moves to the left.
Press Keytocallthefunction afterthenumberisassigned tothe
function.
Sequentialincreasein01-53 ifnonumberisassigned
Press Key to store thecurrently displayed valueandpress onceagain tomove to ST. CAL.

20
- How to enter after assigning F-Function
After assigning F-Function using & Key, you may enter the
appropriate F-Function using Key.
1.Whenever Key is pressed, the number increases in 0~9 on the position.
2.Press Key to change the number in 0~9.
3. Press Key again to increase the number in 0~9.
4. Press Keyto enter theassigned F-Function.
EX) Assign F53andthen enter it:
1. On thescreen for F01-01
2.When the number 1 is blinking, press Key to make the number 3.
3. Press Key to move the number on the position and then the number 0 is blinking.
4. Press Key again to make the number 5.
5. Press Keyagain to entertheFunction immediately.
※Caution:Beawarethat thevaluefor the Function isstored when Keyispressed.
- How to change the setting of F-Function
After entering a value to change the setting of F-Function, press Key to
store it in the internal memory and finish the change.
If Key is not pressed only after the desired value is entered, the value is not
stored.
※Thevalue canbe storedinthe internal memorywhen you press
Key afterthevalueis changed to your desired set value.

21
■F-FUNCTION LIST
Function
default
Details
Division
01
2
DECIMALPOINTSETTING
0,0.0,0.00,0.000
02
0
ZEROMEMORYMODE
Normal(0),Back-UP(1)
03
5
MOTIONBANDRANGE
0~9
04
5
ZEROTRACKINGRANGE
0~9
05
0
AUTOZERORANGESETTING
00~99
06
15
DIGITALFILTERRANGE
01~49
07
0
ZERO,TAREKEYOPERATION
MODE
0)duringthestableperiod,
1)duringtheinstableperiod
08
3
ZEROKEYOPERATIONRANGE
SETTINGMODE
2%(0),5%(1),10%(2),20%(3),100%(4)
09
3
TAREKEYOPERATIONRANGE
SETTINGMODE
10%(0),20%(1),50%(2),100%(3)
10
0
HOLDFUNCTIONSETTING
Peak-hold(0),Samplehold(1)
5secondaveragehold(2)
11
3
EXTERNALRELAYINPUTSETTING
0,1,2,3,4
12
0
FRONTKEYOPERATIONSETTING
0,1,2,3,4
13
0
CODENUMBERASSIGNING
0,1,2
14
0
HOLDOFFTIME
0.0~9.9seconds
21
1
WEIGHINGMODESELECTION
1,2,3,4
22
10
COMMUNICATIONOUTPUT” DELAY
TIME(T1)SETTING
0.0~9.9seconds
24
10
DELAYTIMEOFRELAYOUTPUT
FORTHEWEIGHINGJUDGMENT
0.0~9.9seconds
25
10
ONTIMEOFRELAYOUTPUTFOR
THEWEIGHINGJUDGMENT
0.0~9.9seconds
30
0
SERIALPARITYBITSETTINGMODE
NO(0),ODD(1),EVEN(2)
31
7
BAUDRATEFORSERIAL
COMMUNICATIONS
0~9,115200bps~2400bps
32
0
SERIALCOMMUNICATIONMODE
0:StreamMode,1:StableMode,
33
1
SERIALCOMMUNICATIONMODE
0:UnilateralTransmissionMode
1:COMMANDMode,
2:LCDMode
4:ExternalDisplayMode
34
1
EQUIPMENTIDNUMBERSETTING
1~99
35
0
TRANSMISSIONDATEFORMAT
0:BASICFORMAT,
1:CASFORMAT
36
0
BCCSELECTIONMODE
0:BCCnotused
1:BCCused
37
3
DATATRANSFERENCE
COUNTSETTING
0~6
40
0
WeightUnit
selection(Communication)
0:kg,1:g,2:ton
This manual suits for next models
1
Table of contents
Other CAS Scale manuals