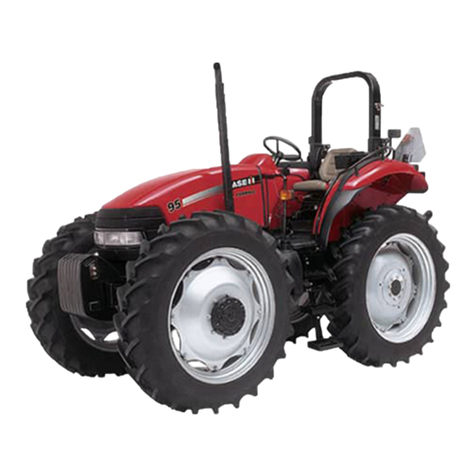
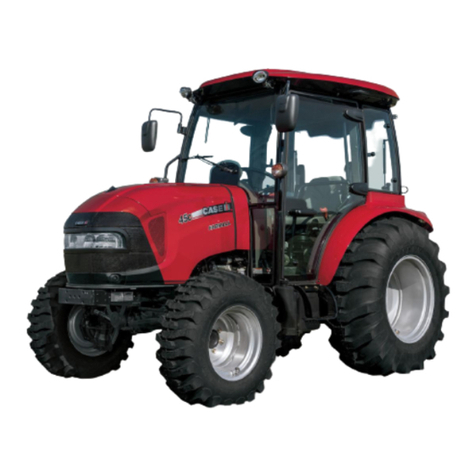
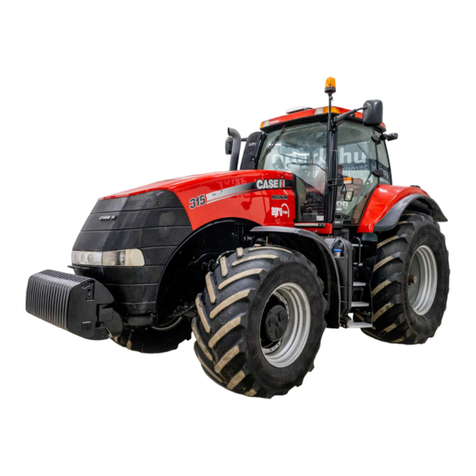
Case JX60 User manual

JX60 -- JX70 -- JX80 -- JX90 -- JX95
MODEL TRACTORS
SERVICE MANUAL
SECTIONS
GENERAL 00.....................................................
ENGINE 10.......................................................
CLUTCH 18.......................................................
GEARBOX 21.....................................................
TRANSMISSION OF MOTION 23. . . . . . . . . . . . . . . . . . . . . . . . . . . . . . . . . . . .
FRONT MECHANICAL TRANSMISSION 25. . . . . . . . . . . . . . . . . . . . . . . . . .
REAR MECHANICAL TRANSMISSION 27. . . . . . . . . . . . . . . . . . . . . . . . . . . .
POWERTAKE-OFF 31.............................................
BRAKES 33.......................................................
HYDRAULICSYSTEMS 35.........................................
STEERING 41.....................................................
AXLEANDWHEELS 44............................................
AUXILIARY EQUIPMENT 50. . . . . . . . . . . . . . . . . . . . . . . . . . . . . . . . . . . . . . . .
ELECTRICAL SYSTEM 55. . . . . . . . . . . . . . . . . . . . . . . . . . . . . . . . . . . . . . . . . .
CAB 90...........................................................
S E R V I C E

Repair Manual -- JX Series Tractors
CONTENTS
GENERAL SECTION 00
General Instructions and Health and Safety Chapter 1
Section Description Page
00 000 Generalinstructions 1............................................................
Notesforspareparts 2...........................................................
Notesforequipment 2............................................................
Safetyrules 3...................................................................
Consumables 6..................................................................
ENGINE SECTION 10
Engine System Chapter 1
Section Description Page
10 000 Generalspecification 2...........................................................
Injectionpumpcalibrationdata 5...................................................
Generalspecifications 16........................................................
Tighteningtorques 24...........................................................
Tools 25.......................................................................
Cross--sectionalviews 28........................................................
Lubricationandcoolingsystemdiagrams 32........................................
Faultdiagnosis 35..............................................................
10 001 10 Engine Removal--Installation 39...................................................
10 001 54 Engine Bench overhaul 53.......................................................
Checks,measurementsandrepairs 78............................................
10 406 10 Radiator Removal--Installation 102................................................
10 102 70 Crankshaft front oil seal removal installation 106....................................
10 402 10 Coolant pump removal installation 112.............................................
10 402 30 Coolingsystemthermostat 115...................................................
10 206 14 Bosch injection pump removal installation 118......................................
Bosch injection pump timing 121..................................................
Bosch injection pump air bleeding 123.............................................
10 218 30 Injectors removal installation 124..................................................
10 106 12 Valveclearanceadjustment 126..................................................

10 402 28 Coolantpumpoverhaul 129......................................................
10 001 30 Compressiontest 130...........................................................
CLUTCH SECTION 18
Clutches Chapter 1
Section Description Page
18 000 Generalspecifications 1..........................................................
Tighteningtorques 2.............................................................
Tools 3.........................................................................
Cross--sectionalviews 4..........................................................
ClutchTroubleshooting 5.........................................................
18 110 10 Removal--Installation 6..........................................................
Overhaul 14....................................................................
Minimum permissible dimensions after refacing 18. . . . . . . . . . . . . . . . . . . . . . . . . . . . . . . . . .
Adjustments 19................................................................
18 100 40 Adjustment of the main and PTO clutch control linkage 21. . . . . . . . . . . . . . . . . . . . . . . . . . . .
GEARBOX SECTION 21
Mechanical Transmission (12x4) Chapter 1
Section Description Page
21 000 Maindata 1.....................................................................
Tighteningtorques 2.............................................................
Tools 3.........................................................................
Sectionviews 3&5...............................................................
Descriptionandoperation 8.......................................................
Faultdiagnosis 8................................................................
21 110 Removal--Refitting seesect27..................................................
Reverser (12x12) Chapter 2
Section Description Page
21 000 Maindata 1.....................................................................
Tighteningtorques 2.............................................................
Tools 3.........................................................................
Sectionviews 3..................................................................
Descriptionandoperation 5.......................................................
Faultdiagnosis 5................................................................
21 110 Removal--Refitting 6.............................................................
Reverser and Creeper (20x12) Chapter 3
Section Description Page
21 000 Maindata 1.....................................................................
Tighteningtorques 2.............................................................
Tools 3.........................................................................
Sectionviews 4..................................................................

Descriptionandoperation 6.......................................................
Faultdiagnosis 6................................................................
21 110 Removal--Refitting 7.............................................................
DRIVE LINES SECTION 23
Drive Lines Chapter 1
Section Description Page
23 000 Mainspecification 1..............................................................
TorquesettingsandTools 2.......................................................
Cross--Sectionalviews 3..........................................................
23 101 26 Transmission shafts and guard (Disassembly -- Assembly) 4. . . . . . . . . . . . . . . . . . . . . . . . . . .
23 101 40 Drive gear housing (Removal -- Installation) 5. . . . . . . . . . . . . . . . . . . . . . . . . . . . . . . . . . . . . . . .
23 101 42 Drive gear housing removed (Disassembly -- Assembly) 7. . . . . . . . . . . . . . . . . . . . . . . . . . . . .
FRONT AXLE MECHANICAL TRANSMISSION SECTION 25
Front Axle Mechanical Transmission Chapter 1
Section Description Page
25 000 Maindata 1.....................................................................
Tighteningtorques 4.............................................................
Tools 6.........................................................................
Cross--sectionalviews 7..........................................................
Descriptionandoperation 9.......................................................
25 100 30 Complete front axle. Removal -- Installation 10. . . . . . . . . . . . . . . . . . . . . . . . . . . . . . . . . . . . .
25 100 38 Frontaxle.Removal--Installation 14..............................................
25 108 46--47 Steering knuckle bearing pins. Replacement 24. . . . . . . . . . . . . . . . . . . . . . . . . . . . . . . . . . . .
Stubaxleadjustment 25.........................................................
Wheelhubbearingadjustment 27.................................................
Beveldriveadjustment 29........................................................
25 102 24 Frontaxledifferential.Overhaul 36................................................
25 100 27 Front axle differential with LIM--SLIP. Overhaul 37. . . . . . . . . . . . . . . . . . . . . . . . . . . . . . . . . . .
Front axle differential with NO SPIN. Overhaul 39. . . . . . . . . . . . . . . . . . . . . . . . . . . . . . . . . . .
44 511 80 Leadingdrivewheelstoe--incheck 42.............................................
REAR AXLE AND TRANSMISSION SECTION 27
Rear Axle And Transmission Chapter 1
Section Description Page
27 000 Maindata 1.....................................................................
Tighteningtorques 3.............................................................
Specialtools 5..................................................................
Cross--sectionalviews 7..........................................................
Description and operation and troubleshooting 9. . . . . . . . . . . . . . . . . . . . . . . . . . . . . . . . . . . . .

21.118.10 -- 12 Transmission--gearbox casing Removal--Installation 10. . . . . . . . . . . . . . . . . . . . . . . . . . . . . .
21.118.85 Transmission--gearbox casing Disassembly--Overhaul 27. . . . . . . . . . . . . . . . . . . . . . . . . . . .
Gearbox driven shaft end float adjustment 35. . . . . . . . . . . . . . . . . . . . . . . . . . . . . . . . . . . . . . .
Differential lock engagement sleeve adjustment 36. . . . . . . . . . . . . . . . . . . . . . . . . . . . . . . . . .
Determining the bevel pinion positioning adjustment ring 37. . . . . . . . . . . . . . . . . . . . . . . . . .
Adjusting the taper roller bearings for the bevel pinion shaft 39. . . . . . . . . . . . . . . . . . . . . . . .
Adjusting the bearings and checking the backlash 40. . . . . . . . . . . . . . . . . . . . . . . . . . . . . . .
Differential pinion and side gear backlash adjustment 44. . . . . . . . . . . . . . . . . . . . . . . . . . . . .
POWER TAKE--OFF SECTION 31
Mechanical Power Take -- Off Chapter 1
Section Description Page
31 000 Mainspecification 1..............................................................
Tools 3.........................................................................
Torquesettings 4................................................................
Sectionaldrawings 5.............................................................
Descriptionandoperation 9.......................................................
Troubleshooting 10..............................................................
Removal --Refitting 11...........................................................
31 101 Benchoverhaul 14..............................................................
BRAKING SYSTEM SECTION 33
Braking System Chapter 1
Section Description Page
33 000 Maindata 1.....................................................................
Tighteningtorques 2.............................................................
Cross--sectionalviews 2..........................................................
Description&Operation 9.........................................................
Tools--Troubleshooting 10.......................................................
33.206 Front brake assembly mod. JX60 and JX70 removal and refitting --
overhaulingonthebench 11......................................................
33.202.60 Servicebrakeremovalandrefitting 14.............................................
33.202.50 Removal--Refittingoffrontbrakepumps 19.........................................
33.202.40 Bleeding air from the front braking system 23. . . . . . . . . . . . . . . . . . . . . . . . . . . . . . . . . . . . . . .
33.120.08 Adjustingservicebrakepedalstravel 24...........................................
33.110.08 Parkingbraketraveladjustment 24................................................
HYDRAULIC SYSTEM SECTION 35
Rear Mechanical Hydraulic Lift Chapter 1
Section Description Page
35 000 Mainspecification 1.............................................................
Tighteningtorques 3............................................................

Tools 6........................................................................
Cross--sectionalviews 7.........................................................
Description&Operation 9........................................................
Hydrauliccircuit 9...............................................................
Descriptionandoperationofliftphases 10.........................................
Faultdiagnosis 13..............................................................
35 110.30 Hydrauliclift--disassemblyreassembly 15.........................................
35.110.40--42--46 Hydrauliclift--benchoverhaul 21.................................................
Adjustingthelift 26..............................................................
35.110.08 Linkageadjustment 32..........................................................
35.110.30 Pressure relief valve -- disassembly reassembly 34. . . . . . . . . . . . . . . . . . . . . . . . . . . . . . . . . .
35.110.32 Pressurereliefvalve--setting 34..................................................
35.110.14 Lift control valve -- disassembly assembly and overhaul on bench 36. . . . . . . . . . . . . . . . . .
35.0101.10 Liftpump 41....................................................................
Open Centre System Auxiliary Control Valves Chapter 2
Section Description Page
35 000 Maindata--Tools 1..............................................................
Auxiliarycontrolvalves--sectionalviews 2..........................................
Descriptionandoperation 3.......................................................
Faultdiagnosis seechapter1.....................................................
35 204 46 Auxiliary control valves -- Assembly--Disassembly 7. . . . . . . . . . . . . . . . . . . . . . . . . . . . . . . . . .
Spoolbindingtest 15............................................................
Spoolleakagetest 16...........................................................
Adjustment of the automatic detent release pressure 17. . . . . . . . . . . . . . . . . . . . . . . . . . . . . .
Trailer Brake Auxiliary Control Valve Chapter 3
Section Description Page
35 000 Sectionviews 1..................................................................
Descriptionandoperation 1.......................................................
Hydraulicdiagram 2..............................................................
Descriptionandoperationofvalvephases 3.........................................
Trailer brake auxiliary control valve linkage adjustment 6. . . . . . . . . . . . . . . . . . . . . . . . . . . . . .
STEERING SECTION 41
Steering Chapter 1
Section Description Page
41 000 Principaldata 1..................................................................
Tighteningtorques 3.............................................................
Sectionviews 4..................................................................
Hydraulicdiagram 6..............................................................
Operation 7.....................................................................
Faultdiagnosis 9................................................................
Tools 10.......................................................................
41 204 30 Hydrostatic steering control valve -- Removal--Installation 11. . . . . . . . . . . . . . . . . . . . . . . . . . .
41 204 34 Hydrostatic steering control valve -- Disassembly--Assembly 14. . . . . . . . . . . . . . . . . . . . . . .
41 204 38 Hydrostatic steering control valve -- Bench testing 28. . . . . . . . . . . . . . . . . . . . . . . . . . . . . . . .
Hydrostatic steering oil pump -- Disassembly--Assembly 30. . . . . . . . . . . . . . . . . . . . . . . . . . .
41 216 20 Steering cylinder (two--wheel drive axle) -- Removal--Refitting 32. . . . . . . . . . . . . . . . . . . . . .
Steering cylinder (four wheel drive axle) -- Removal--Refitting 33. . . . . . . . . . . . . . . . . . . . . .
FRONT AXLE AND WHEELS SECTION 44

Front Axle And Wheels Chapter 1
Section Description Page
44 000 Principaldata 1..................................................................
Sectionalviews 3................................................................
Torquesettings 4................................................................
Equipment--Faultdiagnosis 5.....................................................
44 101 30 Removal--Refitting--Overhaul 6....................................................
44 101 22 Wheelhubdisassembly--assembly 9...............................................
44 101 46 Stubaxleoverhaul 16...........................................................
44 101 80 Checkingwheelalignment 20....................................................
AUXILIARY UNITS SECTION 50
Auxiliary Units Chapter 1
Section Description Page
50 000 Safetyinstructions 2.............................................................
Generalcharacteristics 3.........................................................
Equipment 4....................................................................
Operatingprinciples 5............................................................
Faultdiagnosis 7................................................................
Cabcontrols 11..................................................................
Use 14........................................................................
Main components of the cab air conditioning system 15. . . . . . . . . . . . . . . . . . . . . . . . . . . . .
Refrigerant recovery--recycling and evacuation--charging stations 20. . . . . . . . . . . . . . . . . .
50 200 04 Dryingrechargingandcheckingcooling 22.........................................
50 200 03 Functional testing of air conditioning system 27. . . . . . . . . . . . . . . . . . . . . . . . . . . . . . . . . . . . .
Summary of the cab air--conditioning system charging operations 28. . . . . . . . . . . . . . . . . .
Checking for refrigerant leaks using an electronic leak detector 30. . . . . . . . . . . . . . . . . . . . .
Summary of fault diagnosis and maintenance 31. . . . . . . . . . . . . . . . . . . . . . . . . . . . . . . . . . .
Air conditioning and heating pipes -- Replacement 33. . . . . . . . . . . . . . . . . . . . . . . . . . . . . . .
50 200 04--74 Receiver--drier--Replacement 36................................................
50 200 04--72 Condenser--Replacement 38...................................................
50 200 04--26 Compressor--Removal--Refitting 39..............................................
50 200 10 Compressor drive belt tension adjustment 41. . . . . . . . . . . . . . . . . . . . . . . . . . . . . . . . . . . . . .
ELECTRICAL SYSTEM SECTION 55
Instruments Chapter 1
Section Description Page..............................................................
AnalogueinstrumentsIntroduction 1..............................................................
Transmitter and switch 4 .

Components Chapter 2
Section Description Page..............................................................
55 500 Introduction 1...................................................................
Componentdescription 1.........................................................
Starting System Chapter 3
Section Description Page..............................................................
55 000 Technicalinformation 1...........................................................
Tighteningtorques 1.............................................................
Descriptionandoperation 2.......................................................
Startingcircuit 3.................................................................
Systemtests 5..................................................................
55 201 Removal and re--installation of starter motor 8. . . . . . . . . . . . . . . . . . . . . . . . . . . . . . . . . . . . . . .
Servicing 9......................................................................
Benchtests 10.................................................................
Charging System Chapter 4
Section Description Page..............................................................
55 000 Technicalinformation 1...........................................................
Tighteningtorques 1.............................................................
Descriptionandoperation 2.......................................................
Systemtestingandtrouble--shooting 4..............................................
55 301 Removal,re--installationandservicing 10..........................................
Battery Chapter 5
Section Description Page..............................................................
55 000 Technicalinformation 1...........................................................
Descriptionandoperation 1.......................................................
55.301.040 Removalandre--installation 2.....................................................
Batterycheckingandmaintenance 3...............................................
Chargingthebattery 4............................................................
Batteryproblems--Frequentcauses 7..............................................
Electrical Circuits Chapter 6
Section Description Page..............................................................
55 100 Contents 1. . . . . . . .
Fuses(allversions) 2............................................................
Symbolsusedinelectricalcircuits 4................................................
Electricalwirecolourcoding 5.....................................................
Groundlocations 5...............................................................
Electricaldiagrams ...............................................................
-- Generaldiagrams(W/Cab) 9.............................................

-- Generaldiagrams(W/OutCab) 15........................................
-- Analogue instrument circuit and connector overview 19. . . . . . . . . . . . . . . . . . . . . .
-- Start--up circuit and connector overview 21. . . . . . . . . . . . . . . . . . . . . . . . . . . . . . . . .
-- Direction indicator & hazard warning light circuit and connector overview 25. . . .
-- Windscreen and rear window wiper/washer circuit and connector overview 31. . .
-- Brake light circuit and connector overview 35. . . . . . . . . . . . . . . . . . . . . . . . . . . . . . .
-- Heating and air--conditioning system circuit and connector overview 41. . . . . . . .
-- Work lamp (without cab circuit and connector overview) 45. . . . . . . . . . . . . . . . . . .
-- Work lamp (without cab circuit and connector overview) 49. . . . . . . . . . . . . . . . . . .
-- Side lights,main and dipped headlights, parking light circuit and connector
overview 53
BODYWORK AND DRIVER POSITION SECTION 90
Bodywork And Driver Position Chapter 1
Section Description Page..............................................................
90 160 42 -- 43
90 120 10 Control levers, seat and electrical controls -- disassembly and reassembly 2. . . . . . . . . . . . .
90 156 52 Rear window, handle and lock -- disassembly and reassembly 10. . . . . . . . . . . . . . . . . . . . .
90 154 30 Left--hand door exterior handle and lock -- disassembly and reassembly 11. . . . . . . . . . . . . .
90 154 10 Left--hand door -- disassembly and reassembly 12. . . . . . . . . . . . . . . . . . . . . . . . . . . . . . . . . . .
90 160 60
55 518 52 Windscreen wiper motor -- disassembly and reassembly 13. . . . . . . . . . . . . . . . . . . . . . . . . .
90154 24
90 156 10 -- 14
90 156 28 Cabwindows--replacement 15...................................................

SECTION 00 – GENERAL – CHAPTER 1 3
???
SAFETY RULES
PAY ATTENTION TO THIS SYMBOL
This warning symbol points out important messages involving personal safety.
Carefully read the safety rules contained herein and follow advised precautions to
avoid potential hazards and safeguard your safety and personal integrity.
In this manual you will find this symbol together with the following key–words:
WARNING – it gives warning about improper repair operations and deriving potential
consequences affecting the service technician’s personal safety.
DANGER – it gives specific warning about potential dangers for personal safety of the
operator or other persons directly or indirectly involved.
TO PREVENT ACCIDENTS
Most accidents and personal injuries taking place in
workshops are due from non–observance of some
simple and essential prudential rule and safety pre-
cautions. For this reason, IN MOST CASES THEY
CAN BE AVOIDED. It suffices to foresee possible
causes and act consequently with necessary caution
and care.
The possibility that an accident might occur with any
type of machines should not be disregarded, no mat-
ter how well the machine in question was designed
and built.
A wise and careful service technician is the best pre-
cautions against accidents.
Careful observance of this only basic precaution
would be enough to avoid many severe accidents.
DANGER: Never carry out any cleaning, lubrication
or maintenance operations when the engine is run-
ning.
SAFETY RULES
GENERALITIES
Carefully follow specified repair and mainte-
nance procedures.
Do not wear rings, wristwatches, jewels, unbut-
toned or flapping clothing such as ties, torn
clothes, scarves, open jackets or shirts with open
zips which could get hold into moving parts. We
advise to use approved safety clothing such as
anti–slipping footwear, gloves, safety goggles,
helmets, etc.
Never carry out any repair on the machine if
someone is sitting on the operator’s seat, except
if they are certified operators to assist in the
operation to be carried out.
Never operate the machine or use attachments
from a place other than sitting at the operator’s
seat.
Never carry out any operation on the machine
when the engine is running, except when specifi-
cally indicated.
Stop the engine and ensure that all pressure is
relieved from hydraulic circuits before removing
caps, covers, valves, etc.
All repair and maintenance operations should be
carried out with the greatest care and attention.
Service stairs and platforms used in a workshop
or in the field should be built in compliance with
the safety rules in force.
Disconnect the batteries and label all controls to
warn that the tractor is being serviced. Block the
machine and all equipment which should be
raised.
Never check or fill fuel tanks and accumulator
batteries, nor use starting liquid if you are smok-
ing or near open flames as such fluids are flam-
mable.
Brakes are inoperative when they are manually
released for maintenance purposes. In such
cases, the machine should be kept constantly
under control using blocks or similar devices.
The fuel filling gun should remain always in con-
tact with the filler neck. Maintain this contact until
the fuel stops flowing into the tank to avoid pos-
sible sparks due to static electricity buildup.

4 SECTION 00 – GENERAL – CHAPTER 1
????
Use exclusively specified towing points for tow-
ing the tractor. Connect parts carefully. Ensure
that foreseen pins and/or locks are steadily fixed
before applying traction. Do not stop near towing
bars, cables or chains working under load.
To transfer a failed tractor, use a trailer or a low
loading platform trolley if available.
To load and unload the machine from the trans-
portation mean, select a flat area providing a firm
support to the trailer or truck wheels. Firmly tie
the machine to the truck or trailer platform and
block wheels as required by the forwarder.
For electrical heaters, battery–chargers and sim-
ilar equipment use exclusive auxiliary power
supplies with a efficient ground to avoid electrical
shock hazard.
Always use lifting equipment and similar of
appropriate capacity to lift or move heavy compo-
nents.
Pay special attention to bystanders.
Never pour gasoline or diesel oil into open, wide
and low containers.
Never use gasoline, diesel oil or other flammable
liquids as cleaning agents. Use non–flammable
non–toxic proprietary solvents.
Wear protection goggles with side guards when
cleaning parts using compressed air.
Do not exceed a pressure of 2.1 bar, in accor-
dance with local regulations.
Do not run the engine in a closed building without
proper ventilation.
Do not smoke, use open flames, cause sparks in
the nearby area when filling fuel or handling
highly flammable liquids.
Do not use flames as light sources when working
on a machine or checking for leaks.
Move with caution when working under a tractor,
and also on or near a tractor. Wear proper safety
accessories: helmets, goggles and special foot-
wear.
During checks which should be carried out with
the engine running, ask an assistant to seat at the
operator’s seat and keep the service technician
under visual control at any moment.
In case of operations outside the workshop, drive
the tractor to a flat area and block it. If working on
an incline cannot be avoided, first block the trac-
tor carefully. Move it to a flat area as soon as pos-
sible with a certain extent of safety.
Ruined or plied cables and chains are unreliable.
Do not use them for lifting or trailing. Always han-
dle them wearing gloves of proper thickness.
Chains should always be safely fastened.
Ensure that fastening device is strong enough to
hold the load foreseen. No persons should stop
near the fastening point, trailing chains or cables.
The working area should be always kept CLEAN
and DRY. Immediately clean any spillage of
water or oil.
Do not pile up grease or oil soaked rags, as they
constitute a great fire hazard. Always place them
into a metal container.
Before starting the tractor or its attachments,
check, adjust and block the operator’s seat. Also
ensure that there are no persons within the trac-
tor or attachment operating range.
Do not keep into your pockets any object which
might fall unobserved into the tractor’s inner
compartments.
Whenever there is the possibility of being
reached by ejected metal parts or similar, use
protection eye mask or goggles with side guards,
helmets, special footwear and heavy gloves.
Wear suitable protection such as tinted eye
protection, helmets, special clothing, gloves and
footwear whenever it is necessary to carry out
welding procedures. All persons standing in the
vicinity of the welding process should wear tinted
eye protection. NEVER LOOK AT THE WELD-
ING ARC IF YOUR EYES ARE NOT SUITABLY
PROTECTED.
Metal cables with the use get frayed. Always
wear adequate protections (heavy gloves, eye
protection, etc.)
Handle all parts with the greatest caution. Keep
your hands and fingers far from gaps, moving
gears and similar. Always use approved protec-
tive equipment, such as eye protection, heavy
gloves and protective footwear.

SECTION 00 – GENERAL – CHAPTER 1 5
???
START UP
Never run the engine in confined spaces which
are not equipped with adequate ventilation for
exhaust gas extraction.
Never bring your head, body, arms, legs, feet,
hands, fingers near fans or rotating belts.
ENGINE
Always loosen the radiator cap very slowly before
removing it to allow pressure in the system to dis-
sipate. Coolant should be topped up only when
the engine is stopped or idle if hot.
Do not fill up fuel tank when the engine is running,
mainly if it is hot, to avoid ignition of fires in case
of fuel spilling.
Never check or adjust the fan belt tension when
the engine is running.
Never adjust the fuel injection pump when the
tractor is moving.
Never lubricate the tractor when the engine is run-
ning.
ELECTRICAL SYSTEMS
If it is necessary to use auxiliary batteries, cables
must be connected at both sides as follows: (+) to
(+) and (–) to (–). Avoid short–circuiting the termi-
nals. GAS RELEASED FROM BATTERIES IS
HIGHLY FLAMMABLE. During charging, leave
the battery compartment uncovered to improve
ventilation. Avoid checking the battery charge by
means of “jumpers” made by placing metallic
objects across the terminals. Avoid sparks or
flames near the battery area. Do no smoke to pre-
vent explosion hazards.
Prior to any service, check for fuel or current
leaks. Remove these leaks before going on with
the work.
Do not charge batteries in confined spaces. En-
sure that ventilation is appropriate to prevent acci-
dental explosion hazard due to build–up of gases
releaved during charging.
Always disconnect the batteries before perform-
ing any type of service on the electrical system.
HYDRAULIC SYSTEMS
Some fluid slowly coming out from a very small
port can be almost invisible and be strong enough
to penetrate the skin. For this reason, NEVER
USE YOUR HANDS TO CHECK FOR LEAKS,
but use a piece of cardboard or a piece of wood
to this purpose. If any fluid is injected into the skin,
seek medical aid immediately. Lack of immediate
medical attention, serious infections or dermato-
sis may result.
Always take system pressure readings using the
appropriate gauges.
WHEELS AND TYRES
Check that the tyres are correctly inflated at the
pressure specified by the manufacturer. Periodi-
cally check possible damages to the rims and
tyres.
Keep off and stay at the tyre side when correcting
the inflation pressure.
Check the pressure only when the tractor is
unloaded and tyres are cold to avoid wrong read-
ings due to over–pressure. Do not reuse parts of
recovered wheels as improper welding, brazing
or heating may weaken the wheel and make it fail.
Never cut, nor weld a rim with the inflated tyre
assembled.
To remove the wheels, block both front and rear
tractor wheels. Raise the tractor and install safe
and stable supports under the tractor in accor-
dance with regulations in force.
Deflate the tyre before removing any object
caught into the tyre tread.
Never inflate tyres using flammable gases as they
may originate explosions and cause injuries to
bystanders.
REMOVAL AND INSTALLATION
Lift and handle all heavy components using lifting
equipment of adequate capacity. Ensure that
parts are supported by appropriate slings and
hooks. Use lifting eyes provided to this purpose.
Take care of the persons near the loads to be
lifted.
Handle all parts with great care. Do not place your
hands or fingers between two parts. Wear
approved protective clothing such as safety
goggles, gloves and footwear.
Do not twine chains or metal cables. Always wear
protection gloves to handle cables or chains.

6 SECTION 00 – GENERAL – CHAPTER 1
????
CONSUMABLES
COMPONENT TO BE FILLED OR
TOPPED UP
QUANTITY CASE IH
RECOMMENDED
INTERNATIONAL
SPECIFICATION
TOPPED UP litres/dm3US gal IMP gal
RECOMMENDED
PRODUCTS SPECIFICATION
Cooling system:
JX60, JX70 models
JX80, JX90, JX95 models
with cab :
JX60, JX70 models
JX80, JX90, JX95 models
12
14
14
16
3.2
3.7
3.7
4.2
2.64
3.08
3.1
3.5
Water & liquid
AKCELA PREMIUM
ANTI–FREEZE
50% + 50%
–
Windscreen washer bottle . . . . . . . . . . 2 0.53 0.44 Water & cleaning
liquid –
Fuel tank 90 23.8 19.8 Decanted and filtered –
Additional fuel tank (Optional) . . . . . . . 27 7.1 5.94 diesel fuel –
Engine sump:
without filter :
JX60, JX70 models
JX80, JX90, JX95 models
with filter :
JX60, JX70 models
JX80, JX90, JX95 models
7.6
10.5
8.3
11.2
1.98
2.77
2.19
2.96
1.67
2.31
1.83
2.46
AKCELA No.1
ENGINE OIL
API CH–4 * ACEA
E5 * MB 228.3 *
CUMMINS CES
200072/20076/20077
API CF–4/SG
CCMC D4
MIL–L–2104E
Brake control circuit . . . . . . . . . . . . . . . . 0.4 0.1 0.09 AKCELA LHM
FLUID Oil ISO 7308
Hydrostatic steering circuit . . . . . . . . . . 2.0 0.5 0.44
Front axle:
– axle housing :
JX60, JX70 models
JX80, JX90, JX95 models
– final drives (each) :
JX60, JX70 HP models
JX80, JX90, JX95 models
4.5
7.0
0.8
1.25
1.2
1.8
0.2
0.3
0.99
1.54
0.18
0.28
Rear transmission (bevel drive and
brakes), gearbox, hydraulic lift and
PTO
JX60, JX70, JX80, JX90,
JX95 models . . . . . . . . . . . . . . . . . .
– with synchro–reverser:
JX60, JX70, JX80, JX90,
JX95 models . . . . . . . . . . . . . . . . . .
46
46
12.15
12.15
10.12
10.12
Oil
AKCELA
NEXPLORE
API GL4
ISO 32/46
SAE 10W–30
Rear final drives (each) :
JX60, JX70 HP models
JX80, JX90, JX95 models
3.9
5.3
1.03
1.40
0.86
1.17
Front wheel hubs . . . . . . . . . . . . . . . . . . – – – Grease
AKCELA
MULTI–PURPOSE
NLGI 2
Grease fittings . . . . . . . . . . . . . . . . . . . . – – –
MULTI–PURPOSE
GREASE
(251H EP)
NLGI 2

SECTION 10 -- ENGINE -- CHAPTER 1 1
6- 62720 -- 09 -- 2006
SECTION 10 -- ENGINE
Chapter 1 -- Engine
CONTENTS
Section Description Page
10 000 Generalspecification 2..........................................................
Injectionpumpcalibrationdata 5..................................................
Generalspecifications 16........................................................
Tighteningtorques 24...........................................................
Tools 25.......................................................................
Cross--sectionalviews 28........................................................
Lubricationandcoolingsystemdiagrams 32........................................
Faultdiagnosis 35..............................................................
10 001 10 Engine Removal--Installation 39...................................................
10 001 54 Engine Bench overhaul 53.......................................................
Checks,measurementsandrepairs 78............................................
10 406 10 Radiator Removal--Installation 102................................................
10 102 70 Crankshaft front oil seal removal installation 106....................................
10 402 10 Coolant pump removal installation 112.............................................
10 402 30 Coolingsystemthermostat 115...................................................
10 206 14 Bosch injection pump removal installation 118......................................
Bosch injection pump timing 121..................................................
Bosch injection pump air bleeding 123.............................................
10 218 30 Injectors removal installation 124..................................................
10 106 12 Valveclearanceadjustment 126..................................................
10 402 28 Coolantpumpoverhaul 129......................................................
10 001 30 Compressiontest 130...........................................................

2SECTION 10 -- ENGINE -- CHAPTER 1
6- 62720 -- 09 -- 2006
GENERAL SPECIFICATIONS 3 cylinders 4 cylinders
Engine type:
-- mod. JX60 normally aspirated -- type 8035.05D.939
(BOSCHpump) ....................................... seedatapages
6--7
--
-- mod. JX70 turbocharged -- type 8035.25C.939
(BOSCHpump) ....................................... seedatapages
8--9
--
-- mod. JX80 normally aspirated -- type 8045.05R.939
(BOSCHpump) ....................................... -- seedatapages
10--11
-- mod. JX90 turbocharged -- type 8045.25.939
(BOSCHpump) ....................................... -- seedatapages
12--13
-- mod. JX95 turbocharged -- type 8045.25L.939
(BOSCHpump) ....................................... -- seedatapages
14--15
Cycle .................................................. Diesel,4--stroke
Fuelinjection ........................................... Direct
Numberofcylindersinline................................ 3 4
Cylinderliners .......................................... dryforce--fittedin
cylinder block
Piston diameter
-- mod.JX60............................................ 104mm(4.0945in.) --
-- mod.JX70............................................ 104mm(4.0945in.) --
-- mod.JX80............................................ -- 104mm(4.0945in.)
-- mod.JX90............................................ -- 104mm(4.0945in.)
-- mod.JX95............................................ -- 104mm(4.0945in.)
Pistonstroke ........................................... 115mm(4.5276in.)
Total displacement:
-- mod.JX60--JX70 ...................................... 2931cm3
(178.8496 in.3)
--
-- mod. JX80--JX90--JX95 . . . . . . . . . . . . . . . . . . . . . . . . . . . . . . . . -- 3908 cm3
(238.4662 in.3)
Compression ratio . . . . . . . . . . . . . . . . . . . . . . . . . . . . . . . . . . . . . . . 17 to 1 normally aspirated
16.5 to 1 turbocharged
Maximum power 2000/25 EC at 2500 rpm:
-- mod.JX60............................................ 43.4kW(59hp) --
-- mod.JX70............................................ 50.7kW(69hp) --
-- mod.JX80............................................ -- 58.8kW(80hp)
-- mod.JX90............................................ -- 65.5kW(89hp)
-- mod.JX95............................................ -- 69.1kW(94hp)
Maximum power ECE R 24 at 2500 rpm:
-- mod.JX60............................................ 41.2kW(56hp) --
-- mod.JX70............................................ 47.8kW(65hp) --
-- mod.JX80............................................ -- 55.9kW(76hp)
-- mod.JX90............................................ -- 63.3kW(86hp)
-- mod.JX95............................................ -- 66.9kW(91hp)
Fastidlingspeed ....................................... 2500rpm.
Maximum torque (daNm) at 1500 rpm: JX60 model . . . . . . . . . . 20.7 (152.6753 ft lb) --
Maximum torque (daNm) at 1500 rpm: JX70 model . . . . . . . . . . 25.0 (184.3905 ft lb) --
Maximum torque (daNm) at 1500 rpm: JX80 model . . . . . . . . . . -- 27.9 (205.9778 ft lb
Maximum torque (daNm) at 1500 rpm: JX90 model . . . . . . . . . . -- 32.0 (236.0194 ft lb)
Maximum torque (daNm) at 1500 rpm: JX95 model . . . . . . . . . -- 33.7 (248.5584 ft lb)
Numberofmainbearings................................. 4 5
Sump .................................................. Structural,castiron

SECTION 10 -- ENGINE -- CHAPTER 1 3
6- 62720 -- 09 -- 2006
(continued)
GENERAL SPECIFICATIONS 3 cylinders 4 cylinders
Lubrication ........................................... forced,withgearpump
Pumpdrive ............................................ camshaft
Engine speed/oil pump speed ratio . . . . . . . . . . . . . . . . . . . . . . . 2:1
Oilcleaning............................................ meshfilteronoilintakeand
cartridge filter on delivery line
Normal oil pressure, with engine hot and at fast idling speed . 2.9 to 3.9 bar (42.06 to 56.56 psi)
Pressure relief valve . . . . . . . . . . . . . . . . . . . . . . . . . . . . . . . . . . . . built into pump housing
Valve opening pressure . . . . . . . . . . . . . . . . . . . . . . . . . . . . . . . . . 3.5 bar (50.76 psi)
For further lubrication data . . . . . . . . . . . . . . . . . . . . . . . . . . . . . . . See page 23
Cooling system ....................................... coolantcirculation
Radiator on JX60, JX70, JX80 and JX90 models . . . . . . . . . . . three--row vertical pipes with copper fins
Radiator on JX95 models . . . . . . . . . . . . . . . . . . . . . . . . . . . . . . . four--row vertical pipes with
copper fins
Fan, attached to coolant pump pulley . . . . . . . . . . . . . . . . . . . . . four--blade steel exhauster fan
6--blade steel exhauster fan (JX95)
Coolantpump .......................................... centrifugalvane--type
Engine speed/coolant pump speed ratio . . . . . . . . . . . . . . . . . . . 1:1,403
Temperaturecontrol .................................... Thermostat
Coolant temperature gauge . . . . . . . . . . . . . . . . . . . . . . . . . . . . . . coloured scale divided into three sections
Temperature ranges corresponding to each section:
-- initial white section . . . . . . . . . . . . . . . . . . . . . . . . . . . . . . from 30 to 65 C (86 to 149 F)
-- middle green section . . . . . . . . . . . . . . . . . . . . . . . . . . . . . from 65 to 105 C (149 to 221 F)
-- final red section from 105 to 115 C (221 to 300.2 F)
For further cooling system data . . . . . . . . . . . . . . . . . . . . . . . . . . . See page 23
Rev counter .......................................... incorporatedincontrolpanel
Revcounterdrive ...................................... fromgearoncamshaft
Hour counter calibrated for engine speed of . . . . . . . . . . . . . . . . 1800 rpm.
(Continued)

4SECTION 10 -- ENGINE -- CHAPTER 1
6- 62720 -- 09 -- 2006
(continued)
GENERAL SPECIFICATIONS 3 cylinders 4 cylinders
Timing ............................................... overheadvalvesoperatedbyacamshaft
located in the engine block through
tappets, pushrods and rockers.
Camshaft is driven by the crankshaft
through helical gears.
Intake:
-- start:beforeT.D.C .................................... 12
-- end:afterB.D.C...................................... 31
Exhaust:
-- start:beforeB.D.C ................................... 50
-- end:afterT.D.C ...................................... 16
Valve clearance for timing check . . . . . . . . . . . . . . . . . . . . . . . . . . 0.45 mm (0.0177 in.)
Valve clearance for normal running (engine cold):
-- intake ............................................... 0.30 0.05 mm (0.0118 0.0020 in.)
-- exhaust ............................................. 0.30 0.05 mm (0.0118 0.0020 in.)
Forfurthertimingdata .................................. Seepage20
Fuel System
Air cleaning . . . . . . . . . . . . . . . . . . . . . . . . . . . . . . . . . . . . . . . . . . . . dual cartridge dry air filter, with clogged
filter indicator with centrifugal pre--filter
and automatic dust ejector.
Fuelpump............................................. withdoublediaphragm
Fuelfilter .............................................. meshfilterinfuelsupplypump,and
replaceable cartridge on delivery line to
injection pump.
Minimum fuel flow rate with pump shaft rotating at 1600 rev/min. 100 litres/hour
Operated by eccentric cam . . . . . . . . . . . . . . . . . . . . . . . . . . . . . . on camshaft
BOSCH Injection pump . . . . . . . . . . . . . . . . . . . . . . . . . . . . . . . . . rotary distributor type
All--speed governor, incorporated in pump: BOSCH centrifugal counterweights
Automatic advance regulator, incorporated in pump: BOSCH hydraulic
For further fuel system data: see pages 5 to 15
For fixed advance (pump setting for start of delivery before
TDC) -- Pressure setting -- Injection order, and other
information regarding the BOSCH pump
refer to the data for the relevant engine
type in the tables from page 6 to page
14.

SECTION 10 -- ENGINE -- CHAPTER 1 5
6- 62720 -- 09 -- 2006
DATA
Turbocharger (Model JX95):
-- GARRETTtype..... ................................. T25
Fuel injection pump . . . . . . . . . . . . . . . . . . . . . . . . . . . . . . . . . . . . . distributor type with incorporated speed
governor and automatic advance regulator
BOSCH pump:
-- JX60 model. . . . . . . . . . . . . . . . . . . . . . . . . . . . . . . . . . . . . . . . VE 3/12 F 1250 L 976 -- 504054473
-- JX70 model. . . . . . . . . . . . . . . . . . . . . . . . . . . . . . . . . . . . . . . . . VE 3/12 F 1250 L 977 -- 504054474
-- JX80 model. . . . . . . . . . . . . . . . . . . . . . . . . . . . . . . . . . . . . . . . . VE 4/12 F 1250 L 985 -- 504041416
-- JX90 model. . . . . . . . . . . . . . . . . . . . . . . . . . . . . . . . . . . . . . . . . VE 4/12 F 1250 L 982 -- 504042214
-- JX95 model. . . . . . . . . . . . . . . . . . . . . . . . . . . . . . . . . . . . . . . . . VE 4/12 F 1250 L 952 -- 504042718
Directionofrotation ..................................... anticlockwise
Injectionorder ......................................... 1--2--3(JX60andJX70)
1--3--4--2 (JX80, JX90 and JX95)
Fuel injectors:
BOSCH ..........................
-- Nozzle holder type . . . . . . . . . . . . . . .
-- Nozzletype .....................
Number of nozzle holes . . . . . . . . . . . . 5 6
Diameter of nozzle orifices . . . . . . . . . .
Pressure setting . . . . . . . . . . . . . . . . . . . 248--272 bar
(3596.9176--3945.0064 psi)
248--272 bar
(3596.9176--3945.0064 psi)
JX70 JX95 JX60 JX80 JX90
Fuel delivery lines -- BOSCH pump
-- Type ...........................
-- Dimensions mm. . . . . . . . . . . . . . . . . -- -- -- -- --
Other manuals for JX60
1
This manual suits for next models
4
Other Case Tractor manuals

Case
Case FARMALL 80N Tier 4A User manual

Case
Case 150-190 User manual

Case
Case JX95 HC User manual

Case
Case 9100 Series User manual

Case
Case FARMALL 45C CVT User manual

Case
Case MX Series User manual

Case
Case 220 User manual

Case
Case CVX 140 User manual

Case
Case MX100 Configuration guide

Case
Case JX1060V User manual

Case
Case 130 User manual

Case
Case T9.435 Stage IV User manual

Case
Case FARMALL 105U EP User manual

Case
Case Magnum 235 User manual

Case
Case CX50 User manual

Case
Case Farmall 115C User manual

Case
Case 220 User manual

Case
Case MXM120 User manual

Case
Case FARMALL 45C Tier 4B User manual

Case
Case 446 User manual