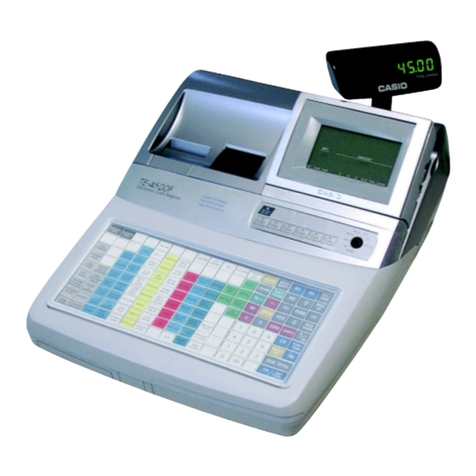
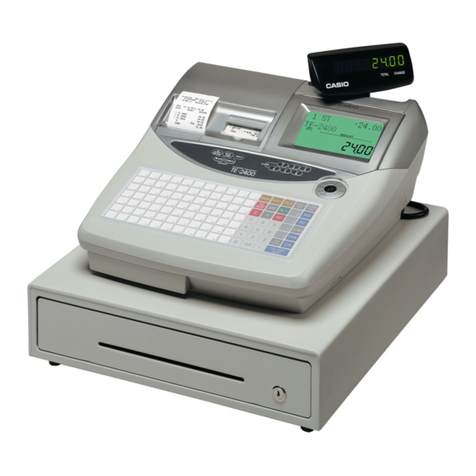
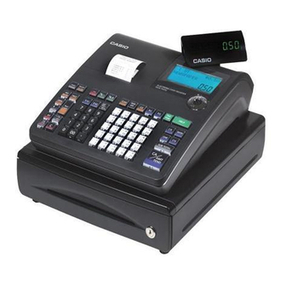
Casio TE-2200 User manual

CASIO TE2200
OPERATION MANUAL

BASIC FUNCTIONS INDEX
1. Making a Sale
2. Multiple Tender
3. Multiple Sales of Same Product
4. Corrections
5. Refunds
6. Holiday Premium
7. Percentage Discount
8. Dollar Discount
9. Whole Transaction Discount
10. Receipts
11. EFTPOS Cash Out
12. Clerks
13. Correction Keys
14. Tables/Tabs

Ensure register is turned to REG mode
1. Making a Sale
1. Press the key that corresponds to the item purchased, or use the
keys to enter in the amount and then the department. Do not use
the decimal point key when entering $ amounts!
2. Press SUBTOTAL for the total amount due
3. Enter amount of cash given by customer and press the CASH key.
If the customer is paying by credit card or eftpos then instead of
pressing CASH press Credit Card or EFTPOS
4. The amount of change to be given to the customer will display on
the screen and receipt will print if turned on.
2. Multiple Tender
1. When your customer pays by more then one method (eg part cash,
part eftpos), first enter the amount to be paid by the first method
2. Press the key corresponding to the method of payment (eg CASH)
3. Enter the amount to be paid by the second method
4. Press the key corresponding to the second method of payment (eg
EFTPOS)
3. Making Multiple Sales Of Same Product
1. Enter the number of items you are selling (eg 4)
2. Press the X key
3. Press the key that corresponds to the items purchased.
4. Press SUBTOTAL to give the total amount due
5. Enter amount of cash given by the customer and press the CASH
key.
6. The amount of change to be given to the customer will display on
the screen and receipt

4. Making Corrections To A Transaction
1. To clear the last transaction (before the subtotal key is entered)
press the ERR CORR key.
2. Press the CANCEL key to cancel the entire transaction
3. The C key clears the screen but does not delete items already
entered.
5. Refunds
1. Press the REFUND key then the key for the corresponding item
that is being refunded
2. Press SUBTOTAL to give the total amount due/owned
6. Holiday Premium
1. Enter items to be charged
2. Press Subtotal
3. Press HOL PREM key
7. To Give A % Discount (eg 15%)
1. Press the key that corresponds to the item purchased, or use the
keys to enter in the amount and then the item key
2. Enter the amount to be discounted (eg 15 for 15%)
3. Press the % key. This will display the dollar amount that has been
discounted
4. Press the SUBTOTAL key and this will display total amount due

8. To Give A $ Discount (eg $5)
1. Press the key that corresponds to the item purchased, or use the
keys to enter in the amount and then the item
2. Enter the amount to be discounted (eg 500)
3. Press the –key. This will display the dollar amount that has been
discounted
4. Press the SUBTOTAL key and this will display the total amount
due
9. To Give A $ Or % Discount For A Whole
Transaction
1. Enter all items in normally the press the SUBTOTAL key
2. Enter discount amount either for $ or % discount
3. Press corresponding discount key, % for % discount and –for $
discount
10. To Print A Receipt
1. Push the receipt on/off key to print receipts for every transaction.
When receipts are set to print a light will be displayed on the
button.
If the receipt function is switched off a receipt can still be printed by
pressing the RECEIPT key
11. EFTPOS Cash Out
1. This needs to be processed as a separate transaction
2. Enter the amount of cash to be given out
3. Press the CASH OUT key on the register

12. Assigning A Clerk
To assign a clerk press one of the clerk keys above the keyboard (eg
CLERK 1 or CLERK 2 etc)
13. Explanation Of Correction Keys
ERROR CORRECT
Used to take off last item before CASH key has been pressed. Only
takes off last sale item.
REFUND
Used to clear any item before CASH key has been pressed. Press
refund key then press preset price department, or press REFUND key,
enter amount to be refunded then department.
CANCEL
Cancels whole transaction.
% DISCOUNT
Used to register a % off discount. Enter amount then press % key.
MINUS KEY
Used to register dollar discounts. Enter $ amount then –key
CASH OUT
Used to enter cash out sales. Enter amount and press CASH OUT key,
is made separately from a sale transaction

14. Tables/TABS
A. Opening and Adding Items to Tabs
1. ENTER Table Number
2. PRESS OPEN TABLE button
3. ENTER Items to be charged
4. PRESS CLOSE TABLE
B. Printing Out Tab Accounts
1. ENTER Table Number
2. PRESS Print Bill button
C. Cashing Table Off
1. ENTER Table Number
2. PRESS OPEN TABLE button
3. ENTER Amount being paid
4. PRESS Tender type –Cash, Eftpos, Credit Card etc.
5. PRESS RECEIPT button
D. Open Table Report
1. TURN Key to X
2. PRESS 25
3. PRESS CASH twice
4. TURN Key back to Reg
E. Pay By Item
1. ENTER Table Number
2. PRESS Pay by Item (This will display the first item)
3. For each item:
3. PRESS Next Item to scroll to the next item OR
4. PRESS Pay by Item to select that item
When you reach the end you can go through the
items again
5. PRESS Close Table when you have selected the items
6. You can then pay off the items as normal

PROGRAMMING INDEX
1. Price Changes
2. Name Changes
3. Changing/Adding Clerk Names
4. Group and Department List
5. Adding/Changing Group and Departments
6. Group and Department PLU Linking
7. Printer Linking
8. Link Clerk Details Report
9. Changing / Adding Clerk Report Details
10.Programming Time and Date
11.Reports
Programming Notes:
The new Casio range of cash registers are the most advanced ECR system on the market, it
incorporates easy programmability with complex functions, to form a system that can suit any retail
requirements. While basic programming changes can be performed by the end user (price changes
and descriptions), it is advised that more advanced features should be programmed by an authorised
CASIO dealer. The use of specialised back up and programming software enables us to safeguard your
valuable data before changes are made. If you are unsure about the steps you are about to attempt, we
suggest you seek professional help from our support staff.
Important please read this:
The incorrect programming of LINKS to GROUPS , DEPT’s and PLU’s can cause abnormal REPORT
information. We advise that unless you know exactly how LINKS are set up for your machine, do not
attempt to program these items. This also applies to the changing of PLU and DEPT names, an
example of an incorrect name change that would conflict with LINKS is if a PLU or DEPT were to be
programmed from a food item to a drink item: eg changing a DEPT name from CHOC CAKE to COLA
the LINK would also have to be changed from a food group to a drink group. While this manual is
correct to the best of our knowledge, we take no responsibility whatsoever, including: mis-interpretation,
programming errors, loss of income and machine failure.

1. Changing Prices
1. TURN Turn key to the PROGRAM position
2. DISPLAY Should show P01
3. SIGN ON Press Clerk key (if necessary)
4. ENTER New price (without using decimal point)
5. PRESS Preset item button that you wish to change
6. REPEAT Steps 3 to 4 until finished
7. PRESS Subtotal button to finish
8. TURN Key back to REG1

2. Name Changes
1. TURN Turn key to the PROGRAM position
2. SIGN ON Press Clerk key (if necessary)
3. ENTER 2
4. PRESS Subtotal button
5. DISPLAY Should show P02
6. TYPE New description (using the instructions on page
90 of the Casio manual) of up to 16 characters
7. PRESS 00 button
8. PRESS Preset item button that you wish to change
9. REPEAT Steps 6 to 8 until finished
10. PRESS Subtotal button to finish
11. TURN Key back to REG1

3. Clerk Name Changing
1. TURN Turn key to the PROGRAM position
2. SIGN ON Press Clerk key (if necessary)
3. ENTER 2
4. PRESS Subtotal button
5. DISPLAY Should show P02
6. ENTER XX07
Where XX stands for the memory number of each clerk.
Ie. 01 Jeannie, 02 Leanne, 03 Holly, 04 Tania
7. PRESS Subtotal button
8. TYPE New clerk name (using the typewriter keyboard
sheet on the reverse side of the item keyboard) of
up to 16 characters.
9. PRESS 00 button
10. PRESS CASH (or TOTAL) button
11. PRESS Subtotal button to finish
12. TURN Key back to REG1

4. Group Read
When it comes to programming a new item onto the keyboard, or when
making changes to the category or type of keyboard item, you may need
to also change the group and department code to which the sales figures
are entered into. ie a button earlier labelled beer is programmed as steak
meal. In this case you will need to change the group and department
links to enter the sales totals into the correct category. To assist in
programming these changes you will need to know the following
information:-
1. TURN Turn key to the PROGRAM position
2. SIGN ON Press Clerk Key (if necessary)
3. ENTER 6
4. PRESS Subtotal button
5. ENTER 205 ( department printout )
6. ENTER Subtotal
7. ENTER CASH
8. PRESS CASH
9. ENTER 206 ( group printout )
10. PRESS Subtotal
11. TURN Key back to REG1

5. Adding/Changing Group and Departments
This job will set up Groups & Department Names.
1. TURN Turn key to the PROGRAM position
2. ENTER 2
3. PRESS Subtotal
4. ENTER 0105
01 = That it is the 1st Department
5. PRESS Subtotal key
6. ENTER Department description ie Haircuts using
alpha keysheet ( up to 12 characters )
7. PRESS 00 key Then CASH key
8. REPEAT Steps 6 and 8 until all group names
entered
9. PRESS Subtotal key
10. TURN Key back to REG1
To set up group names;
At step 4 enter 0106 06 = Group
Follow the steps as above

6. Group and Department Linking
1. TURN Turn key to the PROGRAM position
2. SIGN ON Press Clerk Key (if necessary)
3. ENTER 3
4. PRESS Subtotal button
5. DISPLAY Should show PGM3
6. ENTER 1166
7. PRESS Subtotal
8. ENTER Group code XX, Department code XX
(ie to set as linking to group 5 and
department 2 enter 0502)
9. PRESS Item button to be linked
10. REPEAT Steps 7 and 8 until all links completed
11. PRESS CASH
12. PRESS Subtotal key to finish
13. TURN Key back to register

7. Printer Linking
1. TURN Turn key to the PROGRAM position
2. SIGN ON Press Clerk Key (if necessary)
3. ENTER 3
4. PRESS Subtotal button
5. DISPLAY Should show PGM3
6. ENTER 1666
7. PRESS Subtotal
8. ENTER 100
9. PRESS Item button to be linked to the printer
10. REPEAT Press all buttons to be linked
11. ENTER 0
12. PRESS Item button to not be linked to the printer
13. REPEAT Press all buttons to not be linked
14. PRESS Subtotal key to finish
15. TURN Key back to register

8. Linking clerks for end of night reports.
You will need to have a report of what items are already coming
up on the end of night reports.
1. TURN Turn key to the PROGRAM position
2. SIGN ON Press Clerk Key (if necessary)
3. ENTER 6
4. PRESS Subtotal button
5. ENTER 330
6. PRESS Subtotal button

9. Adding / Changing items on clerk reports
for end of night reports.
Once you have the report you can then add or change what is
coming up on the reports
1. TURN Turn key to the PROGRAM position
2. SIGN ON To clerk number that needs to be changed
You will need to individually do every clerk.
3. ENTER 3
4. PRESS Subtotal button
5. ENTER Record number ( from list ) followed by 30
ie. 0630
6. PRESS Subtotal button
7. ENTER Department number from keyboard,
followed by 05
ie. Department 98 enter 9805
7. PRESS CASH key
9. ENTER Next clerk number
10. REPEAT Steps 5 to 9 until all clerks have been
programmed
11. PRESS Subtotal key to finish
12. TURN Key back to REG

10. Date and Time Programming
1. TURN Turn key to the PROGRAM position
2. SIGN ON Press the Clerk Key (if necessary)
3. ENTER 1
4. PRESS Subtotal key
5. DISPLAY Should show PGM1
6. ENTER Date in the following format:-
(for days 1 to 9, be sure to enter them as 01 to
09. Enter months 1 to 9 as 01 to 09)
YYMMDD
YY = Year
MM = Month
DD = Day
7. PRESS X / Date Time button
8. ENTER Time in the following format:-
(for hours 1 to 9, be sure to enter them as 01
to 09. Enter minutes 1 to 9 as 01 to 09)
HHMM
HH = Hour
MM = Minute
9. PRESS X / Time Date button
10. TURN Key back to REG1

11. Reports
X Report - Daily Read
1. TURN Turn key to the X1 position
2. SIGN ON Press Clerk Key (if necessary)
3. PRESS CASH button
4. TURN Key back to REG
Z Report - Daily Read & Reset
1. TURN Turn key to the Z1 position
2. SIGN ON Press Clerk Key (if necessary)
3. PRESS CASH button
4. TURN Key back to REG
Weekly Read & Reset
1. TURN Turn key to the Z2/X2 position
2. SIGN ON Press Clerk key (if necessary)
3. ENTER 1
4. PRESS CASH button
5. TURN The key to the REG 1 POSITION

Monthly Read & Reset
1. TURN Turn key to the X2/Z2 position
2. SIGN ON (if necessary)
3. ENTER 2
4. PRESS CASH button
5. TURN Key back to REG
Troubleshooting –when an error occurs, please see the list of error
messages and solutions on page 104 of the Casio manual.
Other manuals for TE-2200
6
Table of contents
Other Casio Cash Register manuals

Casio
Casio CE-4700 User manual

Casio
Casio SR-C4500 User manual

Casio
Casio QT-6100 User manual

Casio
Casio PCR-T273 User manual

Casio
Casio CE-3700 User manual

Casio
Casio QT-6000 User manual

Casio
Casio DR-120LB User manual

Casio
Casio PCR-T2000 User manual

Casio
Casio SE-S400 User manual

Casio
Casio PCR T265 - Electronic Cash Register User manual

Casio
Casio PCR T48S - Cash Register User manual

Casio
Casio QT-8000C User manual

Casio
Casio SE-S10 User manual

Casio
Casio TK-T200 User manual

Casio
Casio SE-S100 User manual

Casio
Casio SE-S2000 Manual

Casio
Casio TE-2200 User manual

Casio
Casio TE-8000F Series Owner's manual

Casio
Casio 200cR User manual

Casio
Casio 110CR User manual