manuals.online logo
Brands
  1. Home
  2. •
  3. Brands
  4. •
  5. Casio
  6. •
  7. Cash Register
  8. •
  9. Casio TE-M80 User manual

Casio TE-M80 User manual

CAL
REG
OFF
PGM
X
Z
RF
MODE LOCK
TE-M80 Quick Setup Guide
Making a Sale
2
Helpline Monday to Friday
8.30am to 4.30pm on
01924 438238 (Option 2)
Initial Setup
1
CAL
REG
OFF
PGM
X
Z
RF
MODE LOCK
FEED
C
X
DATE
TIME
ERR.
CORR
DEPT
SHIFT
RC
PD
CH CHK
MR
AC %#
NS
SUBTOTAL
CA AMT
TEND
789
456
12
0
00
3
14
9
15
10
13
8
45
3
13
8
2
11
6
1
Insert the Memory Protection Batteries
The batteries ensure the settings of the register are
stored even when the machine is powered off.
By entering the price of the goods and pressing the
appropriate department button you are preparing
and organising sales data for the end of day report.
• Insert the OP key
(operator’s key) and
turn the key to the
REG position.
• Enter the price of the
goods without the
decimal point and press
one of the department
buttons.
i.e. £1 equals 1 0 0 .
• To enter another sale repeat as above by
entering a price then a department button.
• Press the SUBTOTAL key
to show the amount due.
• If you would like to calculate change:
• Enter the value of money given by the customer.
i.e. £5.00 is entered as 5 0 0 .
(It is optional to enter the money given)
• Press the CA/AMT TEND key, or for non cash
sales press CHK or CH .
If a cash value was entered, the amount of change
due will be displayed on the screen.
• Turn the key to the REG position for normal use.
The cash register has two reporting modes, one for
printing out the information without clearing any
figures, this is referred to as the X Mode.
The second is for printing and clearing the figures
back to zero ready for the next day, this is referred
to as the Z Mode.
01 1.25
Example - End of Day Report
Departments can be
named as shown
overleaf
Monetary Amounts
Reporting
3
•CA/AMT TEND Daily End of Day Report
•1 0 CA/AMT TEND Periodic End of Day Report
CORRECT
PRINTER
✓
PRINTER
INCORRECT
✗
Install the Paper
• Place the roll in the space
under the printer arm.
• Feed the paper underneath,
ensuring the excess is
brought forward over the
printer arm which will then close.
• Close the printer arm until it
locks steadily.
• The printer can be used as
either a customer receipt or
manager audit. The setting for
which is shown overleaf.
• If the roll is to be used
as an audit wind on to the
spool as shown opposite.
• Press the printer ‘OPEN’
button, located on the left
hand side of the register
below the printer section.
• Lift the printer arm where it
says ‘PUSH HERE’.
• Press the clip and lift the
cover off to remove the
battery cover.
• Insert 3 x AA batteries.
• Replace the cover.
Department
• Insert the PGM key
(program key) and turn
to either the:
The Xposition to print without
clearing or
Zposition to print and clear sales.
Press one of the keys from the table below to print out
the required report:
CAL
REG
OFF
PGM
X
Z
RF
MODE LOCK
CAL
REG
OFF
PGM
X
Z
RF
MODE LOCK
CAL
REG
OFF
PGM
X
Z
RF
MODE LOCK
CAL
REG
OFF
PGM
X
Z
RF
MODE LOCK
• Insert the PGM key and turn
to the PGM position.
• Press 2followed by the
SUBTOTAL key.
• Enter the line number you
wish to program followed
by the CH key.
• For example, enter
1 CH for line 1, 2 CH for line 2, etc.
• Enter the text using the
keyboard.
As the keys are pressed, the
letter will appear in the
‘CHARACTER’ display box.
Keep pressing the key until the
required letter appears.
Press the key twice to enter a space.
Date
• Insert the PGM key and turn
to the PGM position.
• Press 1then the
SUBTOTAL key.
• Enter the date in the format
YYMMDD.
For example, enter
0 7 0 9 2 8
(for 28th Sept. 2007).
• Press the X/DATE TIME key.
• Press the key to finalise.
Time
• Insert the PGM key and turn
to the PGM position.
• Press 1then the
SUBTOTAL key.
• Enter the time in the format
HHMM.
• For example, enter
1 5 3 0 (for 3.30pm).
• Press the X/DATE TIME key.
• Press the key to finalise.
• Turn the key to the REG position for normal use.
Presetting Departments
5Setting the Date & Time
6
FEED
C
X
DATE
TIME
ERR.
CORR
DEPT
SHIFT
RC
PD
CH CHK
MR
AC %#
NS
SUBTOTAL
CA AMT
TEND
789
456
12
0
00
3
14
9
15
10
13
8
45
3
13
8
2
11
6
1
28 - 09 - 07
15 - 30
Print Style
4
Programming the Company Logo
The cash register can print a receipt header message
of upto 5 lines, each with 24 letters per line.
For example, to enter ‘THANK YOU’ press
24486655 33366622
• Press CA/AMT TEND to save the text.
• Press SUB TOTAL to finalise.
Repeat the process for more lines.
Spool Printing
• Insert the PGM key and turn to the PGM mode.
• Press 1then the SUBTOTAL key.
• Press 0(for spool) CH ,then the SUBTOTAL key.
• Turn the key to the REG position for normal use.
Receipt Printing
• Insert the PGM key and turn to the PGM mode.
• Press 1then the SUBTOTAL key.
• Press 1(for receipt) CH ,then the SUBTOTAL key.
• Turn the key to the REG position for normal use.
CHARACTER
A
FEED
C
X
DATE
TIME
ERR.
CORR
DEPT
SHIFT
RC
PD
CH CHK
MR
AC %#
NS
SUBTOTAL
CA AMT
TEND
789
456
12
0
00
3
14
9
15
10
13
8
45
3
13
8
2
11
6
1
CHARACTER
A
• Insert the PGM key and
turn to the PGM position.
• Press 2then the
SUBTOTAL key.
• Press the required key i.e.
Dept 1-15.
• Enter the text using the
keyboard.
As the keys are pressed,
the letter will appear in the
‘CHARACTER’ display box.
Keep pressing the key until
the required letter appears.
Press the key twice to enter a space.
Programming A Department Name
The cash register has 15 department keys which can be
programmed with a name for analysing your sales.
i.e. Food and Non Food buttons.
For example, to enter ‘OPEN FOOD’ press
66619966 999666 6669
• Press CA/AMT TEND to save the text.
• Press SUB TOTAL to finalise.
• Repeat the process for further department keys.
• Turn the key to the REG position for normal use.
Receipt not Printing
• Check the paper type is 57mm THERMAL paper.
In Constant Error
• Insert the PGM key.
• Turn the key to each position and press key.
• Then press the CA/AMT TEND key.
AC C
AC C
AC C
01 1.25
• The fifteen department keys can be programmed
with a preset price (if required).
• Insert the PGM key and turn to the PGM position.
• Enter 1 then the SUBTOTAL key.
• Enter the item price
without a decimal point.
For example, for £1.25 enter 1 2 5 and press
the department key.
• Press the required department key.
• Press the SUBTOTAL key to finalise.
• Turn the key to the REG position for normal use.
Spool or Receipt Printing Programming a Department Price General Errors
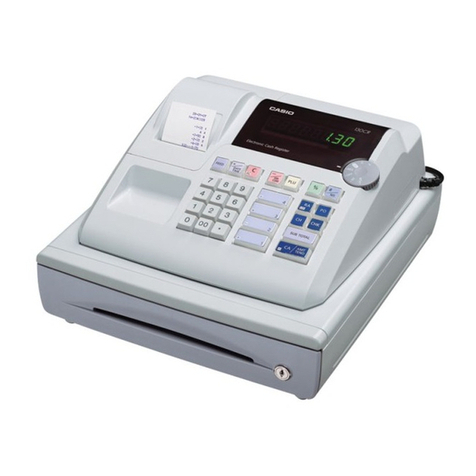
Other manuals for TE-M80
1

Other Casio Cash Register manuals

Casio QT-7300 Series User manual

Casio

Casio QT-7300 Series User manual

Casio CE-T300 User manual

Casio

Casio CE-T300 User manual

Casio CE-6100 User manual

Casio

Casio CE-6100 User manual

Casio SE-S400 User manual

Casio

Casio SE-S400 User manual

Casio PCR-T2000 User manual

Casio

Casio PCR-T2000 User manual

Casio PCR T2000 - Deluxe 96 Department Cash... User manual

Casio

Casio PCR T2000 - Deluxe 96 Department Cash... User manual

Casio PCR-T2000 User manual

Casio

Casio PCR-T2000 User manual

Casio PCR-T273 User manual

Casio

Casio PCR-T273 User manual

Casio CE-2350 User manual

Casio

Casio CE-2350 User manual

Casio CE-280 Assembly instructions

Casio

Casio CE-280 Assembly instructions

Casio CE-6000 User manual

Casio

Casio CE-6000 User manual

Casio 130CR User manual

Casio

Casio 130CR User manual

Casio PCRT275 - Cash Register w/ 15 Depts User manual

Casio

Casio PCRT275 - Cash Register w/ 15 Depts User manual

Casio TK-T200 User manual

Casio

Casio TK-T200 User manual

Casio CE-3700 User manual

Casio

Casio CE-3700 User manual

Casio PCR-T2000 User manual

Casio

Casio PCR-T2000 User manual

Casio FE-700 MEX User manual

Casio

Casio FE-700 MEX User manual

Casio QT-6100 User manual

Casio

Casio QT-6100 User manual

Casio PCR-T276 User manual

Casio

Casio PCR-T276 User manual

Casio 130CR User manual

Casio

Casio 130CR User manual

Casio V-R100 User manual

Casio

Casio V-R100 User manual

Casio TE-7000S User manual

Casio

Casio TE-7000S User manual

Casio PCR-265P User manual

Casio

Casio PCR-265P User manual

Casio 200cR User manual

Casio

Casio 200cR User manual

Popular Cash Register manuals by other brands

TEC MA-1595-1 SERIES owner's manual

TEC

TEC MA-1595-1 SERIES owner's manual

TEC TEC MA-1900 owner's manual

TEC

TEC TEC MA-1900 owner's manual

Sam4s ER-420 Series Service manual

Sam4s

Sam4s ER-420 Series Service manual

TEC MA-1535-2 series owner's manual

TEC

TEC MA-1535-2 series owner's manual

Sam4s ER-180U Series Service manual

Sam4s

Sam4s ER-180U Series Service manual

POSIFLEX PST-6000 SERIES Technical manual

POSIFLEX

POSIFLEX PST-6000 SERIES Technical manual

Sam4s ER-230 Series Operation and program manual

Sam4s

Sam4s ER-230 Series Operation and program manual

Sam4s NR-500 Series Service manual

Sam4s

Sam4s NR-500 Series Service manual

QUORION QMP 2000 series user manual

QUORION

QUORION QMP 2000 series user manual

Sharp XE-A202 - Electronic Cash Register instruction manual

Sharp

Sharp XE-A202 - Electronic Cash Register instruction manual

ACLAS CR6X Quick start manual

ACLAS

ACLAS CR6X Quick start manual

Olivetti CRF7100 ERRORS AND TROUBLESHOOTING

Olivetti

Olivetti CRF7100 ERRORS AND TROUBLESHOOTING

Samsung ER-5100 Service manual

Samsung

Samsung ER-5100 Service manual

Elo Touch Solutions PayPoint user manual

Elo Touch Solutions

Elo Touch Solutions PayPoint user manual

Sam4s ER-900 Series Getting started

Sam4s

Sam4s ER-900 Series Getting started

POS-X ION-C16M-1B Brochure & specs

POS-X

POS-X ION-C16M-1B Brochure & specs

Ingenico Moby C150 user guide

Ingenico

Ingenico Moby C150 user guide

Sharp XE-A110 Bedienungsanleitung

Sharp

Sharp XE-A110 Bedienungsanleitung

manuals.online logo
manuals.online logoBrands
  • About & Mission
  • Contact us
  • Privacy Policy
  • Terms and Conditions

Copyright 2025 Manuals.Online. All Rights Reserved.