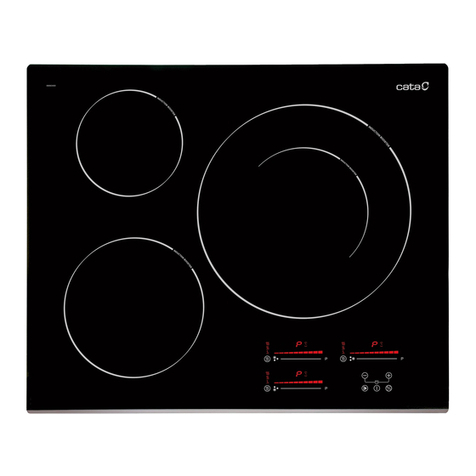
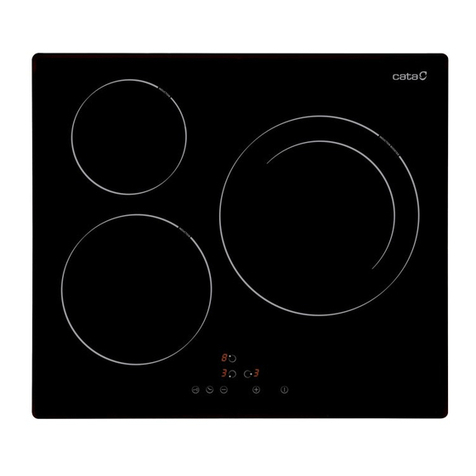
Cata INSB 6003 BK User manual

OPERATION AND STORAGE MANUAL
Read in full and retain for future reference
Keep this manual with the appliance. If the appliance is to be used
by a third party, this instruction manual must be supplied with it.
60CM INDUCTION HOB

1
Before First Use
• Before first use, remove any stickers or similar from the appliance,
except for the rating label.
• Dispose of any plastic bags as they pose a risk of suffocation for
young children.
Please read this manual before operating the appliance and keep it
in a safe place for future reference. If this appliance is transferred to
a new owner, the manual should also be provided to the new owner.
Important Safety Measures and Precautions
WARNING!
Unattended cooking on a hob can be dangerous and may result
in fire. NEVER try to extinguish a fire with water. Switch o the
appliance and then cover the flame e.g. with a lid or a fire blanket.
60CM INDUCTION HOB

2
• Do not use your appliance as a work or storage surface, or leave any
objects or utensils on the appliance.
• Do not place or leave any magnetisable objects or electronic devices
near the appliance, as they may be affected by its electromagnetic field.
• The appliance is not intended to be operated by means of an external
timer or separate remote-control system.
• Do not use this appliance for anything other than its intended use.
• After use, always turn off the cooking zones and the cooktop as
described in this manual. Do not rely on the pan detection feature to
turn off the cooking zones once you remove the cookware.
• Do not place or drop heavy objects onto your cooktop.
• Do not use cookware with jagged edges or drag them across the
Induction glass surface as this can scratch the glass.
• Do not use any aluminium foil or place any food wrapped in
aluminium foil directly on the hob.
WARNING!
Accessible parts will become hot when in use. To avoid burns and
scalds children should be kept away.
• Do not use scourers or any other harsh abrasive cleaning agents to
clean your cooktop, as these can scratch the Induction glass.
• Do not use a steam cleaner to clean your cooktop.
• Do not let your body, clothing or any item other than suitable
cookware contact the Induction glass until the surface has cooled.
• Only use counter top protectors designed for use with the cooking
appliance.
• When cooking in non-stick cookware without seasoning, do not
exceed 1-2 minutes preheating time.
• If the surface is cracked, switch off the appliance to avoid the
possibility of an electric shock.
• Do not repair or replace any part of the appliance unless specifically
recommended in the manual. All other servicing should be done by a
qualified technician.
• If the supply cord is damaged, it must be replaced by the
3
Installation Precautions
Read these instructions carefully before installing or using this
appliance and make sure this information is available to the person
responsible for installing the appliance as it could reduce your
installation costs.
• No combustible material or products should be placed on this
appliance at any time.
• This appliance is to be properly installed and earthed only by a
suitably qualified person.
• This appliance should be connected to a circuit which incorporates an
isolating switch providing full disconnection from the power supply
and must be easily accessible to the customer.
• Failure to install the appliance correctly could invalidate any warranty
or liability claims.
BEFORE INSTALLATION
• Make sure that the work surface is square and level, and that there is
no structural interference with the space requirements.
• Check that the work surface is made of a heat-resistant material.
• Ensure that if the hob is installed above an oven, that the oven has a
built-in cooling fan.
• Check that the installation complies with all clearance requirements
and applicable standards and regulations.
manufacturer, its service agent or similarly qualified persons in order
to avoid a hazard.
• This appliance can be used by children aged from 8 years and above
and persons with reduced physical, sensory or mental capabilities or
lack of experience and knowledge if they have been given supervision
or instruction concerning use of the appliance in a safe way and
understand the hazards involved. Cleaning and user maintenance
should not be undertaken by children without supervision.
• Persons with cardiac pacemakers or other electrical implants
(such as insulin pumps) must consult with their doctor or implant
manufacturer before using this appliance to make sure that their
implants will not be affected by the electromagnetic field.

4
• Make sure that you use heat-resistant and easy-to-clean finishes
(such as ceramic tiles) for the wall surfaces surrounding the hob.
• Ensure the hob will not be installed directly above a dishwasher,
fridge, freezer, washing machine or clothes dryer, as the humidity may
damage the hob electronics.
• Make sure that the appliance is installed in such a way that allows for
better heat radiation in order to enhance the products reliability.
Installation
SELECTION OF INSTALLATION EQUIPMENT
Cut out the work surface according to the sizes shown in the drawing.
For the purpose of installation and use, a minimum of 5 cm space shall
be preserved around the hole.
Be sure the thickness of the work surface is at least 30 mm.
Please select heat-resistant work surface material to avoid any large
deformation caused by the heat radiation from the hotplate.
MODEL L
(mm)
W
(mm)
H
(mm)
D
(mm)
A
(mm)
B
(mm)
X
(mm)
INSB 6003 BK
590 520 58 54 565 495 50
(minium)
INSB 6003 X
INSB 6004 BK
INSB 8021 BK 800 520 590 56 745 495 50
(minium)
INSB 9012 BK 900 520 590 56 875 495 50
(minium)

5
The unit should be placed on a stable, smooth surface. Do not apply
force onto the controls protruding from the hob.
1. Cut out worktop to the supplied
dimensions shown, with suitable
equipment. Seal the cut edge
of the worktop using silicone or
PTFE and allow to dry before
fitting the Hob.
2. Stretch out the supplied seal
along the underside edge of
the hob, ensuring that the ends
overlap. Do not use adhesive to
fix the hob into the worktop
3. Once the seal is fitted, position the hob into the cutout in the
worktop. Apply gentle downwards pressure onto the hob to push it
into the worktop, ensuring a good seal around the outer edge.
• Make sure the Induction Hob is well ventilated at all times and that
the air inlet and outlet are not blocked. Ensure the appliance is
always in good working state.
CAUTION!
The safety distance between the hotplate and the cupboard
above the hotplate should be at least 760 mm.

6
A (mm) B (mm) C (mm) D (mm) E
760 min. 50 min. 20 min. Air intake
5 min. Air exit 5min.
AFTER YOU HAVE INSTALLED THE HOB
• Make sure that the power supply cable is not accessible through
cupboard doors or drawers.
• Check that there is adequate flow of fresh air from outside the
cabinetry to the base of the hob.
• Make sure that a thermal protection barrier is installed below the base
of the hob, if the hob is installed above a drawer or cupboard space.
• Check that the isolating switch is easily accessible by the customer.

7
CHOOSING THE RIGHT COOKWARE
• Only use cookware with a base suitable for induction cooking. Look
for the induction symbol on the packaging or on the bottom of the
pan.
• You can check whether your cookware is suitable by carrying out
a magnet test. Move a magnet towards the base of the pan. If it is
attracted, the pan is suitable for induction.
• If you do not have a magnet:
1. Put some water in the pan you want to check.
2. If it does not flash in the display and the water
is heating, the pan is suitable.
• Cookware made from the following materials is not suitable: pure
stainless steel, aluminum or copper without a magnetic base, glass,
wood, porcelain, ceramic, and earthenware.
A WORD ON INDUCTION COOKING
Induction cooking is a safe, advanced, efficient, and economical
cooking technology. It works by electromagnetic vibrations generating
heat directly into the cookware, rather than indirectly through heating
the glass surface. The glass becomes hot only because the cookware
eventually warms it up.
Induction cooking has the following characteristics:
• Minimal dispersion (high performance).
• Removing (or lifting) the cookware from the hob automatically stops
the cooking zone.
• The electronic system permits flexibility and precision control.
Cookware
Induced current
Magnetic field
Inductor
Electronic circuit
Electronic power supply

8
• If cast iron cookware is used, make sure it has an enamel bottom to
aviod scratching the ceramic hob surface.
• Do not use cookware with jagged edges or a curved base.
• Make sure that the base of your pan is smooth, sits flat against the
glass, and is the same size as the cooking zone.
• It is important to use cookware that has the same diameter as the
graphic of the zone selected. Using a wider pot will result in engery
being used at it’s maximum efficiency. If you use a smaller pot
efficiency could be less than expected. Anything less than 140mm
could be undetected by the hob.
• Always centre your pan on the cooking zone.
• Always lift pans off the Induction Hob.
Do not slide, or they may scratch the glass.
Product Description
Timer (1)
Power level slider (3)
Keylock (6)
Cooking functions (7)
Booster (8)
Stop&Go (4)
On/O (5)
Flexible zone (2)
(only in some models)

9
Operation
TO START COOKING
1. Touch the ON/OFF control. After power on, the will buzzer beep
once and all displays will show (-) or (--), indicating that the
Induction Hob has entered the state of standby mode.
2. Place suitable cookware on the cooking zone that you wish to
use. Make sure the bottom of the cookware and the surface of the
cooking zone are clean and dry.
3. Set a power level between 1 and 9 by sliding along the “slider” key,
(3) or just touch any point of the “slider” (3).
• If you don’t choose a power setting within 20 seconds, the Induction
Hob will automatically switch off. You will need to start again at
step 1.
• You can modify the power setting at any time during cooking.
If the display flashes alternately with the power setting, This
means that:
• The cookware is not placed on the correct cooking zone.
• The cookware you’re using is not suitable for induction cooking.
• The cookware is too small or not properly centred on the cooking zone.
No heating will take place unless there is suitable cookware on the
cooking zone. The display will automatically turn off after 1 minute if no
suitable cookware has been placed.
WHEN YOU HAVE FINISHED COOKING
1. Touch the power level slider (3) to decrease the power to level 0.
2. Beware of hot surfaces.
Residual Heat Indicator
After switching off the cooking zone, the corresponding power display
will indicate “H” until the temperature in the zone has dropped below
the critical level.

10
USING THE BOOST FUNCTION
The Booster function provides higher power for a maximum of 5
minutes giving you a faster cooking time with more power. The function
can work in any cooking zone.
To active the Boost function
1. Touch Booster key (8) of the desired cooking zone. The related
power display will show “P.” and the zone will reach the maximum
power. The Booster power will last for 5 minutes and then the zone
will go back to the power level 9.
To cancel the Boost function
1. Touch power level slider (3) to cancel the Booster function, then
the cooking zone will revert to the power level that you wish.
Restrictions when using
The three zones are divided into two groups. If you want to use
Booster function, when you press the Booster key (8) the selected
zone will be able to reach power level “P”. In the case where the power
level of the other zone within the same group is also “P”, then the
power of this zone will be automatically reduced to level 9.
USING THE COOKING FUNCTIONS
You can choose 3 handy cooking functions by pressing “Cooking
functions” (7). Each press moves from one function to the other.
• Melt or defrost (45-55 °C).
• Heating or keeping warm (65-70 °C).
• Simmering, temperature close to boiling, useful for slow cooking
(about 85-95 °C).
USING THE PAUSE FUNCTION – STOP&GO
The Pause function can be used at any time during cooking. It allows
the user to stop the Induction Hob and come back to it, keeping all the
same settings.
1. Make sure that the cooking zone is working.
2. Touch the Stop&Go button (4). All the cooking zone displays will
show (=). All the operation functions of the Induction Hob will be
deactivated except for Stop&Go (4), ON/OFF (5) and Keylock (6).

11
3. To cancel the pause status, touch Stop&Go (4), The cooking zones
will go back to the power level that they were previously set.
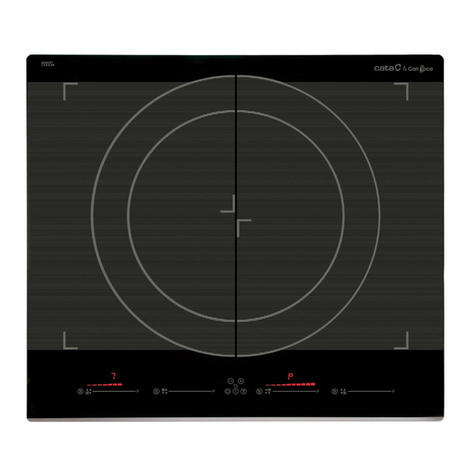
FLEXIBLE ZONE FUNCTION (only in some models)
This area can be used as a single, big zone or as two different zones,
according to the cooking needs.
• The flexible zone area is made of two independent inductors that can
be controlled separately.
• When working as a big single zone, the power level is the same in the
entire area. The part that is not covered by cookware will not heat.
ATTENTION!
Make sure to place the cookware in the centre of the single cooking
zone. In case of oversized or elongated cookware make sure to
place it in the centre of the big cooking zone, covering the centre of
each single zone.
To use as a single big zone
1. To activate the flexible area as a single big zone, simply press the
Flexible Zone key (2).
2. The Flexible Zone indicator next to the power level indicator will
light up.
• The power setting works the same as any other normal area.
• If the cookware is moved from the front to the rear part (or viceversa),
the flexible zone will automatically detect the new position, keeping
the power level the same.
To use as two independent zones
1. To use the flexible zone as two different zones with different power
settings, press the Flexible Zone key (2) again.

12
USING CHILD LOCK FUNCTION
You can lock the controls to prevent unintended use (for example
children accidentally turning the cooking zones on). When the controls
are locked, all of the controls except for the OFF control are disabled.
To lock the controls
1. Touch the Keylock (6) for 3 seconds. The timer indicator will show
“Lo”.
To unlock the controls
1. Make sure the Induction Hob is turned on.
2. Touch and hold the Keylock (6) for a while
3. You can now start using your Induction Hob.
CAUTION!
When the hob is in the lock mode, all of the controls are disabled
except ON/OFF (5) and Keylock (6). You can always turn the hob
off with the ON/OFF (5) button in an emergency, but you will have
to unlock the hob first before the next operation.
OVER-HEATING PROTECTION
When an excessive temperature is monitored within the Induction Hob,
the appliance will stop operation automatically.
DETECTION OF SMALL ARTICLES
When undersized or non-magnetic cookware (e.g. aluminium), or some
other small item (e.g. knife, fork) has been left on the hob, the hob will
automatically go into standby mode after 1 minute. The fan will keep
cooking down the Induction Hob for a further minute.
AUTO SHUTDOWN PROTECTION
Auto shut down is a safety protection function. It shuts down the
cooking zone automatically if you ever forget to turn it off. The default
working time for each power level is shown in the following table.
Power Level 1-3 4-6 7-8 9
Default Working Timer (mins) 240 180 120 90

13
Maintenance and Cleaning
• Before maintaining or cleaning is carried out, the appliance should be
disconnected from the main power supply. Switch o the appliance
at the wall socket and remove the plug.
USING THE TIMER
You can use the timer in two different ways. You can use it as a Minute
Minder or you can set it to turn one cooking zone off after the set time
is up. The timer can be set for up to 99 minutes.
Using the Timer as a Minute Minder
1. After selecting the cooking zone and the power level required (3),
the dot next to power level indicator will flash for 5 seconds.
2. Once the dot stops flashing, touch the timer (1). You can set the
timer anywhere from 1 to 99 minutes
3. When the timer is set, it will begin to count down immediately.
The display will show the time remaining and the dot next to timer
indicator will keep on flashing.
4. The buzzer will beep and the timer indicator will turn off once the
specified time has finished.
Setting the timer to turn one cooking zone off
1. Select the relevant cooking zone by touching the power level slider
(3) and set to the power level you require. The dot next to the
power level indicator will flash for 5 seconds.
2. Once the dot stops flashing, touch the timer (1). You can set the
timer anywhere from 1 to 99 minutes.
3. When the timer is set, the indicator will flash for 5 seconds and the
countdown will begin. The display will show the time remaining.
4. When the cooking timer expires, the corresponding cooking zone
will automatically switch off and the display will show “H”. Other
cooking zones will keep operating if they had been turned on
previously.
5. When using “the timer as an alarm” and “the timer to switch off
the zones” together, the display will show the remaining time of
the alarm as the first priority. Press the power level slider (3) of the
cooking zone to show the time remaining on the switch off timer.

14
Troubleshooting
If an error occurs, the induction Hob will enter the protective state
automatically and display corresponding protective codes:
Troubleshooting
If an error occurs, the Induction Hob will enter the protective state
automatically and display corresponding protective codes:
ERROR POSSIBLE CAUSE SOLUTION
The induction hob
cannot be turned on.
No power. • Make sure the induction hob is
connected to the power supply
and that it is switched on.
• Check whether there is a power
outage in your home or area.
If you’ve checked everything
and the problem persists, call a
qualified technician.
The touch keys are
unresponsive.
The keys are locked. Unlock the keys. See section
‘Using your induction hob for
instructions.
The touch keys are
dicult to operate.
There may be a slight film of
water over the keys or you may
be using the tip of your finger
when touching the keys.
Make sure the touch key area is
dry and use the ball of your finger
when touching the keys.
The glass is being
scratched.
• Rough-edged cookware.
• Unsuitable, abrasive scourer
or cleaning products are
being used.
• Use cookware with flat and
smooth bases.
• See ‘Choosing the right
cookware’.
Cookware is making
crackling or clicking
noises.
This may be caused by the
construction of your cookware.
This is normal for cookware and
does not indicate a failure.
The Induction Hob is
making a low humming
noise when used on a
high power level.
This is caused by the technolo-
gy of induction cooking.
This is normal, but the noise
should quieten down or disappear
completely when you decrease
the power level.
Fan noises are coming
from the Induction
Hob.
A cooling fan built into your
Induction Hob has switched on
to prevent the electronics from
overheating. It may continue to
run even after you have turned
the Induction Hob o.
This is normal and needs no
action. Do not switch o the
power supply of the Induction
Hob while the fan is running.
Cookware isn’t
becoming hot and
the symbol has
appeared in the
display.
• The Induction Hob cannot
detect the cookware because
it is not suitable for induction
cooking.
• The Induction Hob cannot
detect the cookware because
it is too small for the cooking
zone or not properly centred
on it.
• Use cookware suitable for
induction cooking. See section
‘Choosing the right cookware’.
• Centre the cookware and make
sure that its base matches the
size of the cooking zone.

15
ERROR POSSIBLE CAUSE SOLUTION
No cookware or cookware
is not suitable.
Replace the cookware.
ER03 Water or cookware on the glass is
over the control area.
Clean the user interface.
F1E The connection between the display
board and the mainboard has failed
(the cooking zone indicator is
showing “E”).
• The connection cable is not
correctly plugged in or is
defective.
• Replace the mainboard.
F3E Coil temperature sensor failure.
(the cooking zone indicator is
showing “E”)
Replace the coil sensor.
F4E Mainboard temperature sensor
failure (the cooking zone indicator
is showing “E”)
Replace the mainboard.
E1E The temperature measured by
thesensor of the ceramic glass plate
is too high.
Please restart after the Induction
Hob cools down.
E2E The temperature sensor of the IGBT
is too high.
Please restart after the Induction
Hob cools down.
E3E Abnormal supply voltage (too high) Please inspect whether the power
supply is normal. Power on after the
power supply returns to normal.
E4E Abnormal supply voltage (too low) Please inspect whether the power
supply is normal. Power on after the
power supply returns to normal.
E5E Temperature sensor failure
(the cooking zone indicator is
showing “E”)
The connection cable is not
correctly plugged in or is defective.
The above are examples of the judgment and inspection of common
failures. Please do not disassemble the unit by yourself to avoid any
dangers and damages to the Induction Hob, and please contact the
supplier.


Customer Support
www.asiapacbrands.com
Helpline New Zealand call toll free 0508 274 2722
Australia call +64 9 974 9206
Distributed by
Asia Pacific Brands 2019 Ltd
PO Box 301145 Albany,
Auckland 0752, New Zealand
Other manuals for INSB 6003 BK
1
This manual suits for next models
4
Table of contents
Other Cata Hob manuals

Cata
Cata UBTC30BV Specification sheet

Cata
Cata GHDFF60AL User manual

Cata
Cata TCDO604BV Manual

Cata
Cata GHFF60SS2 User manual

Cata
Cata IHB 6403 BK Quick start guide

Cata
Cata INSB 6003 BK Manual

Cata
Cata GH614BS User manual

Cata
Cata T 3102 BK Quick start guide

Cata
Cata L-7005 CI Quick start guide

Cata
Cata UBIND60 User manual

Cata
Cata AS 750 Manual

Cata
Cata TT 603 Manual

Cata
Cata IBG 6304 BK Quick start guide

Cata
Cata GIGA 600 BK Manual

Cata
Cata IND60T User manual

Cata
Cata GHFF70SS2 User manual

Cata
Cata GHI 6104 BK /A Quick start guide

Cata
Cata TDG 3002 BK Quick start guide

Cata
Cata EC60T2 User manual

Cata
Cata IB 6303 BK/A Quick start guide