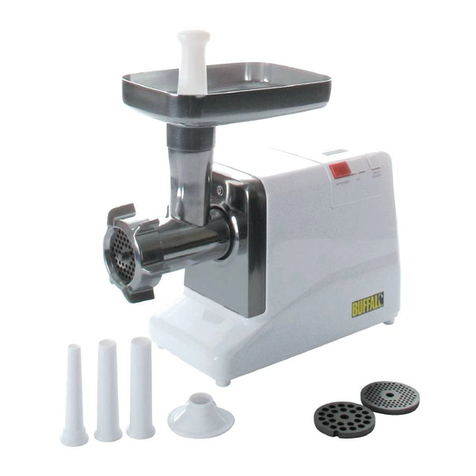
Caterlite CB943 User manual

Gehaktmachine
Handleiding
Hachoir à viande
Mode d'emploi
Fleischwolf
Bedienungsanleitung
Tritacarne
Manuale di istruzioni
Picadora de carne
Manual de instrucciones
Picadora de Carne
Manual de instruções
Köttkvarn
Bruksanvisning
Kødhakker
Instruktionsvejledning
Kjøttkvern
Brukerhåndbok
Lihamylly
Ohjekirja
NL
FR
DE
IT
ES
PT
S
DK
N
FIN
Meat Mincer
Instruction manual
Model •Modèle •Modell •Modello •Modelo •Malli:
CB943

Table of Contents
Safety Tips . . . . . . . . . . . . . . . . . . . . . . . . . . . . . . . . . . . . . . . . . . . . . . 1
Introduction . . . . . . . . . . . . . . . . . . . . . . . . . . . . . . . . . . . . . . . . . . . . . 1
Pack Contents . . . . . . . . . . . . . . . . . . . . . . . . . . . . . . . . . . . . . . . . . . . 1
Assembly . . . . . . . . . . . . . . . . . . . . . . . . . . . . . . . . . . . . . . . . . . . . . . . 2
Operation . . . . . . . . . . . . . . . . . . . . . . . . . . . . . . . . . . . . . . . . . . . . . . . 2
Cleaning, Care & Maintenance . . . . . . . . . . . . . . . . . . . . . . . . . . . . . . 3
Troubleshooting . . . . . . . . . . . . . . . . . . . . . . . . . . . . . . . . . . . . . . . . . . 3
Technical Specifications . . . . . . . . . . . . . . . . . . . . . . . . . . . . . . . . . . . . 4
Electrical Wiring . . . . . . . . . . . . . . . . . . . . . . . . . . . . . . . . . . . . . . . . . . 4
Compliance . . . . . . . . . . . . . . . . . . . . . . . . . . . . . . . . . . . . . . . . . . . . . 4
Inhoudsopgave
Veiligheidstips . . . . . . . . . . . . . . . . . . . . . . . . . . . . . . . . . . . . . . . . . . . . 5
Inleiding . . . . . . . . . . . . . . . . . . . . . . . . . . . . . . . . . . . . . . . . . . . . . . . . 5
Verpakkingsinhoud . . . . . . . . . . . . . . . . . . . . . . . . . . . . . . . . . . . . . . . . 5
Montage . . . . . . . . . . . . . . . . . . . . . . . . . . . . . . . . . . . . . . . . . . . . . . . . 6
Werking . . . . . . . . . . . . . . . . . . . . . . . . . . . . . . . . . . . . . . . . . . . . . . . . 6
Reiniging, zorg & onderhoud . . . . . . . . . . . . . . . . . . . . . . . . . . . . . . . . 7
Oplossen van problemen . . . . . . . . . . . . . . . . . . . . . . . . . . . . . . . . . . . 7
Technische specificaties . . . . . . . . . . . . . . . . . . . . . . . . . . . . . . . . . . . . 8
Elektrische bedrading . . . . . . . . . . . . . . . . . . . . . . . . . . . . . . . . . . . . . . 8
Productconformiteit . . . . . . . . . . . . . . . . . . . . . . . . . . . . . . . . . . . . . . 8
Sommaire
Conseils de sécurité . . . . . . . . . . . . . . . . . . . . . . . . . . . . . . . . . . . . . . . 9
Introduction . . . . . . . . . . . . . . . . . . . . . . . . . . . . . . . . . . . . . . . . . . . . . 9
Contenu de l'emballage . . . . . . . . . . . . . . . . . . . . . . . . . . . . . . . . . . . . 9
Montage . . . . . . . . . . . . . . . . . . . . . . . . . . . . . . . . . . . . . . . . . . . . . . . . 10
Fonctionnement . . . . . . . . . . . . . . . . . . . . . . . . . . . . . . . . . . . . . . . . . . 10
Nettoyage, entretien et maintenance . . . . . . . . . . . . . . . . . . . . . . . . . 11
Dépannage . . . . . . . . . . . . . . . . . . . . . . . . . . . . . . . . . . . . . . . . . . . . . . 11
Spécifications techniques . . . . . . . . . . . . . . . . . . . . . . . . . . . . . . . . . . . 12
Raccordement électrique . . . . . . . . . . . . . . . . . . . . . . . . . . . . . . . . . . . 12
Conformité . . . . . . . . . . . . . . . . . . . . . . . . . . . . . . . . . . . . . . . . . . . . . . 12
UK
NL
FR

Inhalt
Sicherheitshinweise . . . . . . . . . . . . . . . . . . . . . . . . . . . . . . . . . . . . . . . 13
Einführung . . . . . . . . . . . . . . . . . . . . . . . . . . . . . . . . . . . . . . . . . . . . . . . 13
Lieferumfang . . . . . . . . . . . . . . . . . . . . . . . . . . . . . . . . . . . . . . . . . . . . . 13
Montage . . . . . . . . . . . . . . . . . . . . . . . . . . . . . . . . . . . . . . . . . . . . . . . . 14
Betrieb . . . . . . . . . . . . . . . . . . . . . . . . . . . . . . . . . . . . . . . . . . . . . . . . . 14
Reinigung, Pflege und Wartung . . . . . . . . . . . . . . . . . . . . . . . . . . . . . . 15
Störungssuche . . . . . . . . . . . . . . . . . . . . . . . . . . . . . . . . . . . . . . . . . . . 15
Technische Spezifikationen . . . . . . . . . . . . . . . . . . . . . . . . . . . . . . . . . 16
Elektroanschlüsse . . . . . . . . . . . . . . . . . . . . . . . . . . . . . . . . . . . . . . . . . 16
Konformität . . . . . . . . . . . . . . . . . . . . . . . . . . . . . . . . . . . . . . . . . . . . . 16
Indice
Suggerimenti per la sicurezza . . . . . . . . . . . . . . . . . . . . . . . . . . . . . . . . 17
Introduzione . . . . . . . . . . . . . . . . . . . . . . . . . . . . . . . . . . . . . . . . . . . . . 17
Contenuto dell'imballaggio . . . . . . . . . . . . . . . . . . . . . . . . . . . . . . . . . 17
Montaggio . . . . . . . . . . . . . . . . . . . . . . . . . . . . . . . . . . . . . . . . . . . . . . . 18
Funzionamento . . . . . . . . . . . . . . . . . . . . . . . . . . . . . . . . . . . . . . . . . . . 18
Pulizia e manutenzione . . . . . . . . . . . . . . . . . . . . . . . . . . . . . . . . . . . . . 19
Risoluzione dei problemi . . . . . . . . . . . . . . . . . . . . . . . . . . . . . . . . . . . 19
Specifiche tecniche . . . . . . . . . . . . . . . . . . . . . . . . . . . . . . . . . . . . . . . . 20
Cablaggi elettrici . . . . . . . . . . . . . . . . . . . . . . . . . . . . . . . . . . . . . . . . . . 20
Conformità . . . . . . . . . . . . . . . . . . . . . . . . . . . . . . . . . . . . . . . . . . . . . . 20
Índice
Consejos de Seguridad . . . . . . . . . . . . . . . . . . . . . . . . . . . . . . . . . . . . . 21
Introducción . . . . . . . . . . . . . . . . . . . . . . . . . . . . . . . . . . . . . . . . . . . . . 21
Contenido del Conjunto . . . . . . . . . . . . . . . . . . . . . . . . . . . . . . . . . . . 21
Montaje . . . . . . . . . . . . . . . . . . . . . . . . . . . . . . . . . . . . . . . . . . . . . . . . . 22
Funcionamiento . . . . . . . . . . . . . . . . . . . . . . . . . . . . . . . . . . . . . . . . . . 22
Limpieza, Cuidado y Mantenimiento . . . . . . . . . . . . . . . . . . . . . . . . . . 23
Resolución de problemas . . . . . . . . . . . . . . . . . . . . . . . . . . . . . . . . . . . 23
Especificaciones Técnicas . . . . . . . . . . . . . . . . . . . . . . . . . . . . . . . . . . . 24
Cableado Eléctrico . . . . . . . . . . . . . . . . . . . . . . . . . . . . . . . . . . . . . . . . 24
Cumplimiento . . . . . . . . . . . . . . . . . . . . . . . . . . . . . . . . . . . . . . . . . . . . 24
DE
IT
ES

Índice
Conselhos de segurança . . . . . . . . . . . . . . . . . . . . . . . . . . . . . . . . . . . 25
Introdução . . . . . . . . . . . . . . . . . . . . . . . . . . . . . . . . . . . . . . . . . . . . . . 25
Conteúdo da embalagem . . . . . . . . . . . . . . . . . . . . . . . . . . . . . . . . . . . 25
Montagem . . . . . . . . . . . . . . . . . . . . . . . . . . . . . . . . . . . . . . . . . . . . . . . 26
Funcionamento . . . . . . . . . . . . . . . . . . . . . . . . . . . . . . . . . . . . . . . . . . . 26
Limpeza, cuidados & manutenção . . . . . . . . . . . . . . . . . . . . . . . . . . . . 27
Resolução de problemas . . . . . . . . . . . . . . . . . . . . . . . . . . . . . . . . . . . 27
Especificações técnicas . . . . . . . . . . . . . . . . . . . . . . . . . . . . . . . . . . . . . 28
Cablagem eléctrica . . . . . . . . . . . . . . . . . . . . . . . . . . . . . . . . . . . . . . . . 28
Conformidade . . . . . . . . . . . . . . . . . . . . . . . . . . . . . . . . . . . . . . . . . . . 28
Innehållsförteckning
Säkerhetsråd . . . . . . . . . . . . . . . . . . . . . . . . . . . . . . . . . . . . . . . . . . . . . 29
Inledning . . . . . . . . . . . . . . . . . . . . . . . . . . . . . . . . . . . . . . . . . . . . . . . . 29
Förpackningsinnehåll . . . . . . . . . . . . . . . . . . . . . . . . . . . . . . . . . . . . . . 29
Montering . . . . . . . . . . . . . . . . . . . . . . . . . . . . . . . . . . . . . . . . . . . . . . . 30
Drift . . . . . . . . . . . . . . . . . . . . . . . . . . . . . . . . . . . . . . . . . . . . . . . . . . . 30
Rengöring, omvårdnad och underhåll . . . . . . . . . . . . . . . . . . . . . . . . . 31
Felsökning . . . . . . . . . . . . . . . . . . . . . . . . . . . . . . . . . . . . . . . . . . . . . . . 31
Technical Specifications . . . . . . . . . . . . . . . . . . . . . . . . . . . . . . . . . . . . 32
Elektriska kablar . . . . . . . . . . . . . . . . . . . . . . . . . . . . . . . . . . . . . . . . . . 32
Tillmötesgående . . . . . . . . . . . . . . . . . . . . . . . . . . . . . . . . . . . . . . . . . . 32
Indholdsfortegnelse
Sikkerhedstips . . . . . . . . . . . . . . . . . . . . . . . . . . . . . . . . . . . . . . . . . . . 33
Introduktion . . . . . . . . . . . . . . . . . . . . . . . . . . . . . . . . . . . . . . . . . . . . . 33
Emballagens indhold . . . . . . . . . . . . . . . . . . . . . . . . . . . . . . . . . . . . . . . 33
Samling . . . . . . . . . . . . . . . . . . . . . . . . . . . . . . . . . . . . . . . . . . . . . . . . . 34
Brug . . . . . . . . . . . . . . . . . . . . . . . . . . . . . . . . . . . . . . . . . . . . . . . . . . . 34
Regnøring, pleje og vedligeholdelse . . . . . . . . . . . . . . . . . . . . . . . . . . . 35
Fejlfinding . . . . . . . . . . . . . . . . . . . . . . . . . . . . . . . . . . . . . . . . . . . . . . . 35
Tekniske specifikationer . . . . . . . . . . . . . . . . . . . . . . . . . . . . . . . . . . . 36
El-kabler . . . . . . . . . . . . . . . . . . . . . . . . . . . . . . . . . . . . . . . . . . . . . . . . 36
Overensstemmelse . . . . . . . . . . . . . . . . . . . . . . . . . . . . . . . . . . . . . . . 36
PT
S
DK

Innhold
Sikkerhetstips . . . . . . . . . . . . . . . . . . . . . . . . . . . . . . . . . . . . . . . . . . . . 37
Innledning . . . . . . . . . . . . . . . . . . . . . . . . . . . . . . . . . . . . . . . . . . . . . . . 37
Pakkeinnhold . . . . . . . . . . . . . . . . . . . . . . . . . . . . . . . . . . . . . . . . . . . . 37
Montasje . . . . . . . . . . . . . . . . . . . . . . . . . . . . . . . . . . . . . . . . . . . . . . . . 38
Bruk . . . . . . . . . . . . . . . . . . . . . . . . . . . . . . . . . . . . . . . . . . . . . . . . . . . 38
Rengjøring, stell og vedlikehold . . . . . . . . . . . . . . . . . . . . . . . . . . . . . . 39
Feilsøking . . . . . . . . . . . . . . . . . . . . . . . . . . . . . . . . . . . . . . . . . . . . . . . 39
Tekniske spesifikasjoner . . . . . . . . . . . . . . . . . . . . . . . . . . . . . . . . . . . 40
Elektrisk tilkopling . . . . . . . . . . . . . . . . . . . . . . . . . . . . . . . . . . . . . . . . 40
Samsvar . . . . . . . . . . . . . . . . . . . . . . . . . . . . . . . . . . . . . . . . . . . . . . . . 40
Sisällysluettelo
Turvallisuusvihjeitä . . . . . . . . . . . . . . . . . . . . . . . . . . . . . . . . . . . . . . . . 41
Johdanto . . . . . . . . . . . . . . . . . . . . . . . . . . . . . . . . . . . . . . . . . . . . . . . . 41
Pakkauksen sisältö . . . . . . . . . . . . . . . . . . . . . . . . . . . . . . . . . . . . . . . . 41
Kokoonpano . . . . . . . . . . . . . . . . . . . . . . . . . . . . . . . . . . . . . . . . . . . . . 42
Käyttö . . . . . . . . . . . . . . . . . . . . . . . . . . . . . . . . . . . . . . . . . . . . . . . . . . 42
Puhdistus, hoito & huolto . . . . . . . . . . . . . . . . . . . . . . . . . . . . . . . . . . 43
Vianetsintä . . . . . . . . . . . . . . . . . . . . . . . . . . . . . . . . . . . . . . . . . . . . . . 43
Tekniset tiedot . . . . . . . . . . . . . . . . . . . . . . . . . . . . . . . . . . . . . . . . . . . 44
Sähköjohdot . . . . . . . . . . . . . . . . . . . . . . . . . . . . . . . . . . . . . . . . . . . . . 44
Vaatimustenmukaisuus . . . . . . . . . . . . . . . . . . . . . . . . . . . . . . . . . . . . . 44
N
FIN

1
UK
Safety Tips
• Position on a flat, stable surface.
• A service agent/qualified technician should carry out installation and any repairs if required. Do not
remove any components on this product.
• Consult Local and National Standards to comply with the following:
• Health and Safety at Work Legislation
• BS EN Codes of Practice
• Fire Precautions
• IEE Wiring Regulations
• Building Regulations
• DO NOT feed meat in to the appliance by hand. ALWAYS use the pusher supplied.
• DO NOT use fingers to clear the exit hole while the appliance is turned on.
• DO NOT allow the motor to work against a blockage for any length of time.
• DO NOT immerse in water.
• Only use as much power cable as required. Store the unused cable in the compartment at the rear of
the appliance.
• Only use original Caterlite parts and attachments with this appliance.
• Always carry the appliance by the motor housing.
• Not suitable for outdoor use.
• Keep all packaging away from children. Dispose of the packaging in accordance to the regulations of
local authorities.
• If the power cord is damaged, it must be replaced by a Caterlite agent or a recommended qualified
technician in order to avoid a hazard.
Introduction
Please take a few moments to carefully read through this manual. Correct maintenance and operation of
this appliance will provide the best possible performance from your Caterlite product.
Pack Contents
The following is included:
Caterlite prides itself on quality and service, ensuring that at the time of packaging the contents are supplied
fully functional and free of damage.
Should you find any damage as a result of transit, please contact your Caterlite dealer immediately.
• Caterlite Meat Mincer
•Hoppertray
•Foodpusher
• Feed screw
•Cuttingblade
• Cutting plate (coarse - 8mm)
• Cutting plate (medium 5mm)
• Cutting plate (fine - 3 mm)
• Instruction Manual

2
UK
Telephone Helpline: 0845 146 2887 (United Kingdom)
Assembly
1. Loosen the locking knob.
2. Insert the mincing barrel into the motor housing mouth, with the shaft facing upwards.
3. Tighten the locking knob.
4. Insert the feed screw into the mincing barrel. Turn the screw slightly to slot the end of the screw on to
the transmission shaft, if necessary.
5. Insert the cutting blade on to the end of the feed screw.
6. Match the groove on the edge of the desired cutting plate to the pin on the mincing barrel. Slide the
cutting disc on to the feed screw.
7. Screw the barrel cap on to the end of the mincing barrel until tight.
8. Twist the hopper tray into place.
Operation
1. Cut the meat into small enough pieces to fit in to the hole in the hopper tray.
2. Press the ON button.
3. Feed the meat into the shaft using the food pusher.
Note: Ensure the flat face of the blade faces forwards as illustrated.
Note: Clean the appliance with warm soapy water and dry thoroughly before using for
the first time.
WARNING: Never push the meat into the shaft using your fingers.
Locking Knob Cutting Blade Barrel Shaft Hopper ON button
Barrel cap Cutting plate Feed screw Locking Knob OFF/Reverse button
CIRCUIT BREAKER
button

3
UK
If the circuit breaker stops the appliance or the appliance becomes jammed:
1. Press the OFF/REVERSE button immediately.
2. Press the CIRCUIT BREAKER button.
3. Press and HOLD the OFF/REVERSE button to clear the blockage.
4. Turn off the appliance and disconnect from the power supply.
5. Remove and clear the mincing barrel and all components.
Cleaning, Care & Maintenance
• Do not use any abrasive cleaning agents on the appliance. Use warm soapy water.
• Do not immerse the motor housing in water. Clean the exterior with a damp cloth.
• Always dry thoroughly after cleaning.
• A Caterlite agent or qualified technician should carry out repairs if required.
For ease of cleaning, disassemble the appliance:
• Unscrew the barrel cap.
• Remove the mincing barrel, plate, blade and feed screw as one unit. Gently tip the barrel to remove
the pieces one by one.
• Twist off the hopper tray.
• Remove meat from all components and wash in warm, soapy water.
•Drythoroughly.
• Lubricate the parts with a little cooking oil before replacing for best performance.
Troubleshooting
If your Caterlite appliance develops a fault, please check the following table before making a call to the
Helpline.
Note: Always switch off and disconnect the appliance from the power supply before
cleaning.
Note: If the cap has been put on too tight, knock the corners of the cap with a rubber
mallet or similar instrument to loosen it.
Fault Probable Cause Action
The appliance is not working The appliance is not switched on Check the appliance is plugged in correctly
and switched on
Plug and lead are damaged Call Caterlite agent or qualified technician
Fuse in the plug has blown Replace the plug fuse
Power supply Check power supply
Internal wiring fault Call Caterlite agent or qualified technician

4
UK
Telephone Helpline: 0845 146 2887 (United Kingdom)
Technical Specifications
Electrical Wiring
This appliance is supplied with a 3 pin, moulded, BS1363 plug and lead, with a 13 amp fuse as standard.
The plug is to be connected to a suitable mains socket.
This appliance is wired as follows:
• Live wire (coloured brown) to terminal marked L
• Neutral wire (coloured blue) to terminal marked N
• Earth wire (coloured green/yellow) to terminal marked E
This appliance must be earthed, using a dedicated earthing circuit.
If in doubt consult a qualified electrician.
Electrical isolation points must be kept clear of any obstructions. In the event of any emergency
disconnection being required they must be readily accessible.
Compliance
The WEEE logo on this product or its documentation indicates that the product must
not be disposed of as household waste. To help prevent possible harm to human
health and/or the environment, the product must be disposed of in an approved and
environmentally safe recycling process. For further information on how to dispose of
this product correctly, contact the product supplier, or the local authority responsible
for waste disposal in your area.
Caterlite parts have undergone strict product testing in order to comply with
regulatory standards and specifications set by international, independent, and federal
authorities.
Caterlite products have been approved to carry the following symbol:
All rights reserved. No part of these instructions may be produced or transmitted in any form or by any means,
electronic, mechanical, photocopying, recording or otherwise, without the prior written permission of Caterlite.
Every effort is made to ensure all details are correct at the time of going to press, however, Caterlite reserve the
right to change specifications without notice.
Fault Probable Cause Action
Minced meat does not exit the
appliance evenly
The barrel cap is on too tight Loosen the cap
The cutting plate is blocked Remove and clean the plate
The cutting blade is blunt Replace the cutting blade
Appliance is overfilled Follow instructions for clearing a jam
Model Voltage Power Current Output Dimensions
h x w x d mm Weight
CB943 230V 50Hz 350W 1.5A 110kg/hour 430 x420 x 170 6kg
5
NL Klantenondersteuning: 050 – 609999 (België)
Veiligheidstips
• Plaatsen op een vlakke en stabiele ondergrond.
• De installatie en eventuele reparaties zijn door een servicetechnicus/vaktechnicus uit te voeren.
Verwijder geen componenten of servicepanelen van dit product.
• Raadpleeg en volg de plaatselijke en nationale regelgeving op m.b.t. tot het volgende:
• Wetgeving van gezondheid en veiligheid op de werkplaats
• Werkregels
• Brandpreventie
• IEE bekabelingsnormen
• Bouwverordeningen
• NIET met de hand vlees in het apparaat stoppen. ALTIJD de meegeleverde aandrukker gebruiken.
• NOOIT uw vingers in de nabijheid van de afvoeropening houden wanneer het apparaat aanstaat.
• NIET de motor geforceerd laten werken bij blokkeringen gedurende enige tijd dan ook.
• NIET in water onderdompelen.
• Alleen de vereiste kabellengte gebruiken. Bewaar ongebruikte kabellengte in het compartiment
achterin het apparaat.
• Gebruik uitsluitend originele Caterlite onderdelen en hulpmiddelen bij dit apparaat.
• Houd bij het verplaatsen het apparaat aan de motorbehuizing vast.
• Niet geschikt voor gebruik buitenshuis.
• Laat verpakkingsmateriaal niet binnen handbereik van kinderen. Verpakkingsmateriaal in
overeenstemming met de regelgeving van de plaatselijke overheden als afval laten verwerken.
• Indien de stroomkabel beschadigd raakt, dient men deze door een Caterlite technicus of aanbevolen
vaktechnicus te laten vervangen om gevaarlijke situaties te verhinderen.
Inleiding
Neem de tijd en lees deze handleiding aandachtig door. Een correct gebruik en onderhoud van deze
machine waarborgt de beste prestatie van uw Caterlite product.
Verpakkingsinhoud
De verpakking bevat het volgend:
Caterlite is trots op de haar productkwaliteit en dienstverlening en controleer de inhoud van de
verpakkingen, tijdens de verpakkingsfase, op functionaliteit en schade.
Mocht u product door transport zijn beschadigd, neem dan onmiddellijk contact op met uw Caterlite dealer.
•CaterliteGehaktmachine
• Haklade
• Vleesaandrukker
• Invoerschroef
•Snijschroef
• Snijplaat (grof - 8 mm)
• Snijplaat (middelgroot - 5 mm)
• Snijplaat (fijn - 3 mm)
• Handleiding

6
NL
Klantenondersteuning: 040 – 2628080 (Nederland)
Montage
1. Vergrendelingsknop losmaken.
2. Plaats de hakcilinder in de mond van de motorbehuizing en met de schacht naar boven.
3. Draai de bevestigingsknop aan.
4. Plaats de invoerschroef in de hakcilinder. Draai de schroef lichtjes om het einde van de schroef in de
transmissieas te plaatsen, indien nodig.
5. Plaats het snijblad op het uiteinde van de invoerschroef.
6. Lijn de inkeping aan de rand van de gewenste snijschijf op de pin van de hakcilinder. Schuif de
snijschijf op de invoerschroef.
7. Schroef de cilinderkap goed vast op het uiteinde van de hakcilinder.
8. Draai de haklade op zijn plaats.
Werking
1. Snij het vlees in kleine stukken en zodanig dat deze in de opening van de haklade passen.
2. Druk op de ON- knop.
3. Stop het vlees met behulp van de vleesaandrukker in de cilinder.
Opmerking: controleer of het vlakke oppervlak van het snijblad aan de voorzijde zit,
conform afbeelding.
Opmerking: Alvorens het eerste gebruik, dient u het apparaat met warm zeepwater te
reinigen en zorgvuldig te drogen.
WAARSCHUWING: nooit met uw vingers het vlees in de cilinder aandrukken.
Bevestigingsknop Snijblad Cilinder As Hakker ON-knop
Snijplaat Snijschijf Invoerschroef OFF/Reverse knop
CIRCUIT
BREAKER-knop

7
NL Klantenondersteuning: 050 – 609999 (België)
Wanneer de stroomonderbreker het apparaat stopt of het apparaat geblokkeerd raakt,zet dan het apparaat
onmiddellijk uit.
1. Druk onmiddellijk de OFF/REVERSE-knop in.
2. Druk de CIRCUIT BREAKER-knop in.
3. Druk en HOUD de OFF/REVERSE-knop in om de blokkering te verwijderen.
4. Zet het apparaat uit en haal de steker uit het stopcontact.
5. Verwijder en ontruim de hakcilinder en alle componenten.
Reiniging, zorg & onderhoud
• Gebruik geen bijtende reinigingsmiddelen voor dit apparaat. Gebruik warm zeepwater.
• De motorbehuizing niet in water dompelen. Reinig de buitenkant met een vochtige doek.
• Na reiniging altijd zorgvuldig drogen.
• Eventuele reparaties moeten door een Caterlite technicus of een vaktechnicus worden uitgevoerd.
Demonteer het apparaat voor een gemakkelijke reiniging:
• Schroef de cilinderkap los.
• Verwijder de hakcilinder, plaat, snijblad en invoerschroef als één geheel. Kantel de cilinder voorzichtig
naar voren om één voor één de onderdelen te verwijderen.
• Draai de haklade los.
• Verwijder het vlees van alle componenten en was deze in warm zeepwater.
• Zorgvuldig drogen.
• Voor de beste prestatie smeert u voor de plaatsing de onderdelen met een beetje kookolie in.
Oplossen van problemen
Indien er een storing van uw Caterlite product optreedt, dient u de onderstaande tabel te raadplegen
alvorens contact op te nemen met uw Caterlite dealer of de Hulplijn te bellen.
Opmerking: alvorens het apparaat te reinigen dient men altijd de stroomvoorziening uit
te schakelen.
Opmerking: Indien de kap te vast is aangedraaid, tik met een rubberen hamer of
vergelijkbaar instrument op de hoeken van de kap, zodat deze losraakt.
Probleem Mogelijke oorzaak Handeling
Het apparaat werkt niet Het apparaat staat uit Controleer of de stroomkabel van het
apparaat is aangesloten en of het apparaat
is ingeschakeld
Steker en kabel zijn beschadigd Laat een Caterlite technicus of een
vaktechnicus komen
De zekering in de steker is gesprongen Vervang de zekering in de steker
Stroomvoorziening Controleer de stroomvoorziening
Storing interne bedrading Laat een Caterlite technicus of een
vaktechnicus komen

8
NL
Klantenondersteuning: 040 – 2628080 (Nederland)
Technische specificaties
Elektrische bedrading
Men dient de steker op een geschikt stopcontact aan te sluiten.
De bedrading van dit apparaat is als volgt:
• Stroomkabel (bruin) naar de aansluitklem gemarkeerd met L
• Neutraalkabel (blauw) naar de aansluitklem gemarkeerd met N
• Aardekabel (groen/geel) naar de aansluitklem gemarkeerd met E
Dit apparaat moet worden geaard met behulp van een adequaat aardingscircuit.
Bij twijfels raadpleeg een vakkundige elektricien.
De elektrische isolatiepunten mogen niet worden geblokkeerd. In geval van een nooduitschakeling moeten
de isolatiepunten direct toegankelijk zijn.
Productconformiteit
Het WEEE-logo op dit product of bijbehorende documentatie geeft aan dat het product
niet onder huisvuil valt en als zodanig ook niet mag worden verwerkt. Ter preventie
van mogelijke gevaren voor de gezondheid van personen en/of voor het milieu, dient
men dit product in overeenstemming met het voorgeschreven en milieuveilige
recyclingproces als afval te verwerken. Raadpleeg uw productleverancier of uw
plaatselijk afvalverwerkingsbedrijf voor meer informatie over de juiste
afvalverwerking van dit product.
De onderdelen van Caterlite producten hebben strenge producttesten ondergaan om
te voldoen aan wettelijke regels en specificaties die door internationale,
onafhankelijke en landelijke overheden worden voorgeschreven.
Caterlite producten zijn goedgekeurd en voorzien van het volgende symbool:
Alle rechten voorbehouden. Het is verboden om deze handleiding, hetzij volledig of gedeeltelijk, elektronisch of
mechanisch te reproduceren, kopiëren, op opslagmedia op te slaan of op enigerlei wijze over te dragen, zonder
voorafgaande goedkeuring van Caterlite.
Wij hebben er alles aan gedaan om er zeker van te zijn dat op publicatiedatum van de handleiding alle details correct
zijn, desondanks, behoudt Caterlite het recht voor om specificaties zonder aankondiging te wijzigen.
Probleem Mogelijke oorzaak Handeling
Het gehakte vlees komt
niet geleidelijk uit het
apparaat
De cilinderkap is te strak aangedraaid Maak de kap los
De snijplaat is geblokkeerd Verwijder en reinig de plaat
Het snijblad is bot Vervang het snijblad
Apparaat is te vol Volg de aanwijzingen om een verstopping
te verwijderen
Model Voltage Vermogen Stroom Vleesproductie Afmetingen
h x b x d mm Gewicht
CB943 230V 50Hz 350W 1,5A 110kg/uur 430 x420 x 170 6kg
9
FR Standard d'assistance téléphonique: 050 – 600006 (Belgique)
Conseils de sécurité
• Placez l'appareil sur une surface plane, stable.
• L'installation et les éventuelles réparations doivent être confiées à un dépanneur / technicien qualifié.
Ne retirez aucun composant ou cache de ce produit.
• Consultez les normes locales et nationales pour vous conformer aux :
• lois sur l'hygiène et la sécurité au travail ;
• codes de bonnes pratiques BS EN ;
• précautions contre le risque d'incendie ;
• réglementations sur les branchements électriques IEE ;
• règlements sur la construction.
• NE PAS pousser la viande dans l'appareil à la main. Utilisez TOUJOURS le pilon fourni.
• NE PAS essayer de déboucher du bout des doigts les trous de sortie de la viande, quand l'appareil est
en marche.
• NE PAS laisser le moteur forcer trop longtemps en cas d'obturation.
• NE PAS immerger l'appareil.
• N'utilisez pas plus de longueur de cordon d'alimentation que nécessaire. Rangez le surplus de cordon
inutilisé dans le compartiment prévu à l'arrière de l'appareil.
• N'utilisez que des pièces et accessoires d'origine Caterlite avec cet appareil.
• Ne portez l'appareil que par le carter moteur.
• Cet appareil est réservé exclusivement à une utilisation à l'intérieur.
• Gardez les emballages hors de portée des enfants. Débarrassez-vous des emballages conformément
aux règlements des autorités locales.
• Un cordon d'alimentation endommagé doit être remplacé par un agent Caterlite ou un technicien
qualifié recommandé, pour éviter tout danger.
Introduction
Nous vous invitons à consacrer quelques instants à la lecture attentive de ce manuel. L'entretien et
l'utilisation appropriés de cet appareil vous permettront de tirer le meilleur de votre produit Caterlite.
Contenu de l'emballage
Eléments fournis de série :
Caterlite attache une grande importance à la qualité et au service et veille à fournir des produits en parfait
état opérationnel, parfaitement intacts au moment de l'emballage.
Nous vous prions de contacter votre revendeur Caterlite immédiatement si vous constatez un dommage
quelconque survenu pendant le transport du produit.
• Hachoir à viande Caterlite
•Plateaudetrémie
• Pilon
• Spirale d'alimentation
• Disque de coupe
• Plaque de coupe (grossière - 8 mm)
• Plaque de coupe (moyenne - 5 mm)
• Plaque de coupe (fin - 3 mm)
• Mode d'emploi

10
FR
Standard d'assistance téléphonique: 01 64 89 73 61 (Français)
Montage
1. Desserrez la molette de verrouillage.
2. Insérez le broyeur dans l'entrée du carter moteur, en tournant l'arbre vers le haut.
3. Serrez le bouton de verrouillage.
4. Insérez la vis sans fin dans le broyeur. Faites légèrement pivoter la vis pour en insérer l'extrémité dans
l'arbre de transmission, si nécessaire.
5. Insérez le couteau sur l'extrémité de la vis sans fin.
6. Alignez la rainure située sur le bord du disque de coupe utilisé, sur l'ergot du barillet de hachoir.
Glissez le disque de coupe sur la spirale d'alimentation.
7. Vissez à fond la couronne filetée du corps du hachoir sur l'extrémité du corps du hachoir.
8. Faites pivoter le plateau de trémie à sa place.
Fonctionnement
1. Coupez la viande en morceaux assez petits pour passer à travers le trou du plateau de trémie.
2. Appuyez sur ON (MARCHE).
3. Poussez la viande dans le trou, à l'aide du poussoir.
Remarque : Veillez à ce que le côté plat du couteau soit orienté vers l'avant,
conformément à l'illustration.
Remarque : Nettoyez l'appareil à l'eau tiède savonneuse et séchez-le minutieusement
avant la première mise en service.
AVERTISSEMENT : Ne poussez jamais la viande dans le trou à la main.
Couteaux Broyeur Arbre Trémie Bouton ON (MARCHE)
Couronne du Plaque de Vis sans fin Bouton OFF (ARRÊT) / REVERSE
broyeur coupe (MARCHE INVERSÉE)
Bouton COUPE-
CIRCUIT
Bouton de
verrouillage

11
FR Standard d'assistance téléphonique: 050 – 600006 (Belgique)
Si le coupe-circuit se déclenche et arrête l'appareil ou si l'appareil se bloque :
1. Appuyez sur le bouton OFF (ARRÊT) / REVERSE (MARCHE INVERSÉE) immédiatement.
2. Appuyez sur le bouton COUPE-CIRCUIT.
3. Appuyez sur et MAINTENEZ ENFONCÉ le bouton OFF (ARRÊT) / REVERSE (MARCHE INVERSÉE) pour
débloquer le broyeur.
4. Éteignez l'appareil et débranchez-le de la prise secteur.
5. Retirez et débouchez le corps du hachoir et toutes les pièces.
Nettoyage, entretien et maintenance
• N'utilisez aucun produit de nettoyage abrasif sur l'appareil. Nettoyez-le à l'eau tiède savonneuse.
• N'immergez pas le carter moteur de l'appareil, dont vous nettoierez l'extérieur à l'aide d'un chiffon
humide.
• Séchez toujours minutieusement l'appareil après l'avoir nettoyé.
• Les réparations, le cas échéant, doivent être confiées à un agent Caterlite ou à un technicien qualifié.
Démontez l'appareil pour en faciliter le nettoyage :
• Dévissez la couronne filetée du corps du hachoir.
• Retirez ensemble le corps du hachoir, la plaque perforée, le couteau et la vis sans fin. Inclinez
doucement le corps du hachoir pour en retirer les pièces, une par une.
• Dégagez le plateau de trémie, en le faisant pivoter.
• Retirez la viande de toutes les pièces et lavez-les à l'eau tiède savonneuse.
• Séchez-les minutieusement.
• Lubrifiez les pièces avec un peu d'huile de cuisson avant de les remonter, pour optimiser les
performances du hachoir.
Dépannage
En cas de panne de votre appareil Caterlite, vérifiez les données du tableau ci-dessous avant d'appeler notre
standard d'assistance ou votre revendeur Caterlite.
Remarque : N'oubliez jamais d'éteindre l'appareil et d'en débrancher le cordon
d'alimentation avant de le nettoyer.
Remarque : Si la couronne filetée est trop serrée, tapotez les bords de la couronne à
l'aide d'un maillet en caoutchouc ou d'un instrument similaire, pour la décoincer.
Dysfonctionnement Cause probable Intervention
L'appareil ne fonctionne pas L'appareil n'est pas allumé Vérifier que l'appareil est bien branché et
allumé
La prise et le cordon sont
endommagés
Appeler un agent Caterlite ou un technicien
qualifié
Alimentation Vérifier l'alimentation
Problème de branchement interne Appeler un agent Caterlite ou un technicien
qualifié

12
FR
Standard d'assistance téléphonique: 01 64 89 73 61 (Français)
Spécifications techniques
Raccordement électrique
La prise doit être reliée à la prise secteur qui convient.
Cet appareil est câblé comme suit :
• Fil conducteur (brun) à la borne marquée L
• Fil neutre (bleu) à la borne marquée N
• Fil de terre (vert / jaune) à la borne marquée E
Cet appareil doit être raccordé à la terre, par le biais d'un circuit de mise à la terre dédié.
En cas de doute, consultez un électricien qualifié.
Les points d'isolation électrique doivent être libres de toute obstruction. En cas de débranchement requis
en urgence, ils doivent être facilement accessibles.
Conformité
Le logo WEEE qui figure sur ce produit ou sa documentation indique qu'il ne doit pas
être mis au rebut avec les ordures ménagères. Pour éviter qu'il ne présente un risque
pour la santé humaine et / ou écologique, confiez la mise au rebut de ce produit à un
site de recyclage agréé respectueux de l'environnement. Pour de plus amples détails
sur la mise au rebut appropriée de ce produit, contactez le fournisseur du produit ou
l'autorité responsable de l'enlèvement des ordures dans votre région.
Les pièces Caterlite ont été soumises à des tests rigoureux pour pouvoir être déclarées
conformes aux normes et spécifications réglementaires définies par les autorités
internationales, indépendantes et fédérales.
Les produits Caterlite ont été déclarés aptes à porter le symbole suivant :
Tous droits réservés. La production ou transmission, partielles ou intégrales, sous quelque forme que ce soit ou par
n'importe quel moyen, tant électronique que mécanique, sous forme de photocopie, d'enregistrement ou autre de
ce mode d'emploi sont interdites sans l'autorisation préalablement accordée par Caterlite.
Nous nous efforçons, par tous les moyens dont nous disposons, de faire en sorte que les détails contenus dans le
présent mode d'emploi soient corrects en date d'impression. Toutefois, Caterlite se réserve le droit de changer les
spécifications de ses produits sans préavis.
Dysfonctionnement Cause probable Intervention
La viande hachée ne sort pas
uniformément de la plaque perforée.
Couronne de corps du hachoir trop
serrée
Desserrer la couronne
Plaque perforée obstruée Retirer et nettoyer la couronne
Couteau émoussé Remplacer le couteau
Appareil trop plein Suivre les instructions pour éliminer un
blocage
Modèle Tension Puissance Courant
Débit
Dimensions
h x l x l mm
Poids
CB943 230V 50Hz 350W 1,5A 110kg/heure 430 x420 x 170 6kg
13
DE
Sicherheitshinweise
• Auf eine flache, stabile Fläche stellen.
• Alle erforderlichen Montage- und Reparaturarbeiten sollten von Wartungspersonal oder einem
qualifizierten Techniker durchgeführt werden. Keine Bauteile oder Bedienflächen von diesem Produkt
entfernen.
• Für folgende Normen und Vorschriften sind die lokalen und nationalen Normen heranzuziehen:
• Arbeitsschutzvorschriften
• BS EN Verhaltenspraktiken
• Brandschutzvorschriften
• IEE-Anschlussvorschriften
• Bauvorschriften
• Fleisch NICHT von Hand in das Gerät füllen. IMMER den mitgelieferten Stopfer verwenden.
• Bei eingeschaltetem Gerät die Ausgangsöffnung NICHT mit den Fingern freimachen.
• Den Motor NICHT über längere Zeit eingeschaltet lassen, wenn eine Blockierung vorliegt.
• NICHT in Wasser eintauchen.
• Nur so viel Kabel verwenden wie erforderlich. Das nicht genutzte Kabel im Fach hinten am Gerät
verstauen.
• Für dieses Gerät nur Caterlite-Originalteile und -Zubehör verwenden.
• Zum Tragen das Gerät stets am Motorgehäuse fassen.
•NichtzumGebrauchim Freien geeignet.
• Verpackungsmaterial außerhalb der Reichweite von Kindern aufbewahren und gemäß den lokalen
Vorschriften entsorgen.
• Aus Sicherheitsgründen muss ein beschädigtes Stromkabel von einem Caterlite-Mitarbeiter oder
empfohlenen qualifizierten Elektriker erneuert werden.
Einführung
Bitte nehmen Sie sich einige Minuten Zeit und lesen Sie dieses Handbuch sorgfältig durch. Nur bei korrekter
Wartung und vorschriftsgemäßem Betrieb kann Ihr Caterlite-Produkt optimale Leistung erzielen.
Lieferumfang
Folgende Teile befinden sich in der Verpackung:
Caterlite ist stolz auf die hochwertige Qualität seiner Produkte und seinen erstklassigen Service. Wir stellen
sicher, dass alle gelieferten Produkte zum Zeitpunkt der Verpackung voll funktionsfähig sind und sich in
einwandfreiem Zustand befinden.
• Caterlite-Fleischwolf
• Einfülltrichter
•Stopfer
• Zuführschraube
• Schnittschraube
• Schneidplatte (grob - 8 mm)
• Schneidplatte (mittelfein - 5 mm)
• Schneidplatte (fein - 3 mm)
• Bedienungsanleitung

14
DE
Telefonische Helpline: 0800 – 1860806 (Deutschland)
Montage
1. Den Verriegelungsknopf lösen.
2. Die Hacktrommel in die Öffnung des Motorgehäuses einführen (Schaft weist nach oben).
3. Den Verriegelungsknopf anziehen.
4. Die Zuführschraube in die Hacktrommel einführen. Bei Bedarf die Schraube leicht drehen, um das
Schraubenende auf den Getriebeschaft zu stecken.
5. Das Messer auf das Ende der Zuführschraube setzen.
6. Die Nut an der Kante der gewünschten Schneidscheibe muss am Stift an der Hacktrommel
ausgerichtet werden. Die Schneidscheibe auf die Zuführschraube stecken.
7. Den Trommeldeckel fest auf das Ende der Hacktrommel schrauben
8. Den Einfülltrichter durch Drehen in Position bringen.
Betrieb
1. Das Fleisch in Stücke schneiden, die durch die Öffnung im Einfülltrichter passen.
2. Die EIN-Taste drücken.
3. Das Fleisch mit dem Stopfer in den Schaft drücken.
Hinweis: Darauf achten, dass die flache Kante des Messers nach vorne weist (siehe
Abbildung).
Hinweis: Das Gerät vor dem ersten Gebrauch mit einer warmen Seifenlauge reinigen
und gründlich trocknen.
VORSICHT: Das Fleisch niemals mit den Fingern in den Schaft drücken.
Verriegelungsknopf Schnittmesser Trommel Schaft Trichter EIN-Taste
Trommeldeckel Schneidplatte Zuführschraube AUS-/UMKEHR-Taste
UNTERBRECHER-
Taste

15
DE
Wenn der Schutzschalter das Gerät stoppt oder das Gerät blockiert ist:
1. Sofort die AUS-/UMKEHR-Taste drücken.
2. Die UNTERBRECHER-Taste drücken.
3. Um die Verstopfung zu beseitigen, die AUS-/UMKEHR-Taste GEDRÜCKT HALTEN.
4. Das Gerät ausschalten und von der Stromversorgung trennen.
5. Die Hacktrommel und alle Bauteile auseinandernehmen.
Reinigung, Pflege und Wartung
• Zum Reinigen keine Scheuermittel verwenden. Mit einer warmen Seifenlauge reinigen.
• Motorgehäuse NICHT in Wasser eintauchen. Das Gerät außen mit einem feuchten Tuch reinigen.
• Nach dem Reinigen stets gründlich trocknen.
• Erforderliche Reparaturen sollten von einem Caterlite-Mitarbeiter oder einem qualifizierten Techniker
ausgeführt werden.
Das Gerät lässt sich einfacher reinigen, wenn zunächst die einzelnen Bauteile ausgebaut werden:
• Trommeldeckel abdrehen.
• Hacktrommel, Scheibe, Messer und Zuführschraube in eins herausnehmen. Die Trommel vorsichtig
neigen, um die Teile nacheinander einzeln zu entnehmen.
• Den Einfülltrichter abdrehen.
• Fleischreste von allen Teilen entfernen und die Teile mit einer warmen Seifenlauge reinigen.
•Gründlichabtrocknen.
• Die Teile vor dem erneuten Zusammenbau mit etwas Speiseöl einfetten, dies verbessert die Leistung
des Geräts.
Störungssuche
Bei einem Defekt Ihres Caterlite-Geräts konsultieren Sie bitte zunächst folgende Tabelle, bevor Sie die
Helpline oder Ihren Caterlite-Händler anrufen.
Hinweis: Vor der Reinigung stets zunächst das Gerät abschalten und den Netzstecker
ziehen.
Hinweis: Wenn der Deckel zu fest sitzt, mit einem Gummihammer oder ähnlichen
Werkzeug auf die Deckelecken klopfen, um ihn zu lösen.
Störung Vermutliche Ursache Lösung
Das Gerät funktioniert
nicht
Das Gerät ist nicht eingeschaltet Prüfen, ob der Netzstecker in die Steckdose
gesteckt wurde und das Gerät
eingeschaltet ist
Stecker und Kabel sind beschädigt Caterlite-Mitarbeiter oder qualifizierten
Techniker anrufen
Sicherung im Stecker ist durchgebrannt Neue Sicherung in den Stecker einsetzen
Stromzufuhr Netzstrom prüfen
Interner Vernetzungsfehler Caterlite-Mitarbeiter oder qualifizierten
Techniker anrufen
Other manuals for CB943
1
Table of contents
Languages:
Other Caterlite Kitchen Appliance manuals

Caterlite
Caterlite CT057 User manual

Caterlite
Caterlite CS939 User manual

Caterlite
Caterlite CN515-A User manual

Caterlite
Caterlite CB943 User manual

Caterlite
Caterlite GH489 User manual

Caterlite
Caterlite FJ989 User manual

Caterlite
Caterlite CD266 User manual

Caterlite
Caterlite K711 User manual

Caterlite
Caterlite CR912 User manual

Caterlite
Caterlite CS939 User manual