manuals.online logo
Brands
  1. Home
  2. •
  3. Brands
  4. •
  5. Cateye
  6. •
  7. Bicycle Accessories
  8. •
  9. Cateye VELO5 User manual

Cateye VELO5 User manual

LIMITED WARRANTY
2-Year Warranty for Main Unit Only
(Accessories/Attachments and Battery Consumption excluded)
If trouble occurs during normal use, the part of the Main Unit will be repaired or replaced free of charge. The service must
be performed by Cat Eye Co., Ltd. To return the product, pack it carefully and remember to enclose the warranty certifi-
cate with instruction for repair. Please write or type your name and address clearly on the warranty certificate. Insurance,
handling and transportation charges to our service shall be borne by person desiring service.
(Address for service)
2-8-25, Kuwazu, Higashi Sumiyoshi-ku, Osaka 546-0041 Japan
Attn.: CAT EYE Customer Service Section
Service & Research Address for United States Consumers:
CAT EYE Service & Research Center
1705 14th St. 115 Boulder, CO 80302
Phone : 303-443-4595 Toll Free : 800-5CATEYE
Fax : 303-473-0006 e-mail : [email protected]
GARANTIE LIMITEE
2 Ans de Garantie Unité Principale Uniquement
(à l'exclusion des accessoires et de la pile)
Ce produit est garanti, sous réserve d'une utilisation normale, pendant une période d'un an. Les réparations effectuées dans le cadre de la
présente garantie sont gratuites et doivent être effectuées par CAT EYE Co., Ltd. Le produit à réparer doit être retourné à CAT EYE Co., Ltd.
directement par l'acheteur. Tout produit retourné au département de réparation CAT EYE doit être soigneusement emballé et le certificat de
garantie ainsi que les instructions de réparation doivent accompagner le produit. Il est conseillé à l'acheteur d'écrire lisiblement ou de dactylo-
graphier ses nom et adresse sur le certificat de garantie, afin que le produit lui soit directement retourné après réparation.
Le coût de l'assurance ainsi que les frais de manutention et de transport sont à charge de la personne souhaitant une réparation sous garantie.
(Adresse d'envoi pour réparation)
2-8-25, Kuwazu, Higashi Sumiyoshi-ku, Osaka 546-0041 Japon
Attn. : CAT EYE Customer Service Section
GARANTIE
2 Jahres Garantie nur auf den Computer
(Die Zubehör-/Montageteile und Batterie sind von Garantieleistungen ausgeschlossen)
Falls während des normalen Gebrauchs Fehler auftreten, wird das entsprechende Teil des Computers kostenlos repariert
oder ersetzt. Die Reparatur muß von Cat Eye Co., Ltd durchgeführt werden. Wenn Sie das Gerät einsenden, packen Sie
es sorgfältig ein und fügen Sie die Garantiekarte sowie Reparaturhinweise anbei. Achten Sie darauf, Ihren Namen und
Ihre Anschrift mit Schreibmaschine oder in Druckbuchstaben deutlich lesbar auf die Garantiekarte zu schreiben. Versi-
cherungskosten und Kosten für den Transport bis zu unserem Kundendienst gehen zu Lasten der Person, die unseren
Kundendienst in Anspruch nehmen möchte.
(Anschrift des Kundendienstes)
2-8-25 Kuwazu, Higashi Sumiyoshi-ku, Osaka, 546-0041 Japan
Attn.: CAT EYE Customer Service Section
GARANTLE BEPALINGEN
2 jaar garantie op de computer unit
(bedrading, magneet, sensor, batterij en bevestigingsmateriaal uitgezonderd)
Indien er problemen optreden gedurende normaalgebruik, binnen de garantie periode, dan geschiedt reparatie of vervanging
kosteloos. Dit dient door de fabrikant Cat eye Co. Ltd. uitgevoerd te worden. de computer moet door de importeur terug
gezonden worden. Bij terugzenden van de computer moet deze zorgvuldig verpakt worden en dient het garantie bewijs, de
aankoopbon en een beschrijving van het probleem meegezonden te worden. Verzekering- en verzend- en transportkosten
zijn voor rekening van de koper.
(Service adres)
2-8-25, Kuwazu, Higashi Sumiyoshi-Ku, Osaka 546-0041 Japan
Attn.: Cat eye consumer service section
GARANZIA LIMITATA
2 Anni di Garanzia soltanto sull'Unità Principale
(Gli accessori e la pila sono esclusi dalla garanzia)
In caso di problema durante l'impiego normale, l'unità principale verrà riparata o sostituita gratuitamente da Cat Eye Co., Ltd.. Al
momento del ritorno del prodotto occorre imballarlo con cura allegandovi il certificato di garanzia con le istruzioni per le ripara-
zioni. Il nome e l'indirizzo dell'acquirente devono essere presenti in modo leggibile sul certificato di garanzia. Le spese di
assicurazione, di manutenzione e di spedizione al nostro Servizio Riparazioni saranno a carico del richiedente la riparazione.
(Indirizzo Servizio Riparazioni)
2-8-25 Kuwazu, Higashi Sumiyoshi-ku, OSAKA 546-0041, Giappone.
Att:Dipartamento Assistenza Clienti
GARANTÍA LIMITADA
2- Años de Garantía Sólo para la Unidad Principal
(Se excluyen Accesorios/Acoplamientos y Batería)
En caso de problemas durante su uso normal, la unidad principal seráreparada o reemplazada sin coste alguno. El servicio
debe ser realizado por el distribuidor CAT EYE en su país. Para enviar el producto al servicio de reparación, empaquételo
primero cuidadosamente y no olvide incluir el certificado de garantía e instrucciones para el servicio de reparación. En el
certificado de garantía deberáconstar su nombre y dirección completa. Los gastos de seguro, manipulación y transporte o
correo deberán correr a cargo de quien solicite dicho servicio.
(Dirección para las reparaciones)
2-8-25, Kuwazu, Higashi Sumiyoshi-Ku, Osaka 546-0041 JAPAN
ATT: CAT EYE Customer Service Section
REKLAMATIONSBETINGELSER
2 års reklamationsret på kun hovedenheden
(Tilbehør/Batteri-forbrug ikke inkluderet)
Hvis der opstår problemer under brug, vil den beskadigede del af hovedenheden blive repareret eller udskiftet, gratis.
Denne reparation skal udføres af Cat Eye Co., Ltd. For at returnere produktet, pak det forsigtigt sammen med garanti-
beviset, samt instruktioner om hvad der skal repareres.Sørg venligst for at dit navn og adresse fremgår tydeligt af garanti-
beviset. Forsikrings-, handling- og transportomkostninger af service vil blive betalt af den person der
ønsker service.
CO.,LTD.
CO.,LTD.
CO.,LTD.
CO.,LTD.
CO.,LTD.
#169-9500
Bracket Sensor Kit (for VELO 5)
Kit de Montage du collier de Détecteur (pour VELO 5)
Halterung und Radsensor (für VELO 5)
Sensor bevestiginset (voor VELO 5)
Kit di Montaggio del collare del Sensore (per VELO 5)
Kit abrazadera de sensor
(para VELO 5)
Holder/Sensor-sæt (for VELO 5)
#169-9520 #166-5150
Wheel Magnet Lithium Battery (CR2032)
Aimant de Roue Pile au Lithium (CR2032)
Radmagnet Lithiumbatterie (CR2032)
Wielmagneet KLithiumbatterij (CR2032)
Magnete per ruota Batteria al litio (CR2032)
Imán de Rueda Batería de Litio (CR2032)
Hjul Magnet Lithium Batteri (CR2032)
#169-9510
Attachment Kit
Kit de Gamitures
Befestigungsmaterial
Kabelbevestigingset
Guarnizioni da montare
Elementos de fijación
Fastgørings-sæt
#169-9730N
Heavy Duty Wire and Bracket Sensor Kit
Kit Fil Renforcè, Support et Détecteur
Draht und Halterung/Sensor-Kit für starke Beanspruchung
Dikke draad- en bracketset
Cavo rinforzato e kit supporto dell’unitàprincipale e sensore
Cable resistente y Kit Soporte del Sensor
Forstærket Wire og Holder/Sensor-sæt
#169-6567 [#169-6562]
Center Mount Bracket Kit [Long]
Kit Support pour Montage Central [Long]
Halterungskit für Mittelmontage [lang]
Draadset centrale bevestiging [lang]
Kit per montaggio del ciclocomputer al centro del manubrio [Lungo]
Kit Soporte para Montaje Central [Grande]
Holder Til Montering Midt for.
#169-6568
Bracket Sensor Kit for Aero Bar
Kit Support et Détecteur pour Barre Aéro
Halterung/Sensor-Kit für Aero-Stange
Draadset stuurpen bevestiging
Kit supporto sensore per ruote Aero
Kit Soporte del Sensor para Manillar Aero
Holder/Sensor-sæt for Aero Bar
#169-6569
Stem Mount Bracket Kit
Kit Support pour Montage sur Broche de Guidon
Halterungskit für Montage am Lenkerschaft
Draadset stuurpen bevestiging
Kit per montaggio sull'attacco del manubrio
Kit Soporte para Montaje en Potencia
Holder Til Montering på Frempind
#169-9760
Magnet for Composit Wheel
Pour roue composite
Für Verbundräder
Voor o.a, carbonwielen
Magnete per ruote
Para rueda de palos
Magnet Til Eger-fri Hjul
#169-9690
Hi-Power Wheel Magnet (both for normal spoke & aero spoke)
Aimant de roue Hi-Power (Prévue pour rayon normal et rayon aéro)
Hochleistungsradmagnet (für normale Speichen und Karbonspeichen)
Hi-Power magneet (zowel geschikt voor gewone spaak als voor aero spaak)
Magnete ruota Hi-Power (sia per raggio normale che per raggio aerodinamico)
Imán de rueda de alta percisión (Compatible con radios normales y planos)
Hi-Power hjul magnet (Til både normal og aero eger)
●Calorie Consumption *1
The calorie consumption data is only the accumulated value that is calculated from
the speed data of every second. It differs from the actual consumed calorie.
●Consumption des caloris*1
Les details de consomation des calories est seulement le total des dates de vitesse calcules par
seconde. Alors ca n’est pas egale au consumption des calories actuel.
●Kalorienverbrauch*1
Der angegebene Kalorienverbrauch ist lediglich ein Annäherungswert, der anhand der je
Sekunde gefahrenen Geschwindigkeit errechnet wird. Er entspricht nicht Ihrem tatsächlichen
Kalorienverbrauch.
●Calorie Verbruik*1
De calorie verbruik gegevens zijn de totaal waarden die zijn berekend van de snelheidsgegevens
die per seconde gemeten worden. Dit verschilt van het aktueel kalorie verbruik.
●Consumo calorie*1
Il consumo calorie èsolo il valore accumulato calcolato dai dati realtivi alla velocità,
aggiornati ogni secondo. Si differenzia dal connsumo calorie corrente.
●Consumo de calorías*1
La información del consumo de calorías es simplemente el valor acumulado de la
velocidad cada segundo. Esta información difiere del actual consumo calórico.
●Kalorie forbrænding *1
Kalorie forbrændingen er kun vejledende, baseret på hastighedsdata. Det reelle
kalorie forbrug kan afvige.
Speed Kcal per hour Speed Kcal per hour
10 km/h 67.3 kcal 10 mph 155.2 kcal
20 km/h 244.5 kcal 20 mph 768.2 kcal
30 km/h 641.6 kcal 30 mph 2297.2 kcal
CO.,LTD.
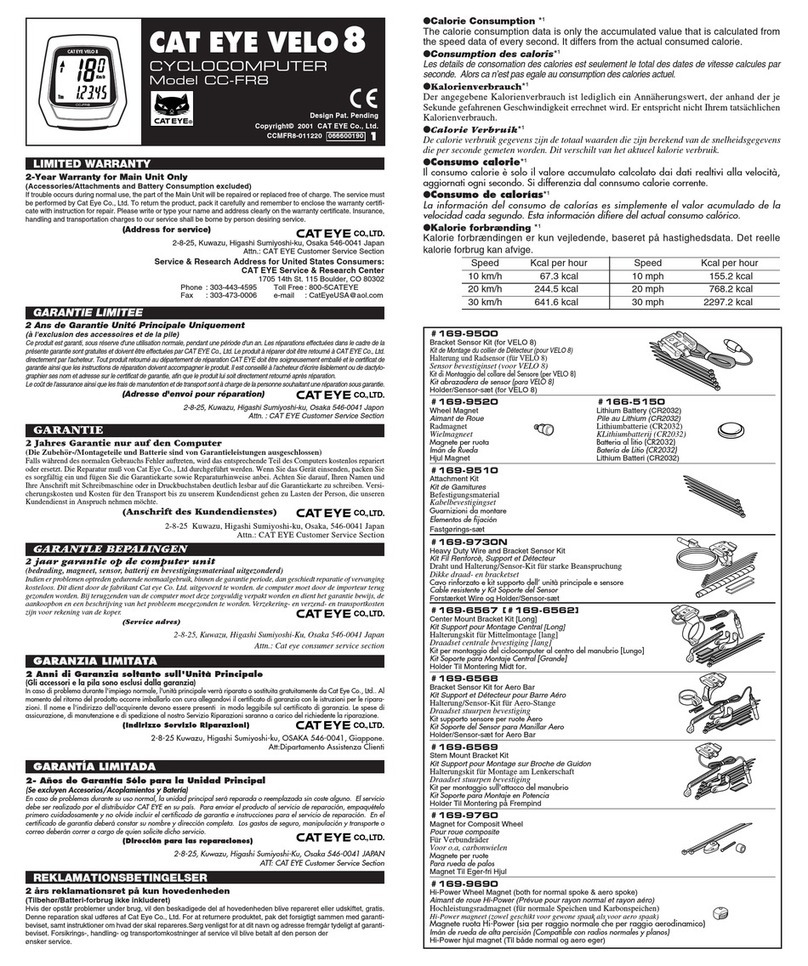
CAT EYE VELO5
CYCLOCOMPUTER
Model CC-FR5
®
Design Pat. Pending
Copyright© 2001 CAT EYE Co., Ltd.
CCMFR5-011220 066600170
1
26" 700c 27" 16"
24" 22" 20" 18"
Spd
Current Speed
0.0(4.0) to 100 km/h
[0.0(3.0) to 60 mph]
Reset
Reset
Reset
Odo
Total Distance
0.0 to 9999.9 km [mile]
Mx
Maximum Speed
0.0 to 100 km/h
[0.0 to 60 mph]
Dst
Trip Distance
0.00 to 999.99
km [mile]
Cal
Calorie
Consumption
*
1
0.0 to 9999.9 kcal
(estimated from speed data)
5
1
3
5
4
3
4
3
4
1
2
3
5
1
Back How to Change Tire Size
In the Total Distance (Odo) mode, press SET button (fig. 5).
The tire size is flashing. Press Main Button to change it, and push SET Button to
fix. The screen returns to the normal measuring display.
Maintenance
• If the contact of the unit or the bracket gets wet, dry it off with a cloth. If they become rusty, it will cause
speed detection error.
• If the gaps between the buttons and the unit get clogged with mud or sand, wash them away with water.
Troubleshooting
No display.
Has the battery in the main unit run down?
Replace it with a new one.
Incorrect data appears.
Do all clear operation.
Current speed does not appear.(First, short-circuit the contact of the main unit a few times with a piece of
metal. If current speed appears, the main unit is working fine and the cause should be attributed to the
bracket or the sensor.)
Is the wire broken?
Replace the bracket/sensor set with a new one.
Is the clearance between the sensor and the magnet too large?
Are the magnet’s center and the sensor’s marking line aligned?
Re-adjust the positions of the magnet and the sensor. (The clearance should be less than
3mm.)
Is there anything sticking on the contact of the main unit or the bracket?
Clean the contact with a cloth.
Current speed disappears when using in the rain.
Wipe water/dirt off of the contact of the bracket and apply water-repellent agent (silicon grease)
which is available at DIY shops. Do not apply general grease for machinery; it may cause dam-
age on the bracket.
Replacing Battery (fig.6)
If the screen gets dim, it is the time to replace the battery.
*Insert a new lithium battery (CR2032) with the (+) mark facing up.
All Clear Operation
Press SET Button with a pen while pushing Main Button (fig. 7). All the memory
(total distance, speed scale and tire size) are erased, and the display shows the
speed scale setting mode. Perform this operation after replacing the battery or
when incorrect data appears on the screen.
Close
Open
Push
Push
Fig. 1
Km=Kilometer
Mile=mile
Setup Completed
Setting up Computer
Set up the main unit according to the following procedure.
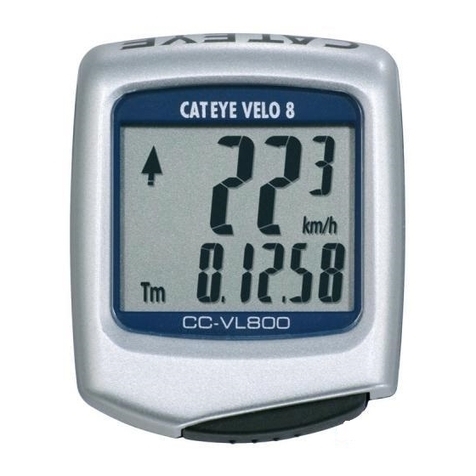
A. Data Display
B. Speed Scale
C. Mode Symbol
D. Main Button
E. SET Button
F. Battery Case Cover
G. Contact
All Clear
1. Do all clear operation and set speed scale
Push SET button while pressing Main Button (All Clear Operation: fig. 1). By this operation, the entire
memory is erased. All the displays illuminate for a while and then only “Km” flashes. Push Main Button
to switch between “Km” and “Mile” (fig. 2). Push SET button to fix the desired speed scale.
Operation
Start/Stop of Measuring
The unit starts measuring automatically when you
start your bicycle, and stops measuring when your
bicycle stops.
Shift of Display
By every press of Main Button the display changes
as in fig. 4.
Power Saving Function
When the main unit does not receive a signal for
approximately 1 to 2 hours, it falls into Power Sav-
ing mode. When you press Main Button, or when
you start your bicycle again, the main unit wakes up
and the screen returns normal.
Data Reset
The reset symbol
Reset
shown in the
fig. 4 means that the recorded data of
these functions can be reset to zero.
Hold down Main Button to reset. The
data of Total Distance cannot be reset.
Fig. 4: How display shifts by Main Button
Fig. 2
Fig. 3
Fig. 7
Fig. 6
Fig. 5
Specification
Battery ------------------------------ Lithium Battery CR2032 x 1 (battery life: approx. 3 years)
(*The life of the factory-loaded battery might be shorter than this.)
Microcomputer -------------------- 4-bit 1-chip (Crystal controlled oscillator)
Display ----------------------------- Liquid crystal display
Sensor ------------------------------ No-contact magnetic sensor
Wheel Circumference Range --------
16, 18, 20, 22, 24, 26, 700c, 27” (default figure: 26”)
Working Temperature ------------ 0°C – 40°C
Length of Wire -------------------- 70cm
Dimension/Weight ---------------- 1-3/4” x 1-21/32” x 23/32” (44 x 42 x 18 mm) / 0.88 oz ( 25 g)
*The specifications and design are subject to change without notice.
2. Select Tire Size
With every press of Main Button, the tire size changes as: 26”
→700c →27” →16” →18” →20” →22” →24” →26”.
Select your bicycle’s tire size.
Note: The tire size is usually shown on the rim or on the side
of your tire.
Push SET button to fix the tire size. The unit is set up and
ready for riding.
Back
tire size (inch)
A
B
2
3
1
Lever
Slide
• Do not concentrate too much on the computer operations while riding. Always try to ensure safety riding.
• Be sure to securely mount the magnet, sensor and bracket on your bicycle, and periodically check if such components
or screws have loosened.
• Used batteries are harmful if swallowed by mistake. They must be disposed in accordance with the method specified
by regulations.
• Do not leave the main unit exposed to direct sunlight. Never disassemble the main unit.
• For cleaning of the main unit or accessories, use diluted neutral detergent on a soft cloth, and then wipe it off with a dry
cloth. Do not use paint thinner, benzine or alcohol since such chemicals may damage the surface.
Caution
Installing the Unit
Install the parts on your bicycle in accordance with the following procedures.
1
2
3
4
5
Adjust the positions of the sensor and the magnet so that
they meet the conditions
A
and
B
at the left.
Pull
strongly
Inner side of the right fork
Right spoke
Attach the magnet onto the spoke so
that it faces the sensor.
IMPORTANT!
Correct positions of the sensor and the magnet:
Note: Allow enough wire
length at the area marked with
to ensure full and unhin-
dered operation of the handle-
bar.
Handlebar
How to Attach/De-
tach Main Unit
Slide the main unit from
front. To detach, slide it for-
ward while pressing down
the lever.
Attach the main unit onto the bracket and spin the
front wheel slowly. If the data on the display is up-
dated, installation is correct. If not, check the po-
sitions of the sensor and the magnet again ac-
cording to the above
A
and
B
.
Bracket
Wire
Sensor
Magnet
Nylon Ties
When rotating the front
wheel, the magnet’s 4
center must be aligned
with the sensor’s 3
marking line.
The clearance between
the sensor 3and the
magnet 4must be less
than 3mm.
Magnet’s center Marking line
Less than 3mm
Click
Fix the sensor securely
onto the fork so that it will
not be dislocated.
Back
EOPERATION INSTRUCTIONS
VELO 5

This manual suits for next models

1

Other Cateye Bicycle Accessories manuals

Cateye Padrone Smart + CC-SC100B Guide

Cateye

Cateye Padrone Smart + CC-SC100B Guide

Cateye Enduro8 CC-ED300 Setup guide

Cateye

Cateye Enduro8 CC-ED300 Setup guide

Cateye VIZ100 User manual

Cateye

Cateye VIZ100 User manual

Cateye CC-VL500 User manual

Cateye

Cateye CC-VL500 User manual

Cateye Reflex TL-LD560-F Assembly instructions

Cateye

Cateye Reflex TL-LD560-F Assembly instructions

Cateye TL-LD1000 Use and care manual

Cateye

Cateye TL-LD1000 Use and care manual

Cateye Volt1300 HL-EL1025RC User manual

Cateye

Cateye Volt1300 HL-EL1025RC User manual

Cateye RAPIDmicro G User manual

Cateye

Cateye RAPIDmicro G User manual

Cateye Solar CC-2000 Operating and maintenance instructions

Cateye

Cateye Solar CC-2000 Operating and maintenance instructions

Cateye OS 1.1 User manual

Cateye

Cateye OS 1.1 User manual

Cateye CC-ED200N User manual

Cateye

Cateye CC-ED200N User manual

Cateye CC-HB1OO User manual

Cateye

Cateye CC-HB1OO User manual

Cateye CC-CD300DW User manual

Cateye

Cateye CC-CD300DW User manual

Cateye CC-ED200N User manual

Cateye

Cateye CC-ED200N User manual

Cateye VELO Wireless+ CC-VT235W User manual

Cateye

Cateye VELO Wireless+ CC-VT235W User manual

Cateye CC-RD310W Slim User manual

Cateye

Cateye CC-RD310W Slim User manual

Cateye CC-CL200 User manual

Cateye

Cateye CC-CL200 User manual

Cateye RAPIDX2 TL-LD710-R User manual

Cateye

Cateye RAPIDX2 TL-LD710-R User manual

Cateye Micro CC-6000 User manual

Cateye

Cateye Micro CC-6000 User manual

Cateye STRADA User manual

Cateye

Cateye STRADA User manual

Cateye STRADA User manual

Cateye

Cateye STRADA User manual

Cateye Vectra CC-VT100W User manual

Cateye

Cateye Vectra CC-VT100W User manual

Cateye V2C - Instruction manual

Cateye

Cateye V2C - Instruction manual

Cateye CC-VL200 User manual

Cateye

Cateye CC-VL200 User manual

Popular Bicycle Accessories manuals by other brands

DAPU LCD-K manual

DAPU

DAPU LCD-K manual

Tailfin Direct X Series Assembly instructions

Tailfin

Tailfin Direct X Series Assembly instructions

SKS Germany INFINITY UNIVERSAL quick start guide

SKS Germany

SKS Germany INFINITY UNIVERSAL quick start guide

Sigma BC 14.12 ALTI instruction manual

Sigma

Sigma BC 14.12 ALTI instruction manual

tubus Racktime Instructions for use

tubus

tubus Racktime Instructions for use

Tune TURNSTANGE WUNDERBAR manual

Tune

Tune TURNSTANGE WUNDERBAR manual

FSA E-SYSTEM user manual

FSA

FSA E-SYSTEM user manual

GAMOH KingCarrier KCL-1R instruction manual

GAMOH

GAMOH KingCarrier KCL-1R instruction manual

Bryton Rider 100 user manual

Bryton

Bryton Rider 100 user manual

Thule Chariot CX 1 Maintenance Guide

Thule

Thule Chariot CX 1 Maintenance Guide

Stages cycling Stages Dash owner's manual

Stages cycling

Stages cycling Stages Dash owner's manual

Yeti SB150 owner's manual

Yeti

Yeti SB150 owner's manual

FISCHER 50600 Instructions for use

FISCHER

FISCHER 50600 Instructions for use

SRAM Reverb Stealth Service manual

SRAM

SRAM Reverb Stealth Service manual

Bryton Rider 50 user manual

Bryton

Bryton Rider 50 user manual

Shimano SL-M980 user manual

Shimano

Shimano SL-M980 user manual

Shimano Steps BT-E6000 Dealer's manual

Shimano Steps

Shimano Steps BT-E6000 Dealer's manual

Bontrager Race XXX Lite owner's manual

Bontrager

Bontrager Race XXX Lite owner's manual

manuals.online logo
manuals.online logoBrands
  • About & Mission
  • Contact us
  • Privacy Policy
  • Terms and Conditions

Copyright 2025 Manuals.Online. All Rights Reserved.