10
OPERATING YOUR VACUUM SEALER VS 812
OPERATING YOUR VACUUM SEALER VS 812
BEFORE FIRST USE
Before rst use, remove all packaging
and advertising labels / stickers from the
appliance. Make sure you have removed all
accessories from the package. Please check
the appliance and all accessories for damage.
Wipe the outer surface with asoft sponge
lightly dipped in warm water with asmall
amount of dishwashing liquid.
USING
Place the appliance on adry, at, and rm
surface at asucient distance from the
mains socket.
Insert the power cord plug to the mains
socket and the backlight of all buttons lights
up.
Put food into abag suitable for using in the
vacuum sealer. Do not ll the bag up to the
edge. Leave enough space (about 8cm for
dry food, about 10cm for food with higher
water content) to make aseal.
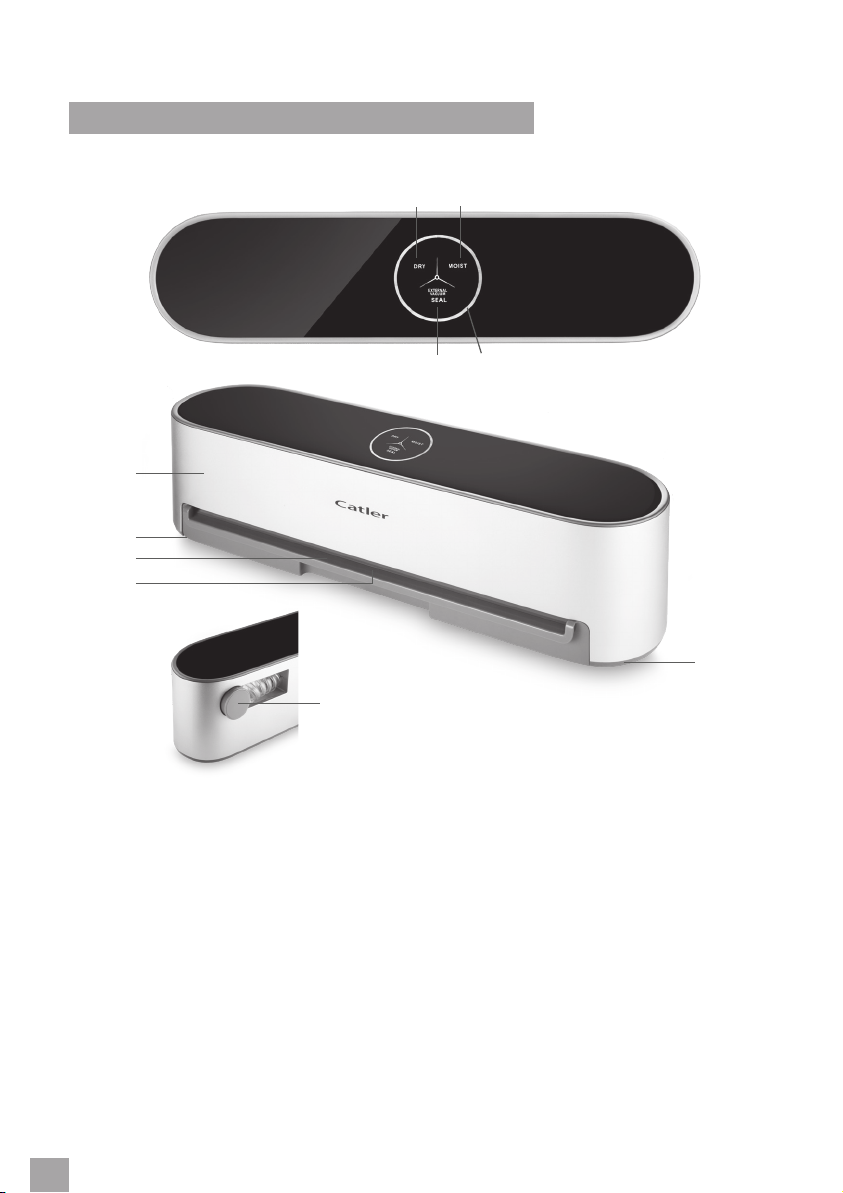
DRY BUTTON
The DRY button serves to vacuum and seal
the relatively dry food.
•Insert the bag with food into the opening
in the appliance. It is necessary to insert
the bag enough deep so that the seal is
not near the bag edge.
•Press the DRY button and the vacuuming
process starts. The DRY button will ash
during the process.
•Once the air has been vacuumed, it
will automatically start to make aseal.
The SEAL button will ash during the
process.
•Once the entire progress bar has lit up,
the process of vacuuming and sealing is
completed.
•Remove the bag with food.
•Whenever you need to cancel the
process, press the DRY button.
MOIST BUTTON
The MOIST button serves to vacuum and
seal the relatively moist food.
•Insert the bag with food into the opening
in the appliance. It is necessary to insert
the bag enough deep so that the seal is
not near the bag edge.
•Press the MOIST button and the
vacuuming process starts. The MOIST
button will ash during the process.
•Once the air has been vacuumed, it
will automatically start to make aseal.
The SEAL button will ash during the
process.
•Once the entire progress bar has lit up,
the process of vacuuming and sealing is
completed.
•Remove the bag with food.
•Whenever you need to cancel the
process, press the MOIST button.
•If the drip tray cleaning indicator light
comes on, it is necessary to carefully
remove the drip tray and empty its
content.
SEAL BUTTON
The SEAL button serves only to seal the bag.
•Insert the bag with food into the opening
in the appliance. It is necessary to insert
the bag enough deep so that the seal is
not near the bag edge.
•Press the SEAL button and the process of
making aseal starts. The SEAL button will
ash during the process.
•Once the entire progress bar has lit up,
the process of sealing is completed.
•Remove the bag with food.
•Whenever you need to cancel the
process, press the SEAL button.