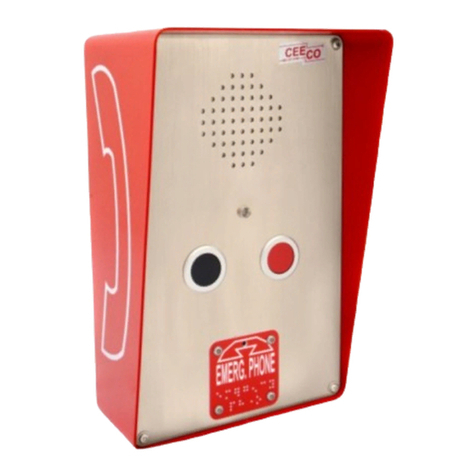
CEECO SSP-550-D User manual

SSP-550-D-(SSP-510-D)-LPSPKRPCB-ATD11-ISSUE4.0
SERVICE MANUAL
FOR
MODEL SSP-550-D
(FORMERLY SSP-510-D)
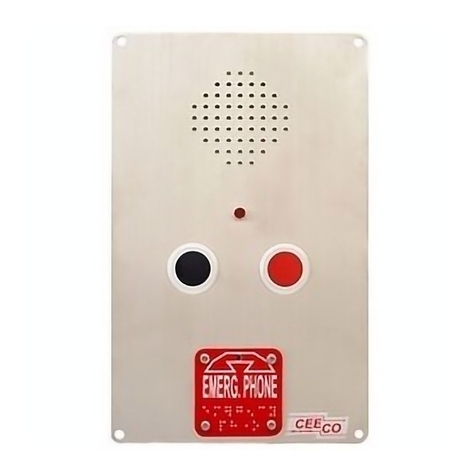
HANDS FREE ELEVATOR PHONE
EQUIPPED WITH LOW-POWER SPEAKER BOARD
AND ATD11 BOARD
Serving the Telephone Industry Since 1930
Communication Equipment 519 W South Park Street
& Engineering Company Okeechobee, FL 34972
Voice: 863-357-0798
Fax: 863-357-0006

ISSUE 4.0
CEECO
Communication Equipment & Engineering Company
PROPRIETARY
2
IMPORTANT INFORMATION
FOR
CUSTOMER
Please fill in before you continue.
The following information is necessary when calling CEECO for assistance.
MODEL NUMBER MODEL SSP-550-D EQUIPPED WITH LOW-
POWER SPEAKER BOARD & ATD11 BOARD
SERIAL NUMBER
DATE MANUFACTURED
LOCATION INSTALLED
For us to better serve you, please have this information available when calling for
technical support.
CEECO
Communication Equipment and Engineering
Company
519 W South Park Street
Okeechobee, FL 34972
863-357-0798- telephone
863-357-0006- facsimile
www.ceeco.net

ISSUE 4.0
CEECO
Communication Equipment & Engineering Company
PROPRIETARY
3
TABLE OF CONTENTS
SECTION PAGE
1.0 INTRODUCTION..................................................................................................... 4
2.0 GENERAL................................................................................................................. 4
3.0 PROGRAMMING .................................................................................................... 5
PROGRAMMING CONTINUED…....................................................................... 6
PROGRAMMING CONTINUED…....................................................................... 7
4.0 TESTING/OPERATION ......................................................................................... 8
5.0 RECOMMENDED TOOLS AND TEST EQUIPMENT ...................................... 8
6.0 INSTALLATION NOTES AND ASSEMBLY INSTRUCTIONS ....................... 9
7.0 SPECIFICATIONS................................................................................................. 10
8.0 PARTS LIST ........................................................................................................... 11
9.0 REPAIR AND RETURN INFORMATION......................................................... 13
10.0 WARRANTY POLICY .......................................................................................... 14

ISSUE 4.0
CEECO
Communication Equipment & Engineering Company
PROPRIETARY
4
1.0 INTRODUCTION
The practices in this manual provide installation and maintenance information for
the CEECO Model SSP 550-D (Formerly Model SSP-510-D) Telephone.
The information in this manual is subject to change without notification.
For information not included in this manual, please call or write:
CEECO
Customer Service
519 W South Park Street
Okeechobee, FL 34972
863-357-0798- telephone
863-357-0006- facsimile
www.ceeco.net
2.0 GENERAL
The CEECO Model 550-D Hands free telephone is a sturdy, vandal resistant,
Stainless steel panel Speakerphone. Instead of a hookswitch and handset, the
550-D has a Press to start/Press to stop button for initiation and termination of
phone calls. This Press to start/Press to stop Auto Dial button is provided for one
button dialing of a preprogrammed number of up to 11 digits. Manual volume
control is also provided inside the phone. The microphone is muted during the
dialing sequence to prevent the use of hand-held dialers. Fully line powered, no
battery backup required for memory retention.

ISSUE 4.0
CEECO
Communication Equipment & Engineering Company
PROPRIETARY
5
3.0 PROGRAMMING
NOTE: It is recommended that you ground yourself to prevent ESD
damage to the PCB(s).
3.1 This phone has two “programmable features”, both of which are
controlled by the manipulation of mini-jumpers on the PC boards. The
phone can be programmed to automatically dial a number of up to eleven
digits in length. The phone can also be programmed to automatically
disconnect a phone call after the elapse of a selected period of time (1, 3 or
5 minutes). A pair of small needle nose pliers may be helpful with
moving the mini-jumpers, however; you must be very careful not to touch
the circuit boards with the pliers, as this may cause damage.
3.2 PROGRAMMING THE NUMBER TO AUTODIAL (ATD-11):
If the number to be programmed is a (1+) or long-distance call, locate the
green plastic mini-jumper at the “J1” position location of the ATD11
printed circuit board. The ATD11 circuit board has a smaller board
mounted to it, which has several rows and columns of copper contacts/pins
on it. The “J1” position you are looking for is located just below the
bottom right hand corner of that smaller piggyback board. The “J1”
position has three copper contacts/pins, with a green plastic mini-jumper,
and is readily identified by the “+1” that appears on the board in small
white print just to its left. By moving the green plastic mini-jumper so
that it bridges the middle copper pin and the far left or “+1” pin, you will
cause the digit “1” to automatically dial out prior to any other programmed
number. If your desired number is local or does not need a preceding one,
then move the mini-jumper to bridge the middle copper pin and the far
right pin. You will observe a “P” in small white print on the circuit board
just right of this right hand pin.
Next, locate the green plastic mini-jumper at the “J3” position of the
circuit board, which is just below the “J1” position. It could also be
considered the second green plastic mini-jumper below the bottom right
hand corner of the smaller piggyback board. Just left of this “J3” position,
in small white print, appears “11”. Be sure this mini-jumper is placed
closest to the “11”, bridging the middle and far left copper pins. The “J3”
mini-jumper should always be in this position, regardless of the number
you are programming.

ISSUE 4.0
CEECO
Communication Equipment & Engineering Company
PROPRIETARY
6
PROGRAMMING CONTINUED…
Now let’s program the number to be automatically dialed. Looking at the
piggyback circuit board containing several rows and columns of copper
pins, you will see ten green plastic mini-jumpers. The rows are labeled 1
thru 0 on the left side of the circuit board. The columns are labeled A thru
K across the top of the circuit board and the columns of copper pins are in
pairs. Each pair of copper pins represents a number to be dialed. For
example, let’s assume that you want to program the phone to dial 1-954-
587-5430. Place the green plastic mini-jumper under column “A” across
the two copper pins that align with row “9”. Place the mini-jumper under
column “B” so that it bridges the pair of copper pins in row “5”. Place the
mini-jumper under column “C” across the pair of copper pins in row “4”
and so on, until the entire number is programmed. Each column
represents a digit, so do not skip any. This example happens to include a
long distance number, so you would move the “J1” jumper to the “+1”
position. If your desired number was short, like 911 for example, the
programming would be slightly different. In a case such as that, you
would place the jumper under column “A” in the “9” position and the
jumpers under columns “B” and “C” in the “1” position. You would then
remove the seven remaining green plastic mini-jumpers, so that no
erroneous digits dial out.
3.4 Be sure each green mini-jumper is properly positioned to make good
contact and dial the intended number. Do not discard unused mini-
jumpers, as you may need them in the future. It may be wise to tape them
to the inside of the phone somewhere out of harms way.
3.5 There is one last mini-jumper location that has not been addressed yet.
This jumper is positioned at the time of manufacturing to accommodate
most telephone environments. If your telephone line delivers dial tone to
your phone in one second or less, then you should proceed to section 3.6.
If you happen to be in a long loop environment, which takes more than
one second to deliver dial tone on the line, then you will need to locate the
green plastic mini-jumper located at the “J2” position of the ATD11
board. On this particular model phone, the “J2” position is hidden under
the low-power speaker board. You will first have to remove the screws,
which secure the low-power speaker board, and gently raise the board
enough to locate the mini-jumper. You must be very careful to avoid
touching the circuit boards with metal objects, as this may cause damage.
The “J2” position can be found approximately 1.5” – 1.75” directly below
the “J1” and “J3” positions and is somewhat by itself. Position the “J2”
green, plastic mini-jumper, so that it bridges the middle and far right
copper pins. A “3” appears in small white print just right of this position.
Placing the jumper there will cause the phone to delay 3 to 4 seconds
ISSUE 4.0
CEECO
Communication Equipment & Engineering Company
PROPRIETARY
7
PROGRAMMING CONTINUED…
before dialing. This should allow the phone to accommodate those extra
long loop situations in terms of time to receive dial tone. When you have
completed this, carefully replace the low-power speaker board and secure
it with the screws.
3.6 PROGRAMMING THE TIME OUT DISCONNECT FEATURE:
If you desire the phone to automatically disconnect the call after a
specified period of time, we will discuss that now. Otherwise proceed to
section 3.7.
The low power speaker board, which is the larger printed circuit board,
has two green plastic mini-jumpers on it, just like the ones you have been
manipulating thus far. These mini-jumpers are used to program the Time
Out Disconnect feature. Locate the green plastic mini-jumper that has
“JP3” written above it in small white print on the PC board. Below it, in
small white print, appear the words “ON” and “OFF”. Place the mini-
jumper across the middle and far-left copper pins. This is the "ON"
position, which activates the Time Out Disconnect feature. When this
feature is not used, the jumper should be in the “OFF” position (jumper
bridges the middle and far right copper pins).
When utilizing the Time Out Disconnect feature, you select a 1, 3, or 5
minute timed disconnect. Locate the green plastic mini-jumper on the
same circuit board; above which appears “JP2” in small white print.
Below it are “5”, “3” and “1” also in small white print. Place the jumper
so that it bridges the two copper pins corresponding with your selection of
1, 3, or 5 minutes.
3.7 Programming is now complete and the telephone is ready for
testing/operation.

ISSUE 4.0
CEECO
Communication Equipment & Engineering Company
PROPRIETARY
8
4.0 TESTING/OPERATION
Action: Connect the phone to a working telephone line or DTMF test set.
Press the "CALL" button.
Reaction: Dial tone. Red LED illuminates (If equipped)
The preprogrammed number is automatically dialed.
Action: The called party answers.
Reaction: A normal speakerphone conversation is allowed.
Action: Finish the conversation and press the "CALL" button to hang up.
Reaction: Red LED goes out. (If equipped) and the call is terminated. If you
do not hang up the phone it will automatically disconnect if you
programmed it as such.
5.0 RECOMMENDED TOOLS AND TEST EQUIPMENT
Volt/Ohm Meter
1/4" Nut Driver
3/8" Nut Driver
Security Tool, CEECO part number 301-037
Flat Blade Screw Driver
DTMF Test Set

ISSUE 4.0
CEECO
Communication Equipment & Engineering Company
PROPRIETARY
9
6.0 INSTALLATION NOTES AND ASSEMBLY INSTRUCTIONS
6.1 Using a 301-037security tool (sold separately), loosen and remove the
security screws.
6.2 The security tool is for a standard 5/32" button head screw generally used
on the framework of the phone booths.
6.3 Run the inside station wire into the housing enclosure and terminate on the
RJ11C terminal block inside.
6.4 The use of a gas tube, or carbon station protector is recommended. The
station ground should not exceed 50 ohms.
6.5 Plug the modular line cord from the faceplate assembly into the RJ11C
terminal block.
6.6 Dress the line cable away from the security screws and seat the faceplate
into the housing enclosure.
6.7 Secure the faceplate assembly by tightening the security screws.
*****WARNING*****
A. Never install telephone wiring during a lightning storm.
B. Never install telephone jacks in wet locations unless the jack
is specifically designed for wet locations.
C. Never touch uninsulated telephone wires or terminals unless
the telephone line has been disconnected at the network
interface.
D. Use caution when installing or modifying telephone lines.

ISSUE 4.0
CEECO
Communication Equipment & Engineering Company
PROPRIETARY
1
0
7.0 SPECIFICATIONS
INPUT POWER : C.O. Line powered
LOOP CURRENT : 23ma. min. 80ma. max.
IMPEDANCE : 600 ohms
SIGNALING : DTMF, 70ms tone, 50ms spacing
OUTPUT : -4.0 to -6.0dbm
ENVIRONMENTAL : Temperature 0c to 50c
Humidity 20%-90% non-condensating
PROGRAMMING : Via DTMF keypad.
DIMENSIONS : 5"w X 7"h X 2 1/2"
MOUNTING : Vertical Rough-in Mounting Box
MEMORY RETENTION : Non-volatile memory control
WEIGHT : 4 Pounds
FCC REGISTRATION NO.: BW-88T7-68447-KX-T
UL LISTED NO.: 60F5
RINGER EQUIVALENCY: 0.8A
TYPE JACK : RJ11C

ISSUE 4.0
CEECO
Communication Equipment & Engineering Company
PROPRIETARY
11
8.0 PARTS LIST
QUANTITY PART NUMBER DESCRIPTION
4 406-019 OUTER COVER SECURITY SCREW
1 301-018 MODULAR LINE CORD
1 510-000 FACE PLATE
1 301-054 MODULAR CONNECTOR (RJ11C)
1 510-200 SERVICE MANUAL
1 660-100 CEECO SPK BOARD
1 510-xxx MOMENTARY PANEL SWITCH
1 14047 SPEAKER
ACCESSORIES :
1 301-037 SECURITY TOOL

ISSUE 4.0
CEECO
Communication Equipment & Engineering Company
PROPRIETARY
12
9.0 FCC NOTICE
9.1 FCC REGISTRATION AND REPAIR INFORMATION
Your new telephone has been registered with the Federal Communication
Commission (FCC) in accordance with Part 68 of its rules. The FCC
requires that you be advised of certain requirements involving the use of
this telephone.
9.2 CONNECTION AND USE WITH THE NATIONWIDE
TELEPHONE NETWORK
The FCC requires that you connect this telephone to the Nationwide
Telephone Network through a registered jack provided by the Telephone
Company in your area. This jack is a modular outlet, which you can order
from your local telephone company.
9.3 NOTIFICATION TO THE TELEPHONE COMPANY
Before connecting this telephone, the FCC requires that you notify your
local telephone company business office. The number is in the front of
your phone book.
Tell them:
The "line" to which you will connect the telephone (that is, your phone
number), the telephone's FCC registration number and ringer equivalence
number. These numbers are listed in section 7.0
The FCC further requires that you notify your local telephone company
when permanently disconnecting this telephone.

ISSUE 4.0
CEECO
Communication Equipment & Engineering Company
PROPRIETARY
13
10.0 REPAIR AND RETURN INFORMATION
10.1 WARRANTY REPAIR
Any device returned requiring warranty service, repair or credit must be
accompanied with a "Return Material Authorization" (RMA) FORM. It
must include: return shipping instructions, original purchase order number
and special marking instruction. A description of the trouble observed
must be attached to the defective unit. This information must be inside the
shipping container.
10.2 DIRECT ALL INQUIRES TO:
CEECO
Repair Department
863-357-0798- telephone
863-357-0006- facsimile
www.ceeco.net
10.3 NON-WARRANTY REPAIR:
CEECO will repair equipment out of warranty for a set charge plus parts.
The customer must pay the shipping costs for both directions.
10.4 RETURN FOR CREDIT:
Material may be returned for credit only with prior approval. Material
authorized for return is subject to a 20% restocking charge based on the
manufacturer's list price. Return Material Authorization must be
requested no later than 30 days after original shipment.

ISSUE 4.0
CEECO
Communication Equipment & Engineering Company
PROPRIETARY
14
11.0 WARRANTY POLICY
11.1 GENERAL
CEECO products are guaranteed to be free of defects in material and
workmanship for a period of 365 days from the date of original purchase.
CEECO's obligation under this warranty is limited to repair or
replacement of any part found to be defective by CEECO. Under no
circumstances shall CEECO be liable for loss, damage, cost of repair or
consequential damages of any kind which have been caused by neglect,
abuse, acts of GOD or improper operation of equipment.
11.2 PRINTED CIRCUIT BOARDS
Printed circuit boards should not be field repaired. If a unit is found to be
faulty, replace it with another unit and return the faulty unit to CEECO for
repair. Modifications by anyone other than CEECO will void the
warranty.
This manual suits for next models
1
Table of contents
Other CEECO Telephone manuals

CEECO
CEECO MHD-341-D User manual

CEECO
CEECO WPL-531-X User manual

CEECO
CEECO SSW-321-FP User manual

CEECO
CEECO SSW-521-X-ADA User manual

CEECO
CEECO SSP-511-D-ADA User manual

CEECO
CEECO SSP-363-E User manual

CEECO
CEECO SSP-373-D User manual

CEECO
CEECO SSP-361-X User manual

CEECO
CEECO WPP-333-F-M-IVC User manual

CEECO
CEECO SSP-371-D User manual

CEECO
CEECO SSP-511-F User manual

CEECO
CEECO BLC-303-F User manual

CEECO
CEECO SSW-321-Xr1 User manual

CEECO
CEECO SSW-321-X User manual

CEECO
CEECO SSP-571-D User manual

CEECO
CEECO WPP-531-X-ADA-STROBE User manual

CEECO
CEECO SSC-501-F User manual

CEECO
CEECO SSC-303-D User manual

CEECO
CEECO WPP-333-F User manual

CEECO
CEECO 403-F User manual