Cepex EXTREME Series Manual

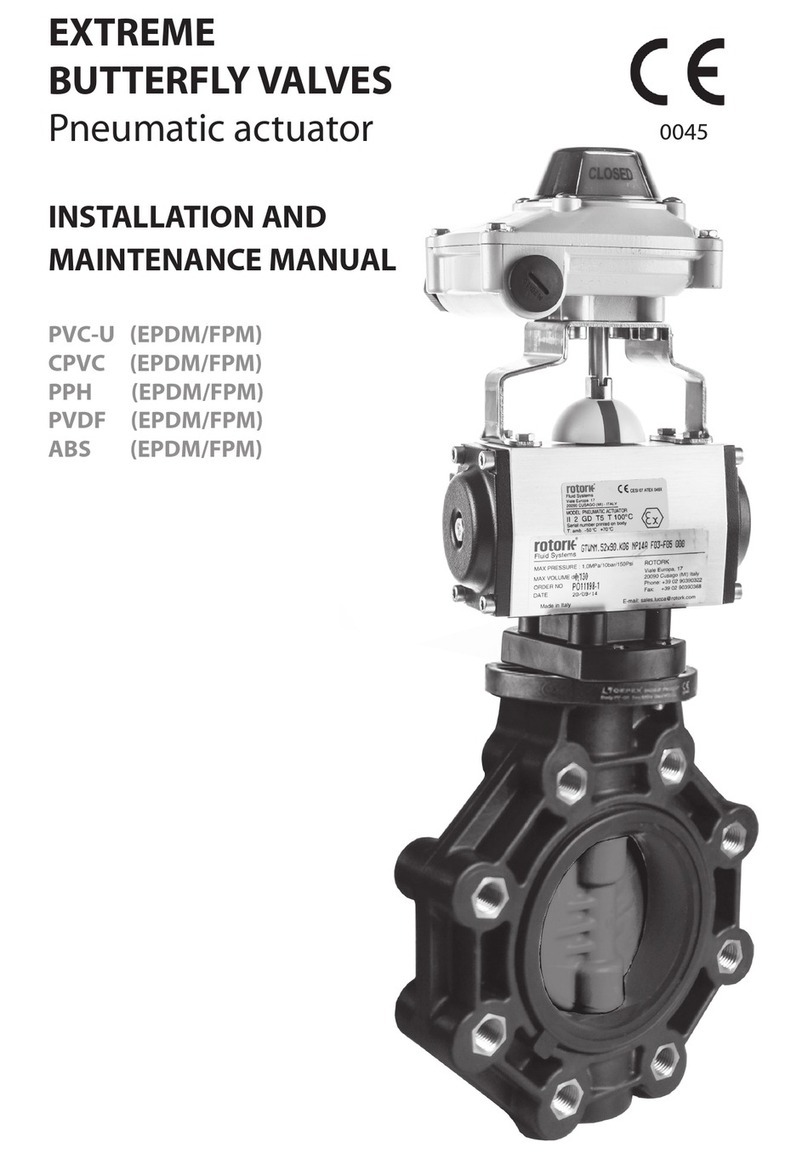
EXTREME SERIES
BUTTERFLY VALVES
LUG type
Electric actuator
INSTALLATION AND
MAINTENANCE MANUAL
PVC-U (EPDM/FPM)
CPVC (EPDM/FPM)
PPH (EPDM/FPM)
PVDF (EPDM/FPM)
ABS (EPDM/FPM)
0045

2
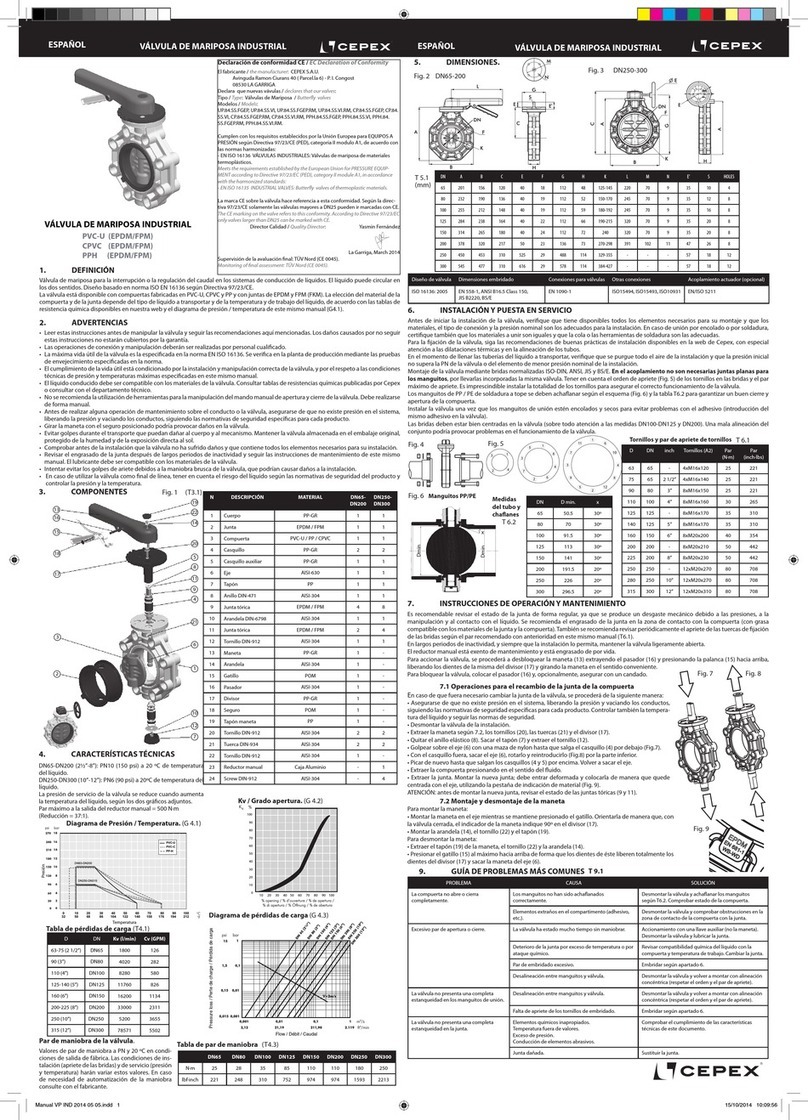
Declaración de conformidad CE / EC Declaration of Conformity
El fabricante / the manufacturer: CEPEX S.A.U.
Avinguda Ramon Ciurans 40 ( Parcel.la 6) - P. I. Congost
08530 LA GARRIGA
Declara que nuestras vávulas / declares that our valves:
Tipo / Type: Válvulas de Mariposa / Buttery valves
Modelos / Models: INDUSTRIAL and EXTREME SERIES
Compuerta / Gate: PVC-U / PVC-C / PPH / PVDF / ABS
Cumplen con los requisitos establecidos por la Unión Europea para EQUIPOS A PRESIÓN
según Directiva 2014/68/UE (PED), categoría II módulo A2, de acuerdo con las normas
harmonizadas:
- EN ISO 16136 VÁLVULAS INDUSTRIALES: Válvulas de mariposa de materiales
termoplásticos.
Meets the requirements established by the European Union for PRESSURE EQUIPMENT ac-
cording to Directive 2014/68/UE (PED), category II module A2, in accordance with the harmo-
nized standards:
- EN ISO 16136 INDUSTRIAL VALVES: Buttery valves of thermoplastic materials.
La marca CE sobre la válvula hace referencia a esta conformidad. Según la directiva
2014/68/UE solamente las válvulas mayores a DN25 pueden ir marcadas con CE.
The CE marking on the valve refers to this conformity. According to Directive 2014/68/UE only
valves larger than DN25 can be marked with CE.
Organismo certicador / Notied Body: TÜV NORD Systems GmbH & Co. KG
Große Bahnstrasse 31 , D-22525 Hamburg / Germany
N.º de identicación / Identication number : 0045 Yasmin Fernández
Quality management
La Garriga, Mayo 2018

3
EXTREME ELECTRIC BUTTERFLY VALVE
Please read the instructions below carefully in order to get the best performance from you actuated valve.
These symbols indicate potential danger if the advice set out here is not followed.
DANGER. Risk of electrocution. Failure to follow the advice set out here may result in electrocution.
DANGER. Failure to follow the advice set out here may result in personal harm or damage to the device.
WARNING. Failure to follow the advice set out here may result in damage to the automatic valve or device.
GENERAL SAFETY ADVICE
The valves described in this manual are especially designed to ensure a correct circulation of the ow in all work phases.
Device should be installed in accordance with the specic instructions for each installation. All existing safety legislation should be
respected at all times in order to avoid accidents.
Any modication to the electric actuator requires prior authorisation from the manufacturer. Spare parts and accessories authorised by
the manufacturer are a guarantee of greater safety. The manufacturer of this actuated valve is exempt from all responsibility for damage
arising from unauthorised spare parts and accessories.
The electrical and pneumatic parts of this device will have an electrical current running through them during operation. All work on the
automatic valve and other related equipment should only be carried out after having rst disconnected the start up mechanism.
The user should ensure that all assembly and maintenance work is carried out by suitably authorised, qualied personnel, and that they
have previously read the installation and service instructions set out in this manual.
Safe usage of this actuated valve can only be guaranteed by closely following the installation and service instructions set out here.
Voltage and air pressure limits should not be exceeded under any circumstances.
In case of malfunction or breakdown, contact the nearest factory representative or technical assistance service department. Knocks
should be avoided during transport, since they may damage the body and mechanism of the valve.
Store the valve in the original packaging, protected against humidity and direct sunlight.
ELECTRIC BUTTERFLY VALVE WARNINGS
The maximum service life of the valve is specied in EN ISO 16136. This has been veried at the factory using ageing tests specied in
the standard.
Correct installation and handling of the valve, as well as adherence to the maximum pressure and temperature conditions specied in
this manual are essential in order to preserve the service life of the valve.
The liquid to be conduted must be compatible with the valve materials. Consult chemical resistance charts published by Cepex or
consult the technical department.
The use of tools to open or close the manual valve control is not recommended.
Before carrying out any maintenance operations on the pipe or valve, ensure that the system has been depressurised by releasing the
pressure and emptying the pipes, following the specic safety regulations for each product.
Before installation, check that the valve is undamaged and that it contains all the parts required for installation.
After long periods of inactivity, check the grease on the o-rings and follow the maintenance instructions set out in this manual. The
grease must be compatible with the valve materials.
Rapid closure of valves should be avoided to eliminate the possibility of water hammer causing damage to the system.
When using the valve as the nal element of an installation, the risks of the liquid should be taken into account and the pressure and
temperature should be controlled, according to the safety standards for each product.
Make all connections following the instructions referring to electrical supply set out in this manual. Ensure that all cables are correctly
connected.
If the box at the end of the run needs to be opened, when it is closed again, check that it is correctly positioned to avoid any contact with
water. Also check that connectors are correctly positioned.
At all times, avoid contact, even accidental, with the motorised valve’s moving parts during operation and/or before it has come to a
complete standstill.
Ensure that the start-up mechanisms are blocked before beginning any electrical maintenance, The following steps should be followed
before any modication to the motorised valve:
1.- Disconnect from the main supply.
2.- Block the system’s start-up mechanisms.
3.- Make sure that no voltage is running through the circuits, including the auxiliary circuits and supplementary services.
All the above should be taken as indicative and not directly linked to the safety procedure as specic safety regulations may be in place
in some cases.
IMPORTANT: As a result of the complexity of the subject, the installation, usage and maintenance instructions found in this manual are
not designed to cover all imaginable service and maintenance scenarios. Should any further instructions be required or specic problems
encountered, please do not hesitate to contact the distributor or valve manufacturer.
Important: This instruction manual contains essential information regarding safety measures to be adopted when installing and
starting up the equipment. It is therefore essential that the user reads these instructions before installing and starting to use this
product.
We strongly recommend to x the valve with ange adaptor and loose ange in both sides of the valve to keep the technical
characteristics of the valve.
In case of xing only the valve with screws from one side, the maximum supported pressure will be reduced in some factor (f = 0,4).
Please ask to Cepex technical department for the specic conditions of installation and possible changes in the performance of
the valve.
4
6
4
1
2
3
5
7
8
EXTREME ELECTRIC BUTTERFLY VALVE
1. DEFINITION
Ball valve for isolating the ow in liquid handling systems.
Design based on Standard EN ISO 16136 in accordance with Directive 97/23/EC.
The valve is available with PVC-U, CPVC, PPH, PVDF and ABS discs and EPDM perox. and FPM sealing gaskets. The choice of material
for the body and gaskets depends on the type of liquid to be carried and on the working temperature of the liquid, in accordance
with the chemical resistance tables available on our website and the pressure/temperature chart in this Manual.
The electric actuator controls the positions of the valve (closed / open).
Lug-style valves have threaded inserts at both sides of the valve body. This allows them to be installed into a system using sets of
bolts and no nuts.
The valve is installed between anges using a separate set of bolts for each ange.
This setup permits either side of the piping system to be disconnected without disturbing the other side.
2. COMPONENTS
N DESCRIPTION MATERIAL Q
1 Industrial Buttery
valve bare shaft
Body: PP-GR
Disc: PVC-U/CPVC/PPH/PVDF/ABS
1
2 Coupling bush AISI-304 /AISI-316 1
3 Mounting clamp PP-GR 1
4 Electric actuator PA housing 1
6 Screw DIN-912 AISI-304 /AISI-316 4
7 Screw DIN-912 AISI-304 /AISI-316 4
8 Washer DIN-925 AISI-304 /AISI-316 4
9Nut DIN-934 AISI-304 /AISI-316 4
2.1 Actuated valve components
Fig. 1
Valve design Flanged dimensions Valve connections Other connections Actuator coupling (optional)
ISO 16136: 2006 EN 558-1,ANSI B16.5 Class 150,JIS B2220, BS/E EN 1090-1 ISO15494, ISO15493, ISO10931 EN/ISO 5211

5
2.2 Valve components
Fig. 2
EXTREME ELECTRIC BUTTERFLY VALVE
3. COMPONENTS (T3.1)
N DESCRIPTION MATERIAL DN65-
DN200
DN250-
DN300
1Lug Body PP-GR + AISI-303 Inserts 1 1
2Sealing gasket EPDM / FPM 1 1
3Disc PVC-U/PPH/CPVC/PVDF/ABS 1 1
4Lower bearing POM 1 1
5Upper bearing POM 1 1
6Auxiliary bearing POM 1 1
7Shaft AISI 630 / AISI 316L / AISI 904L 1 1
8Cap PP 1 1
9Ring DIN-471 AISI-304 /AISI-316 1 1
10 O-ring EPDM / FPM 2 4
11 O-ring EPDM / FPM 2 4
12 Lower washer POM (DN65: AISI-304) 1 1
13 O-ring EPDM / FPM 2 4
14 Screw DIN-912 AISI-304 /AISI-316 1 1
15 Handle PP-GR 1 -
16 Washer AISI-304 /AISI-316 1 -
17 Lever PP-GR 1 -
18 Pin AISI-304 1 -
19 Left spring AISI-304 1 -
20 Right spring AISI-304 1 -
21 Throttle plate PP-GR 1 -
22 Safety lock POM 1 -
23 Handle cap PP 1 -
24 Screw DIN-912 AISI-304 /AISI-316 2 2
25 Nut DIN-934 AISI-304 /AISI-316 2 2
26 Screw DIN-912 AISI-304 /AISI-316 1 -
27 Gear box Aluminium (housing) - 1
28 Mounting clamp PP-GR - 1
29 Coupling bush AISI-304 /AISI-316 - 1
30 Washer DIN-125 AISI-304 /AISI-316 - 4
31 Nut DIN-934 AISI-304 /AISI-316 - 4
32 Screw DIN-912 AISI-304 /AISI-316 - 4
33 Screw DIN-912 AISI-304 /AISI-316 - 4
34 Inserts AISI-303

6
Pressure loss chart (G 3.3)
Pressure / Temperature Chart. (G 3.1)
Pressure loss table (T3.1)
Valve operating torque
Operating torque values at rated pressure (PN) and 20 °C as supplied by default from the factory. Installation and operating condi-
tions (pressure and temperature) may affect these values.
The actuator required for an automatic operation must be calculated according to some safety factors that were determined in tests
carried out in the factory.
DN40 DN65 DN80 DN100 DN125 DN150 DN200 DN250 DN300
N·m 12 25 28 35 85 110 110 180 250
lbf·inch 106 221 248 310 752 974 974 1593 2213
(T3.2)Operating torque table (N·m)
Kv / % opening
(G 3.2)
3. BUTTERFLY VALVE
3.1 VERICATION OF VALVE TYPE
On opening the packaging please check that the valve is the model ordered.
Check that the actuator model corresponds with the code number ordered. Make
especially sure that the voltage indicated on the actuator label corresponds to that of
your mains supply (actuators do no incorporate valves, meaning that incorrect voltage
will cause irreparable damage to the device).
All valves are electrically and hydraulically tested in the factory. Valves will always be
replaced in the event of any justiable claim.
For more technical information about the actuators, please refer to the instruction
manuals attached to the valve documentation.
3.2 GUARANTEE
This equipment has been extensively tested in the factory, thus guaranteeing it is in
perfect working condition. This guarantee will be applicable assuming the device has
been properly installed and not used in an incorrectly. For this reason, this equipment
must be installed by a suitably qualied person.
3.3 TECHNICAL CHARACTERISTICS
D DN Kv (l/min) Cv (GPM)
50 (1 1/2”) DN40 600 42
63-75 (2 1/2”) DN65 1568 110
90 (3”) DN80 4980 349
110 (4”) DN100 7212 505
125-140 (5”) DN125 12320 863
160 (6”) DN150 25447 1134
200-225 (8”) DN200 35778 2505
280 (10”) DN250 65222 4567
315 (12”) DN300 94660 6629
EXTREME ELECTRIC BUTTERFLY VALVE
PVC-U
0 10 20 30 40 50 60 70 80 90 100
32 50 68 86 104 122 140 158 176 194 212
PVC-C
PP-H
DN63-DN200
DN250-DN315
psi bar
-30 -20 -10 0 10 20 30 40 50 60 70 80 90 100 110 120
-22 -4 14 32 50 68 86 104 122 140 158 176 194 212 230 248
PVDF
ABS
DN250-DN315
DN40-DN200
ºC
ºF
ºC
ºF
psi bar

7
4. DIMENSIONS
DN A B E F H K HOLES
40 175 120 26 18 40 98-110 4
65 201 156 120 18 45 125-145 4
80 232 190 136 19 48 150-170 8
100 255 212 148 19 54 180-192 8
125 284 238 164 22 64 190-215 8
150 314 265 180 24 70 240 8
200 378 320 217 23 71 270-298 8
250 450 392 310 29 112 329-355 12
300 545 470 310 29 114 384-427 12
Valve design Flanged dimensions Valve connections Other connections Actuator coupling
ISO 16136: 2005 EN 558-1,ANSI B16.5 Class 150,JIS B2220, BS/E EN 1090-1 ISO15494, ISO15493, ISO10931 EN/ISO 5211, NAMUR
See the actuator and limit switch manuals to
check the dimensions M, N and L.
DN ISO FLANGE SQUARE (mm)
40 F07 17
65 F07 17
80 F07 17
100 F07 17
125 F07 17 / 22
150 F07 17 / 22
200 F07/F10 17 / 22
250 F07/F10/F12 22 / 27
300 F07/F10/F12 22 / 27
Fig. 3
Fig. 4
Actuator coupling dimensions (T4.2)
EXTREME ELECTRIC BUTTERFLY VALVE

8
EXTREME ELECTRIC BUTTERFLY VALVE
6. INSTALLATION AND COMMISSIONING
Before starting the installation process, check that all the parts needed for the valve assembly are there, and that the materials,
connection type and nominal pressure are suitable for the installation.
For solvent or welded connections, ensure also that the parts to be connected are of the same material and that the correct solvent or
welding tools are used.
To install the valve, follow best installation practice recommendations provided on the Cepex website, paying specic attention to
thermal expansion and pipe alignment.
When lling the pipes with liquid, check that all the air has been purged from the system and that the initial pressure does not exceed
the nominal pressure of the valve, or of the system element with the lowest nominal pressure rating.
Valve assembly using standard ISO-DIN, ANSI, JIS and BS/E anges. Flat gaskets are not needed in the socket couplings, as they are
incorporated in the valve itself. Observe the tightening sequence of the screws on the anges (Fig. 6) and the maximum tightening
torque. All screws must be used in the ange in order to ensure proper operation of the valve.
The PP/PE sockets for butt welding must be chamfered as indicated in the diagram (Fig. 7) and table (T5.2), to ensure correct opening
and closing of the disc.
Install the valve once the sockets are solvent-bonded and dry, to avoid problems with the adhesive (entry of the latter into the valve).
Flanges must be well centred on the valve (pay special attention to measurements DN100-DN125 and DN200). Misalignment on
assembly could cause problems with the valve operation.
The threads of the screws and the inserts must be cleaned and lubricated in order to avoid seizing between the screw and the
insert.
The conditions of the installations and abience could need modications in the installation standards.
An unnecessary over-torque will damage the ange.
D DN
PN10
Screws (A2)
DIN (PN10)
inch
ANSI-150
Screws (A2)
ANSI-150
Insert
length
(mm)
Max. Threaded
lenght in both
sides L (mm)
Screws
Torque
(N·m)
Screws
Torque
(inch·lbs)
50 40 4xM16x2 1 1/2” 4xUNC 5/8 33 All 25 221
63 50 4xM16x2 2” 4xUNC 5/8 45 20 25 221
75 65 4xM16x2 2 1/2“ 4xUNC 5/8 45 20 25 221
90 80 8xM16x2 3” 8xUNC 5/8 48 25 25 221
110 100 8xM16x2 4” 8xUNC 5/8 54 25 30 265
125 125 8xM16x2 64 25 35 310
140 125 8xM16x2 5” 8xUNC 3/4 64 25 35 310
160 150 8xM20x2,5 6” 8xUNC 3/4 70 25 40 354
200 200 8xM20x2,5 71 30 50 442
225 200 8xM20x2,5 8” 8xUNC 3/4 71 30 50 442
280 250 12xM20x2,5 10” 12xUNC 7/8 114 30 80 708
315 300 12xM20x2,5 12” 12xUNC 7/8 114 30 80 708
Screws and screw tightening torque
DN D min. x
40 31 30º
65 50.5 30º
80 70 30º
100 91.5 30º
125 113 30º
150 141 30º
200 191.5 20º
250 226 20º
300 296.5 20º
Fig. 4
Fig. 5
Fig. 6
Pipe and chamfer
measurements
PP/PE sockets
T 6.2
T 6.1
Recommended
installation

9
6. OPERATION OF THE ACTUATOR
The motorised valve consists of an electronic actuator mounted on a conventional valve.
OPERATION. When an electric signal is received, the motor turns to either“OPEN” or“CLOSE”depending on the switching signal until
the internal cam connects to the microswitch, bringing the motor to a stop. When it receives an electric signal again, the motor will
turn in the opposite direction.
- Reversible monophase motor with visual position indicator and exit signal.
- Applications: In 90° turns (or 180° in the case of the three-way ball valve).
- Both AC and DC power supply. Both positions possible with the same actuator. Always follow the connection diagram on the
actuator label.
- Emergency manual operation. The motor will be automatically disconnected by putting the lever in the M (Manual) position.
- Additional auxiliary contacts for transmission position signal.
- WARNING. Do not connect low voltage actuators to higher voltage sources. Similarly do not connect high-voltage actuators
to lower voltage sources. Actuators do not have fuses and incorrect voltages can cause irreparable damage to the device.
J+J Characteristics
- Thermostat controlled temperature: Incorporation of a thermostat-controlled 4W heating system, working temperature between
20°C and 30°C (68°F to 86°F). In order for the system to work correctly it is important to keep the voltage running through the actuator.
- Safety: The actuator features an automatic electronic cut-o system in case the maximum torque is exceeded. Should this happen,
the device may be manually operated using the handle on the actuator.
- A permanently lit internal LED indicates that the actuator is working correctly. If it starts ashing, this means something is wrong and
the power supply to the actuator will automatically switch o.
Optional accessories:
- Digital positioning System
- Safety block. Independent terminal providing power supply to the actuator in the event of power failure.
5.1 COMPLIANCE TO STANDARDS
J+J Actuator
ISO 5211 - DIN 3337 (valve connection) EN 60204 (safety)
EN 50081-1 / EN 50081-2 / EN 50082-1 / EN 50082-2 / EN 61000-4-2 / EN 61000-4-3 / EN 61000-4-4 / EN 61000-4-5 / EN 61000-4-6 / EN
61000-4-11 (electromagnetic compatibility)
EXTREME ELECTRIC BUTTERFLY VALVE

10
7. OPERATION AND MAINTENANCE INSTRUCTIONS
It is recommended that the condition of the sealing gasket be regularly checked, since it may show signs of mechanical wear due
to pressure, handling and contact with the liquid. The sealing gasket should be greased in the disc contact area (the grease must
be compatible with the materials of the gasket and the disc). It is also advisable to regularly check that the ange xing nuts are
tightened correctly, as per the recommended torque values specied above (T5.1).
Periodic movement should be carried out to avoid the locking of the valve during long periods of time when it is in a closed
position. It is advisable that the liquid be passed through before the valve is manoevred.
7.1 REPLACING THE SEALING GASKET
If the sealing gasket needs to be replaced, proceed as follows:
• Ensure that the system is depressurised by releasing the pressure and emptying the pipes, follow-
ing the specic safety regulations for each product. Also check the temperature of the liquid and
follow safety standards for temperature.
• Remove the valve from the installation.
• Remove the handle, screws (20), nuts (21) and throttle plate (17).
• Remove the ring (8). Take o the cap (7) and remove the screw (12).
• Tap on the shaft (6) with a rubber mallet until the bearing (4) is exposed from the bottom (Fig. 11).
• Once the bearing is out, remove the shaft (6), turn it and re-insert it (Fig. 12) from the bottom.
• Tap again until the bearings (4 and 5) emerge from the top. Remove the shaft again.
• Remove the disc by pressing in the direction of the liquid ow.
• Remove the sealing gasket. Fit the new sealing gasket; it needs to be folded and positioned so that
it lines up with the shaft, according to the gasket indicator tab (Fig. 13).
WARNING: Before installing the new gasket, check the condition of the O-rings (9 and 11).
Fig. 11 Fig. 12
Fig. 13
8. MOUNT AND DISMANTLE THE ACTUATOR
If the actuator or the valve needs to be replaced, proceed as follows:
1. Move the buttery valve to the closed position.
2. Depressurise and drain the plant or the plant component.
3. Depressurise the control medium.
4. Remove the control medium line(s) from the actuator.
5. Remove the screws, the washers and the nuts (7, 8 and 9, Fig. 1).
6. Remove the assembly of the pneumatic actuator (4) with the mounting clamp (5) from the bare shaft
valve (Fig. 14).
7. Remove the screws (6) in order to dismantle the actuator from the mounting clamp.
8. In case the actuator needs to be be replaced by a handle, also remove the coupling bush (4 Fig.1).
In order to assemble a new actuator or a new valve, proceed in the opposite direction to the description
above.
Fig. 14
EXTREME ELECTRIC BUTTERFLY VALVE

11
10. TROUBLESHOOTING T 9.1
FAULT POSSIBLE CAUSE FAULT CLEARANCE
The disc does not fully open
or close.
The sockets were not correctly bevelled. Disassemble the valve and bevel the sockets as indicated
in table T6.2.
Foreign materials in the compartment (adhesive, etc.). Disassemble the valve and check for obstructions in the
disc and gasket contact area.
Excessive opening or closing
torque.
The valve has been inactive for a long time. Operate with an auxiliary release key (not the plastic
handle).
Disassemble the valve and lubricate the sealing gasket.
High temperatures or chemicals can cause damage to
the gasket.
Check the chemical compatibility of the liquid with the
disc and the working temperature. Replace the gasket.
Excessive ange torque. Tighten anges as indicated in table T5.1.
Misalignment between sockets and valve. Disassemble the valve and reassemble with concentric
alignment (observe the correct tightening sequence and
torque).
The valve is not completely
watertight in the sockets.
Misalignment between sockets and valve. Disassemble the valve and reassemble with concentric
alignment (observe the correct tightening sequence and
torque).
Flange screws not tight enough. Tighten anges as indicated in table T6.1.
The valve is not completely
watertight at the sealing
gasket.
Inadequate chemical resistance. Check compliance with the specications in this
document.
Temperature out of range. Replace the gasket.
The valve does not open or
close.
Lack of current. Check power supply to the actuator.
The valve does not close
completely.
The actuator stroke is not well adjusted to the valve. Check adjustment limits according to the actuator manual.
The torque of the valve has increased above the
calculated value.
Check the valve: obstructions in the disc or malfunction
of the valve.
EXTREME ELECTRIC BUTTERFLY VALVE

Av. Ramón Ciurans 40, PI Congost P6
La Garriga (BCN) - Spain
Tel: +34 93 870 42 08
www.cepex.com
COPYRIGHT © CEPEX, S.A.U. - ALL RIGHTS RESERVED
CODE: C584075MELXT - Version 1.3: 2020/01
Other manuals for EXTREME Series
3
This manual suits for next models
6
Table of contents
Other Cepex Control Unit manuals

Cepex
Cepex PVC-U Series User manual

Cepex
Cepex STD Manual

Cepex
Cepex EXTREME Series Manual

Cepex
Cepex EXTREME Series Manual

Cepex
Cepex EXTREME Series Manual

Cepex
Cepex PVC-U Series Manual

Cepex
Cepex Industrial Series User manual

Cepex
Cepex PVC-U Manual

Cepex
Cepex DN15 User manual

Cepex
Cepex PVC-U User manual