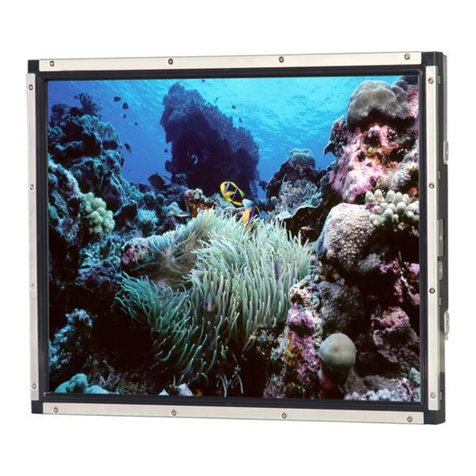
WallMount Set Fixed Kit Installation Drawing /
WallMount Set 嵌壁式人機套組安裝示意圖 /
WallMount Set 嵌壁式人机套组安装示意图
STEP1. Install Wall Mount Metal Case / 安裝嵌壁鐵殼 /安装嵌壁铁壳
將滑軌鐵片置回嵌牆鐵殼 / ㅌ⿍⺍㳛㠍䐤⿹㣗㣞㳛㋨
STEP2. Put Back White Iron Sheets into Wall Mount Matel Case/
將人機置入嵌牆鐵殼(人機和牆面切齊)/
ㅌ㦬〛䐤㧌㣗㣞㳛㋨㦬〛⼮㣞㘇㣱㡌
STEP3. Put Machine into Wall Mount Matel Case
(Machine has to align the wall) /
STEP4. Put On the Front Bezel /
放上前飾板 / ⳦㩰㣑㬯⟆
方式1:透過標準 VESA 75mm / 100mm 孔洞鎖螺絲 /
Ⳟ㬞㵙⺞⢋䓝 VESA 75mm / 100mm ㋸Ⱅ㰙㔾㯠
•Method 1: Fasten Screws Though VESA 75mm/100mm Standard /
透過鐵殼十字孔洞鎖螺絲 / 㵙⺞㳛㋨㬏䓷㋸Ⱅ㰙㔾㯠
•Method 3: Fasten Screws Though Cross Holes from Matel Case /
透過鐵殼左右孔洞鎖螺絲 / 㵙⺞㳛㋨䔔䇳㋸Ⱅ㰙㔾㯠
•Method 4: Fasten Screws Though Left & Right Holes from Matel Case/
透過鐵殼上下孔洞鎖螺絲 / 㵙⺞㳛㋨㩰㻣㋸Ⱅ㰙㔾㯠
•Method 5: Fasten Screws Though Top & Down Holes from Matel Case/
方式2:透過鐵殼四角孔洞鎖螺絲 /
Ⳟ㬞㵙⺞㳛㋨㯥ㅨ㋸Ⱅ㰙㔾㯠
•Method 2: Fasten Screws Though Four Corners from Matel Case/
!Please download documents from our website for more detail installation/
詳細安裝尺寸圖請至本公司網站下載 / 详细安装尺寸图请至本公司网站下载
200mm
100mm
130mm
65mm
100mm
100mm
75mm
75mm
197.83mm
102.83mm
135.66mm
67.83mm
WALL / 牆面 / 墙面
15mm
50.98mm62.87mm
50.98mm 62.87mm
45mm
20mm
57.15mm
20mm
20mm
20mm
20mm
20mm
15mm
57.15mm
15mm
15mm
20mm
The products have been designed for use in an industrial environment in compliance with the
2014/30/EU directive.
本產品適用於工業環境並符合2014/30/EU 標準 /
⡟⥛㠘㬫䇤䇻⹅䄖㈔⤃ⴜ⼰2014/30/EU ⢋䓝
The products have been designed in compliance with:
本產品符合以下標準: / ⡟⥛㠘ⴜ⼰䄵㻣⢋䓝
The installation of these devices into the residential, commercial and light-industrial environments is
allowed only in the case that special measures are taken in order to get the conformity to IEC-61000-6-3
本產品若要安裝於住宅;商業及輕工業的環境時,必須加測特殊檢驗以符合
⡟⥛㠘㧕䄋➓䓑䇻䓂䍍㩭䄖ゑ㤂⹅䄖⭥㈔㬒⡹㿌ゴ⥃㲹㭃ネ䂊䄵ⴜ⼰
IEC-61000-6-3 /
IEC-61000-6-3
EN 61000-6-4: 2007 +A1: 2011
EN 61000-3-2: 2014
EN 61000-3-3: 2013
EN 61000-6-2: 2005 / AC: 2005
IEC 61000-4-2: 2008; IEC 61000-4-3: 2006 + A1: 2007 +A2: 2010;
IEC 61000-4-4: 2012; IEC 61000-4-5: 2014
+ A1: 2017
; IEC 61000-4-6: 2013;
IEC 61000-4-8: 2009; IEC 61000-4-11: 2004
+ A1: 2017
本文件內容版權為Cermate Technologies Inc.所有,非經本公司同意,請勿自行重製、拷貝或修正文件內容
⡟㸥ミ㚻㦾⟇㦉㸋Cermate Technologies Inc.㰚䇱⳨㈎⡟⹌㯟㵍䅃㤌㹑䓵㾱䐹䐧᱃㋞⡕〓㾿䎞㸥ミ㚻㦾
Reproduction of the contents of this copyrighted document, in whole or part without written
permission of Cermate Technologies Inc., is prohibited. \
WALL / 牆面 / 墙面 WALL / 牆面 / 墙面
WALL / 牆面 / 墙面
Battery Replacement Installation /
替代電池安裝說明 /替代电池安装说明
* Note: It will affect the product warranty, if open the rear cover and damage
the "Void if torn" Warranty label. Please contact us for details. /
(For PK2070-51WT & PK2070-51RT / PK2070-51WT & PK2070-51RT /
PK2070-51WT & PK2070-51RT)
* 注意:若於產品保固期限內自行開啟產品後殼造成「撕毀保固無效」貼紙損毀將會影響產品保固。
相關保固問題請跟本公司聯絡詢問 /
* 䓃䅃㧕䇻⥛㠘⡄㠻㻿㚻䓵㾱㋋㡕⥛㠘⽔㋨䋍⧪᱙㯛⿺⡄㸿㾈ᱚ㳚䐞㰑⿺ㅌ。䇑㼍⥛㠘⡄᱄
㼁⡄㸫㳃㤌ⷛ⡟⹌㯟㑋㕈䁐㸫
Please scan QR Code to download the installation guide. /
請掃描QR Code下載說明文件 / 㤌㩉㘉QR Code㻣䊹㯖㘘㸥ミ
適用於
㬫䇤䇻
PK2070(B) & WallMount Set V2.2
20CRP8Z-CM0-WK1
Installation Guide /安裝手冊 /安装手册
78
56
https://reurl.cc/o9WZqM
