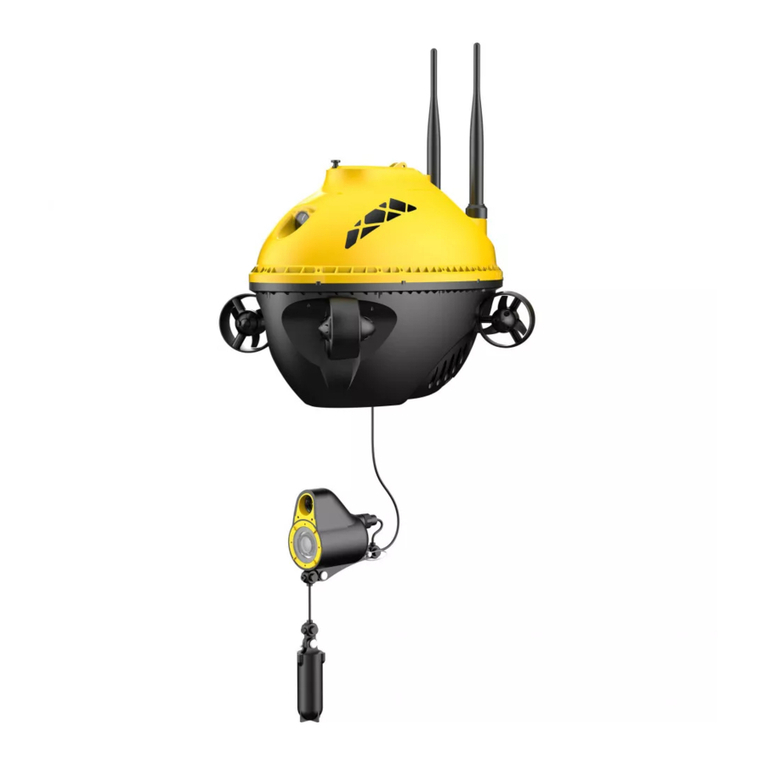
Chasing F1 User manual

User Manual
V1.1
www.chasing.com
support@chasing-innovation.com

DISCLAIMER CONTENTS
01. Damage(s) or injuries incurred when users are drunk, taking drugs, drug anesthesia, dizziness,
fatigue, nausea and any other conditions no matter physically or mentally that could impair
your ability.
02. Damage(s) or injuries caused by subjective intentional operations.
03. Any compensation for any damage arising out of the accident.
04. Failure to follow the guidance of the manual to assemble or operate.
05. Malfunctions caused by refit or replacement with non-Chasing accessories and parts, or
unauthorized modification, disassembly, or shell opening not in accordance with official
instructions.
06. Damage(s) or injuries caused by using third-party products or fake Chasing products.
07. Damage(s) or injuries caused by misoperation or subjective misjudgment.
08. Damage(s) or injuries caused by mechanical failures associated with erosion and aging.
09. Damage(s) or injuries caused by operating the unit with a low battery alert.
10. Damage(s) or injuries caused by operating the drone out of maximum safe range and depth.
11. Damage(s) or injuries caused by knowingly operating the product in abnormal conditions
( such as the assembly is not completed, or the main components have obvious faults,
obvious defects or missing accessories).
12. Damage(s) or injuries caused by operating the drone in a military control zone or privately-
owned water areas without official permission.
13. Damage or injury caused by using in bad water conditions (such as high winds, or turbid zone).
14. Damage or injury caused by uncontrollable external factors, including severe collision, tide
wave and being swallowed by animal.
15. Damage caused by infringement of any photography and video data obtained by the
operator using Chasing F1.
16. Other losses that are not covered by the scope of Chasing's liability.
Thank you for purchasing the CHASING F1 fish finder drone. Please read this entire
document carefully before using the drone. By using this product, you hereby
signify that you have read this disclaimer and all instructions carefully and that you
understand and agree to abide by the terms and conditions herein.
Chasing accepts no liability for damage, injury, or any legal responsibility incurred
directly or indirectly from the use of the CHASING F1 in the following conditions:
Maintenance and Safety Precautions
Chasing F1 Introduction
Installation & Connection
Descriptions of Main Functions
Micro SD Card Copy
Sonar Bracket
Bait Boat(optional)
Specifications
Fish Detector
Video and Photo Download
Navigation
Battery Charging Guidance
03
03
04
04
04
06
08
08
08
09
09
09
01 02

Chasing F1 Introduction
Installation & Connection
1.Power button
2.Thruster
3.Antenna mounting base
4.Hanging buckle
5.Peripheral interface
6.Reset Button
(Short press to switch 2.4Ghz or 5Ghz WiFi)
7.MicroSD slot
8.Navigation light
9.Locking screw
10.Hanging ring
11.Antenna
12.Battery
13.Camera probe connector
14.Camera probe
15.IR Infrared Light
16.Quick Release Pin
17.Lead weight
1. Hanging buckle
2. Connection interface
3. Baffle
4. Switch block
5. Connection cable
1. Hanging buckle
Sonar Bracket
Bait Boat(optional)
CHASING GO2 App :
Scan QR code or visit iOS App store / Google Play
to download. (iOS 9.0 / Android 5.0 and above)
Download CHASING GO2 App 1
a. Install Antennas:
Screw the two antenna mounts securely on
the drone and tighten them.
Install Fish Detector
2
CHASING F1 is a hi-tech digital full HD fish finder drone with remote control designed for all types of fishing.
It is a must-have for every angler of every skill level who desires to maximize his/her catch rate. F1 provides
you with intelligent information about the underwater terrain, surroundings, other objects underneath, the
location of fish masses, and the position of fish in water. In addition to fishing situations, F1 delivers both
real-time water temperature readings and accurate depth readings. It has the ability to take both great
quality pictures and to capture high-definition videos during the process of fishing. With built-in waterproof
full HD digital stellar camera equipped with white LED and IR highlight night-vision lights, fishes can be
caught in sight and video-recorded more clearly in the dark environment. F1 moves vertically and can
ascend and descend automatically. The maximum operating depth of F1 is 28 meters. It is featured by four
thrusters and has various functions, such as GPS, all-directional movement, suspension and stop, keeping
records of multiple fishing points, automatic cruise between fishing locations and one-key return. The
lithium battery is swappable and can last up to 6 hours in continuous use. Apart from the above-mentioned
functionality, F1 can be also mounted with smart sonar ball, small bait boat, and other optional accessories
to undertake more tasks.
1
1
2
3
4
Fish Detector
5
b. Install Camera Probe:
·Connect the connector of the Fish Detector to the
Camera probe cable socket (shown in ①) and
tighten the nut.
·Align the cable clamp of the Fish Detector with
the mounting hole of the Camera probe (shown
in ②), then gently push the Quick Release Pin
into the hole.
03 04
2
8
9
2
76
2
1
3
5
3
9
2
11
11
12
13
10
14
15
16
17
4
①
②

Wi-Fi
Wi-Fi
Gladius_5G_xxxxx
xxxxxxxxxx
CHOOSE A NETWORK...
6:27 89%
Settings
xxxxxxxxxx
xxxxxxxxxx
Chasing_xxxxx
Descriptions of Main Functions
To start the Fish Detector, press the power button.
The power indicator lights up, and the navigation
light exhibits a short flash, accompanied by two
beeps sounds of self-test.
Start the Fish Detector
3
Navigation light: It is convenient to observe the position of the Fish Detector at night, and it also has the
effect of attracting fish.
1
· Manual: The speed of the probe releasing and retracting can be controlled by adjusting the slider, more
closer to the end of sides, more faster.
Ascend:Slide up and press long, release to stop; Descend: Slide down and press long, release to stop.
· Auto: When the auto retracting and releasing button is hit, the manual icon will be changed into the
speed adjustment icon, and the speed can be adjusted by sliding slider.
Ascend: Hit the probe retracting slider, hit again to stop.
Descend: Hit the probe releasing slider, hit again to stop.
Ascend and Descend:
4
IR Infrared Light: Turn it on in the low light conditions or dark underwater environment for better vision.
2
Picture and video: Photos can be taken while recording.
3
On the smartphone/tablet, go to Wi-Fi settings. Wait
for 5-10 seconds and the Chasing_xxxx network will
appear as an option. Hit to connect and enter the
Wi-Fi password: 12345678
Wi-Fi Connection
4
c. Connect Sonar Bracket/ Bait Boat to Fish Detector:
Connect the Bait boat to the Fish Detector. Make
sure the hanging bucket and cable are in place.
Connect the Sonar bracket to the Fish Detector.
Clip the sonar hanging buckle to the Fish Detector
and move it slightly to make sure it is attached and
mounted properly.
When you launch the CHASING GO2 App for the
first time, please follow the interface prompts to
register an account and log in to the App. A network
connection is required during the registration and
login process.
Registration & Login
5
Run the App, when you see "connected" on the
bottom left corner, hit "start" on the right. Now you
will see the main App interface (below).
CHASING GO2 App Tutorial
6
Hide/Show
camera probe
orientation
Device
connection status Current
mode Depth Temperature GPS Battery
Settings
Navigation
light switch
Record
video
Take photo
IR Infrared
Light switch
Wind-up button
Wind-up/Wind-down slider
Wind-down button
Lock/
Unlock
Bait boat
switch
Camera probe
orientation indication
Hit the Lock/Unlock button to unlock the thruster and use the virtual joy stick on screen to control the
Fish Detector’s movement.
Lock/Unlock:
5
Forward
Backward
Left Right Pan Left Pan Right
1) Setting the return point: After unlocking, a pop-up will appear on the interface to prompt setting the
return point. Hit "Confirm setting" as shown in the figure, and then set the Fish Detector 's current
position as return point. If you hit "Ignore", you can set the return point when the Fish Detector moves
to the position where you want to return.
2) One-key return:If the return point has been set, hit the "one-key return button" again, Slide to the
right to perform the one-key return function, and slide to the left to "reset the return point".
Fishing point and return:
6
One-key return
One-key return
Do you want to one-key return? The device will
return according to the release point after entering
the water
Reset the
return point Slide right
and turn back
device connected
05 06
Note:1) Before installing or disassembling the
Bait Boat, turn off the Fish Detector’s power.
1/11
2 )F ind the video/photo that you want to download.
Hit the download button and the image will be
saved directly to the phone/tablet's photo album
(Download folder).
Connected Star >
Device Media
Media
Micro SD Card Copy
Enable 5G: Switch between 2.4g and 5G WIFI
bands.
Winder protection: If power is on, when the
Camera probe depth does not change, it will
automatically stop winding;If power is off, you
need to manually winding.
Auto return if disconnected: After starting, if the
Fish Detector is disconnected, it will auto return
to the saved return point.
Note: If the return point is not set, auto return
won’t occur.
Settings:
7
When the power level of the drone is less than 10%, a low power reminder will be displayed in the upper
left corner. At this time, the function is still in normal use. When the power is less than 5%, the interface
popup textual box reminds the user whether the drone will turn back automatically. If you choose ‘yes’,
the drone will turn back immediately. If you choose ‘cancel’,it will cancel the turn back. If you do not
choose, the drone will return after 20 seconds.
Low Power Protection:
8
Once the return point has been set, the distance
between the Fish Detector and return point will
be displayed on the smartphone/tablet.
1) ① Loosen the top screw on the Fish Detector,
remove the cover plate, ② then gently press the
Micro SD card to pull out.
2) After copying, insert the Micro SD card back into
the card slot, install the cover plate and lock the
screw.
Distance between the Fish Detector
and return point:
9
After unlocking, you can hide the control/function
buttons by double tap the screen for better image
viewing.
Double tap to hidden:
10
3 ) A dd fishing point: Hit the "Fishing point Function"
button. You can add fishing point here and change
the name and add notes according to your
personal needs.
4) Fishing points list: Hit to view the saved fishing
points.
5 ) G o to the selected fishing point: Hit "Go Here"
in the list of fishing points and the Fish Detector
will head to the selected fishing point.
Distance between the Fish
Detector and return point
*Note:1) Before removing or inserting the Micro SD
card, turn off the Fish Detector’s power and make
sure the surface of the sealing plate is dry.
2) Pay attention to check whether the O-ring of card
slot is dropped or damaged. If the O-ring is missing
or damaged, please replace it in time.
② Remove the cover and pull out the Micro SD card
① Loosen the screw
Video and Photo Download
1)After connecting Wi-Fi, open CHASING GO2 App,
hit the Media button in the lower right corner.
Navigation
CHASING F1 has a vector layout propulsion system with four thrusters, which can achieve multiple-freedom
motion.
Forward /Backward Left/Right Pan left/Pan right
Fishing poin
function button
Fishing
point list
Add fishing point
07 08

This content is subject to change without prior notice
You could have the latest user manual by the
https://www.chasing.com
Specifications
Fish Detector
Size(mm)
Weight
Max Depth
Wire Length
Working Time
Battery Cycle Times
Working Temperature
278x154x215
2KG
28M
28.5M
4-6 Hours
>300 Times
-10℃~45℃
Sensor
IMU
Depth Sensor
Temperature Sensor
GPS
Triaxial Gyroscope
Accelerometer / Compass
<±0.25m
<±2℃
±1m
LED
IR Infrared Light 7*IR Infrared Light LED
Charger
Power
Charging Time
2A/12.6V
3.5H
Camera
CMOS
Light Ring
Focal Distance
ISO Range
Viewing Angle
Photo Maximum
Resolution
Photo Form
Video Resolution
Video Maximum Bitstream
Video Form
SD Card Memory
1/2.8
F2.0
2.7mm
100-102400
164.6°
Two-mega-pixel
(1920*1080)
JPEG
1080P@30fps
4M
MP4
Standard 16G
(maximum support 256G)
Other
1. Pay attention to the orientation when installing the battery to avoid violent removal and damage to the
battery.
2. Before launching into the water, please check whether the connections are firm, whether the thrusters
are loose, and ensure the top MicroSD waterproof sealing cover is properly installed and fastened.
3. After each use, please check whether the motor blade is entangled with aquatic plants, fishing nets and
other foreign objects. Meanwhile, rinse the drone body with fresh water, dry it, air it, and then put it back
into the packing box.
4. Do not bend the antenna to avoid damage
5. When not in use, the waterproof cover shall be screwed on tight to avoid corrosion of the interface.
6. Do not place heavy objects on drone or accessories to avoid possible damage.
7. Children under the age of 16 must be accompanied by an adult to use the drone.
8. When not in use, please do not expose the Fish Detector and accessories under sunlight. Store it in a cool
place or in a special box.
Support
1. Any questions about our products please contact by support@chasing-innovation.com or leave a message
on the Chasing Website (https://www.chasing.com) chatting window.
2. You can also join the OFFICAL CHASING OWNERS GROUP on Facebook for latest news, app update and
other shared stories with Chasing Products worldwide.
Maintenance and Safety Precautions
Navigation Safety
1
Open water
navigation
Relatively clear
water quality, no
dense aquatic plants
No dense radio or
radar signals
Charging Protection
3
·Only use the Chasing standard adapter;
·Red light means charging;
·Green light means fully charged.
Winding
5
1) Please pay attention to adjust the winding speed to a slow speed to avoid damage to the probe or cable.
2) Please stop winding if the Camera probe depth remains unchanged for more than half a second.
3) Please do not winding when the Fish Detector is out of water.
Battery Protection
2
Do not run out
of battery power
Charge when power
is less than 25%
When not in use,
keep battery power
at 50% - 80%
Working
temperature
-10 °C ~ 45 °C
Do not touch the
Thrusters after unlocking.
Do not unlock the Thruster for more than
30 seconds in the air to avoid overheating.
Thruster/ Propeller
4
Battery Charging Guidance
(1)Press the limit buckle on the bottom of the Fish
Detector to remove the battery.
(2)Connect the power cord to charge the battery.
A solid red light indicates normal charging is in
process. A solid green light indicates a complete
charge. After charging, please unplug the power
adapter. ①
②
09 10
Other manuals for F1
1
Table of contents
Other Chasing Drone manuals

Chasing
Chasing M2 User manual

Chasing
Chasing M2 PRO User manual

Chasing
Chasing F1 User manual

Chasing
Chasing E-Reel User manual

Chasing
Chasing GLADIUS MINI S User manual

Chasing
Chasing DORY User manual

Chasing
Chasing GLADIUS mini User manual

Chasing
Chasing Gladius Standard Pro User manual

Chasing
Chasing M2 PRO Installation guide

Chasing
Chasing DORY User manual