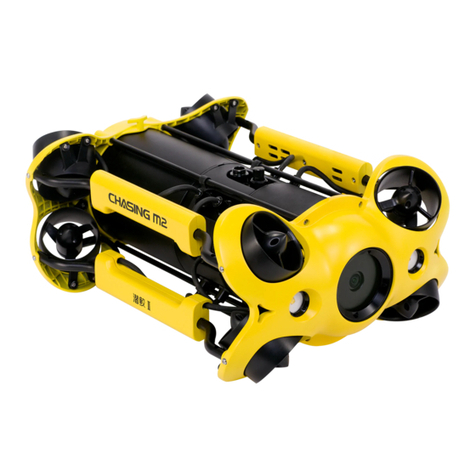
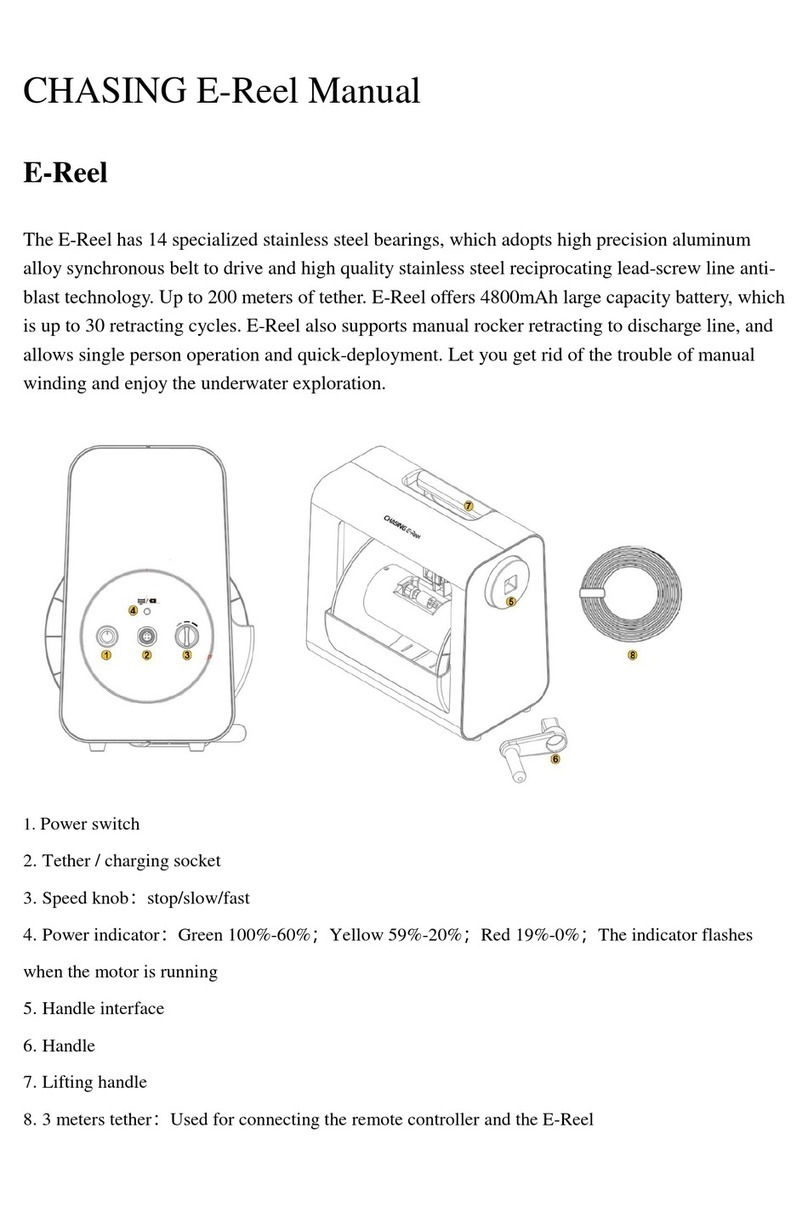
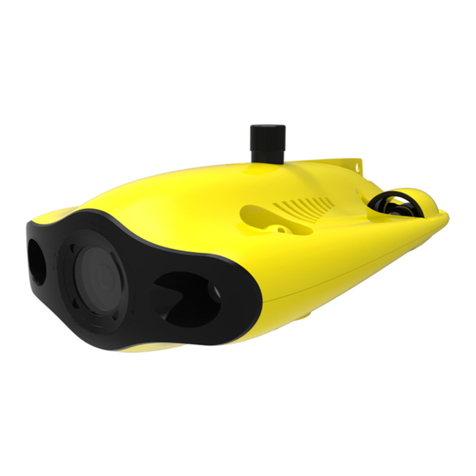
Chasing M2 S User manual

用户手册
V1.0
潜 行 创 新
www.chasing.com
support@chasing-innovation.com

Contents
EN
CN
JP
KR
SE
ES
DE
RU
03
19
35
51
67
83
99
115
User Manual
用户手册
ユーザーマニュアル
사용 설명서
Bruksanvisning
Manual del usuario
Benutzerhandbuch
Руководство пользователя

EN
03 04
EN EN
EN
Disclaimer
Thank you for purchasing the CHASING M2 S underwater drone. Please
read this entire document carefully before using the drone. By using this
product, you hereby signify that you have read this disclaimer and all
instructions carefully and that you understand and agree to abide by the
terms and conditions herein.
Chasing accepts no liability for damage, injury, or any legal responsibility
incurred directly or indirectly from the use of the CHASING M2 S in the
following conditions:
01. Damage(s) or injuries incurred when users are drunk, taking drugs, drug
anesthesia, dizz-iness,fatigue, nausea and any other conditions no matter、
physically or mentally that could impair your ability.
02. Damage(s) or injuries caused by subjective intentional operations.
03. Any mental overcompensation caused by accident.
04. Failure to follow the guidance of the manual to assemble or operate.
05. Malfunctions caused by refit or replacement with non-Chasing accessories and
parts, or unauthorized modification, disassembly, or shell opening not in
accordance with official instructions.
06. Damage(s) or injuries caused by using third-party products or fake Chasing
products.
07. Damage(s) or injuries caused by misoperation or subjective misjudgment.
08. Damage(s) or injuries caused by mechanical failures due to erosion, aging.
09. Damage(s) or injuries caused by operating the unit with a low battery alert.
10. Damage(s) or injuries caused by operating the drone out of maximum safe range
and depth.
11. Damage(s) or injuries caused by knowingly operating the product in abnormal
conditions( such as the assembly is not completed, or the main components
have obvious faults,obvious defect or missing accessories ).
12. Damage(s) or injuries caused by operating the drone in a sensitive zone such as a
military area or private waters without official permission.
13. Damage or injury caused by using in bad water conditions (such as high winds, or
turbid zone).
14. Damage or injury caused by uncontrollable external factors, including severe
collision, tidal wave. swallowed by animal.
15. Damage(s) or injuries caused by infringement such as any data, photo or video
material recorded by the use of the CHASING M2 S. 16. Other losses that are not
covered by the scope of Chasing's liability.
ROV
1.Camera
2.LED lights
3.Thruster/ Propeller
4.Micro SD slot
5.Tether socket / Charging socket
6.Sensor
7.Main Cabin
8.Battery Cabin
9.Buckle bracket
10.Peripheral interface
11.Battery pull ring
(For battery disassembling)
12.Battery fastener
13.Battery twistlock knob
3
3
5
43
7
9
8
3
3
3
2
2
1
3
3
13
13
11
12
10
6
CHASING M2 S is an innovatory industrial underwater ROV, featuring open body
design, flagship closed structure, CHASING third-generation anti-stuck motor,
intelligent flight control system, and image algorithm. CHASING M2 S can run at a
maximum speed of 3 knots, dive into a depth of 100 m, and move around a
maximum horizontal radius of 200 m. It can be attached with grabber arm, GOPRO,
external LED light, laser scaler and other mounts, as well as internally installed with
4K/12MP EIS camera, 4,000 lumen LED light, detachable/replaceable battery,
removable Micro SD memory card, aluminum alloy compact body (less than 5KG
weight), and manual cable winder (typically equipped) or optional electric winder.
The ROV is compact and light, easy to operate, and applicable to various underwater
operation scenarios.

CHASING Reel
EN
05 06
EN
Remote controller
The Chasing M2 S remote controller had integrated communication and control. It
connects directly to the drone via the included tether and connects wirelessly to
your mobile phone/tablet via Wi-Fi. It allows the drone to display a live video feed on
your phone/tablet, which enables users to control the drone in real-time. The base
station's HDMI output can also be used to display a live video feed to a larger screen.
* Note: Do not put the controller in the water to avoid damaging the device, damages
caused by water ing-ress are not covered by the warranty.
17
18
10
15
14
12 11
16
13
9
8
7
1
3
2
5
4
9
6
1. Power switch: Turns controller on/off
2. Power Indicator: Green (High power), Blue
(Medium power), Red (Low power)
3. Wi-Fi switch button: Short press to switch
5Ghz/2.4Ghz Wi-Fi
4. Signal Indicator:
2.4G : 2.4Ghz Wi-Fi indicator, always on
when working
5G: 5Ghz Wi-Fi indicator, always on when
working
ROV(drone): Indicates the communication
status between the controller and the
drone (Steady light indicates successful
connection; Blinking light indicates
disconnection.)
5. One-key reset: Short press to reposition
the ROV return to a horizontal state/
Long press to switch control mode
6. Unlock: Unlock/Lock,current state of
the Thruster will show on the App
7. Led Control: On/off led light (0%50%100%)
8. Safety Buckle: Can be used with a safety rope
9. Control Sticks: Used to control the
naviga-tion of the ROV
10.Multi function buttons: used to control
accessories
11. Photo/Video: Short press to take
photos, long press to start / end
recording video
12.
Right Angel Adjustment:
Adjust the roll
angle or control the opening and
closing of the grabber claw
13. Left Angel Adjustment: Adjust the pitch
angle
14. Type-c Port: Direct connection with
mobile phone/tablet device
15. HDMI Socket: 1080P HD image
real-time output
16. Tether Connection Socket/Charging
socket
17. Phone/Tablet Clamp: Used to attach
phone/tablet mount to mounting
bracket
18. Clamp Button: Pull apart the two ends
and put in the phone/tablet, then
press this button to tighten
Handle indicators introduction
Battery:
Red:10%↓ Red light flashes quickly;10-29% Red light always on.
Blue:30-69% Blue light always on.
Green:70-100% Green light always on.
Signal Indicator:
2.4G: 2.4Ghz Wi-Fi indicator,always on when working.
5G: 5Ghz Wi-Fi indicator,always on when working.
ROV: Indicates the communication status between the controller and the
ROV (Steady light indicates successful connection, Blinking light
indicates disconnection.)
Gesture back Button:
The blue light is always on when the ROV is in a non-horizontal position.
Unlock Button:
Locking: No lights ; Unlocking: Blue light on.
Led Control Button:
Bright light:Blue light always on; Low light: Blue light flash; No light:
Blue light off.
1. Handle
2. Manual handle interface
3. Detachable handle
4. 3m cable connection socket
5. 3m cable: connect the handle and manual winder
The manual winder (Reel) uses a total of 14 special customized stainless steel bearings,
adopts high-precision aluminum alloy timing belt transmission and a high-quality
stainless steel reciprocating screw cable anti-winding technology. IP65 waterproof and
dustproof grade, up to 200 meters of cable can be carried. The overall structure is simple
and the performance is reliable, giving you more fun in operation.
4
1
2
3
5

EN
07 08
EN
Pay-off and take-up
1) Installation
Press the button on the
right side of the
straightener to open the
straightener cover.
Insert the buoyancy wire
plug into the groove
interface of the winder
and tighten the nut.
Put the buoyancy line into
the straightener and close
the lid.
2) Pay off
Press the button on the
right side of the
straightener to open the
straightener cover.
Remove the buoyancy
line from the
straightener.
Close the cover of the
straightener, Fix the
winder and start manual
pay-off.
Install the manual handle.
3) Take-up
Press the button on the
right side of the
straightener to open the
straightener cover.
Put the buoyancy line
into the straightener
and close the lid of the
straightener.
Install the manual handle
and start to take up the
wire manually.

Wi-Fi
Wi-Fi
Gladius_5G_xxxxx
xxxxxxxxxx
CHOOSE A NETWORK...
6:27 89%
Settings
xxxxxxxxxx
xxxxxxxxxx
Chasing_xxxxx
Installation & Connection
CHASING GO1 App:
Scan the following QR code or visit the IOS APP
Store/Google Play/Chasing website for downloading.
(For IOS 9.0 or later/Android version 4.4 or later)
1 Download CHASING GO1 App
2 Connect ROV with Remote Controller
a. Turn on the remote controller power button.
b. A few seconds later, the remote controller’s
indicator lights up, 5G or 2.4G light will be always on.
The drone LED lights will flash shortly,
accompanied by three self-tests sounds.
c. Check all the connectors and lights pre-dive, and
unlock the ROV when everything is ready underwater.
3 Start (turn on) the ROV
1. Connect the 3m cable to the manual winder and handle respectively, and
tighten the nuts.
2. Connect the buoyancy line on the manual winder to the submersible, and
tighten the nut.
3. Reserve a suitable length, hang the buckle at the head of the cable on the
buckle bracket at the tail of the submersible and tighten it.
a. On the Phone/Tablet, go to Wi-Fi settings.
b. Wait for 5-10 seconds and the Chasing_xxxx network will appear as an option.
c. Click to connect and enter the Wi-Fi password: 12345678
Wi-Fi Connection
4 Connect remote controller to your phone/tablet
Choose an appropriate remote controller
cable based on the type of mobile device. A
Lightning connector cable, micro USB
cable, and TYPE-C cable are included in
the packaging. Connect the end of the cable
with the mobile phone logo to the mobile
device.
Method 1:USB Direct Cable Connection
Note: * It is recommended to use this kind of way
to connect mobile phone/tablet and remote
controller.* If the connection fails, please try to turn off
your phone's Wi-Fi and mobile network. If still fails, it
may be a phone/ tablet compatibility problem.
Please select method 2 Wi-Fi connection. * The
remote controller type-c port and attached remote
controller cables do not support charging.
*
Warning: Check whether the O-ring on the tether connector pre-dive. If it
is missed or damaged, please replace it in time.
EN
09 10
EN
1
2
3

Open the APP and enter the camera, you will see the real-time scene transmission.
5 App interface Introduction
General
Settings Compass
VR Live Stream
Shrink
Video Slow
Motion
Return
Side
Menu
Depth
Light
Angle Unlock/lock ROV Mode
3D
Gesture
Signal Strength
Battery
White
Balance
Lock
Picture
Video
Recording
Camera
Settings
Accessory
Dock
Temperature
6 Drop the ROV into Water
a. Grasp the grips on both sides of the ROV with both hands and gently throw the
ROV into the water.
b. Unlock the Thruster(motors) to dive.
c. For a better experience, it is recommended to ensure that the water depth exceeds
1 meter.
* Note:1. As the drone will connect to the 2.4G Wi-Fi by default, you can switch to
5G Wi-Fi to get a better experience. (Turn on 5Ghz in the Settings-ROV, the
drone's Wi-Fi will automatically restart, and you may need to re-connect
to the Gladius Wi-Fi).
2. You could check more guidance videos on the website page https://ww
w.chasing.com/,or you could contact the global support team with any
questions :[email protected]om
Wi-Fi
Wi-Fi
Gladius_5G_xxxxx
xxxxxxxxxx
CHOOSE A NETWORK...
6:27 89%
Settings
xxxxxxxxxx
xxxxxxxxxx
Chasing_xxxxx
Video and Photo Download
1 )C onnect the ROV with remote controller
by the tether, Switch remote controller
power button to on.
2 )F ind the Chasing_xxxxxxxx Wi-Fi on the
phone/tablet/laptop Wi-Fi list.
3)Input M2 S Wi-Fi Password :12345678
Connect Wi-Fi
1)Open CHASING GO1 App, click the Media
button in the lower right corner.
2)Find the video/photo that you want to
download. Click the download button and
the image will be saved directly to the
phone/tablet's photo album (Download
folder).
Download to Phone/Tablet
1)Open the web browser and type IP ad-
dress:192.168.1.88
2)Find the video/photo that you want to
download. Click the download icon and
save, then the images will generally save
in the Download folder.
3)It is recommended to use Firefox or Google
Chrome browser for better experience.
Media
Not secure | 192.168.1.88
1/11
Download to Computer(laptop or the computer which could use Wi-Fi)
Micro SD card copy
1)Remove the cover on the SD card socket
counter clockwise, then open the waterproof
rubber plug,and gently press the SD card. It
will pop up aut-omatically, then remove the
SD card.
2)Read the SD card in a Card reader, and copy
the images with computer.
3)Insert the SD card back to the SD card socket
after copying the images, press gently to
ensure the SD card and waterproof rubber
plug are locked, and tighten the cover
clockwise downward.
EN
11 12
EN

EN
13 14
EN
1 )T urn the knobs on both sides of the fuselage 90°
to the shallow card slot;
2 )T urn the switch ① on the slider to the left, and
pull the lock assembly upwards while holding
the chute ②;;
3 ) P ull the lower sides of the pressure plat③, by
hand, pull down to deform the pressure plate ③,
and make the buckle come off the rear bracket.
4 )P ull the Battery compartment slowly to pull it out.
a Disassemble:
Disassemble and Install the
Battery compartment
3
4
1
2
1 )R otate the knobs on the both sides of the fuselage
90 ° to the deep card slot;
2 )S lowly install the Battery compartment along the
chute under the fuselage. Press down hard until
you hear a "click" sound, and the knobs close in
place.
3 )P ull the lower sides of the Pressure Plate by hand,
pull down to deform the Pressure Plate ③, make
the buckle fasten on the rear bracket;
b Install:
4 )P ress down firmly on the chute of the locking assembly. When you hear a
“click” sound, the buckle is snapped into place properly, then the
installation is complete.
* Warning:1. Before removing or installing the Micro SD card, please switch remote
controller power button to off, and wipe off the water on the ROV;
2. Check the O-ring on the tether connector, please be sure the O-ring
cannot be squeezed out when tightening the cover. If it is missed or
damaged, please replace it in time.
Navigation
Rov
(Flight Direction)
Forward/backward
Remote
Controller
Left Joystick
Rov
(Flight Direction)
Turn Left / Right
Remote
Controller
Left Joystick
Pan Left and RightRight Rocker Up / DownRight Rocker
Turn the Dial To Adjust
the Pitch Attitude
Scroll the
Left Wheel Scroll the
Right Wheel
Turn the Dial to Adjust The
Roll
Attitude, Release to Fix Status
M2 S has 8 Vectored Thrusters layout which allows OMNI movement (up, down, left
and right, back and forth, pitch, roll, and pan) in all directions. The default is basic
control mode, suitable for beginners. Navigation attitude and remote control are as
follows:
If necessary, users can switch modes by long pressing the "One-key reset " button of
the remote controller. When switching to the advanced mode, the ROV can achieve
all-round full-freedom movement. The advanced mode is based on the first-person
perspective.
Charging Guidance
ROV & Remote Controller
Adapter(25.2V 2.9A) : It is a 3 in 1 charger that could charge the ROV, Remote
Controller, Battery Cabin & E-reel,
Red light indicates Charging, green light indicates fully charged.
* Note: in the basic mode, the maximum Angle of pitch and roll is about 80
degrees.

If the motor fails to work due to rusting or sticking, please visit http://www.chas-
ing.com to view the teaching video of "Motor Replacement" and follow the steps to
replace the motor by yourself.
For any questions, please seek for global technical support directly via emailing to
upport@chasing-innovation.com.
Maintenance and Precautions
Navigation Safety
1
Battery Protection
2
Open sea
navigation Relatively clear
water quality, no
dense seaweed
No dense radio
or radar signals Do not dive
more than
330 ft
330ft
Do not run out
of battery power Charge when
power is less
than 25%
When not in use,
keep battery power
at 50% - 70%
Working
temperature
-10 °C ~ 60 °C
( -18°F-140°F)
Specifications
Motor replacement
ROV
Size
Weight
Battery
Maximum Depth
Maximum Speed
Battery Life
Battery Cycle
Operating
Temperature
15*10.5*6.5 inch
4.5kg
97.68Wh
328 ft
1.5 m/s (3 Knots))
≤4h (Depend on working
condition)
>300times
14℉~113℉
Reel
Adapter
Adapter
ROV Charging time
Remote controller
charging time
2.9A/25.2V
2.5h
2h
Dimmable LED Lights
Brightness
Color Temperature
CRI
Dimming
2 x 2000lm
5000K~5500K
85
Three adjustable
Sensor
IMU
Depth Sensor
Temperature Sensor
Three-axis gyroscope
acceleration
compass
<±0.25m
<±2℃
Remote Controller
Size
Weight
Battery capacity
Battery life
Wireless
HDMI
TYPE-C
6.3*6.1*4.9 inch
0.685kg
2500mAh
≥6H (Depend on working
condition)
Wi-Fi
1080P
USB communication
EN
15 16
EN
Size
Weight
Maximum storage cable length
296x189x279 mm
2.5kg
200m
Camera
CMOS
Aperture
Focal Length
ISO Range
Field of View
Maximum Image
Resolution
Image File Types
Normal video
Slow motion video
Time-lapse video
Video Maximum
Stream
Video Type
micro SD
Card Memory
1/2.3
F2.8
3.2mm
100-6400
150°
12M
JPEG/DNG
4K UHD:3840*2160 30fps
FHD:1920*1080 30/60/120fps
720P: 8x (240fps)
1080P:4x (120fps)
4K/1080P
60M
MP4
Standard 64G
(maximum support 512G)

EN
17 18
EN
O-ring
6
Connector Sockets /Tether Connectors
5
Charging Protection
3
·Only use the Chasing standard adapter.
·Red light means charging.
·Green light means fully charged.
Thruster/ Propeller
4
a. Do not touch the propellers of the Thruster
b. Do not unlock the Thruster for more than 30 seconds in the air to avoid
overheating
c . After using the ROV in the salt water, please put it in fresh water for about 1
hour and turn it on, let the drone run for10 minutes to discharge the salt,
and try out the water after cleaning with a towel.
·Check the Connector socket and tether pre-dive, keep dry and clean.
Salt and moisture may cause corrosion of the connector. Be sure to wash the
socket with fresh water if
the interface has water stains, and make the connectors dry after cleaning.
· Check whether the O-ring on the tether connector/Battery socket/SD card
socket pre-dive, and make a replacement when it is missed or damaged.
· It is recommended to grease the o-ring at the interface seal for maintenance
each time when the battery cabin and Micro SD card are removed and
installed.
Other
1. Do not turn on the LED lights before entering the water to avoid damages.
2. Check if the Thrusters/propellers are getting stuck by seaweed or external
matters, rinse the ROV with fresh water and then dry and put it back in the
packing box.
3. Remote control cannot be washed with water, please clean it with towel.
4. The pull ring at the end of the battery can only be used to remove the battery,
not to lift the ROV, otherwise it may damage the ROV.
5. Do not place heavy objects on drone or accessories to avoid possible
damage.
6. People under the age of 16 should only use this drone under adult
supervision.
7. When not in use, please do not expose the drone and accessories under
sunlight. Store it in a cool place or in a special box.
8. Chloride or other chemicals can erode Chasing M2 S. Do not use if the pool is
under high chlorine level.
9. Before you remove the battery compartment, make sure to unlock the buckle for
the battery compartment. If you lift the battery compartment by using excessive
force, the battery compartment may be damaged, and this damage falls out of the
scope of the after-sales warranty.
Support
If you have any questions or technical issues, send an email to the aftersales services of
Chasing or contact us on the official website.
Aftersales support on the official website: https://www.chasing.com/ >> Contact us >>
Online Customer Support >>Click here
Aftersales service email addresses:
support01@chasing-innovation.com for Europe,support02@chasing-innovation.com for Asia
and Oceania,and support03@chasing-innovation.com for South America,North America,
and Africa.
This guide may be updated without notice.
Visit the Chasing official website for the latest version: https://www.chasing.com

免责申明 潜航器
任何用户在使用CHASING M2 S潜航器之前,请仔细阅读本声
明。一旦使用本产品,即视为对本声明全部内容的认可和接受。
使用本产品时,因下列原因造成人身伤害,财产损失等(包括直接或间接损失),
潜行创新不承担赔偿责任:
1)操控员在身体或精神状况不佳的情况下使用,造成的损害。
2)操控员的主观故意造成人身伤害,财产损失等。
3)因事故发生而引起的任何有关损害的赔偿。
4)未按本手册的正确引导对本产品组装或操控。
5)自行改装或更换非潜行创新生产的配件或零件,致使整个潜航器运行不良而造
成的其他损害。
6)使用非潜行创新生产的产品或仿制潜行创新的产品,造成的损害。
7)操控员操作失误或主观判断失误造成的损害赔偿。
8)潜航器自然磨损、朽蚀、线路老化等问题造成潜航器的运行不良。
9)潜航器发出低电量警报,仍不收回潜航器,导致潜航器失联。
10)明知潜航器处于非正常状态【如主要部件发生明显故障、配件存在
显而易见的缺损或缺失】,仍强制入水,而造成的损害。
11)未经官方许可,潜航器处于军事管理区、公海区域等敏感水域而造成
的损害。
12)在恶劣水质(如狂风巨浪、泥沙浑浊)下运行潜航器。
13)潜航器遭遇激烈碰撞、海啸、生物吞食等不可控情况。
14)操控员使用潜航器取得的任何影像资料,因侵权而发生的损害。
15)其他不属于潜行创新责任范围内的损失。
1. 摄像头
2. LED灯
3. 推进器
4. Micro SD卡接口
5. 浮力线接插口/充电口
6. 传感器
7. 控制舱体
8. 电池舱
9. 挂扣支架
10. 外设接口
11. 电池舱拉环
(仅用于拆卸电池舱时使用)
12. 电池舱紧固压板
13. 电池舱锁扣旋钮
3
3
5
43
7
9
8
3
3
3
2
2
1
3
3
13
13
11
12
10
6
CHASING M2 S行业级水下机器人全面革新,采用开放式机身设计、旗舰级密闭结
构、CHASING第三代防卡沙电机、智能飞控系统和图像算法。CHASING M2 S最大
航速3节、深度100米、最大水平半径200米。支持机械臂、GOPRO、外置LED灯和激
光卡尺等多种挂载。内置4K/1200万像素EIS防抖相机、4000流明LED灯、可拆卸/
可更换电池,可插拔Micro SD存储卡、铝合金紧凑型机身(重量小于5KG),标配可
排线式手动绕线器,选配电动绕线器。整机小巧轻便,操作简单易用,适用各种水下
作业场景。
EN
19 20
EN CN
CN

遥控器
CHASING M2 S遥控器是一款集通讯和操控于一体的专业遥控器,能让手机/
平板设备通过其提供的Wi-Fi信号与潜航器连接,能够实时控制机器和返回拍
摄的画面,支持HDMI1080P高清视频输出。
1. 电源开关:开/关遥控器电源
2. 电源指示灯:绿灯(高电量);
蓝灯(中电量);红灯(低电量)
3. Wi-Fi切换键:切换2.4G/5G Wi-Fi
4. 指示灯:ROV/2.4G/5G
5. 一键回正:任意姿态下,可回至水
平状态,长按进行操控模式切换
6. 解锁:解锁/锁定电机,可在App中
确认电机当前状态
7. 补光灯:开/关补光灯(0%50%100%)
8. 安全扣:可附安全绳使用,以防掉落
9. 摇杆:操控潜航器航行,具体操作参
考航行姿态
9
8
7
1
3
2
5
4
9
6
* 注:由于浸入液体而导致的损坏不在保修范围之内。
手柄指示灯
2.4G: 2.4G Wi-Fi 指示灯,工作状态下常亮
5G: 5G Wi-Fi指示灯,工作状态下常亮
ROV: 手柄与潜航器之间的通讯
闪烁:未连接
常亮:连接
一键回正键: 当机器姿态处于非水平状态时,蓝灯常亮
解锁键: 解锁后,蓝灯常亮
补光灯键: 补光灯高亮,蓝光常亮
补光灯低亮,蓝光闪烁
补光灯关闭,蓝灯熄灭
电池: 电量指示灯,有三种颜色状态
红色:10% 以下红灯快闪; 10-19% 红灯慢闪; 20-29% 红灯常亮
蓝色:30-69% 蓝灯常亮
绿色:70-100% 绿灯常亮
10. 多功能按键:用于控制配件
11. 录像/拍照: 短按拍照;长按开始/结束
录像
12. 右拨轮:调节横滚角度;控制机械臂开合
13. 左拨轮:调整俯仰角度
14. TYPE-C接口:与手机/平板设备直连通讯
15. HDMI接口:1080P高清实时图像输出
16. 连接线插座/充电插座
17. 手机/平板夹:用来固定手机/平板设备,
拉开两端可将设备放入,按下背面按钮即
可收紧设备
18. 夹钳按钮:将两端拉开,放入手机/平
板电脑,然后按下此按钮以拧紧
17
18
10
15
14
12 11
16
13
手动绕线器
1. 提手 2. 把手接口
3. 可拆卸手把 4. 3米连接线接插口
5. 3米连接线(连接手柄和手动绕线器)
手动绕线器(Reel)共使用14颗专用定制不锈钢轴承,采用高精度铝合金同步带传
动和优质不锈钢往复丝杆排线防缠绕技术。IP65防水防尘等级,最大可搭载200米
线缆。整体结构简单,性能可靠,赋予您更多操作乐趣。
4
1
2
3
5
EN
21 22
EN CN
CN

安装与连接
CHASING GO1 App:
( 适用于iOS 9.0/Android 4.4及以上版本 )
扫描下方的二维码下载或者访问 iOS App Store/
Google Play/潜行官网进行下载。
1 安装CHASING GO1 App
2 连接潜航器和遥控器
*注:检查浮力线接插头上的O型密封圈是否掉落或破损,如缺失或破损请及时更换。
1.将3米连接线分别连接到手动绕线器和手柄并锁紧螺母。
2.将手动绕线器上的浮力线连接到到潜航器上并拧紧螺母。
3.预留合适长度,将线缆头部的挂扣挂在潜航器尾部挂扣支架上并收紧。
1
2
3
放线与收线
1) 安装
按下校直器右侧按钮,
打开校直器盖子
将浮力线插头插入绕线
器凹槽接口并拧紧螺母
将浮力线装入校直器中
并合上盖子
2) 放线
按下校直器右侧按钮,
打开校直器盖子
从校直器中取下浮力线 合上校直器盖子,开始手
动放线
安装好可拆卸手把
3) 收线
按下校直器右侧按钮,
打开校直器盖子
将浮力线装入校直器中,
合上校直器盖子
安装好可拆卸手把,开 始
手动收线
EN
23 24
EN CN
CN

打开App选择进入相机,进入到App后会看到机器画面的实时图传。
5 App界面介绍
设置 指南针
VR 直播
缩时录影
慢动作
返回
侧边
菜单栏
温度
深度
灯光
相对
角度 解锁/锁定 潜航器状态模式
3D姿态
信号强度
电池电量
一键锁定
白平衡
拍照
录像开关
相机参数
设置菜单
配件坞
6 投放机身
投放机身时双手抓紧机器两边握柄,将机器轻抛入水。解锁电机之后,开始潜水操作。
为了获得更好的体验,建议启动前保证水深超过1米。
* 注:1.机器默认2.4G Wi-Fi连接,为获得更好的使用体验,您可在“设置-潜航器”点击
切换到5Ghz Wi-Fi,机器Wi-Fi会自动重启,可能需要重新连接Wi-Fi。
2.相关教学视频可前往官网查看,有任何疑问可直接邮件咨询全球技术支持:
support@chasing-innovation.com
打开遥控器的电源开关( ON/OFF )开机后,手柄电量
指示灯亮起,5G 或者 2.4G指示灯常亮,ROV指示灯常
亮。同时潜航器响起三次电机自检声。
3 开机
* 注:自检声响毕,可以通过解锁键解锁机器操控。为了安全及体验,请将机器放入水
中,一切准备就绪之后解锁潜航器。
进入手机/平板Wi-Fi连接界面,
等待5-10秒,连接 Chasing_XXXX,
Wi-Fi密码:12345678。
Wi-Fi连接
无线局域网
无线局域网
xxxxxxxxxx
加密
选取网络...
20:37 89%
中国移动
设置
Gladius_5G_xxxxx
加密
xxxxxxxxxx
加密
xxxxxxxxxx
加密
Chasing_xxxxx
4 连接遥控器和手机/平板
链接方式一:遥控器数据转接线连接
将附赠的遥控器数据转接线连接遥控器
和手机/平板(可根据移动设备接口类型
选择相应接口的遥控器数据转接线),将
印有手机图案的一端连接手机/平板。
* 注: 1. 若您的手机/平板连接不成功,请先尝试关闭手机/平板的Wi-Fi;若仍连
接不成功,再尝试关闭手机/平板的蜂窝数据。
2. 如果上述方法均不能成功连接,可能是手机/平板兼容性问题,请选择方
式二:Wi-Fi连接。
3. 遥控器TYPE-C接口及附赠的遥控器数据线均不支持充电。
EN
25 26
EN CN
CN

无线局域网
无线局域网
xxxxxxxxxx
加密
选取网络...
20:37 89%
中国移动
设置
Gladius_5G_xxxxx
加密
xxxxxxxxxx
加密
xxxxxxxxxx
加密
Chasing_xxxxx
图库
视频与图片下载
1)连接好潜航器和遥控器,打开遥控器电源开关
2)手机/平板Wi-Fi列表中找到:Chasing_XXXX
3)输入密码:12345678
连接Wi-Fi
1)点击APP主界面右下角图库。
下载(手机/平板)
2 )找 到需要下载的视频/图片,点击下载按钮,
视频和图片会直接保存到手机/平板相册里,
一般保存在Download文件夹。
Media
Not secure | 192.168.1.88
1/11
1 )打 开网页浏览器,输入IP地址:192.168.1.88。
2 )点 击需要的视频或图片,点击下载图标,然后
点击保存,一般保存在Download文件夹。
3)为了保障视频和图片的顺利下载,建议使用
火狐浏览器或谷歌浏览器。
下载(电脑)
Micro SD卡拷贝
1)沿逆时针将Micro SD卡(下称SD卡)
密封盖取下,揭开防水橡胶塞,轻轻按
压SD卡自动弹出,取下SD卡;
2)将SD卡插入读卡器等设备中,借用电
脑等设备读取SD卡中的照片和视频;
3)拷贝完毕后,将SD卡按图示插回至卡
槽,并轻轻按压确保SD卡锁紧,安装好
防水橡胶塞,同时把密封盖沿顺时针
向下拧紧。
电池舱拆装
3
4
1
2
a 拆卸
1)首先将机身两侧电池舱锁扣旋钮旋转90°至较浅
的卡槽;
2)用手波动滑块上的开关①,同时扣住滑槽将锁紧
组件向上扳动②;
3)用手拽住压板下方两侧,下拉使压板③变形,使
卡扣从后支架上脱出;
4)拉电池舱拉环④缓慢将电池舱拉出。
b 安装
1)将机身两侧电池舱锁扣旋钮旋转90°至较深卡槽内;
2)将机身头部朝下放置,沿着机身滑槽装入电池舱,用
力下压直到听到“咔嗒”的两声,锁扣旋钮扣合到位;
3)用手拽住压板下方两侧,下拉使压板“③”变形,使卡
扣扣紧在后支架上;
4)将锁紧组件滑槽往下按压,听到“咔嗒”的一声,卡扣
扣合到位,电池安装完成。
* 注:1)Micro SD卡拆卸或安装前,请关闭手柄将潜航器断
电,擦干潜航器舱体的水渍;
2)安装Micro SD密封盖时,注意检查Micro SD卡槽
的O型密封圈是否掉落或破损,拧紧盖子时O型圈
不能被挤压出来,O型圈如缺失或破损请及时更换。
EN
27 28
EN CN
CN

296x189x279 mm
2.5kg
200m
2.9A/25.2V
2.5h
2h
电机更换
当电机生锈、卡沙导致无法使用时,请前往官网http://www.chasing.com查看
“电机更换”教学视频,按照步骤自行更换电机。
有任何疑问可直接邮件咨询全球技术支持:
support@chasing-innovation.com
充电指导
潜航器&遥控器:
三合一适配器(25.2V 2.9A)可对潜航器、遥控器、电池舱、电动绕线器充电。
指示灯:
红灯:正常充电; 绿灯:充电完成。
规格参数
潜航器
尺寸
重量
电池
最大深度
最大航速
续航时间
电池循环次数
工作温度
380*267*165mm
4.5kg
97.68Wh
100米
1.5m/s (3节)
≤4h
>300次
-10℃至45℃
LED补光灯
亮度
色温
CRI
调光
2 x 2000流明
5000K~5500K
85
三档可调
手动绕线器
充电器
充电功率
潜航器充电时间
遥控器充电时间
传感器
IMU
深度传感器
温度传感器
三轴陀螺仪
加速度计
罗盘
<±0.25m
<±2℃
遥控器
尺寸
重量
电池
续航时间
无线
HDMI
TYPE-C
160*155*125mm
≈0.685kg
2500mAh
≥6h (视使用环境而定)
Wi-Fi 支持
1080P 支持
USB通讯
* 注:基本模式下,俯仰与横滚最大角度约80度。
航行姿态
潜拍器姿态
前进/后退
遥控器
左摇杆
潜拍器姿态
左转/右转
遥控器
左摇杆
左/右平移右摇杆 上浮/下潜右摇杆
俯/仰左滚轮 横滚右滚轮
M2 S可以实现上下,左右,前后,俯仰,横滚,平移等360°全方位移动。
M2 S默认为基本模式,适用于初学者,该模式下的航行姿态与遥控器控制关系
如下图:
用户可通过长按遥控器的“一键回正”键进行模式切换,当切换至进阶模式时,
潜航器可以实现360°全方位全自由度运动(进阶模式基于第一人称视角)。
尺寸
重量
最大收纳线缆长度
EN
29 30
EN CN
CN

相机
CMOS
光圈
焦距
ISO范围
视场角
照片最大分辨率
照片格式
普通录影
慢动作录影
缩时录影
视频最大码流
视频格式
SD卡
1/2.3
F2.8
3.2mm
100-6400
150°
12M
JPEG/DNG
4K UHD:3840*2160 30fps
FHD:1920*1080 30/60/120fps
720P: 8x (240fps)
1080P:4x (120fps)
4K/1080P
60M
MP4
标配64G(最大支持512G)
保养及注意事项
航行安全
1
电池保护
2
开阔海域航行 水质相对清晰
无密集海藻 周边没有密集
无线电、雷达 潜水不超过
100米
100m
勿耗尽电池电量 电量低于25%
请充电
闲置时保持电池
电量为50%-70% 工作温度
-10℃ ~ 60℃
充电保护
3
·请用官方标配的充电器;
·红灯代表在充电;
·绿灯代表充电完成。
请勿触碰旋转的电机桨叶 请勿将电机在空气中空转超过30秒,
以免电机过热损坏
电机/桨叶
4
浮力线缆
5
O型密封圈
6
·使用前检查并保持机身通讯接口和浮力线接口干燥、清洁。由于盐分以及湿
气可能导致接口的腐蚀,如果接口进入水渍请务必用淡水冲洗插口,用纸巾
或者棉球吸干插口内水分。
· 注意检查电池舱接口、浮力线插头、Micro SD卡槽的O型密封圈是否掉落、
破损,如缺失破损请及时更换;
· 建议在每次电池舱、Micro SD卡密封盖拆装时,对接口密封处的O型圈进行
润滑脂涂抹保养。
* 注:在海水中使用后,请将机身放入淡水中浸泡至少1小时,并开机运转10分钟,清
洗完成后可用清洁布进行擦拭。
EN
31 32
EN CN
CN

本指南如有更新,恕不另行通知。
您可以进入潜行官网查询最新版本:https://www.chasing.com
潜 行 创 新
支持
有任何疑问或者技术问题请发送邮件至潜行售后或通过官网客户热线联系我们。
售后客服热线:400-667-6959
售后邮箱地址:[email protected]欧洲
support02@chasing-inno vation.com --亚洲&大洋洲
support03@chasing-inno vation.com-- 南北美洲&非洲
1. 下水前,勿将潜航器辅光灯打开,以免烧坏。
2. 每次使用后,请检查电机桨叶是否被海草,渔网等异物缠住,同时使用淡水冲
洗主机机身并擦干、晾干,然后放回至包装箱内;
3. 遥控器不能用水冲洗,需用清洁布擦拭;
4. 电池尾部的拉环只能用来拆卸电池,不能用来提机器,否则可能摔坏机器;
5. 勿在机器上放置重物,以免可能会对机身造成损坏。
6. 16岁以下青少年需在大人的陪同下使用本潜航器。
7. 不使用时,勿将机器放阳光下暴晒存放阴凉处或专用箱内。
8. 氯化物或其他化学物质会腐蚀机器;若游泳池含氯较高,切勿在其中使用。
9. 拆取电池舱前务必要解锁电池舱锁扣,否则暴力拔取导致的人为损坏无法售
后保修。
其他
EN
33 34
EN CN
CN

JP
35 36
JP
3
3
5
43
7
9
8
3
3
3
2
2
1
3
3
13
13
11
12
10
6
免責事項
水中ドローン「CHASING M2 S」をご購入いただき有難うございます。ご使用
前に本取扱説明書をよくお読みください。 本製品 の使用は、免責事項および
本製品の使用説明書をお読みいただきご理解の上、免責事項に含まれる諸
条件の順守に同意することになります。
CHASING M2 S は8つのモーターエンジンを搭載した小型の水中ドローンで、水中撮影、
探査およびリアルタイムの観察が可能です。Chasing Innovation は以下条件にて
CHASING M2 Sを使用した際に生じた直接的または間接的損傷や傷害または法的責任
に対し一切の責任を負いません。
01) 泥酔、薬物使用、麻酔薬の使用、めまい、疲労、吐き気および身体的または精神的能
力を損なうその他の状態で生じる損傷や傷害。
02) 自覚的かつ故意的な操作に起因する損傷や傷害。
03) 事故の影響による精神的な補償。
04) マニュアルの指示に従わず組み立てや操作する行為。
05) Chasing-Innovation 製以外のアクセサリーやパーツを用いた修理や交換、または
不正な改造、解体および規定に従わず本体を開くことによって生じる故障。
06) 第3者製品またはChasing-Innovation の偽造品使用に起因する損傷や傷害。
07) 操作ミスまたは自覚的な判断ミスに起因する損傷や傷害。
08) 浸食や経年劣化による機械の故障が原因となる損傷や傷害。
09) 低バッテリー操作によりドローンが安全とされる範囲および深度を超えて生じる損
傷 や 傷 害 。
10) 異常な状態(組み立てが未完成、本体の主なパーツが明らかに不良、明らかな欠陥
またはアクセサリーの不足など)で故意に操作することで生じる損傷や傷害。
11) 軍事施設などの機密性の高い地域や正式な許可を得ずに公共の水域でドローンを
操作し生じる損傷や傷害。
12) 悪天候時(暴風や水質が混濁した地域など)に使用し生じる損傷や傷害。
13) 激しい衝突、高波・高潮、動物による飲み込みなど制御不可能なに外的要因に起因
する損傷や傷害。
14) CHASING M2 Sを用いて記録したあらゆるデータ、写真やビデオ素材が違反とみなさ
れ生じる損傷や傷害。
15) Chasing-Innovationの賠償責任補償外のその他の損失。
ROV本体
1 、 カ メ ラ
2、 LED ライト
3、 スラスター/プロペラ
4 、 マ イ ク ロ S D ス ロ ッ ト
5、 テ ザ ーソ ケット/ 充 電 ソ ケット
6 、 セ ン サ ー
7 、 メ イ ン キ ャ ビ ン
8 、 バ ッ テ リ ー キ ャ ビ ン
9 、 バ ッ ク ル ブ ラ ケ ッ ト
10、 外部インターフェース
11、 バッテリープルリング
(バッテリー取り外し用)
12、 バッテリーファスナー
1 3 、 バッテリーツイストロックノブ
CHASING M2 S業界レベル水中ロボットは全面的に革新され、オープンボディ設計、旗艦レベ
ルの密閉構造、CHASING第3世代サンドトラップ防止モーター、インテリジェントフライシステム、及び
画像アルゴリズムを採用しています。CHASING M2 S最大航速3ノット、深さ100メートル、最大水
平半径200メートル。アーム、GOPRO、外付けLEDライト、レーザーノギスなど多くのマウントに対応してい
ます。4K/1200万画素EIS手振れ防止カメラ、4000ルーメンのLEDライトを内蔵して、取り外し可/
電池交換可、Micro SDメモリカードの挿抜可、アルミニウム合金コンパクトボディ(重量5 KG未満
)、手動巻き上げ機を標準装備、電動巻き上げ機をオプション設置します。全体的に小型・軽量
で使いやすく、あらゆる水中シーンにサポートします。

リモコン
CHASING M2 Sリモートコントローラーには、通信と制御が統合されています。 付属のテザーを介してドロー
ンに直接接続し、Wi-Fiを介してタブレット/スマートフォンにワイヤレスで接続します。 接 続 したタ ブ レット/ ス マ ート
フォンではライブビデオフィードを表 示 することを可 能 にし、ユーザーがリアルタイムでドローンを制 御 することが 可
能です。 ベースステーションのHDMI出力を使用すれば、ライブビデオフィードをより大きな画面に表示すること
もできます 。
コントローラー機能の紹介
バッテリー残高表示:
赤:10%-30%赤灯は常に点灯します。
0%-10%赤灯が点滅します。
青: 30%-70% 青信号が常に点灯します。
緑:70%-100%緑信号が常に点灯します。
チャン ネ ル 表 示:
2.4G : 2.4Ghz Wi-Fi インジケータ、起動中は常に点灯します。
5G:5Ghz Wi-Fiインジケータ、起動中は常に点灯します。
ROV(ドローン):コントローラとドローン間の通信状態を表示します。
(点滅:接続されていない、常時点灯:接続されています)。
ワンキーリセットボタン:
ROVが水平でない状態で、青いライトが点灯します。
ロ ッ ク ボ タ ン:
ロック解除すると、青いライトが点灯します。
LEDコントロールライト:
高ライト:青いライトが点灯します。 低ライト:青いライトが点滅します。 消灯:青いライトが消えます。
* 注意: デバイス の 損 傷 を防ぐた め にコントロ ーラーを 水 に 浸さな いでください 。水 の
浸入による損傷は保証対象外です。
17
18
10
15
14
12 11
16
13
9
8
7
1
3
2
5
4
9
6
1. 電源スイッチ:コントローラーをオンオフします
2. 電源インジケーター:緑 (高出力)、青 (中出
力)、赤 (低出力)
3. Wi-Fi切換ボタン:短く押すと5GHz/2.4GHz
Wi-Fiが切り換わります
4. シグナルインジケーター:
2.4G:2.4GHz Wi-Fiインジケーター、動作中
に点灯
5G:5GHz Wi-Fiインジケーター、動作中に点
灯
ROV (ドローン):コントローラーとドローンの間の
通信状態を表示します (接続が成功すると
点灯し、接続が解除すると点滅します。)
5. ワンキーリセット:短押しでROVが水平状態
に戻り、長押しで制御モードが切り替わります
6. ロック解除:ロック解除/ロック。アプリに
Thrusterの現在の状態が表示されます
7. LEDコントロール:LEDライトのオン/オフ(0%
50% 100%)
8. セーフティバックル:セーフティとロープと併用し
て、リモコンの落下を防止します
9. コントロールスティック:ROVのナビゲーショ
ンを制御するために使用します
10. マルチファンクションボタン:アクセサリーの
コントロール用
11. フォト/ビデオ:短押しで写真撮影、長押
しで動画撮影を開始/終了します
12. 右角度調整:ロールアングルを調整した
り、アームクローの開閉をコントロールします
13. 左角度調整:ピッチ角を調整します
14. TYPE-Cポート:スマートフォン/タブレットと
の直接接続
15. HDMIソケット:1080P HD画像リアルタ
イム出力
16. テザー接続ソケット/充電ソケット
17. スマートフォン/タブレットクランプ:これを使
用してマウンティングブラケットにスマートフォ
ン/タブレットを取り付けます
18. クランプボタン:両端を引き外してスマート
フォン/ タブレットを入れ、このボタンを押して
固定します
JP
37 38
JP
4
1
2
3
5
手動巻き取り機(リール)には、計14個の特注ステンレス鋼ベアリングを使用し、
高精度アルミニウム合金タイミングベルトトランスミッションと高品質ステンレス鋼レシプロネジケーブ
ル巻き戻し技術を採用しています。IP65防水/防塵グレードで、最大200mのケーブルを携帯する
ことができます。構造全体がシンプル且つ高性能であるため、操作性をよりお楽しみいただくこと
ができます。
1. ハンドル 2.手動ハンドルインターフェース
3. 着脱式ハンドル 4.3mケーブル接続ソケット
5. 3mケーブル:ハンドルと手動巻き取り機を接続
手動リール
Table of contents
Languages:
Other Chasing Drone manuals

Chasing
Chasing M2 User manual

Chasing
Chasing Gladius Standard Pro User manual

Chasing
Chasing E-Reel User manual

Chasing
Chasing F1 User manual

Chasing
Chasing GLADIUS MINI S User manual

Chasing
Chasing GLADIUS mini User manual

Chasing
Chasing M2 PRO User manual

Chasing
Chasing DORY User manual

Chasing
Chasing GLADIUS mini User manual

Chasing
Chasing DORY User manual