For completely empty batteries, the charge takes 5
hours app. As soon as the battery is recharged, the unit
continues to use mains power without discharging the
battery.
3.6.4 Changing the battery
Disconnect the CA8335 from the mains supply and the
network measured to change the battery. The unit must
have no connection. The Qualistar+ maintains the date
and time for about 24 hours.
3.6.5 The battery
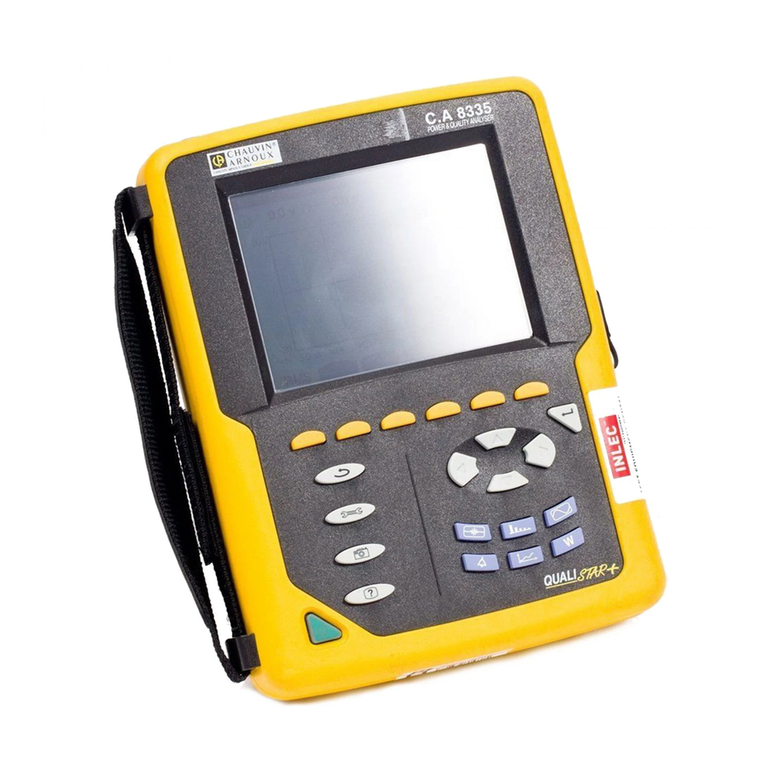
The CA8335 is powered by a specific 8-element battery
(see below, item 2) minimum capacity 4000 mAh.
Figure 5: Battery access flap
3.6.6 Mains operation
The battery is not essential when the unit is running on
mains supply. However, if the mains power is cut off,
data may be lost during the recording process, for
example.
The On/Off button is on continuously (green LED) when
the mains power is active.
3.7 The stand
A retractable stand (Figure 5, item1) located on the
back of the Qualistar+ keeps the unit at a 53° angle.
3.8 Summary of functions
3.8.1 Measurement functions
The values of AC voltages up to 1000 V between
terminals of any voltage.
The values of AC currents up to 6500 amps (neutral
included)
DC voltages and currents (neutral included)
Voltage and current minimum and maximum half-
period values
Peak values for voltages and current (neutral
included)
Frequency of 50 Hz and 60 Hz networks
Current and voltage peak factor (excluding neutral)
Calculation of the K factor (KF) (applicable to
transformers when current harmonics are present).
Distortion factor (DF) for current and voltage
(excluding neutral)
Global harmonics rate for current and voltage
(excluding neutral).
Active, reactive (capacitive and inductive) and
apparent power by phase and cumulative (excluding
neutral).
Power factors (PF) and displacement power factors
(DPF) (excluding neutral).
Short-term flicker (PST) (excluding neutral).
Active, reactive (capacitive and inductive) and
apparent (excluding neutral) energy.
Harmonics and voltages (excluding neutral) up to the
50th: RMS value, percentages in relation to
fundamental, minimum and maximum and harmonics
sequences.
Harmonics for apparent power up to the 50th: value,
percentage in relation to the fundamental, minimum
and maximum.
Inrush currents
Selection of the transformer ratio for MN93A (5A
scale) clamps and the 5 A adapter.
Automatic recognition of types of current sensor
(every second)
1
2
3.8.2 Display function
Display of waveforms (voltages and currents)
Current Inrush function: displays the parameters used
in the study of a motor start-up.
- Instantaneous value of the current at position of
the cursor.
- Maximum instantaneous value of the current
(over the entire start-up period).
- RMS value of the half-period (or lobe) of the
current (excluding neutral) on which the cursor is
positioned
- Maximum half-period RMS value of the current
(over the entire start-up period).
- Motor start-up time
Screen captures (50 maximum)
Trend recording function. Detection and recording of
transients (210 maximum). User defined start and
stop date for event monitoring. Each transient
recording will store 4 cycles, 80mS of data, (1 cycle
pre-trigger and 3 cycles post trigger).
Trend recording function (2Gb memory with user
defined start and stop date for recording campaigns
with a maximum of 100 recordings – 100 records
maximum). Displayed as trends of the average of the
integration period for the selected parameters.
Alarm function. List of Alarm events (1000 maximum)
exceeding user defined limits and within the
starts/stops the duration of alarm monitoring.
3.8.3 Configuration function
Date and time settings
Screen brightness and contrast settings
Choice of curve colours
Choice of reactive power and energy calculation
mode (with or without harmonics)
Choice of connection (one phase, two phase, three
phase with or without neutral).
Configuration of records and alarms
(Total or partial) data removal
Display software and hardware versions
Choice of language
10
