misurazione.
6. Durante la misurazione, mantenere
lontano da fonti di calore esterne.
7.Al primo utilizzo ricordarsi di estrar-
re la linguetta di protezione della
batteria (vedi paragrafo “COME
POSIZIONARE/SOSTITUIRE LA
BATTERIA”).
8. In caso di danneggiamento del
termometro o della sonda il ter-
mometro potrebbe dare problemi
di misura: se il termometro subisce
cadute gravi o ci sono segni di dan-
neggiamento non utilizzare il dispo-
sitivo senza prima farlo verificare.
9. Far verificare la calibrazione ogni
3 anni. Per maggiori informazioni
consultare il sito www.chicco.com
o contattare il numero verde con-
sumatori Italia 800 188 898.
IMPORTANTE: il termometro NON
è a prova d’acqua. Conservare il di-
spositivo in luogo asciutto e lontano
da liquidi. Temperatura di stoccaggio:
-20°C~ 50°C (-4°F~122°F).
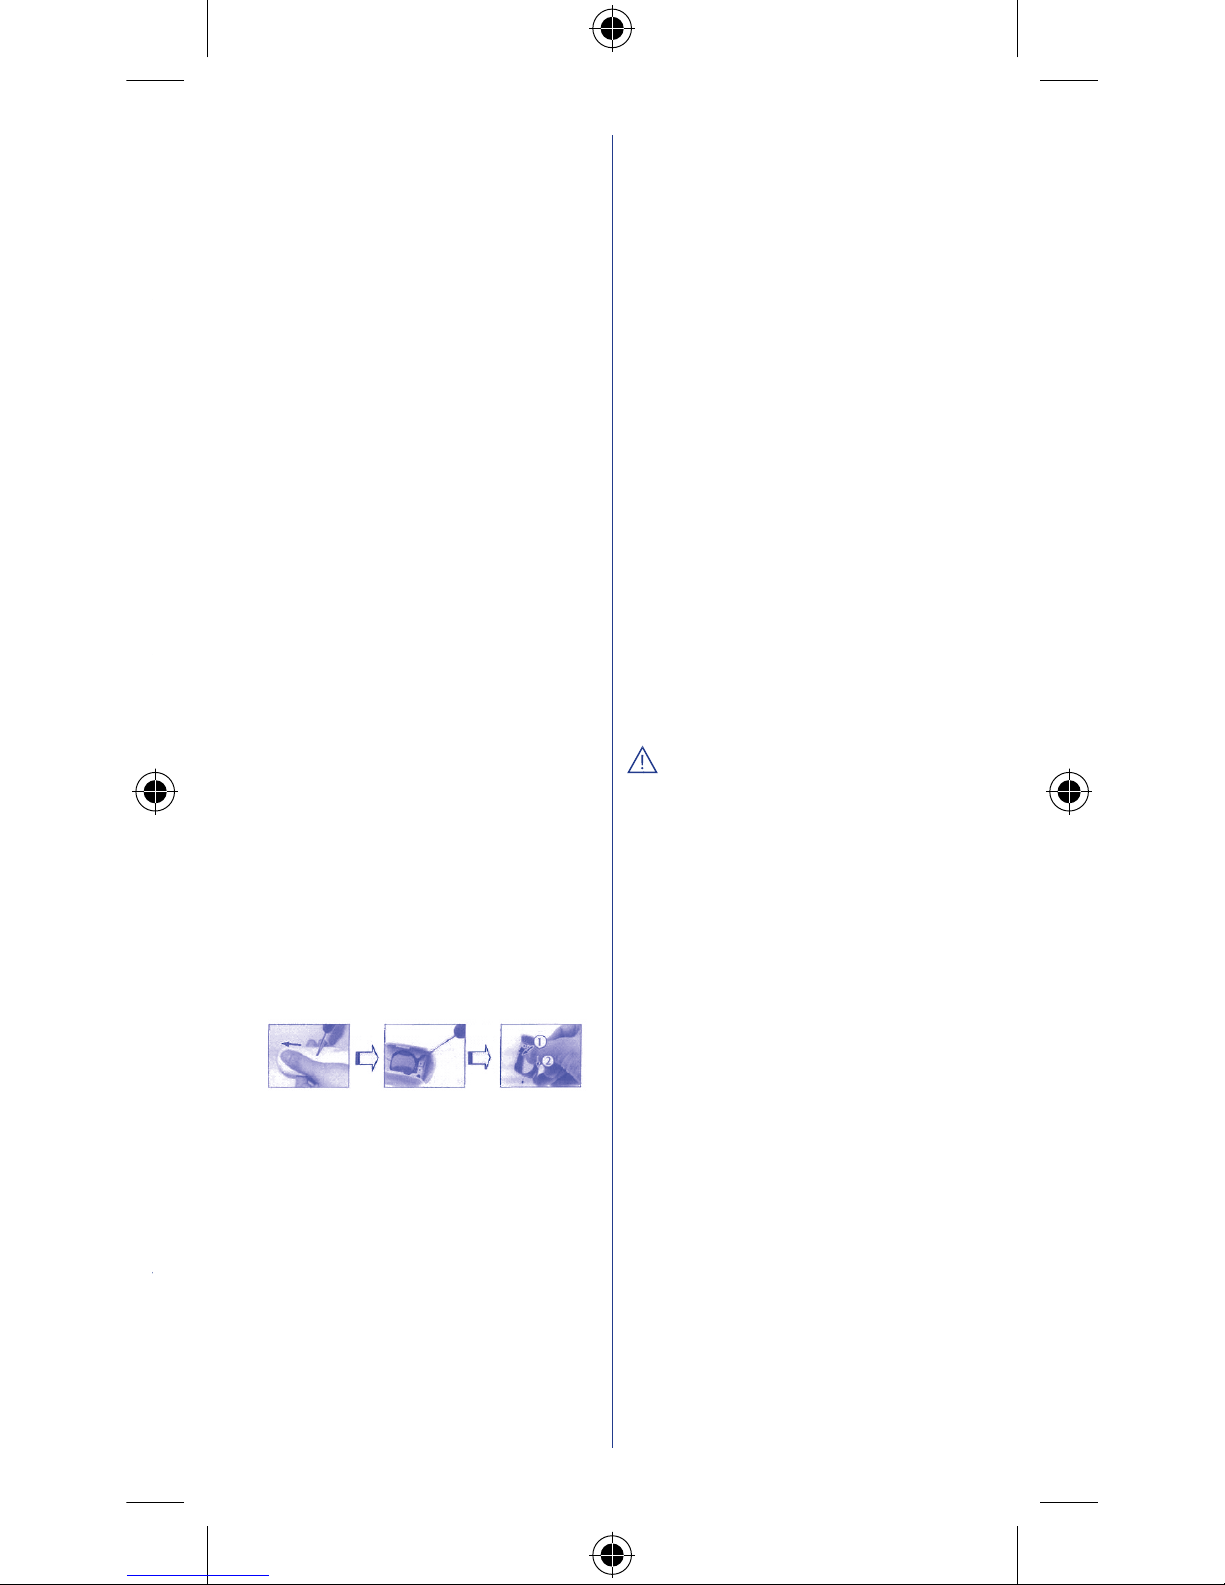
COME POSIZIONARE/SOSTITUIRE
LA BATTERIA
Il dispositivo è fornito di batteria al
litio (CR2032x1pz).
Fig. 10
a b c
1.Aprire il vano portabatteria inseren-
do un piccolo oggetto appuntito
all’interno del foro presente sul retro
del termometro e contemporanea-
mente fare pressione e sfilare il vano
portabatteria (vedi figura 10a).
2. Nel caso di primo utilizzo rimuo-
vere la linguetta di sicurezza della
batteria.
3. Per sostituire la batteria scarica,
tenere saldamente il termometro
e fare leva con un cacciavite sotto
potrebbe risultare inferiore al normale.
FUNZIONE “LAST READING”
L’icona indica che la funzione “last
reading” è attiva. Con questa funzione
se si eseguono misurazioni ripetute
senza spegnere il termometro, sul di-
splay in alto a destra appare anche la
precedente temperatura rilevata.
FUNZIONE MEMORIA
Questo termometro è provvisto di
memoria in grado di conservare sino
a 25 serie di rilevazioni (Nota - Se si
sono effettuate misurazioni ripetute
senza spegnere il termometro, il ter-
mometro salva i solo dati dell’ultima
misurazione effettuata). Per accedere
ai dati di memoria, con il termome-
tro acceso, premere il pulsante
(ON/MEM) tante volte quante solo
le posizioni di memoria di cui si vuole
tornare indietro per visualizzare la
temperatura memorizzata.
SELETTORE GRADI CELSIUS (°C) /
GRADI FAHRENHEIT (°F)
Modificare la modalità di misurazio-
ne sul display LCD da °C a °F: con il
dispositivo spento, premere il pul-
sante “SCAN”, mantenendo premuto
questo tasto, premere e rilasciare poi
il pulsante (ON/MEM). Il display
LCD mostrerà ‘°F’, quindi rilasciare il
pulsante “SCAN”. Seguire la stessa
procedura per modificare il display a
LCD da °F a °C.
ALLARME FEBBRE
Se il termometro rileva una temperatura
≥37.5°C (o 99.5°F) un lungo segnale acusti-
co seguito da tre brevi bip avvertirà l’utente
della presenza di febbre potenziale.
SPEGNIMENTO
Il dispositivo si spegnerà automati-
camente se inutilizzato per oltre 1
minuto per prolungare la durata della
batteria o se premuto il pulsante
per 5 secondi.
CURA E MANUTENZIONE
Il sensore (evidenziato nella figura 9)
rappresenta la parte più delicata del
termometro.
sensore
Fig. 9
Maneggiare con cura durante la pu-
lizia del sensore per evitare danneg-
giamenti.
a. Mantenere il dispositivo asciutto e
lontano da liquidi e dai raggi diretti
del sole.
b. Utilizzare tamponi imbevuti di alcol
o cotone imbevuto di alcol al 70%
per pulire il sensore e la superficie
in plastica a contatto con il canale
auricolare.
c. Utilizzare ogni volta un nuovo copri-
sonda per ogni nuova misurazione
al fine di evitare contaminazioni
incrociate. Pulire il sensore in pre-
senza di tracce di sporco per assi-
curare una lettura accurata. Lasciare
asciugare completamente il sensore
per almeno 1 minuto.
Note importanti:
1.Assicurarsi che il sensore sia pulito.
2. Prima di effettuare una misurazio-
ne, permanere in ambiente stabile
per 5 minuti e tenere il termometro
nell’ambiente in cui si procederà
alla misurazione per almeno 20/25
min. ed evitare esercizio fisico e ba-
gni per 30 minuti.
3. Utilizzare un nuovo copri-sonda per
ogni nuova misurazione.
4. Utilizzare solo copri-sonda dedicati
5. Ricordarsi di mantenere il canale
auricolare pulito prima di rilevare
la temperatura. Ma evitare di deter-
gerlo immediatamente prima della