1. Notes contents:
2. Random Accessories
3. Hardware Specifi cations
4. Knowledge products
5. Startup and shutdown
6. Desktop
7. Button
8. System Settings
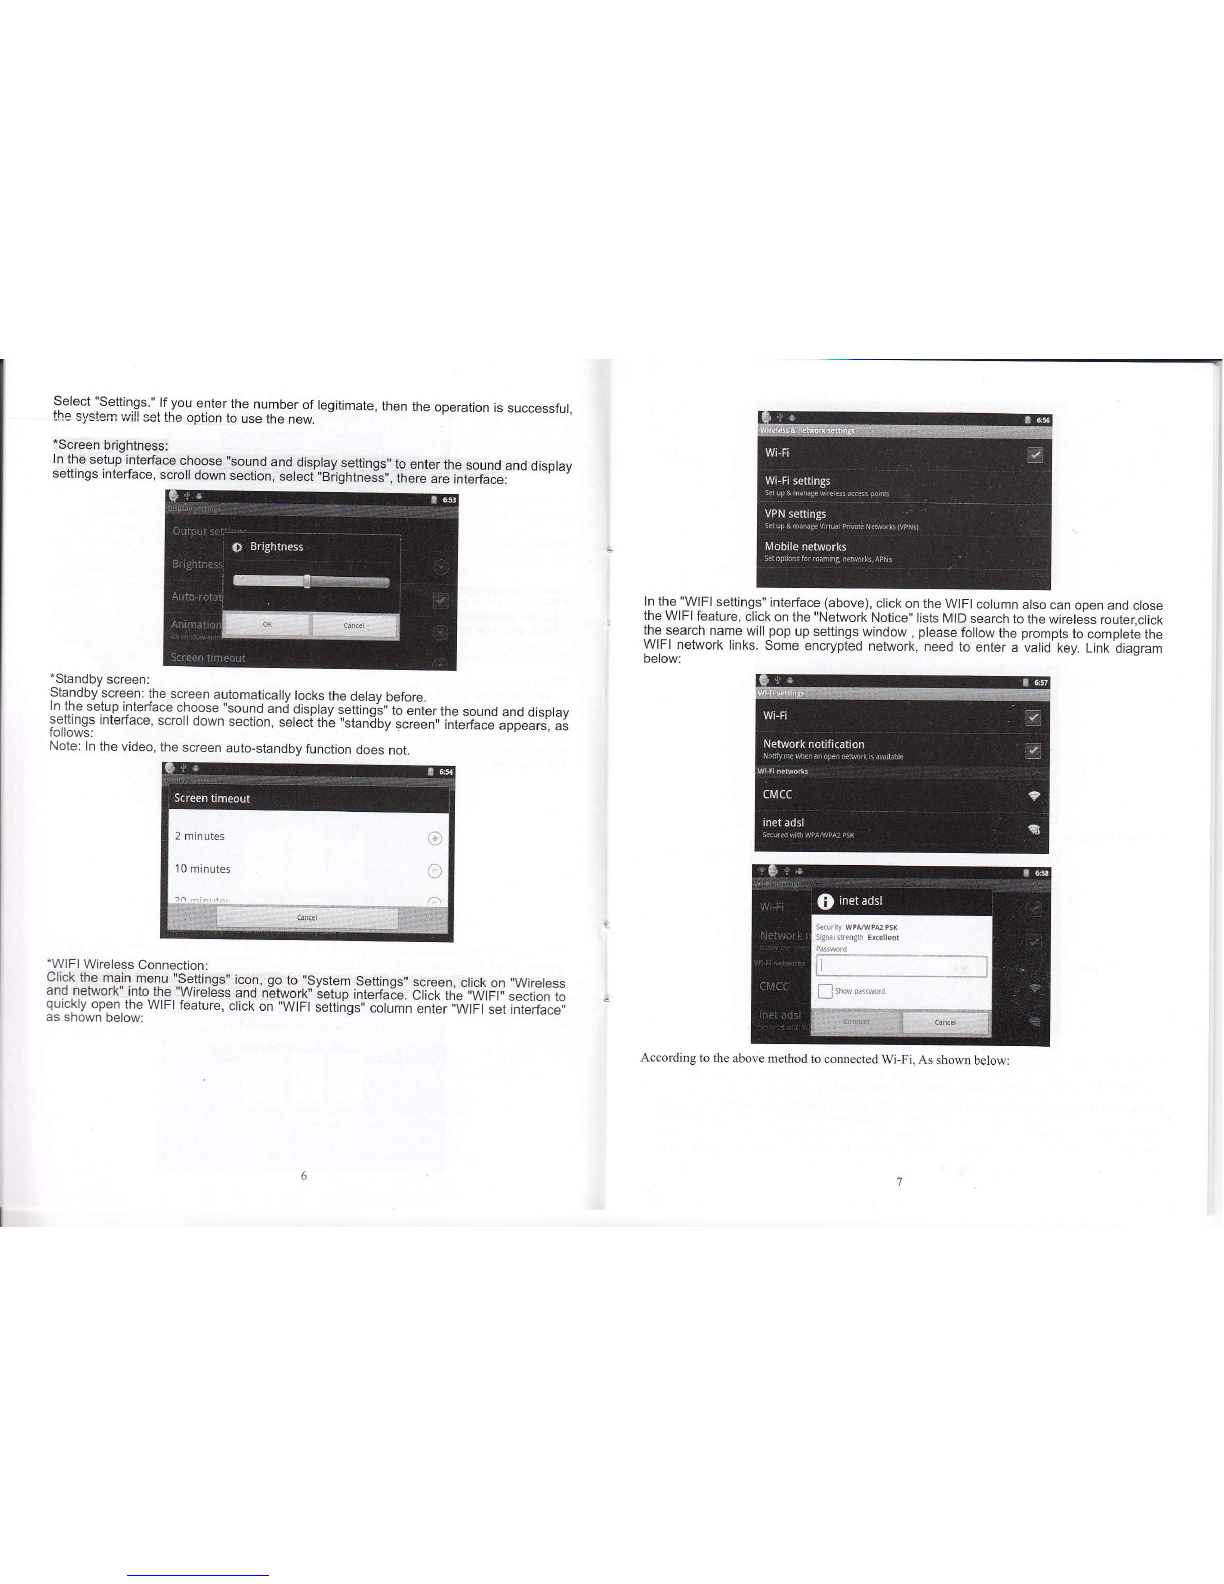
* WlFl Wireless Connection
*Sound
'Time and date settings
* Stiandby screen
9. lnstall, remove and run the application
10. Touch calibration
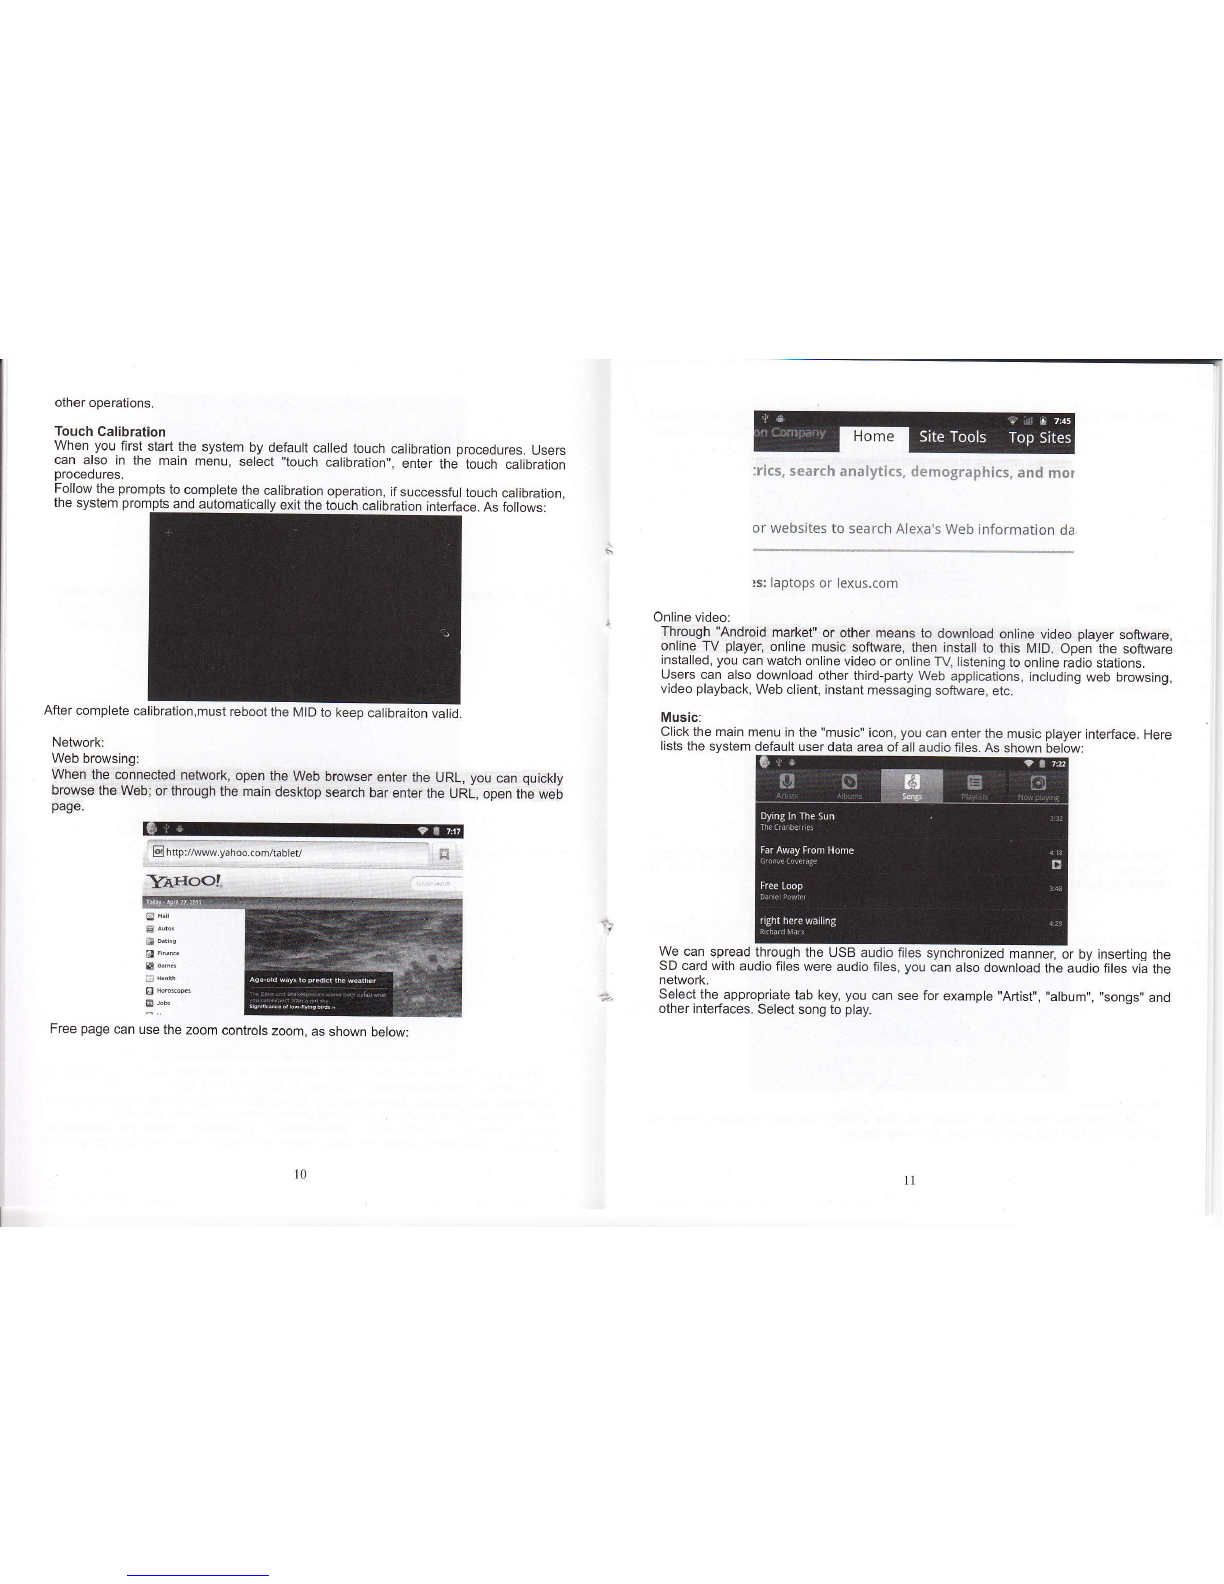
11. Music
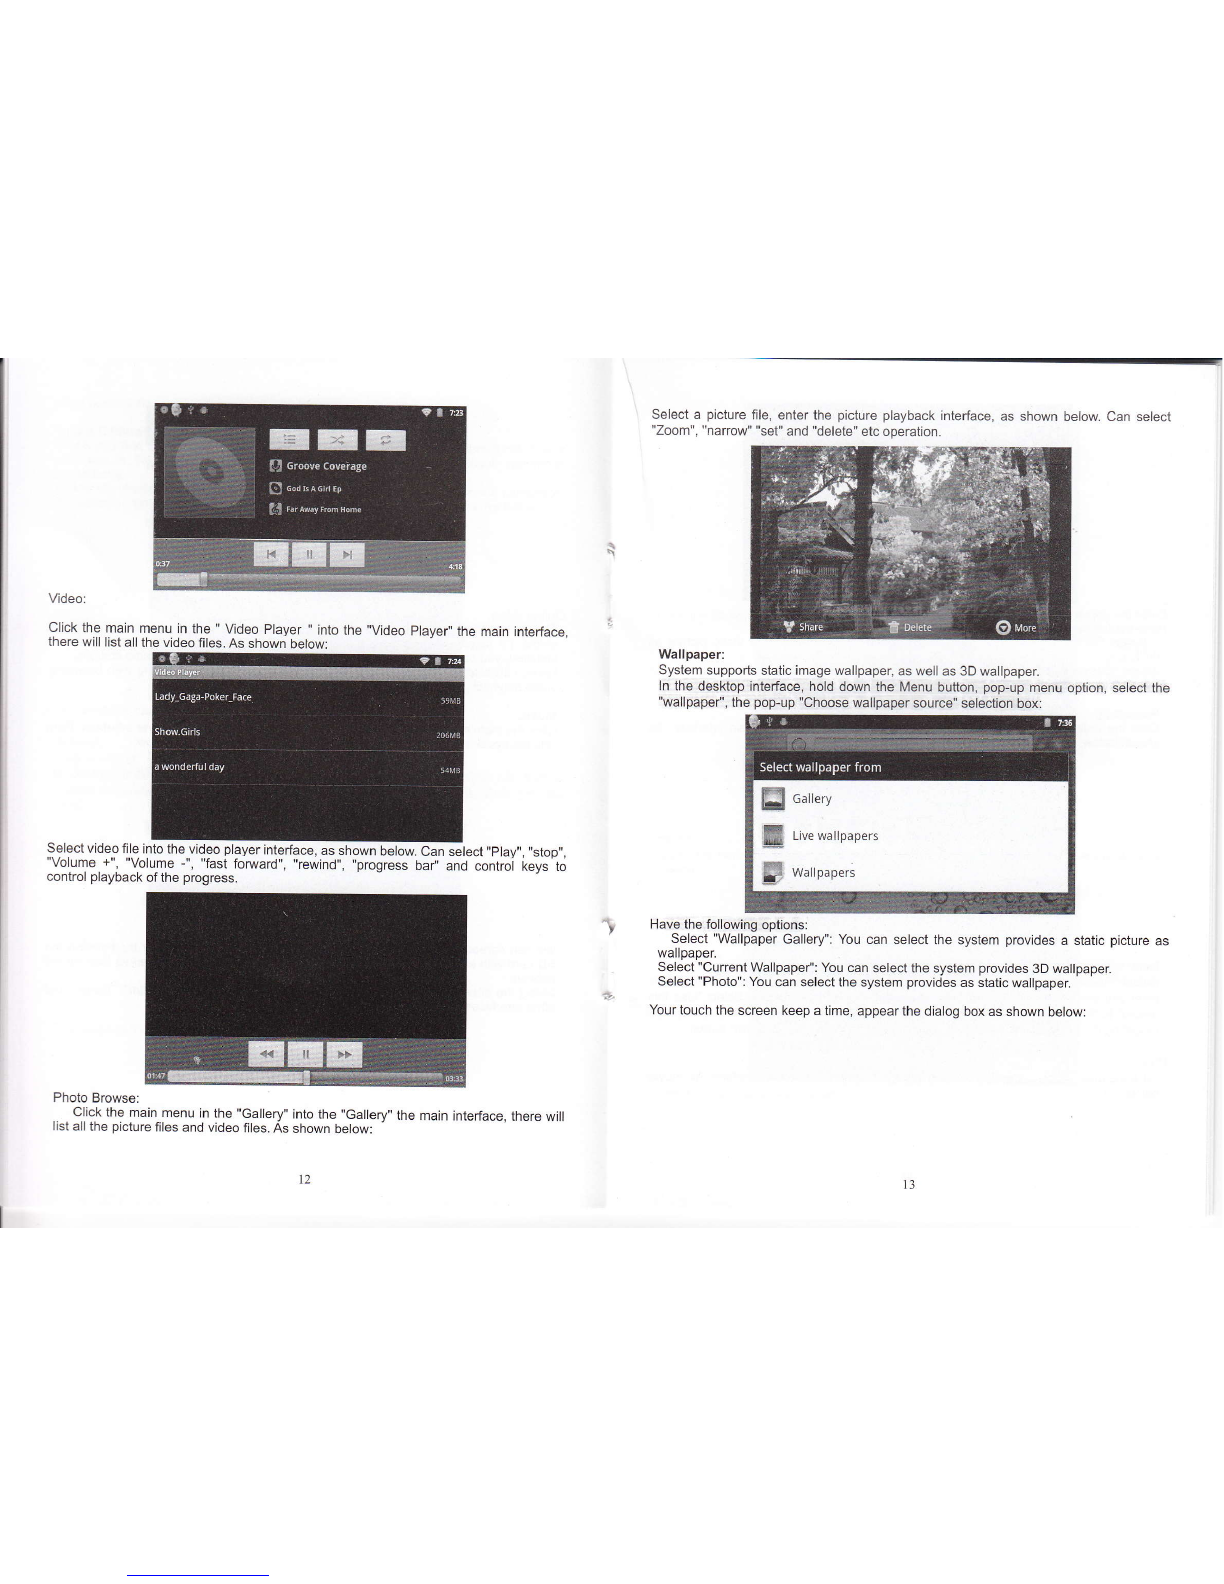
12. Video
13. Picture
14. Network
15. Remrding
16. Photo
17. Market
18. Mail Client
19. Wallpaper
20. External equipment
' USB connection
* OTG use
* Keyboard and mouse
21. Firmware upgrade
22. Frequcnuy Asked Questions Treatment
Note:
* This product is a high precision electronic products, do not disassemble.
* Avoid strong beat, the collision of the product.
* Avoid using this product the following conditions: high and low temperature, moisture,
dust, magnetic flelds strong and long-term exposure tdsunlight.
" Please use a wet cotton cloth wrung genfly wipe the pro-duct shell, do not use other
chemical cleaning solution. This product should not be dripping or splashing waler, so
should.not be pla@d near the product category such as gtaii fiiiea wiih a tiquia itemi.
*. Too long, use the headphone volume is foo large iay cause permarient hearing
damage.
* Do.not cross the road, driving motor vehicle or bicycle use headphones to avoid traffc
accidents.
* Please only use permitted batteries, chargeB and accessories, use any other type of
prctucts w_ould viotate the warranty regulations and may be dangerous.
' Please follow the relevant lo€l environmental regulationi to del with obsolete
machines and accessories.
* This prcduct is in lhe course of any questions, please @nta.t rour locd deabr or
direcuy with the company's customer seruice enler.'
' For those be-cause the product is damaged, repair or oths errses d nuuy lcs wipe
coating, the Company assumes no responsibility, pba-se foIorx lh lE' ngrml ior
standard operation, and timely backups.
Random accessories:
1 pc Tablet PC
'I pc 5V 24 Dc charge
1 pc lnstruction manual
'l pc USB cable
1pc OTG cable
Hardware rules:
lrlD hardwaad parameters
Prcesd Box chips A10 High-performance oortex aO p.ocessots
qequeney 1.2GHz Sr,pport for hardware OpencL 2.0 AD Ordohics:
Memory 512M8 DDN3 RAM
StoEge Memory built-in 2GB/4GB/8GB/1 6GB
Support Micro SD card to expand memory upto 32cB
Wireless |EEE802.II b/o wireless network
USB UEB2.0 OTG hish speed interface and USB1.1
Video HDMI '1.4 Full HD Video Output lnterface
Audio
3.5mm headphone iack
High-quality stereo loud speaker
Built-in microphone
Headset maximum output power of 40mW
Frequency response: 20Hz-20KHz
SNR: oreater than g0db
Screen
Size 7.0 8.0 9.7 inch
Resolution wvGA800-480
Color 16 million colors
ODeratino Resistive sinole touch Denel
Other Color Aluminium silver casino
About 450 q
Battery Buill-in lithium polymer battery 3500AH
Accessories
1pc Power adapte(DC V/A)
1pc HDMI Data line(Name)
1pc USB cable
l pc OTG cable
'lpc lnstruction manual
Startup and shutdown
*Boot: Press and hold the power bufton, the system will enter th6 startup paocess, as
follows:
Boot Logo startup ...
System has been started, are entering the Android system:
The system enters the default home interface.
*Shutdown: Press the power button, pop-up device options, select Shut Down, as follffis:
Click OK, you mn safely shut down.
3