manuals.online logo
Brands
  1. Home
  2. •
  3. Brands
  4. •
  5. Circontrol
  6. •
  7. Batteries Charger
  8. •
  9. Circontrol CCL-WBM User guide

Circontrol CCL-WBM User guide

CCL-WBM INSTALLATION QUICK GUIDE / GUÍA DE INSTALACIÓN RÁPIDA
1.DESCRIPTION / DESCRIPCIÓN
The electric vehicle charging system CCL-WBM is specially designed for use on indoor and outdoor car parks to
provide a safe charging system. It consists of a sturdy box designed to be installed on a parking wall and provide a
continuous use.
El sistema de recarga de vehículos CCL-WBM está diseñado para proporcionar un uso continuo en
aparcamientos interiores y exteriores.
2.TECHNICAL CHARACTERISTICS / CARACTERÍSTICAS TÉCNICAS
Input Voltage
Tensión de entrada
230V AC / 400V AC
Single-phase or Three-
phase
Monofásico o Trifásico
Extended temperature
range*
Temperatura extendida*
Heater (optional)
Calefactor (Opcional)
(-30 ~ 60 ºC)*
Tolerance
Tolerancia
±15%
Temperature range
Rango de temperatura
-10…+60 ºC
Input frequency
Frecuencia de entrada
50…60 Hz
Enclosure IP protection
Protección IP de la caja
IP54
Output Voltage
Tensión de salida
= input voltage
= tensión de entrada
Socket IP Protection
Protección IP conector
IP44
Maximum consumption
Potencia máxima
7,3kW at Single-phase
21KW at Three-phase
Box dimensions
Dimensiones
320x225x125 mm
Maximum current output
Intensidad máxima de salida
32A
Weight
Peso
3Kg
Socket
Conector
Type II VDE-AR-E
2623-2-2 according
IEC62196-2
Anchor
Anclaje
4 points wall mount
4 puntos de montaje
Charge System
Sistema de recarga
MODE 3 (IEC 61851)
Enclosure
Envolvente
ABS
3.WARNINGS / INFORMACIÓN DE SEGURIDAD
Do not use cables there are not in perfect conditions.
No utilice cables de conexión que no estén en perfecto estado de uso.
Do not use WallBox for anything other than electric vehicle charging. Charging mode is IEC 61851-1 MODE 3.
No utilice la unidad para usos que no son los previstos, es decir, para cualquier aplicación que no sea la
carga de un vehículo eléctrico. El modo de recarga es IEC 61851-1 MODE 3.
Do not modify the WallBox. If modified, CIRCONTROL will reject all responsibility and the warranty will be
void.
No modifique la WallBox. De hacerlo, se perderá la garantía y CIRCONTROL rechazará toda
responsabilidad.
Comply strictly with current safety regulations according to your country rules.
Cumpla estrictamente las normas de seguridad vigentes de acuerdo con las normas de su país.
Do not make repairs or install with the device powered.
No manipule el equipo estando conectado a la red eléctrica.
Only trained and qualified personnel should have access to low-voltage electrical parts inside the device.
Unicamente personal cualificado debe poder acceder a partes eléctricas de baja tensión que hay dentro del
equipo.
Check the installation annually by qualified technician.
Verifique anualmente la instalación por personal cualificado.
Remove from service any item that has a fault that could be dangerous for users (broken plugs, caps that
don’t close...).
Retire del servicio cualquier elemento que presente desperfectos que puedan poner en riesgo al usuario
(enchufes rotos, tapas en mal estado…).
Only use Circontrol spare parts.
Utilice sólo recambios originales de Circontrol.
This is a quick CCL-WBM guide.
Este manual es una guía rápida del CCL-WBM
Before performing any maintenance, modification, connection, repair, etc.,
disconnect the device from thepower supply. When you suspecta malfunction of
equipment or protection the equipment should be disconnected from the power
supply.
Antes de efectuarse cualquier operación de mantenimiento, modificación de
conexiones, reparación o etc.… Debe desconectar el aparato de toda fuente de
alimentación. Cuando se sospeche de un fallo de funcionamiento del equipo ó
enlaproteccióndelmismo, debe dejarseelequipo apagadoy fuerade servicio.
STANDARDS
EN 61851-1: 2001 PARTE 1, IEC 61000, IEC 60884-1, IEC 60364-4-41, IEC 61010, IEC 61008-1, IEC
60529,UNE-EN55011, UNE-EN62196-1, UNE-EN61851-1, UNE-EN61851-21, UNE-EN61851-22
CIRCONTROL SA –Technical Dept.
C/ Innovació 3
08232 -Viladecavalls (Barcelona)
Phone: +34 93 736 2940
E-mail: [email protected]
CCL-WBM INSTALLATION QUICK GUIDE / GUÍA DE INSTALACIÓN RÁPIDA
4.STEP BY STEP INSTALATION GUIDE / GUÍA DE INSTALACIÓN PASO A PASO
UNIT DIMENSIONS
DIMENSIONES DE LA UNIDAD
Remove 6
screws from the
cover to access
inside the unit.
Quite los 6
tornillos de la
tapa para
acceder al
interior de la
unidad.
1
2
SINGLE-PHASE ELECTRICAL WIRING AND CONNECTION WARNINGS
CABLEADO ELECTRICO MONOFÁSICO Y ADVERTENCIAS
Current
Intensidad
Cable section
Sección de cable
32A
6mm2
XLPE or EPR recommended cable / Cable recomendado XLPE/EPR
OPERATIONAL CHECK
COMPROBACION DE FUNCIONAMIENTO
Bellow there is a state table for checking the correct operation of the WallBox.
A continuación se detalla una tabla de estados para comprobar el funcionamiento correcto de la WallBox.
STATE
ESTADO
BEACON COLOR
COLOR BALIZA
READY
(Green / Verde)
CHARGE
(Yellow / Amarillo)
FAULT
(Red / Rojo)
WallBox Powered On
WallBox conectada
Green / Verde
OFF
OFF
OFF
EV Connected
VE conectado
Green / Verde
ON
OFF
OFF
Charging EV
Cargando VE
Blue / Azul
ON
ON
OFF
Out of Service
Fuera de servicio
Red / Rojo
OFF
OFF
ON
THREE-PHASE ELECTRICAL WIRING AND CONNECTION WARNINGS
CABLEADO ELECTRICO TRIFÁSICO Y ADVERTENCIAS
Current
Intensidad
Cable section
Sección de cable
32A
10mm2
XLPE or EPR recommended cable / Cable recomendado XLPE o EPR
3
4
5a
5b
Mark 4 holes taking into account the above
measurements.
Place it on a flat surface.
Marque los 4 agujeros teniendo en cuenta
las medidas indicadas.
Sitúela sobre una superficie plana.
-Connect to the 400V AC three-phase as shown.
-It is important to provide the necessary protections between
origin and the WallBox.
-Do not forget to connect the ground cable to ground terminal.
-Localizar y conectar a la línea de 400V AC trifásica como se
muestra en la foto adjunta.
-Es conveniente dotar de las protecciones necesarias entre el
cuadro eléctrico de las instalaciones y la Wallbox.
-No olvide conectar el cable de tierra al terminal de tierra.
-
x1 Supplied
x1 suministrada
Protect the contactor when
you drill the unit. Place the
cable glands supplied.
Al hacer los agujeros en la
unidad, vigile que no entre
suciedad en el contactor e
instale el prensa estopa
suministrado.
6
-Connect to the 230V AC single-phase.
-It is important to provide the necessary protections between
origin and the WallBox.
-Do not forget to connect the ground cable to ground terminal.
-Localizar y conectar a la línea de 230V AC monofásica
como se muestra en la foto adjunta.
-Es conveniente dotar de las protecciones necesarias entre el
cuadro eléctrico de las instalaciones y la Wallbox.
-No olvide conectar el cable de tierra al terminal de tierra.
N
L
N
L3 T
L2 S
L1 R

Other Circontrol Batteries Charger manuals

Circontrol eVolve T User manual

Circontrol

Circontrol eVolve T User manual

Circontrol CCS CHA T2C63 User manual

Circontrol

Circontrol CCS CHA T2C63 User manual

Circontrol Wallbox eHome Series User manual

Circontrol

Circontrol Wallbox eHome Series User manual

Circontrol Raption 150 Series User manual

Circontrol

Circontrol Raption 150 Series User manual

Circontrol Raption 150 Compact CCS User manual

Circontrol

Circontrol Raption 150 Compact CCS User manual

Circontrol Post eVolve Series User manual

Circontrol

Circontrol Post eVolve Series User manual

Circontrol Wallbox eVolve Series User manual

Circontrol

Circontrol Wallbox eVolve Series User manual

Circontrol Raption 50 Series User manual

Circontrol

Circontrol Raption 50 Series User manual

Circontrol CCL-CP1E User manual

Circontrol

Circontrol CCL-CP1E User manual

Circontrol eVolve Smart Series User manual

Circontrol

Circontrol eVolve Smart Series User manual

Circontrol Rapid Series Instruction Manual

Circontrol

Circontrol Rapid Series Instruction Manual

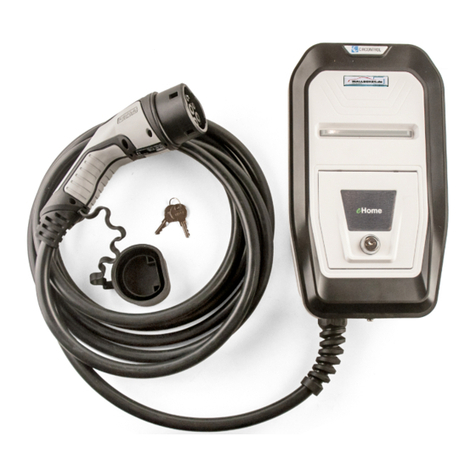
Circontrol Wallbox eHome CCL-eHOME Series User manual

Circontrol

Circontrol Wallbox eHome CCL-eHOME Series User manual

Circontrol Post eVolve Series User manual

Circontrol

Circontrol Post eVolve Series User manual

Popular Batteries Charger manuals by other brands

Avacom PWRB-4000 quick start guide

Avacom

Avacom PWRB-4000 quick start guide

CAR-connect LDC.22-500 operating manual

CAR-connect

CAR-connect LDC.22-500 operating manual

GÜDE GDB 24V/12V-200 Translation of the original instructions

GÜDE

GÜDE GDB 24V/12V-200 Translation of the original instructions

EnerSys NexSys+ Instructions for use

EnerSys

EnerSys NexSys+ Instructions for use

OE electrics OE Elsafe ARC-H quick start guide

OE electrics

OE electrics OE Elsafe ARC-H quick start guide

Belkin BU3DC001-12V user manual

Belkin

Belkin BU3DC001-12V user manual

IVT Accu Trainer Pb PL-782B operating instructions

IVT

IVT Accu Trainer Pb PL-782B operating instructions

Philips SJM2202 Specifications

Philips

Philips SJM2202 Specifications

Carson 50 060 6033 manual

Carson

Carson 50 060 6033 manual

TBB BS1225-3 manual

TBB

TBB BS1225-3 manual

Husqvarna QC80 Operator's manual

Husqvarna

Husqvarna QC80 Operator's manual

Solar CC1005 user manual

Solar

Solar CC1005 user manual

Drone Fighter Byrobot user manual

Drone Fighter

Drone Fighter Byrobot user manual

Baseus CCGAN100UE user manual

Baseus

Baseus CCGAN100UE user manual

Sealey POWER PRODUCTS SUPERCHARGE Series instructions

Sealey

Sealey POWER PRODUCTS SUPERCHARGE Series instructions

Jefferson Dynamo 430A STARTER CHARGER user manual

Jefferson

Jefferson Dynamo 430A STARTER CHARGER user manual

Accelleron A136-H radial Original assembly instructions

Accelleron

Accelleron A136-H radial Original assembly instructions

APA 16618 operating instructions

APA

APA 16618 operating instructions

manuals.online logo
manuals.online logoBrands
  • About & Mission
  • Contact us
  • Privacy Policy
  • Terms and Conditions

Copyright 2025 Manuals.Online. All Rights Reserved.