manuals.online logo
Brands
  1. Home
  2. •
  3. Brands
  4. •
  5. Cisco
  6. •
  7. Conference System
  8. •
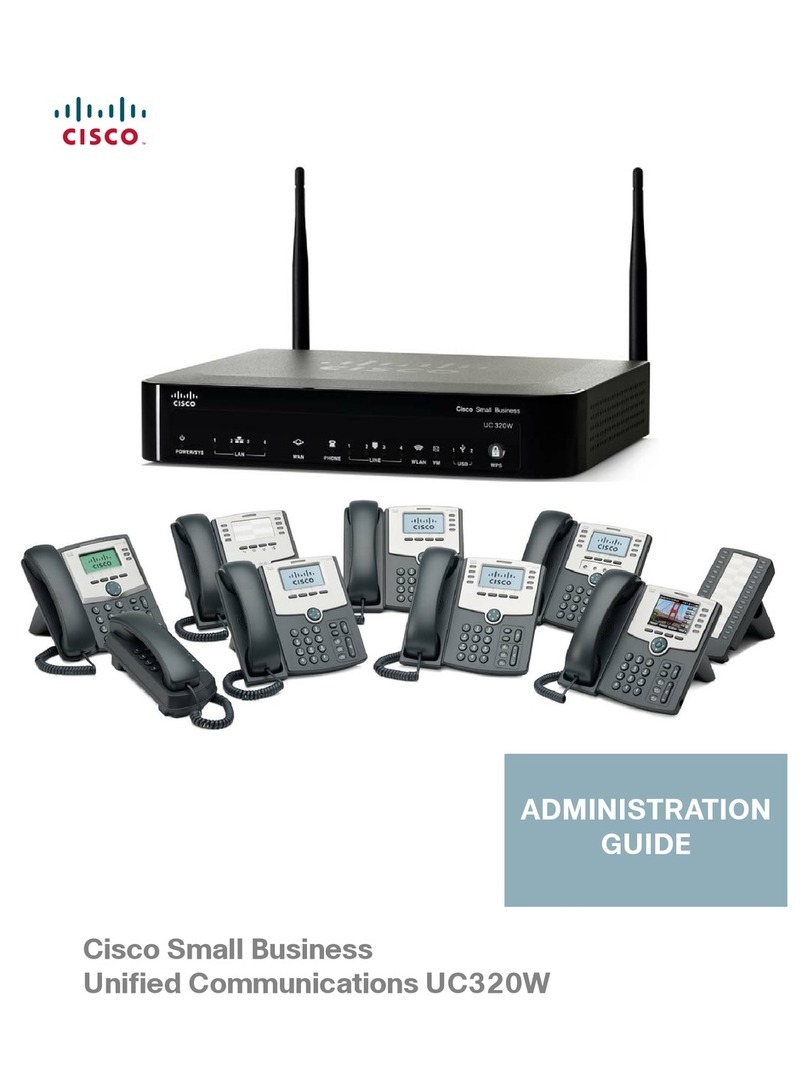
  9. Cisco TelePresence ISDN Link Service manual

Cisco TelePresence ISDN Link Service manual

Cisco TelePresence ISDN Link Administrator Guide
D14954.04 ISDN Link Administrator Guide IL1.1.2, MARCH 2015. Copyright © 2015 Cisco Systems, Inc. All rights reserved.
1
CISCO TELEPRESENCE
ISDN LINK
ADMINISTRATOR GUIDE
Software version IL1.1.2
MARCH 2015
Contents
Introduction
Getting started
Software upgrade
Status information
System settings
Appendices
Cisco TelePresence ISDN Link Administrator Guide
D14954.04 ISDN Link Administrator Guide IL1.1.2, MARCH 2015. Copyright © 2015 Cisco Systems, Inc. All rights reserved.
2
Page - ToC - hidden
text Table of Contents
Introduction........................................................................... 4
About this guide...................................................................... 5
User documentation............................................................. 5
Technical specification ......................................................... 5
Support and software download.......................................... 5
What’s new in this version ...................................................... 6
New settings......................................................................... 6
About ISDN Link...................................................................... 7
Supported software versions............................................... 7
Automatic pairing mode ....................................................... 7
Manual pairing mode ............................................................ 7
Changing the password ....................................................... 7
Getting started...................................................................... 8
User scenarios........................................................................ 9
Two user scenarios with IP network..................................... 9
User scenario with no IP infrastructure ................................ 9
Installing and pairing the ISDN Link....................................... 10
Installing the ISDN Link....................................................... 10
Prerequisites for pairing ..................................................... 10
Pairing the ISDN Link.......................................................... 10
Automatic pairing mode ..................................................... 10
Manual pairing mode .......................................................... 10
Configuring the ISDN Link......................................................11
ISDN Link web interface overview .........................................12
Configuration examples.........................................................13
Example with support for PRI E1 mode...............................13
Example with support for PRI T1 mode...............................14
Example with support for BRI Euro type............................. 15
Example with support for External Network....................... 16
Configuring the TelePresence endpoint for ISDN..................17
Setting the default call protocol to H320.............................17
Setting the call protocol to H320 by each call ....................17
Making a call using the Touch controller............................... 18
Making a call using the remote control................................. 19
Making a call using the web interface of the endpoint ......... 20
Making a call using the command line interface on the
endpoint ................................................................................ 21
Software upgrade............................................................... 22
The software upgrade menu ................................................ 23
Upgrading the software ........................................................ 24
Installing the software from a file ....................................... 24
Installing the software from an URL ................................... 24
Status information............................................................... 25
Monitoring ISDN Link status.................................................. 26
Descriptions of the ISDN Link status .................................... 27
System settings ...................................................................47
The ISDN Link Configuration menu....................................... 48
Descriptions of the ISDN Link configurations ....................... 49
Appendices..........................................................................71
Password protection ............................................................. 72
Password management...................................................... 72
Changing the system password......................................... 72
Setting a root password ..................................................... 72
Connecting to the ISDN Link................................................. 73
Connect to the ISDN Link through the endpoint’s web
interface ............................................................................. 73
Connect to the ISDN Link through the serial port .............. 73
Connect to the ISDN Link through SSH ............................. 73
Finding the IP address ..........................................................74
Finding the IP address from the endpoint’s web interface .74
Finding the IP address by connecting to the ISDN Link
serial port ............................................................................74
What’s in this guide?
The top menu bar and the entries in the Table of
Contents are all hyperlinks, just click on them to go to
the topic.
We recommend you visit our web site regularly for
updated versions of the user documentation.
Go to:http://www.cisco.com/go/isdnlink-docs
Contents
Introduction
Getting started
Software upgrade
Status information
System settings
Appendices
Contents
Cisco TelePresence ISDN Link Administrator Guide
D14954.04 ISDN Link Administrator Guide IL1.1.2, MARCH 2015. Copyright © 2015 Cisco Systems, Inc. All rights reserved.
3
Unpairing the ISDN Link ........................................................ 75
Persistent pairing................................................................ 75
Unpairing from the TelePresence endpoint’s
web interface...................................................................... 75
Forced unpairing................................................................. 75
Factory resetting the ISDN Link ............................................ 76
Factory resetting the ISDN Link.......................................... 76
Factory resetting the ISDN Link during boot through
the serial port ..................................................................... 76
Software upgrade from the command line interface............ 77
Software upgrade from IL1.0 to IL1.1.................................. 77
Checking the software version........................................... 77
Installing the software from an URL ................................... 77
The SCP upgrade method.................................................. 77
About audio and video encryption........................................ 78
Encryption indicators.......................................................... 78
Configuring parallel dialing for ADTRAN switch and PRI ...... 79
The physical interface .......................................................... 80
Front panel ......................................................................... 80
Rear panel ......................................................................... 81
Connecting the cables.......................................................... 82
Mounting the unit .................................................................. 83
Wall mounting .................................................................... 83
Table stand ......................................................................... 83
Pin-out schemes................................................................... 84
Cables................................................................................... 86
Supported RFCs ................................................................... 87
Contents
Introduction
Getting started
Software upgrade
Status information
System settings
Appendices
Contents
Cisco TelePresence ISDN Link Administrator Guide
D14954.04 ISDN Link Administrator Guide IL1.1.2, MARCH 2015. Copyright © 2015 Cisco Systems, Inc. All rights reserved.
4
INTRODUCTION
Contents
Introduction
Getting started
Software upgrade
Status information
System settings
Appendices
Introduction
Cisco TelePresence ISDN Link Administrator Guide
D14954.04 ISDN Link Administrator Guide IL1.1.2, MARCH 2015. Copyright © 2015 Cisco Systems, Inc. All rights reserved.
5
About this guide
The main objective with this guide is to describe how to
manage the Cisco TelePresence ISDN Link in automatic
pairing mode.
When using the ISDN Link in automatic pairing mode the
recommended way to manage the ISDN Link is from the
TelePresence endpoint’s web interface. The ISDN Link
must be running software version IL1.1 or later, and the
TelePresence endpoint must be running TC6.0 or later.
It is also possible to connect to the unit through the serial
port, or over the network through SSH. For details see:ISDN
Link API Reference Guide.
When using the ISDN Link in manual pairing mode you will
connect through the serial port or, if you know the IP address,
over the network through SSH. For details see:ISDN Link
API Reference Guide.
User documentation
User documentation for Cisco TelePresence ISDN Link can
be found onhttp://www.cisco.com/go/isdnlink-docs.
Installation guide:
Install and Upgrade | Install and Upgrade Guides
Administrator guide:
Maintain and Operate | Maintain and Operate Guides
API reference guide:
Reference Guides | Command references
Regulatory compliance and safety information:
Install and Upgrade | Install and Upgrade Guides
Software release notes:
Software Downloads, Release and General Information |
Release Notes
Licensing information:
Software Downloads, Release and General Information |
Licensing Information
Technical specification
Information about the technical specification is found on our
web site:Cisco TelePresence ISDN Link Data Sheet
Support and software download
You can download the software for the ISDN Link from our
web site:http://www.cisco.com/cisco/web/support
1. Click the Download tab.
2. Type “ISDN Link” in the search field.
3. Click the Download button. To download the software,
you must log in with your Cisco.com user ID.
Contents
Introduction
Getting started
Software upgrade
Status information
System settings
Appendices
Introduction
Cisco TelePresence ISDN Link Administrator Guide
D14954.04 ISDN Link Administrator Guide IL1.1.2, MARCH 2015. Copyright © 2015 Cisco Systems, Inc. All rights reserved.
6
What’s new in this version
This section provides an overview of the new and changed
settings and new features in the IL1.1.2 software version. Support for G.728 and G.729 audio protocols
ISDN Link supports the G.728 and G.729 audio protocols.
These protocols can only be used if they are supported by
both ISDN Link and the endpoint that ISDN Link is paired to.
The following endpoints support these protocols in TC7.2:
• G.729: All endpoints that support ISDN Link
• Full G.728 support: C90, SX20, MX200 G2 and
MX300 G2
• G.728 support only in point-to-point calls: C40, C60 and
EX90
New settings
H320 Downspeed
ISDN PRI Interface 1 TestClockmode
ISDN PRI Interface 1 TestLoopmode
ISDN PRI Interface 1 TestShutdown
ISDN BRI Interface [1..4] TestLoopmode
ISDN BRI Interface [1..4] TestPattern
Contents
Introduction
Getting started
Software upgrade
Status information
System settings
Appendices
Introduction
Cisco TelePresence ISDN Link Administrator Guide
D14954.04 ISDN Link Administrator Guide IL1.1.2, MARCH 2015. Copyright © 2015 Cisco Systems, Inc. All rights reserved.
7
About ISDN Link
The Cisco TelePresence® ISDN Link is a compact appliance
for in-room ISDN and external network connectivity.
The ISDN Link provides direct connectivity for IP-to-ISDN
or IP-to-V.35 networks. It can be used as main connection
or a back up connection. Support for up to four Basic Rate
Interface (BRI) or one Primary Rate Interface (PRI) ISDN ports
and external networks (cable standards V.35, RS530, RS449,
and RS366).
Refer to the Cisco TelePresence ISDN Link Data Sheet for
information about which endpoints support use of ISDN Link.
Pairing mode
We highly recommend to use automatic paring mode.
Automatic pairing mode is supported in software version IL1.1.
The TC software on the endpoint must be TC6.0 or later.
You should use manual paring mode only if you have to
use software version IL1.0 or if your endpoint has software
version TC5.x.
NOTE: Endpoints that are paired to ISDN Link do not support
Far End Camera Control (FECC).
Changing the password
The ISDN Link is delivered with a default user account with no
password set. This user has full access rights to configuration
of the system.
NOTE: We strongly recommend that you set a password to
restrict access to system configuration.
For details see “Password protection” on page 72
Contents
Introduction
Getting started
Software upgrade
Status information
System settings
Appendices
Introduction
Cisco TelePresence ISDN Link Administrator Guide
D14954.04 ISDN Link Administrator Guide IL1.1.2, MARCH 2015. Copyright © 2015 Cisco Systems, Inc. All rights reserved.
8
GETTING STARTED
Contents
Introduction
Getting started
Software upgrade
Status information
System settings
Appendices
Getting started
Cisco TelePresence ISDN Link Administrator Guide
D14954.04 ISDN Link Administrator Guide IL1.1.2, MARCH 2015. Copyright © 2015 Cisco Systems, Inc. All rights reserved.
9
Two user scenarios with IP network
User scenarios
The ISDN Link can be used with or without IP infrastructure. The TelePresence endpoint
in the illustrations for the three user scenarios is shown as a single codec without monitor,
microphone and loudspeakers. You will need a computer for configuration and maintenance of
the ISDN Link.
NOTE: The endpoint and ISDN Link must be on the same subnet. If the endpoint and/or ISDN
Link are assigned new IP addresses they will remain paired as long as they are kept in the
same subnet.
Two user scenarios with IP network
The user scenarios with IP network allows for automatic pairing mode via the TelePresence
endpoint’s web interface.
• User scenario #1: The ISDN Link and endpoint are connected through the LAN. The
endpoint and computer are connected through the LAN.
• User scenario #2 (recommended): The ISDN Link and endpoint are connected through a
direct connection. The endpoint and computer are connected through the LAN.
User scenario with no IP infrastructure
In the user scenario with no IP infrastructure, you must manually pair the ISDN Link via the
command line interface. See theISDN Link API Guide for details.
• User scenario #3: The ISDN Link and endpoint are connected through a direct connection.
The ISDN Link and computer are connected through the serial interface.
User scenario with no IP infrastructure
User scenario #3: The endpoint and
ISDN Link are directly connected.
ISDN Link
User scenario #2 (recommended): The
ISDN Link and the endpoint are directly
connected.
LAN
User scenario #1 and #2: The
computer and endpoint are
connected over LAN.
User scenario #1: The ISDN Link
and the endpoint are connected
through the LAN.
ISDN Link
User scenario #3: The computer
and ISDN Link are connected
through a serial interface.
LAN
port
Endpoint
port
Serial
port
Endpoint
port
Contents
Introduction
Getting started
Software upgrade
Status information
System settings
Appendices
Getting started
Cisco TelePresence ISDN Link Administrator Guide
D14954.04 ISDN Link Administrator Guide IL1.1.2, MARCH 2015. Copyright © 2015 Cisco Systems, Inc. All rights reserved.
10
Installing and pairing the ISDN Link
Installing the ISDN Link
Follow the instructions as described in the ISDN Link Installation Guide supplied with the unit,
or download the ISDN Link Installation Guide from our web page.
Go to:http://www.cisco.com/c/en/us/support/collaboration-endpoints/telepresence-isdn-link/
products-installation-guides-list.html
Prerequisites for pairing
• The TelePresence endpoint and ISDN Link must run the correct software. For details see
supported software versions in the Cisco TelePresence ISDN Link Data Sheet.
• The endpoint and ISDN Link must be on the same subnet.
• For optimum use, the Ethernet cable should be directly connected between the Endpoint
port on the ISDN Link, and the Ethernet port on the endpoint.
• If the ISDN Link has been previously paired to a TelePresence endpoint, make sure both devices
are properly unpaired before starting the pairing process.
• Make sure the NetworkServices SSH Mode is set to On (default) to enable access from the
web interface.
• When using auto paring, the endpoint’s IPStack must be configured to DualStack or IPv6.
The endpoint uses IPv6 link for local traffic to connect with the ISDN Link.
Pairing the ISDN Link
Pairing is a process in which the ISDN Link and endpoint communicate with each other in
order to establish a connection. The ISDN Link is shipped with pairing mode set to Auto, which
enables the ISDN Link to be discovered by a TelePresence endpoint. In both pairing modes
there is a one-to-one relationship between the endpoint and ISDN link:
• An endpoint can only use one ISDN Link.
• An ISDN Link can only be used by one endpoint.
Automatic pairing mode
In automatic pairing mode the ISDN Link can be managed from the TelePresence endpoint’s
web interface.
1. Open a web browser on your computer, enter the address (IP address or host name) of the
TelePresence endpoint in the address bar, and login.
2. From the top menu, go to Configuration > Peripherals.
3. Click the Manage ISDN Link button. This will open the ISDN Link page.
4. Click the Search for devices button.
5. Choose your ISDN Link from the list and Click the Pair button.
During the pairing process a message will display: Pairing with device: <MAC address>.
The ISDN Link is identified by the MAC Address, which is found on a label
underneath the unit.
6. When successfully paired the following text will appear on the ISDN Link page:
This TelePresence device is paired with an ISDN Link.
Manual pairing mode
In manual pairing mode the ISDN Link is managed from a command line interface through the
serial port or, if you know the IP address, over Ethernet using SSH.
Manual pairing is described in the Appendices section.
Contents
Introduction
Getting started
Software upgrade
Status information
System settings
Appendices
Getting started
Cisco TelePresence ISDN Link Administrator Guide
D14954.04 ISDN Link Administrator Guide IL1.1.2, MARCH 2015. Copyright © 2015 Cisco Systems, Inc. All rights reserved.
11
Configuring the ISDN Link
The web interface provides full configuration access to the
endpoint and ISDN Link. You can connect from a computer
and administer the systems remotely.
1. Connect to the TelePresence endpoint’s web interface
2. Open a web browser on your computer and enter the
address (IP address or host name) of the TelePresence
endpoint in the address bar.
3. Sign in
Enter the user name and password for the endpoint and
click Sign In.
4. Manage ISDN Link
• From the top menu, go to Configuration > Peripherals.
• Click the Manage ISDN Link button to access the ISDN
Link pages.
In the following pages you will find information how to use the
web interface for system configuration and maintenance.
ISDN Link
-
00:00:00:00:00:00
OK
PRI
PRI1
000000-0 [00]
The ISDN Link can be
managed from the
TelePresence endpoint’s
web interface.
Manage the ISDN Link
Navigate to the Peripherals page
and click the Manage ISDN Link
button to access the ISDN Link
pages.
Contents
Introduction
Getting started
Software upgrade
Status information
System settings
Appendices
Getting started
Cisco TelePresence ISDN Link Administrator Guide
D14954.04 ISDN Link Administrator Guide IL1.1.2, MARCH 2015. Copyright © 2015 Cisco Systems, Inc. All rights reserved.
12
ISDN Link web interface overview
ISDN Link status
Shows the ISDN Link status.
Unpairing the ISDN Link
Click the Unpair this device button to unpair the ISDN Link
from the endpoint. See more details in the section:
“Unpairing the ISDN Link” on page 75.
The Software Upgrade menu
The software upgrade page is described in the section:
“Software upgrade” on page 22.
The ISDN Link Status menu
The status that can be read from the ISDN Link is described in
the section: “Status information” on page 25.
The ISDN Link Configuration menu
The system settings that can be set for the ISDN Link is
described in the section: “System settings” on page 47.
Shows the ISDN Link
status.
• Software upgrade
• ISDN Link Status
• ISDN Link Configuration
Unpair this device
Click the Unpair this device
button to unpair the ISDN Link
from the endpoint.
Contents
Introduction
Getting started
Software upgrade
Status information
System settings
Appendices
Getting started
Cisco TelePresence ISDN Link Administrator Guide
D14954.04 ISDN Link Administrator Guide IL1.1.2, MARCH 2015. Copyright © 2015 Cisco Systems, Inc. All rights reserved.
13
Configuration examples
Use the search option on the page to find the parameters, or
choose from the list of menus to the left and then navigate to the
parameters in the right pane.
Example with support for PRI E1 mode
Set the H320 net type to PRI:
H320 > General Settings > NetType: PRI
Set the PRI switch type to E1 (Euro):
ISDN > PRI > SwitchType: Euro
Set the number of the high channel for PRI E1 mode:
ISDN > PRI Interface 1 > HighChannel: 31
Set the number of PRI channels:
ISDN > PRI Interface 1 > MaxChannels: 30
Enter the PRI number(s), replace xxx with your number(s):
ISDN > PRI Interface 1 > NumberRangeStart: xxx
ISDN > PRI Interface 1 > NumberRangeStop: xxx
Check the status after configuration
Go to Configuration > Peripherals and check the ISDN status
information to confirm there are no errors before proceeding. If any
errors, or if the power LED is red, please check your configuration.
Navigate to H320 > General Settings >
NetType.
Set the H320 Net Type:
• PRI
Click the Save button.
Navigate to ISDN > PRI > SwitchType.
Set the ISDN PRI Switch Type:
• Euro
Click the Save button.
Navigate to ISDN > PRI > Interface 1.
Enter the number of high and maximum
channels for the PRI Euro switch:
• HighChannel: 31
• MaxChannels: 30
Enter your ISDN PRI number:
• NumberRangeStart: xxx
• NumberRangeStop: xxx
Click the Save buttons.
Contents
Introduction
Getting started
Software upgrade
Status information
System settings
Appendices
Getting started
Cisco TelePresence ISDN Link Administrator Guide
D14954.04 ISDN Link Administrator Guide IL1.1.2, MARCH 2015. Copyright © 2015 Cisco Systems, Inc. All rights reserved.
14
Configuration examples
Use the search option on the page to find the parameters, or
choose from the list of menus to the left and then navigate to the
parameters in the right pane.
Example with support for PRI T1 mode
Set the H320 net type to PRI:
H320 > General Settings > NetType: PRI
Set the PRI switch type to T1. Choose the National ISDN, or the
switch type provided by the ISDN Carrier:
ISDN > PRI > SwitchType: NI
Set the number of the high channel for PRI T1 mode:
ISDN > PRI Interface 1 > HighChannel: 23
Set the number of PRI channels:
ISDN > PRI Interface 1 > MaxChannels: 23
Enter the PRI number(s), replace xxx with your number(s):
ISDN > PRI Interface 1 > NumberRangeStart: xxx
ISDN > PRI Interface 1 > NumberRangeStop: xxx
Check the status after configuration
Go to Configuration > Peripherals and check the ISDN status
information to confirm there are no errors before proceeding. If any
errors, or if the power LED is red, please check your configuration.
Navigate to H320 > General Settings >
NetType.
Set the H320 Net Type:
• PRI
Click the Save button.
Navigate to ISDN > PRI > SwitchType.
Set the ISDN PRI Switch Type:
• NI
Click the Save button.
Navigate to ISDN > PRI > Interface 1.
Enter the number of high and maximum
channels for the PRI NI switch:
• HighChannel: 23
• MaxChannels: 23
Enter your ISDN PRI number:
• NumberRangeStart: xxx
• NumberRangeStop: xxx
Click the Save buttons.
Contents
Introduction
Getting started
Software upgrade
Status information
System settings
Appendices
Getting started
Cisco TelePresence ISDN Link Administrator Guide
D14954.04 ISDN Link Administrator Guide IL1.1.2, MARCH 2015. Copyright © 2015 Cisco Systems, Inc. All rights reserved.
15
Configuration examples
Use the search option on the page to find the parameters, or
choose from the list of menus to the left and then navigate to the
parameters in the right pane.
Example with support for BRI Euro type
Set the net type:
H320 > General Settings > NetType: BRI
Set the BRI switch type. The switch type setting must match the
switch type for the BRI network the ISDN Link is connected to.
ISDN > BRI > SwitchType: Euro
Enter the BRI numbers according to the assigned numbers for
each interface, replace xxx with your numbers::
ISDN > BRI Interface 1 > DirectoryNumber 1 Number: xxx
ISDN > BRI Interface 1 > DirectoryNumber 2 Number: xxx
ISDN > BRI Interface 2 > DirectoryNumber 1 Number: xxx
ISDN > BRI Interface 2 > DirectoryNumber 2 Number: xxx
ISDN > BRI Interface 3 > DirectoryNumber 1 Number: xxx
ISDN > BRI Interface 3 > DirectoryNumber 2 Number: xxx
ISDN > BRI Interface 4 > DirectoryNumber 1 Number: xxx
ISDN > BRI Interface 4 > DirectoryNumber 2 Number: xxx
Enable the BRI interfaces in use:
ISDN > BRI Interface 1 > Mode: On
ISDN > BRI Interface 2 > Mode: On
ISDN > BRI Interface 3 > Mode: On
ISDN > BRI Interface 4 > Mode: On
Check the status after configuration
Go to Configuration > Peripherals and check the ISDN status
information to confirm there are no errors before proceeding. If any
errors, or if the power LED is red, please check your configuration.
NOTE: Please refer to xConfiguration ISDN BRI AutoActivation if
connected to equipment enforcing BRI line deactivation when BRI
lines are not in use.
Navigate to H320 > General Settings >
NetType.
Set the H320 Net Type:
• BRI
Click the Save button.
Navigate to ISDN > BRI > SwitchType.
Set the ISDN BRI Switch Type:
• Euro
Click the Save button.
Navigate to ISDN > BRI > Interface [1..4].
Enter the BRI numbers according to the
assigned numbers for each interface,
replace xxx with your numbers::
• ISDN > BRI Interface [1..4] >
DirectoryNumber [1..2] Number: xxx
Enable the BRI interfaces in use:
• ISDN > BRI Interface [1..4] > Mode: On
Click the Save buttons.
Contents
Introduction
Getting started
Software upgrade
Status information
System settings
Appendices
Getting started
Cisco TelePresence ISDN Link Administrator Guide
D14954.04 ISDN Link Administrator Guide IL1.1.2, MARCH 2015. Copyright © 2015 Cisco Systems, Inc. All rights reserved.
16
Configuration examples
Use the search option on the page to find the parameters, or
choose from the list of menus to the left and then navigate to the
parameters in the right pane.
Example with support for External Network
Set the net type:
H320 > General Settings > NetType: External
Set the call control protocol:
ExternalNetwork > Interface 1 > CallControl: RS366
Set the clocking mode:
ExternalNetwork > Interface 1 > Clocking: Dual
If using RS530, set the DTRPulse to On; else set to Off:
ExternalNetwork > Interface 1 > DtrPulse: On
Check the status after configuration
Go to Configuration > Peripherals and check the ISDN status
information to confirm there are no errors before proceeding. If
there are any errors, or if the power LED is red, please check your
configuration.
Navigate to H320 > General Settings >
NetType.
Set the H320 Net Type:
• External
Click the Save button.
Navigate to ExternalNetwork > Interface 1.
Set the call control protocol:
• CallControl: RS366
Set the clocking:
• Clocking: Dual
Set the DTR pulse:
• DTRPulse: On/Off
Click the Save buttons.
Contents
Introduction
Getting started
Software upgrade
Status information
System settings
Appendices
Getting started
Cisco TelePresence ISDN Link Administrator Guide
D14954.04 ISDN Link Administrator Guide IL1.1.2, MARCH 2015. Copyright © 2015 Cisco Systems, Inc. All rights reserved.
17
Configuring the TelePresence endpoint for ISDN
When paired to ISDN Link, the default call settings for the TelePresence endpoint can be configured
for ISDN (H320), or you can set the call protocol and call rate each time you make a call.
Setting the default call protocol to H320
Configuring the default call settings to ISDN (H320):
1. Open a web browser on your computer, enter the address (IP address or host name) of the
TelePresence endpoint in the address bar, and login.
• Navigate to Configuration > System configuration > Conference 1 > DefaultCall and set the
Protocol to H320.
• Click the Save button.
Setting the call protocol to H320 by each call
• If using a TelePresence Touch device, see: “Making a call using the Touch controller” on
page 18.
• If using a TelePresence Remote Control, see: “Making a call using the remote control” on
page 19.
• If calling from the TelePresence endpoint’s web interface, see: “Making a call using the web
interface of the endpoint” on page 20.
Contents
Introduction
Getting started
Software upgrade
Status information
System settings
Appendices
Getting started
Cisco TelePresence ISDN Link Administrator Guide
D14954.04 ISDN Link Administrator Guide IL1.1.2, MARCH 2015. Copyright © 2015 Cisco Systems, Inc. All rights reserved.
18
Making a call using the Touch
controller
If your TelePresence endpoint has a Touch controller see
the dialing example on this page.
About the ISDN number
• The ISDN number is the number to the far end
endpoint (for example an MXP codec).
Replace the number used in the example (8000) with
the number you want to call.
About restricted calls
If using the ISDN Restrict option, choose the Restrict in the
Call settings menu.
How to make the call
Touch the panel gently to wake up the system.
1. Tap Dial or Contacts and enter the ISDN number you
want to call.
If the default call protocol is set to ISDN (H320),
proceed to Step 6, else proceed to Step 2.
2. Tap the More (•••) button to open the call dialog.
3. Tap Call rate button to open the ISDN call settings
menu.
4. Move the call protocol slider and choose ISDN.
5. Move the bandwidth slider to set the appropriate call
rate, or if dialing a telephone number, use the slider
to choose Audio Only.
6. Tap the green Call button to make the call.
Connecting the call may take up to 30 seconds.
2
3
1
6
5
4
Contents
Introduction
Getting started
Software upgrade
Status information
System settings
Appendices
Getting started
Cisco TelePresence ISDN Link Administrator Guide
D14954.04 ISDN Link Administrator Guide IL1.1.2, MARCH 2015. Copyright © 2015 Cisco Systems, Inc. All rights reserved.
19
Making a call using the remote
control
If your TelePresence endpoint has a remote control, see
the dialing example on this page.
About the ISDN number
• The ISDN number is the number to the far end
endpoint (for example an MXP codec).
Replace the number used in the example (8000) with
the number you want to call.
About restricted calls
If using the Restrict option, choose the ISDN Restrict in the
Call settings menu.
6. Press (call) to connect the
call. Connecting the call may
take a few seconds. A message
will show on screen while the
call is connecting.
Connecting the call may take up
to 30 seconds.
How to make the call
Press any button on the remote control to wake up the
system.
1. Press (home) button to open the Home menu.
2. Press (right arrow) to open the Call menu.
3. Use the numeric pad and enter the ISDN number you
want to call.
If the default call protocol is set to ISDN (H320), proceed
to Step 6, else proceed to Step 4.
4
5
6
3
(ok)
(home)
(right arrow)
(call)
1
2
4. Press the fifth soft button to display the Call Type menu.
Use the arrow keys to navigate and choose ISDN.
Press (ok) to confirm your selection.
5. Press the fourth soft button to display the Call Rate menu.
Use the arrow keys to navigate and choose the call rate. If
dialing a telephone number, choose Audio Only.
Press (ok) to confirm your selection.
(ok)
Contents
Introduction
Getting started
Software upgrade
Status information
System settings
Appendices
Getting started
Cisco TelePresence ISDN Link Administrator Guide
D14954.04 ISDN Link Administrator Guide IL1.1.2, MARCH 2015. Copyright © 2015 Cisco Systems, Inc. All rights reserved.
20
Making a call using the web
interface of the endpoint
When the ISDN Link is used in automatic pairing mode
you can make a call from the TelePresence system’s web
interface.
About ISDN number
• The ISDN number is the number to the far end
endpoint (for example an MXP codec).
Replace the number used in the example (8000) with
the number you want to call.
About restricted calls
If using the ISDN Restrict option, choose the ISDN Restrict
in the Call settings menu.
How to make the call
Open a web browser on your computer, enter
the address (IP address or host name) of the
TelePresence endpoint in the address bar,
and login.
1. Navigate to Call Control > Call Control >
Contacts
2. Enter the ISDN number you want to call.
If the default call protocol is set to ISDN
(H320), proceed to Step 5, else proceed
to Step 3.
3. Click Show call settings and set the
appropriate call rate.
If dialing a telephone number choose
Audio Only from the drop down menu.
4. Set the call protocol to H320.
5. Click the green Call button to make the
call.
Connecting the call may take up to 30
seconds.
1
2
3
4
5
Contents
Introduction
Getting started
Software upgrade
Status information
System settings
Appendices
Getting started

Other manuals for TelePresence ISDN Link

1

Other Cisco Conference System manuals

Cisco EX90 User manual

Cisco

Cisco EX90 User manual

Cisco 3515 MCU12 Installation and operation manual

Cisco

Cisco 3515 MCU12 Installation and operation manual

Cisco TelePresence IX5000 User manual

Cisco

Cisco TelePresence IX5000 User manual

Cisco MX200 G2 Service manual

Cisco

Cisco MX200 G2 Service manual

Cisco TelePresence DX70 User manual

Cisco

Cisco TelePresence DX70 User manual

Cisco TelePresenceSX10 User manual

Cisco

Cisco TelePresenceSX10 User manual

Cisco Profile Series Assembly instructions

Cisco

Cisco Profile Series Assembly instructions

Cisco TelePresence MX300 User manual

Cisco

Cisco TelePresence MX300 User manual

Cisco CTS-SX10-K9 User manual

Cisco

Cisco CTS-SX10-K9 User manual

Cisco TelePresence SX10 User manual

Cisco

Cisco TelePresence SX10 User manual

Cisco MX200 Series User manual

Cisco

Cisco MX200 Series User manual

Cisco Unified MeetingPlace  Web Conferencing Installation and operation manual

Cisco

Cisco Unified MeetingPlace Web Conferencing Installation and operation manual

Cisco DX600 series User manual

Cisco

Cisco DX600 series User manual

Cisco GW 3340 User manual

Cisco

Cisco GW 3340 User manual

Cisco TELEPRESENCE VIDEO COMMUNICATION SERVER - COMMAND REFERENCE V... Operating manual

Cisco

Cisco TELEPRESENCE VIDEO COMMUNICATION SERVER - COMMAND REFERENCE V... Operating manual

Cisco SX80 User manual

Cisco

Cisco SX80 User manual

Cisco TelePresence MX700 Service manual

Cisco

Cisco TelePresence MX700 Service manual

Cisco 7936 - IP Conference Station VoIP Phone Instruction Manual

Cisco

Cisco 7936 - IP Conference Station VoIP Phone Instruction Manual

Cisco TelePresence SX20 Service manual

Cisco

Cisco TelePresence SX20 Service manual

Cisco TelePresence MX300 Service manual

Cisco

Cisco TelePresence MX300 Service manual

Cisco TelePresence SX20 Setup guide

Cisco

Cisco TelePresence SX20 Setup guide

Cisco TelePresence DX70 Service manual

Cisco

Cisco TelePresence DX70 Service manual

Cisco MXP Series User manual

Cisco

Cisco MXP Series User manual

Cisco TelePresence SX10 User manual

Cisco

Cisco TelePresence SX10 User manual

Popular Conference System manuals by other brands

Ocean Reef G.divers owner's manual

Ocean Reef

Ocean Reef G.divers owner's manual

TANDBERG 1000 user manual

TANDBERG

TANDBERG 1000 user manual

TANDBERG 1000 MXP user manual

TANDBERG

TANDBERG 1000 MXP user manual

ITC TS-0604M user manual

ITC

ITC TS-0604M user manual

Crestron Mercury CCS-UC-1 Configuration guide

Crestron

Crestron Mercury CCS-UC-1 Configuration guide

Yealink MeetingBar A20 Teams Collaboration Bar Setup guide

Yealink

Yealink MeetingBar A20 Teams Collaboration Bar Setup guide

Crestron UC-2 quick start guide

Crestron

Crestron UC-2 quick start guide

LifeSize Express user guide

LifeSize

LifeSize Express user guide

Polycom QDX 6000 System Release notes

Polycom

Polycom QDX 6000 System Release notes

vissonic CLASSIC-D user manual

vissonic

vissonic CLASSIC-D user manual

Sony Ipela PCS-TL50 Guide

Sony

Sony Ipela PCS-TL50 Guide

ProfiTap C8-1G manual

ProfiTap

ProfiTap C8-1G manual

Nortel NN42030-101 user guide

Nortel

Nortel NN42030-101 user guide

Yealink VC110 user guide

Yealink

Yealink VC110 user guide

Huawei TE10 Product overview

Huawei

Huawei TE10 Product overview

Polycom QDX 6000 System Administrator's guide

Polycom

Polycom QDX 6000 System Administrator's guide

Toa TS-D1000-CU instruction manual

Toa

Toa TS-D1000-CU instruction manual

AGV SIDE SHARE EASY Fitting instructions

AGV

AGV SIDE SHARE EASY Fitting instructions

manuals.online logo
manuals.online logoBrands
  • About & Mission
  • Contact us
  • Privacy Policy
  • Terms and Conditions

Copyright 2025 Manuals.Online. All Rights Reserved.