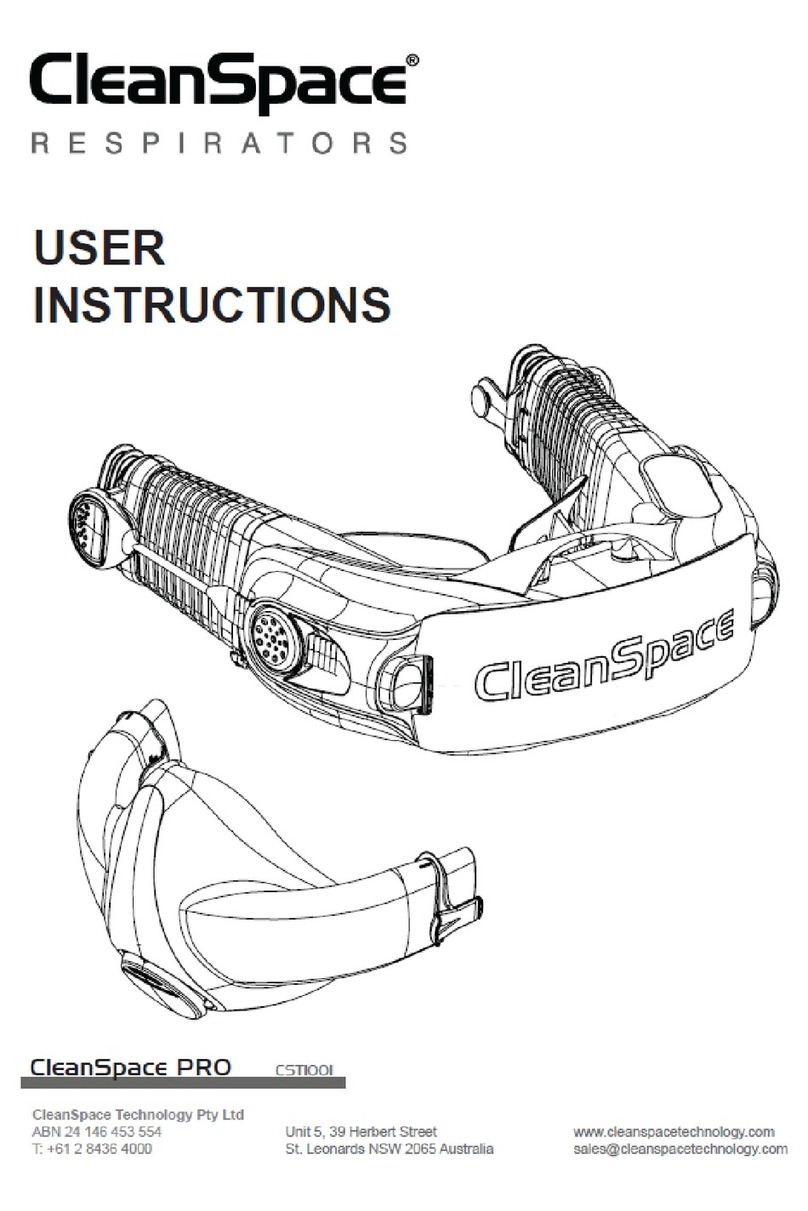
CleanSpace CleanSpace2 Installation instructions

REV 8

1
Contents - Languages
English………………………………………………………………………………………………………2 - 13
French……………………………………………………………………………………………………..14 - 26
German……………………………………………………………………………………………………27 - 39
Swedish………………………………………………………………………………………………......40 - 52
CleanSpace Technology Pty Ltd
ABN 24 146 453 554
Unit 5 , 39 Herbert Street St Leonards NSW 2065 Australia
T: +61 2 8436 4000 |E: sales@cleanspacetechnology.com

English
2
Contents
1
Components in the CleanSpace2™ System
2
Important Safety Information
3
Operating Instructions
4
Fitting and Removing CleanSpace2™
5
Changing the Filters in CleanSpace2™
6
CleanSpace2™ Battery Information
7
Cleaning CleanSpace2™
8
Data Sheet
9
Product Warranty
Read these instructions in conjunction with the appropriate CleanSpace2™ filters and accessories instructions.
1. Components in the CleanSpace2™ System
CleanSpace2™ is a powered air purifying respirator (PAPR) which uses filters to remove air borne contaminants that
are potentially harmful to the wearer. The following parts are used in the CleanSpace2™ System.
1.
CleanSpace2™ Power Unit - including charger, particulate filter, flow test cap, harness, neck pads (2), user
manual and carry bag.
2.
CleanSpace2™ Mask – sold separately from the Power Unit.
1.
Power Unit
2. CleanSpace2TM Mask
(Sold separately to the Power Unit)
Flow Test Cap Charger
Thin Neck Pad
Thick Neck Pad
Carry Bag
Harness
Exhalation Valve
Keypad
Particulate Filter
Filter Cover
Bellows
Filter Locking Pin
Charging Point

English
3
2. Important Safety Information
Use this Respirator strictly in accordance with all instructions in this user manual. Never modify or alter this product.
Do not remove the Respirator until you have left the contaminated area.
This Respirator DOES NOT PROTECT YOUR EYES. In conditions that may damage or irritate eyes, use
protective eyewear.
Only use your Respirator with CleanSpace2 approved parts and accessories.
Do not use the Respirator unless it is powered and running normally.
Do not use CleanSpace2™ Respirator while it is being charged via the AC adaptor.
Do not use in airborne contaminant concentrations above those specified in your National regulations.
Do not use for Respiratory protection against unknown atmospheric contaminants or when
concentrations of contaminants are unknown or immediately dangerous to life or health (IDLH).
Do not use in oxygen deficient or oxygen enriched atmospheres. Do not use in flammable or explosive
environments.
Only for use by trained personnel.
Filters need to be regularly changed. The frequency of change depends on use and the concentration of
contaminants in the atmosphere.
Do not use for escape purposes. National regulations may impose specific limitations on the use of filters
depending on the filter class and the facemask used.
LEAVE THE CONTAMINATED AREA IMMEDIATELY IF:
Respiratory warning lights and sounds activate for low battery or blocked filter
Any part of the Respirator is damaged
Air flow into the mask decreases or stops
Breathing becomes difficult or increased resistance occurs
You feel dizzy or your airway is irritated
You can taste or smell contaminants
Your CleanSpace2™ Respirator is suitable for use in the following atmospheric conditions:
Temperature: -10°C to 45°C
Relative humidity: 10% to 95% non-condensing
The CleanSpace2™ Respirator will stop functioning if its internal temperature rises above 60°C.
If the Respirator has been used in an area that has caused it to become contaminated with a substance requiring
special decontamination procedures it should be placed in a suitable container and sealed until it can be
decontaminated.
Do not disassemble the CleanSpace2™ Respirator case. There are no user serviceable parts inside.
Failure to follow all instructions on the use of this product, and/or failure to use the CleanSpace2™ Respirator during
times of exposure, may lead to adverse effects on the wearer’s health and may render the warranty void.
Manufacturers Minimum Design Condition/Duration: CleanSpace Respirators will maintain positive pressure in the
mask up to 120 l/min. Minimum 4-hour duration. The user must do a Flow Test to check the design condition before
each use.

English
4
3. Operating Instructions
POWER BUTTON
The CleanSpace2™ Respirator has three (3) operating Modes: “On”, “Standby” and “Off”
Mode.
i)
Standby Mode is when the green battery indicator lights are on, the motor is not running
and there is no airflow to the mask. The Respirator will automatically switch to “Standby
Mode” within ten (10) seconds of the user taking off the Respirator. If the CleanSpace2™
Respirator is in “Off Mode” it will switch to “Standby Mode” when the Power button is pressed.
ii)
On Mode is when the Respirator is being worn, the motor is running and there is air flow to
the mask. The motor will start (called On Mode) when the Respirator detects a change in
pressure in the mask triggered by your breathing. In On Mode you should hear the motor
running and feel the airflow on your face.
iii)
Off Mode is when the green battery indicator lights are off and the motor is not running
and there is no air flow to the mask. The Respirator automatically switches into Off Mode
three (3) minutes after the Respirator has been removed from the user’s face and the sensors
detect that there is no “breathing”.
To conserve battery life, the CleanSpace2™ Respirator is designed to automatically switch
from On Mode to Standby then to Off Mode when not being worn. Important: The
CleanSpace2™ switches into “On Mode” when the Respirator is in “Standby Mode” and the
wearer starts to breathe. The Respirator can only switch into “On Mode” from “Standby
Mode”.
BATTERY INDICATOR LIGHTS
The CleanSpace2™ Respirator is equipped with an indicator of battery charge. There are
three (3) battery indicator lights. If all three (3) lights are lit up the Respirator is fully charged
and typically has six (6) hours of operating time. The Respirator should be fully charged
before use. The CleanSpace2™ will function with one (1), two (2) or three (3) green battery
lights illuminated. If two (2) battery indicator lights are on, the Respirator has between 25%
and 75% charge and will typically operate for between 2 and 4 hours. If only one (1) battery
indicator light is on, the battery has less than 20% charge and we recommend that you
charge the Respirator before use.
FILTER WARNING ALARM
All CleanSpace2™ Respirators have a Filter Warning Alarm, which is triggered when the
particulate or combination filter is blocked. If the Filter Warning Alarm sounds (2 beeps every
second) and the Filter Warning Alarm light flashes, you should move out of the contaminated
area, remove the Respirator and change the filter (See the section in this user manual for
instructions on how to change the CleanSpace2™ filters)

English
5
3. Operating Instructions (continued)
FLOW TEST BUTTON
This button is used to check that the respirator is able to deliver its minimum designed flow. Pressing
it once, when the CleanSpace Respirator is in Standby Mode (not ON Mode), starts the flow test
which lasts about 5 seconds. See Section 4 for instructions on running the flow test.
RECALIBRATION
The CleanSpace2™ Respirator has a pressure sensor to ensure accurate positive pressure regulation inside the
mask. When there is a variation in the ambient temperature of greater than 20°C between uses (for example, a
variation from -10°C to 10°C), the CleanSpace2™ Respirator’s pressure sensor should be recalibrated before use.
This can be done in two (2) ways:
1.
Auto Recalibration To recalibrate the pressure sensor, switch the Respirator into Standby Mode for at least 20
seconds before use.
2.
Manual Recalibration Switch the Respirator into Standby Mode. A manual recalibration can be performed by
pressing the Power Button and Flow Test Button at the same time. The Buttons should be held until both the blue
and red lights are on, after which the Buttons should be released. The lights will stay on for a few seconds while the
Respirator recalibrates. The recalibration is completed when the blue and red lights switch off.
4. Fitting and Removing CleanSpace2™
STEP 1: PREPARATION FOR USE
Check the CleanSpace2™ Respirator is complete and undamaged. If there are any damaged or defective parts, the
Respirator should not be used.
Note: The CleanSpace2™ Power Unit does not come with a mask. The mask assembly is sold separately and
is available in three (3) sizes (small, medium and large). You will need to purchase and fit a CleanSpace™
mask assembly before using the CleanSpace2™ System.
Before use, follow the procedures below:
Unclip and release the filter cover to check there is a filter in place.
Check that the battery is charged by pressing the power button. We recommend that a minimum of 2
green lights be lit before use. At this level of charge, the Respirator has between 25% and 75% charge
and will typically operate for between 2 and 4 hours. If the battery needs charging, charge the Respirator
for at least 2 hours before use.
Check the mask to ensure that there are no cracks, tears or dirt; check the mask is not distorted.
Remove the exhalation valve cover and check the exhalation valve thoroughly for cracks, tears and dirt.
Remove any dirt, hairs or anything that could affect the seal of the valve against its seat. Replace the
valve if cracked or torn. Replace the valve cap.
Check the harness is intact and has good elasticity.
Flow Rate Test
CleanSpace2 shall be tested to check its flow performance against the Manufacturer’s Minimum Design Flow
(MMDF) of 120 litre/minute.

English
6
4. Fitting and Removing CleanSpace2™ (continued)
To carry out a Flow Rate Test:
1.
Fit the yellow Calibration Flow Test Cap to the left bellow
2.
Leave the filter in place and press the ON button to put the
respirator into Standby mode.
3.
Press and release the Flow Test button.
4.
CleanSpace2 automatically runs the Flow Test.
5.
After 2 seconds CleanSpace2 reports the result using the
LEDs on the keypad, as follows:
3 LEDs: Filter good and battery good (>180 l/min)
2 LEDs: Filter ok and battery good
1 LED: Filter needs changing soon or battery needs charging
3 LEDs and
red filter LED
FLASH:
System air flow is too low (<120 l/min) to operate. Do not use
CleanSpace2 until a new filter has been fitted and / or battery charged.
If the System airflow is too low, reset the respirator by pressing the Power
button to reset the LEDs to OFF and then fully charge the battery and / or
replace the filter. Repeat the flow test. If CleanSpace2™ fails the test
again, contact CleanSpace Technology and do not use until it has been
evaluated
6.
Remove the yellow Calibration Flow Test Cap
Note: The LEDs during the Flow Test will remain lit for 10 seconds, after which CleanSpace2 and the LEDs will
switch off.
STEP 2: ASSEMBLING THE RESPIRATOR
Check that the mask and the Power Unit are correctly assembled and are in the correct orientation. The nose piece
of the mask and the keypad of the power unit should both be aligned. Familiarise yourself with the keypad and the
three (3) modes of operation (see Section on Operating Functions).
To connect the mask to the Power Unit, locate the black clips on the end of the arms of the mask and the
corresponding black clips on the bellows of the Power Unit. To connect, clip one side of the mask and bellows into
place.
Familiarise yourself with the bellow adjustment buttons and check the adjustment on the bellow is at its loosest and
that both bellows are fully extended. Familiarise yourself with the mask release buttons on either side of the bellows.
Leave the other mask arm and bellow free until you are fitting the Respirator.
Attaching the harness
To connect the harness, locate the two (2) straps on the side and one at the back. Hook the clips on the two side
strap contact points on the Power Unit and mask. On the harness, two (2) clips are attached at the sides of the
mask, and the velcro attachment attaches between the neck pad and the centre inside of the Power Unit.

English
7
4. Fitting and Removing CleanSpace2™ (continued)
STEP 3: PUTTING THE RESPIRATOR ON
To fit the Respirator, follow the procedure below:
Check that the Respirator is in Standby Mode with the battery indicator lights on and the motor not
running.
Ensure one side of the mask is unclipped and place the Power Unit at the back of your neck.
Place the mask on your face, by putting your chin into the bottom of the mask and positioning the mask
over your nose and mouth.
Clip the loose mask arm to the Power Unit at the bellow to secure the Respirator around your neck.
Adjust and tighten the mask by placing one hand on the mask, the other hand on the back of the Power
Unit and gently push together. You should hear several clicks as the adjustment clips tighten. The mask
should form a close seal on your face but should not feel tight.
Breathe normally. The CleanSpace2™ will respond to your breathing and start the motor, automatically
switching from Standby Mode to On Mode. Note: The air flow (On Mode) is triggered when you breathe.
The airflow starts on the second (2nd) breath. In On Mode, when the airflow has started, you should hear
the motor and fan, and feel air on your face.
Check the position of the harness on your head and ensure it is comfortable, supporting the respirator adequately and
not interfering with the mask seal. If the harness needs adjusting for comfort, adjust the length of the front and/or rear
straps.
Adjusting the Respirator
The Respirator should be tightened to achieve a close seal and a comfortable and secure fit on your face.
There are three ways to adjust the Respirator for fit:
1.
Adjust the length of the bellows on the Power Unit. To tighten, push the mask and Respirator toward each other.
You should hear a “click, click” as the adjustments tighten. To loosen the arms, push the adjustment buttons on both
sides and pull the mask out from the Power Unit.
2.
Use the different sized neck pads (thin and thick). For example, to create a tighter fit use the thick neck pad; for a
looser fit, use the thin neck pad.
3.
Use a different sized mask (small, medium and large). The CleanSpace2™ Respirator can be used with a small,
medium or large silicone mask. The correct mask should be selected and fitted before use.
Face Fit Check
The CleanSpace2™ Respirator can be fit checked by using the Portacount fit test adaptor, by consulting a respiratory
safety specialist.
When the CleanSpace2™ Respirator is being worn (following the procedure in “Fitting the CleanSpace2™) and the
mask is fitted correctly, your exhaled air should flow out through the mask exhalation valve. If air is escaping out
around the mask seal, (e.g. into your eyes), adjust the mask appropriately until this is eliminated or minimised. If you
are unable to get an acceptable seal you may need a different size of mask or seek further assistance with a
respiratory safety specialist who can help you fit the Respirator.
Removing the Respirator
To remove the Respirator, find the release clip on one side of the bellows and press to release the mask from the
Power Unit which will allow you to remove the Respirator. Note: The Respirator motor will automatically switch off
and go into Standby Mode in approximately 5-10 seconds when no breath is detected. In Standby Mode, if after
three (3) minutes no breath is detected, the Respirator will automatically go into Off Mode. In Off Mode, all the
battery indicator lights will be off and the motor will not be triggered by the wearer’s breathing.
DO NOT REMOVE THE RESPIRATOR UNTIL YOU HAVE
VACATED THE CONTAMINATED AREA.

English
8
5. Changing the Filters in CleanSpace2™
Before using CleanSpace2™ you should ensure that
you are using the correct filter type for the environment you
are working in. The CleanSpace2™ Power Unit is supplied
with a particulate filter.
Before changing the filter on the Respirator, move out of
the contaminated area and remove the Respirator. Used
filters should be disposed of responsibly and treated as
non-recyclable hazardous* waste (* dependent on the
contaminant being filtered). Filters need to be regularly
changed. The frequency of change depends on use and
concentration of contaminants in the atmosphere.
CHANGING THE PRE-FILTER
We recommend changing the pre-filter daily. Prior to opening the filter cover and removing the pre-filter, clean the
outside of the Respirator with CleanSpace™ Cleaning Wipes or a damp cloth to prevent potential contamination of
the inside of the Power Unit. To unlock the filter cover lift the pin located on the end of the filter cover.
The filter cover should easily swing open exposing the used CleanSpace2™ pre-filter. Remove the used pre-filter and
replace with a new pre-filter, taking care not to disturb the particulate filter. Swing the filter cover back into its closed
position and press the pin down until clicked back into place.
CHANGING THE PARTICULATE FILTER
The particulate filter should be changed when the CleanSpace2™ filter alarm alerts the wearer that the particulate
filter is blocked. To unlock the filter cover lift the pin located on the end of the filter cover. The filter cover should
easily swing open exposing the used CleanSpace™ filter. Remove the used filter (and pre-filter, if applicable) and
replace with a new CleanSpace™ particulate filter and pre-filter. Swing the filter cover back into its closed position
and press the pin down until clicked back into place.
Only CleanSpace™ filters and pre-filters should be used with the CleanSpace2™ Respirator.
Do not use compressed air or any other method to clean the CleanSpace filter media. Cleaning the filter media may
cause damage and affect the filtering efficiency. The filter case may be wiped with a dry cloth free of chemicals.
The markings on these filters in relation to EN12942 must not be confused with markings on filters related to any
other standard.
DO NOT FORCE THE FILTER COVER OPEN BEYOND 90O
IT IS ESSENTIAL THAT THE CORRECT FILTER TYPE IS SELECTED
FOR THE CHOSEN APPLICATION.

English
9
6. CleanSpace2™ Battery Information
CHARGING THE INTERNAL BATTERY
The CleanSpace2™ Respirator has a 11.1V nominal internal lithium ion polymer battery. CleanSpace2™ chargers
and power leads should always be used to charge the CleanSpace2™ batteries or you will invalidate your warranty.
To charge the internal battery, turn the Respirator upside down, and locate the charging port.
Lift off the flexible polymer charging port cover. Slide the charger cable connector into the charging port.
Ensure the charger is plugged into a power socket.
Charging is complete when the Power Unit shows three (3) green solid lights. A fully charged internal
battery typically gives you 6 hours of operating time.
When the Respirator is fully charged, disconnect the charger cable from the Power Unit charging port.
IMPORTANT Ensure you replace the charging port cover to prevent dirt and contaminants getting into
the port.
Note: The CleanSpace2™ Power Unit can be charged at temperatures between 0°C - 35°C.
LOW BATTERY ALARM
All CleanSpace2™ respirators have a low battery alarm, which is triggered when the battery has approximately 5
minutes life remaining.
If the battery alarm sounds (3 beeps per second), leave the contaminated area immediately and re-charge the
battery.
GENERAL BATTERY INFORMATION
The CleanSpace2™ Respirator has an internal lithium ion (Li-ion) polymer battery. Lithium ion (Li-ion) batteries have
the highest energy density of all battery types, and are widely used today in portable electronic devices across many
different industries. The commonly available Li-ion polymer batteries are similar to Li-ion batteries, except they are
packaged in a soft polymer film as opposed to the metal case commonly used for Li-ion cells. The soft packaging
allows the cells to expand slightly under extreme heat, making them safer in fault conditions. CleanSpace2™
Respirators use quality Li-ion polymer batteries and are designed to be viable over a minimum of 500 complete
charge and discharge cycles while still maintaining at least 70% of their specified full capacity.
RESPIRATOR STORAGE
To maintain the integrity of the internal battery, the Respirator should be stored under the following conditions when
not being used:
Long term storage (> 3 months) 18°C to 28°C @ 30-50% RH
Medium term storage (< 90 days) -10°C to 35°C
Short term storage (< 30 days) -10°C to 45°C
Unopened filters have a limited storage life of five (5) years.

English
10
6. CleanSpace2™ Battery Information (continued)
For added safety, all CleanSpace2™ internal batteries have a built-in Protection Circuit Module (PCM) to
ensure the batteries are protected against over-charge and over-discharge. The following precautions must
be followed during use:
Avoid mechanical shocks or impacts from any sharp or hard objects
Do not use or place the Respirator in extreme heat, such as in direct sunlight, near heat sources, etc.
The battery will be damaged if its temperature goes above +70°C. Note: The CleanSpace2™ will stop
functioning if its internal temperature rises above +60°C or below -10°C
Do not dispose of the Respirator in fire
Do not use the CleanSpace2™ Respirator in heavy rain, or allow it to get wet or immersed in liquid
Do not disassemble the Power Unit case, there are no user serviceable parts inside
Do not use the CleanSpace2™ Respirator if there are any signs of severe mechanical damage
7. Cleaning CleanSpace2™
We recommend that you clean your Respirator after every use. The mask, Power Unit, neck pad and harness need
to be cleaned separately. Disassemble the mask, neck pad and harness from the Power Unit before cleaning.
Compatible cleaning wipes are recommended as a simple and effective method of cleaning the CleanSpace2™
Power Unit and masks. For more information on compatible cleaning products contact CleanSpace at
sales@cleanspacetechnology.com
WASHING THE MASK
There are three (3) methods for cleaning the CleanSpace™ mask. Before washing the mask, remove the valve cap
covering the exhalation valve leaf. To remove the valve cap, find the small inlet located under the lower, inside edge
of the valve (see diagram). Use your fingernail to unclip and push up the valve cap. The valve cap is easily fitted
back by placing the cap with the clip aligned to the inlet on the valve seating and pushing down. The valve cap will
gently snap back into place.
1. Compatible wipes for face piece
To clean the exhalation valve, remove the valve cap (using the instructions above), gently wipe the leaf
edge. Replace the valve cap before use.
2. Hand wash in warm soapy water
Wash the mask thoroughly with a mild detergent in warm water (<50°C)
A soft brush or sponge can be used to remove any stubborn dirt or grit
IN THE EXTREMELY RARE CIRCUMSTANCE WHERE THE BATTERY
IS DAMAGED AND ELECTROLYTE COMES IN CONTACT WITH EYES,
FLUSH WITH WATER IMMEDIATELY AND SEEK URGENT MEDICAL ATTENTION

English
11
7. Cleaning CleanSpace2™ (continued)
To clean the exhalation valve, gently wash the warm water solution through the valve and use a sponge to
gently clean the valve surface
Rinse the mask and valve well in warm running water. IMPORTANT: If the mask is not rinsed thoroughly,
residue from cleaning solution may irritate the wearer’s skin or cause the valve to stick. Replace the valve
cap before use.
3. Dishwasher
The mask can be cleaned in a standard dishwasher on the top shelf, face up to prevent water pooling in the mask.
Remove the valve cap (using the instructions above). Use dishwasher detergent on a normal cycle.
Drying the mask
After cleaning, allow the mask to air dry in a clean environment, face up to prevent water pooling. Note: Do not dry
the mask by exposing directly to heat i.e. hair dryers or heaters. The mask can also be hand-dried with a clean, lint-
free cloth. IMPORTANT: Cleaning can cause the exhalation valve leaf to stick. Before use, check that the exhalation
valve leaf operates freely by gently lifting the valve. Replace the valve cap before use.
Cleaning the Power Unit
WARNING: The Power Unit contains a battery, electronic parts and a motor. The Power Unit should NEVER be
submerged in water or washed in running water. To clean the Power Unit, follow the instructions below:
After removing the mask, remove the neck pad. Leave the filter in place to prevent any dust or liquids
from getting into the Power Unit.
Use a gentle brush to remove any dirt, grit or fibres from the Velcro attached to the Power Unit.
Using compatible cleaning wipes, wipe down the outside of the casing. The Power Unit can also be
cleaned with a damp cloth.
Allow the Power Unit to air dry in a clean environment. The Power Unit can also be hand-dried with a
clean lint-free cloth. Note: Do not dry the Power Unit by exposing directly to heat (i.e. hair dryers or
heaters) or compressed air.
Cleaning the harness and neck pads
The harness and neck pads can be washed in warm soapy water or machine washed. After cleaning, allow the
harness and neck pads to air dry in a clean environment.
Note: Do not dry the harness or neck pads by exposing directly to heat i.e. hair dryers or heaters. For information on
trouble shooting and FAQs please go to the www.cleanspacetechnology.com website.

English
12
8. Data Sheet
Description
The CleanSpace2™ Respirator is an innovative, breath responsive, powered air purifying respirator, designed to
provide comfortable respiratory protection at work and at home.
Applications
Welding, Woodworking, Manufacturing, Smelting, Construction, Recycling Plants, Emergency Services, Mining,
Agriculture, Processing Plants, Grinding, DIY, etc.
Key Features
Lightweight and comfortable
Intelligent breath responsive protection
Improved mobility and compatibility with other PPE
High quality and reliability
Hygienic and soft face piece
Battery and filter warnings to support continuous protection
Specifications
Maximum air flow - 200L/min
Weight (Power unit) - 485g; Weight (Mask) – 115g
Audible Alarm – 75dB(A) – at ear
Automatic Switch-Off - 3 minutes after idle
Internal battery duration – Min 4 hours (typically >6 hours)
Internal battery charging time – 2 hours (to 95%)
AC Adaptor charger: Input range 100 – 240V
Output range 13.5V ± 5%
Approvals
AS/NZS1716:2012 PAPR-P2
EN 12942:1998+A2:2008 TM3
ISO9001
Limitations
CleanSpace2™ is an air filtering, fan assisted positive pressure mask and is designed to be worn in
environments where there is sufficient oxygen to breathe safely. Do not use the CleanSpace2™ in IDLH, or in
Oxygen enriched or deficient atmospheres, to protect against gases/vapours that cannot be filtered.
CleanSpace2™ can operate between temperatures -10°C to 45°C. The Respirator battery can be charged
between 0°C to 35°C.
Storage
Before first use: CleanSpace2™ should be stored in its original packaging, out of direct sunlight, in a clean, dry
environment (30% - 50% RH), -10°C to 35°C.
After first use: CleanSpace2™ should be stored out of direct sunlight, in a clean, dry environment (30% - 50% RH)
and away from chemicals and abrasive substances, -10°C to 35°C.

English
13
9. Product Warranty
This product has been manufactured using quality parts and processes.
CleanSpace Technology Pty Ltd warrants that the product is free from defective workmanship and parts for a period
of two (2) year from the date of original purchase provided the product has been used, cleaned and maintained in
accordance with these instructions and CleanSpace Technology’s recommendations. This warranty does not include
consumable parts, such as filters and face masks, which must be replaced regularly by the user. Consumable parts
are warranted up to the point of use, provided they have been stored correctly and are within their expiry date.
This warranty does not cover:
Where the product has been used for industrial purposes outside the recommendations of CleanSpace
Technology Pty Ltd;
Where damage has been caused by misuse, neglect, accident, or excessive wear and tear.
Any claim under this warranty must be made within two (2) year of the date of purchase of the product. All warranty
claims must be made by returning the defective product to your supplier together with the proof of purchase. The
purchaser is responsible for all freight. In the event that any part of the product is found by CleanSpace Technology
to be defective, CleanSpace Technology will either repair or at its discretion replace the faulty part.
This warranty is given by:
CleanSpace Technology Pty Ltd
(ABN 24 146 453 554),
Unit 5, 39 Herbert Street,
St Leonards NSW 2065 Australia
T. +612 8436 4000
E. sales@cleanspacetechnology.com
This warranty is provided in addition to other rights and remedies you have under law. You are entitled to
replacement or refund for a major failure. You are also entitled to have the goods repaired or replaced if the goods
fail to be of acceptable quality and the failure does not amount to a major failure.
Disclaimer:
Whilst CleanSpace Technology has made every effort to ensure that the details and information given in both our
printed and online publications are accurate at the time of issue, full technical specifications are not necessarily
included. Furthermore, CleanSpace Technology has a policy of continuous improvement and the right is reserved to
alter details and information as the need arises. Accordingly, the Customer should check any details and
information they wish to rely on with CleanSpace Technology at the time of purchase. CleanSpace Technology
cannot accept liability in respect of any errors or omissions herein contained or for any loss or damage malfunction
or consequential loss arising from reliance upon our publication.
The Customer will be responsible for any risk to health or safety from goods in the Customer’s possession and/or
control. The Customer’s attention is drawn to the fact that statutory regulations and recognised codes of practice
exist covering the use and handling of some goods (including safety products). The Customer must ensure that
persons who use the goods receive adequate training and safety literature.
©2023 CleanSpace Technology Pty Ltd. All rights reserved.
No page or part of this manual may be reproduced in any form without written permission of the copyright owner
shown above. CleanSpace Technology reserves the right to correct typographical errors. All information is correct at
the time of going to print.
Notified Body (CE): BSI (2797)
The Netherlands B.V. Say building,
John M. Keynesplein 9, 1066 EP Amsterdam
The Netherlands
(EU) 2016/425, Category III
EN12942:1998/A2:2008, Class TM3
cleanspacetechnology.com/eu2016-425/
Approved Body (UKCA): BSI (0086)
Kitemark Court, Davy Avenue, Knowlhill,
Milton Keynes, MK5 8PP
(EU) 2016/425 as brought into UK Law and amended,
Category III
BS EN12942:1998/A2:2008, Class TM3
cleanspacetechnology.com/eu2016-425/
S005-770 Rev 8, 6th May 2023
Released on Change Note ECN2061

14
French
Sommaire
1 Composants du système CleanSpace2™
2 Informations importantes concernant la sécurité
3 Mode d’emploi
4 Mettre et retirer le CleanSpace2™
5 Changer les filtres du CleanSpace2™
6 Informations sur la batterie du CleanSpace2™
7 Nettoyer le CleanSpace2™
8 Fiche technique
9 Garantie du produit
Veuillez lire ces instructions parallèlement à celles concernant les filtres et accessoires du CleanSpace2™.
1. Composants du système CleanSpace2™
Le CleanSpace2™ est un appareil de protection respiratoire filtrant à ventilation assistée (PAPR) qui fait appel à des
filtres pour éliminer les contaminants en suspension dans l'air qui sont potentiellement dangereux pour l'utilisateur.
Les éléments suivants sont utilisés avec le système CleanSpace2™.
1. Système motorisé CleanSpace2™ – comprenant un chargeur, un filtre à particules, un adaptateur pour test de
débit, un harnais, des protèges-nuques (2), un manuel d'utilisation et un sac de transport.
2. Masque CleanSpace2™ – vendu séparément du système motorisé
Chargeur Sac de transport
Protège-nuque fin
Protège-nuque épais
Valve d’expiration
Adaptateur pour
test de débit
Harnais
2. Masque CleanSpace2TM
(Vendu séparément)
1. Système motorisé
Soufflets Clavier
Filtre à particules
Couvercle du filtre
Port de charge
Tige de verrouillage

15
French
2. Informations importantes concernant la sécurité
Utilisez cet appareil respiratoire en respectant strictement toutes les instructions du présent manuel d'utilisation. Ne modifiez
ni n'altérez jamais ce produit.
Ne retirez pas l'appareil respiratoire tant que vous n'avez pas quitté la zone contaminée.
Cet appareil respiratoire NE PROTÈGE PAS VOS YEUX. Dans des situations où vos yeux peuvent être
endommagés ou irrités, utilisez une protection oculaire.
N'utilisez votre appareil respiratoire qu'avec des pièces et accessoires homologuées par CleanSpace
N’utilisez pas l'appareil respiratoire s'il n'est pas en marche et ne fonctionne pas normalement.
N'utilisez pas l'appareil respiratoire CleanSpace2™ pendant qu'il est en charge via l'adaptateur secteur.
N'utilisez pas l'appareil dans des concentrations de contaminants en suspension dans l'air supérieures à celles
spécifiées dans les règlementations en vigueur de votre pays.
N'utilisez pas l'appareil pour une protection respiratoire contre des contaminants atmosphériques inconnus ou
lorsque des concentrations de contaminants sont inconnues ou présentent un danger immédiat pour la vie et la
santé (IDLH).
N'utilisez pas l'appareil dans des atmosphères à faible teneur en oxygène ou enrichies en oxygène. N'utilisez
pas l'appareil dans des environnements inflammables ou explosifs.
Ne peut être utilisé que par du personnel formé.
Les filtres doivent être changés régulièrement. La fréquence des changements dépend de l'utilisation et de la
concentration de contaminants dans l'atmosphère.
Ne l'utilisez pas à des fins d'évacuation. Les réglementations nationales peuvent imposer des limites particulières
à l'utilisation de filtres, selon la catégorie du filtre et le masque utilisé.
QUITTEZ IMMÉDIATEMENT LA ZONE CONTAMINÉE SI :
Des alarmes visuelles et sonores se déclenchent en cas de batterie faible ou de filtre saturé
Une ou plusieurs parties de l'appareil respiratoire sont endommagées
Le flux d'air dans le masque diminue ou cesse
La respiration devient difficile ou il se produit une résistance accrue
Vous êtes pris d'étourdissement ou sentez que vos voies aériennes sont irritées
Vous sentez le goût ou l'odeur des contaminants
Votre appareil respiratoire CleanSpace2™ est adapté à une utilisation dans les conditions atmosphériques
suivantes :
Température : entre -10°C et 45°C
Humidité relative : 10% à 95 % sans condensation
L'appareil respiratoire CleanSpace2™ cessera de fonctionner si sa température interne s'élève à plus de 60°C.
Si l'appareil respiratoire a été utilisé dans une zone qui a provoqué une contamination par une substance
nécessitant des procédures particulières de décontamination, il convient de le placer dans un contenant adapté et
de le sceller jusqu'à ce qu'il puisse être décontaminé.
Ne démontez pas le boîtier de l'appareil respiratoire CleanSpace2™. L'intérieur ne contient aucune pièce réparable
par l'utilisateur.
Tout manquement à suivre toutes les Instructions relatives à l'utilisation de ce produit et/ou tout manquement à
utiliser l'appareil respiratoire CleanSpace2™ pendant des périodes d'exposition, peut provoquer des effets nuisibles
pour la santé des utilisateurs et entrainer l’annulation de la garantie.
Conditions et durées minimales de conception du fabricant : les appareils CleanSpace maintiendront une
pression positive dans le masque avec un débit d’air associé à 120l/mn. Durée de fonctionnement minimale : 4
heures. Avant utilisation, pour confirmer que votre appareil de protection respiratoire peut fonctionner aux conditions
minimales de conception du fabricant, l’utilisateur doit effectuer un test de débit.

16
French
3. Mode d'emploi
BOUTON D'ALIMENTATION
L'appareil CleanSpace2™ dispose de trois (3) modes de fonctionnement : Marche, Veille et Arrêt.
i) Le mode Veille correspond aux moments où les voyants verts de batterie sont allumés, le moteur
ne tourne pas et il n'y a pas de flux d'air vers le masque. L'appareil respiratoire passe
automatiquement en mode Veille dans les dix (10) secondes après que l'utilisateur l'a enlevé. Si
l'appareil respiratoire CleanSpace2™ est en mode Arrêt, il passera en mode Veille lorsque le bouton
d'alimentation sera pressé.
ii) Le mode Marche correspond aux moments où l'appareil respiratoire est porté, le moteur tourne et
il y a un flux d'air vers le masque. Le moteur démarrera (appelé mode Marche) lorsque l'appareil
respiratoire détecte un changement dans la pression du masque déclenchée par votre respiration.
En mode Marche, vous devriez entendre le moteur tourner et sentir le flux d'air sur votre visage.
iii) Le mode Arrêt correspond aux moments où les voyants de batterie sont éteints, le moteur ne
tourne pas et il n'y a pas de flux d'air vers le masque. L'appareil respiratoire passe automatiquement
en mode Arrêt trois (3) minutes après qu'il a été retiré du visage de l'utilisateur et que les capteurs
détectent qu'il n'y a pas de « respiration ».
Afin de préserver la durée de vie de la batterie, l'appareil respiratoire CleanSpace2™ est conçu pour
passer automatiquement du mode Marche au mode Veille puis au mode Arrêt lorsqu'il n'est pas
porté. Important : Le CleanSpace2™ passe en mode Marche lorsqu'il est en mode Veille et que
l'utilisateur commence à respirer. Pour se mettre en mode Marche, l'appareil respiratoire devra
obligatoirement passer par le mode Veille.
VOYANTS DE LA BATTERIE
L'appareil respiratoire CleanSpace2™ est équipé d'un indicateur de charge de la batterie. Il existe
trois (3) voyants de batterie. Si les trois (3) voyants sont allumés, l'appareil respiratoire est
entièrement chargé et dispose généralement de six (6) heures de fonctionnement. L'appareil
respiratoire doit être entièrement chargé avant utilisation. Le CleanSpace2™ fonctionnera avec un
(1), deux (2) ou trois (3) voyants de batterie verts allumés. Si deux (2) voyants de batterie sont
allumés, l'appareil respiratoire est chargé de 25 % à 75 % et fonctionnera entre 2 et 4 heures. Si un
seul (1) voyant de batterie est allumé, la charge de la batterie est inférieure à 20 % et nous vous
recommandons de charger l'appareil respiratoire avant son utilisation.
ALARME DU FILTRE
Tous les appareils respiratoires CleanSpace2™ disposent d'une alarme du filtre qui se déclenche
lorsque le filtre à particules ou le filtre combiné est saturé. Si l'alarme du filtre retentit (deux signaux
sonores par seconde) et que le voyant d'alarme du filtre clignote, vous devez quitter la zone
contaminée, retirer l'appareil respiratoire et changer le filtre à particules (Voir dans ce manuel
d'utilisation, les instructions sur le changement des filtres CleanSpace2™)

17
French
3. Mode d’emploi (suite)
BOUTON TEST DE DÉBIT
Ce bouton sert à contrôler que l’appareil respiratoire est capable de fournir son débit nominal
minimum. Lorsque l’appareil respiratoire CleanSpace est en mode Veille (pas en mode Marche),
appuyer une fois sur le bouton pour lancer le test de débit, qui dure environ 5 secondes. Consulter la
Section 4 pour des instructions sur l'exécution du test de débit.
RECALIBRAGE / ETALONNAGE
L'appareil respiratoire CleanSpace2™ dispose d’un capteur de pression afin de garantir une régulation précise de la
pression positive à l'intérieur du masque. Lorsqu'il existe une variation de la température ambiante supérieure à
20°C entre les utilisations (par exemple, une variation de-10°C à 10°C), le capteur de pression de l'appareil
respiratoire CleanSpace2™ doit être recalibré avant utilisation. Ceci peut se faire de deux (2) façons :
1. Étalonnage automatique Pour étalonner le capteur de pression, placez l'appareil respiratoire en mode
Veille pendant au moins 20 secondes avant utilisation.
2. Étalonnage manuel Placez l'appareil respiratoire en mode Veille. Il est possible d'effectuer un
étalonnage manuel en appuyant simultanément sur le bouton d'alimentation et sur le bouton de test de
débit. Les boutons doivent être enfoncés jusqu'à ce que les deux voyants bleu et rouge soient allumés,
après quoi les boutons peuvent être relâchés. Les voyants vont rester allumés pendant quelques
secondes pendant que l'appareil respiratoire effectue l'étalonnage. L'étalonnage est terminé lorsque les
voyants bleu et rouge s'éteignent.
4. Mettre et retirer le CleanSpace2™
ÉTAPE 1. PREPARATION AVANT UTILISATION
Vérifiez que l'appareil respiratoire CleanSpace2™ est complet et non endommagé. Si des pièces sont endommagées
ou défectueuses, l'appareil respiratoire ne doit pas être utilisé.
Remarque : Le système motorisé du CleanSpace2™ n'est pas fourni avec un masque. Le masque est vendu
séparément et disponible en trois (3) tailles (petit, moyen et grand). Vous devrez acheter et monter un masque
CleanSpace™ avant d'utiliser le système CleanSpace2™.
Avant utilisation, suivez les procédures ci-dessous :
Soulevez la tige de verrouillage du couvercle de filtre pour l’ouvrir et vérifier qu'un filtre est bien en place
Vérifiez que la batterie est chargée en appuyant sur le bouton d'alimentation. Nous recommandons
d'avoir au moins 2 voyants verts allumés avant utilisation. À ce niveau de charge, l'appareil respiratoire a
une charge comprise entre 25 % et 75 % et fonctionnera entre 2 et 4 heures. Si la batterie doit être
chargée, laissez l'appareil respiratoire charger pendant au moins 2 heures avant utilisation.
Vérifiez le masque pour vous assurer qu'il n'est pas craquelé, déchiré ou sale, vérifiez qu'il n'est pas
tordu.
Retirez le cache de la valve d’expiration et vérifiez soigneusement qu’elle n'est pas craquelée, déchirée
ou sale. Retirez toute saleté, cheveux ou quoi que ce soit qui pourrait gêner le joint de la valve dans son
logement. Remplacez la valve si elle est craquelée ou déchirée. Replacez le cache de la valve.
Vérifiez que le harnais est intact et que son élasticité est bonne.
Test de débit
L'appareil CleanSpace2 doit être soumis à un test pour vérifier la performance de son débit par rapport
au débit minimum de conception du fabricant (MMDF) de 120 litres/minute. Nous conseillons d'effectuer
ce test avant chaque utilisation.

18
French
4. Mettre et retirer le CleanSpace2™ (suite)
Pour réaliser un test de débit :
1. Fixez l’adaptateur pour test de débit jaune au soufflet
gauche
2. Laissez le filtre en place et appuyez sur le bouton ON
pour mettre l’appareil en en mode Veille.
3. Appuyez sur le bouton « Flow Test » et relâchez-le.
4. L'appareil CleanSpace2 effectue automatiquement le
test de de débit.
5. Après 2 secondes, l'appareil CleanSpace2 indique le
résultat au moyen des LED du clavier, comme suit :
3 LEDs Filtre correct et batterie correcte (>180 l/min)
2 LEDs Filtre ok et batterie correcte
1 LED Le filtre doit être changé bientôt ou la batterie doit être chargée
3 LED et LED
rouge du filtre
clignotante
Le flux d'air du système est trop faible (<120 l/min) pour fonctionner.
N'utilisez pas l'appareil CleanSpace2™ avant d'avoir monté un filtre neuf et/ou
chargé la batterie.
Si le flux d'air du système est trop faible, réinitialisez l'appareil respiratoire en
appuyant sur le bouton Marche afin de mettre les LED sur Arrêt puis chargez
entièrement la batterie et/ou remplacez le filtre.
Répétez le test de débit.
Si l'appareil CleanSpace2™ échoue de nouveau au test, prenez contact avec
CleanSpace Technology et ne l'utilisez pas tant qu'il n'a pas été diagnostiqué.
6. Retirez le cache jaune de test de débit.
Remarque : Pendant le test de débit, les LED restent allumées pendant 10 secondes après quoi l'appareil
CleanSpace2 et les LED s'éteignent.
ÉTAPE 2. MISE EN PLACE DE L'APPAREIL RESPIRATOIRE
Vérifiez que le masque et le système motorisé sont correctement montés et sont dans le bon sens. La partie nasale
du masque et le clavier du système motorisé doivent être alignés. Familiarisez-vous avec le clavier et les trois (3)
modes de fonctionnement (voir la section sur les fonctionnalités du mode d’emploi).
Pour raccorder le masque au système motorisé, localisez les clips noirs situés à l'extrémité des bras du masque et
les clips noirs correspondants sur les soufflets du système motorisé. Pour le raccordement, fixez un côté du masque
au soufflet.
Familiarisez-vous avec les boutons de réglage des soufflets et vérifiez que le réglage des soufflets est sur la position
la plus lâche et que les deux soufflets sont pleinement déployés. Familiarisez-vous avec les boutons de fixation du
masque de chaque côté des soufflets. Laissez l'autre bras du masque et l'autre soufflet défaits jusqu'à ce que vous
mettiez l'appareil respiratoire.
Fixation du harnais
Pour raccorder le harnais, localisez les deux (2) sangles sur le côté et celle de l’arrière. Accrochez les clips sur les
deux points de contact latéraux des sangles sur le système motorisé et le masque. Sur le harnais, deux (2) clips
sont fixés sur les côtés du masque, et l'attache Velcro se fixe sous le protège-nuque à l'arrière du système motorisé.

19
French
4. Mettre et retirer le CleanSpace2™ (suite)
ÉTAPE 3. METTRE L'APPAREIL RESPIRATOIRE
Pour mettre l'appareil respiratoire, suivez la procédure ci-dessous :
Vérifiez que l'appareil respiratoire est en mode Veille avec les voyants de batterie allumés et que le
moteur ne soit pas en marche.
Assurez-vous qu'un côté du masque est détaché et placez le système motorisé sur la nuque.
Placez le masque sur votre visage, en plaçant votre menton dans le bas du masque et en positionnant le
masque sur votre nez et votre bouche.
Fixez le bras libre du masque au système motorisé, sur le soufflet, pour attacher l'appareil respiratoire
autour de votre cou. Ajustez et resserrez le masque en plaçant une main dessus et l'autre à l'arrière du
système motorisé ; poussez-les doucement l'un vers l'autre. Vous devez entendre plusieurs clics lorsque
les clips de réglage se tendent. Le masque doit former un joint fermé sur votre visage mais ne doit pas
être serré.
Respirez normalement. Le CleanSpace2™ réagira à votre respiration et le moteur démarrera
automatiquement, passant du mode Veille au mode Marche. Remarque : Le flux d'air (mode Marche) se
déclenche lorsque vous respirez. Le flux d'air commence à la deuxième (2e) respiration. En mode
Marche, lorsque le flux d'air a commencé, vous devez entendre le moteur et le ventilateur et sentir l'air
sur votre visage.
Vérifiez la position du harnais sur votre tête et assurez-vous qu'elle est confortable. Veillez à ce que le harnais
soutienne correctement l'appareil respiratoire et qu'il n'interfère pas avec le joint du masque. Si le harnais doit être
réglé pour un meilleur confort, ajustez la longueur des sangles avant et/ou arrière.
Réglage de l'appareil respiratoire
L'appareil respiratoire doit être serré pour permettre l’étanchéité et un ajustement confortable et sûr sur votre visage.
Il existe trois façons de régler l'appareil respiratoire :
1. Réglez la longueur des soufflets sur le système motorisé. Pour serrer, poussez le masque et l'appareil respiratoire
l'un vers l'autre. Vous devez entendre « clic, clic » lorsque les réglages se resserrent. Pour relâcher les bras,
poussez les boutons de réglage des deux côtés et tirez le masque en l'éloignant du système motorisé.
2. Utilisez les protèges-nuques de différentes tailles (fin et épais). Par exemple, pour un ajustement plus serré,
utilisez le protège-nuque épais ; pour un ajustement plus lâche, utilisez le protège-nuque fin.
3. Utilisez un masque de taille différente (petit, moyen et grand). L'appareil respiratoire CleanSpace2™ peut être
utilisé avec un masque en silicone petit, moyen ou grand. Le masque approprié doit être choisi et fixé avant
utilisation.
Vérification de l’ajustement au visage
L'ajustement de l'appareil respiratoire CleanSpace2™ peut être vérifié en utilisant l’adaptateur Portacount pour le test
d’ajustement (fit test), en consultant un spécialiste de la sécurité respiratoire.
Lorsque l'appareil respiratoire CleanSpace2™ est porté (en suivant la procédure indiquée à « Mettre le CleanSpace2™ ») et
que le masque est correctement monté, l'air que vous exhalez doit s'écouler par la valve d’expiration du masque. Si de l'air
s'échappe autour du joint du masque (par ex. dans vos yeux), réglez correctement le masque jusqu'à ce que ce phénomène
cesse ou soit réduit. Si vous n’obtenez pas une étanchéité acceptable, il vous faudra peut-être une taille de masque
différente ou demander l'aide d'un spécialiste de la sécurité respiratoire qui vous aidera à mettre l'appareil respiratoire.
L'appareil respiratoire ne doit pas être porté dans une zone contaminée si l'utilisateur n'obtient pas un bon ajustement du
masque.
Retrait de l'appareil respiratoire
Pour retirer l'appareil respiratoire, trouvez le clip de fixation sur un côté des soufflets et appuyez pour enlever le masque du
système motorisé, ce qui vous permet de retirer l'appareil respiratoire. Remarque : Il n'y a pas d'interrupteur ARRÊT. Le
moteur de l'appareil respiratoire s'éteint automatiquement et passe en mode Veille au bout d'environ 5-10 secondes sans
détection de respiration. En mode Veille, après trois (3) minutes sans détection de respiration, l'appareil respiratoire passe
automatiquement en mode Arrêt. En mode Arrêt, tous les voyants de charge sont éteints et le moteur ne sera pas déclenché
par la respiration de l'utilisateur.
NE RETIREZ PAS L'APPAREIL RESPIRATOIRE TANT QUE VOUS N'AVEZ PAS QUITTÉ LA ZONE
CONTAMINÉE.
Other manuals for CleanSpace2
2
This manual suits for next models
1
Table of contents
Languages:
Other CleanSpace Respiratory Product manuals
CleanSpace
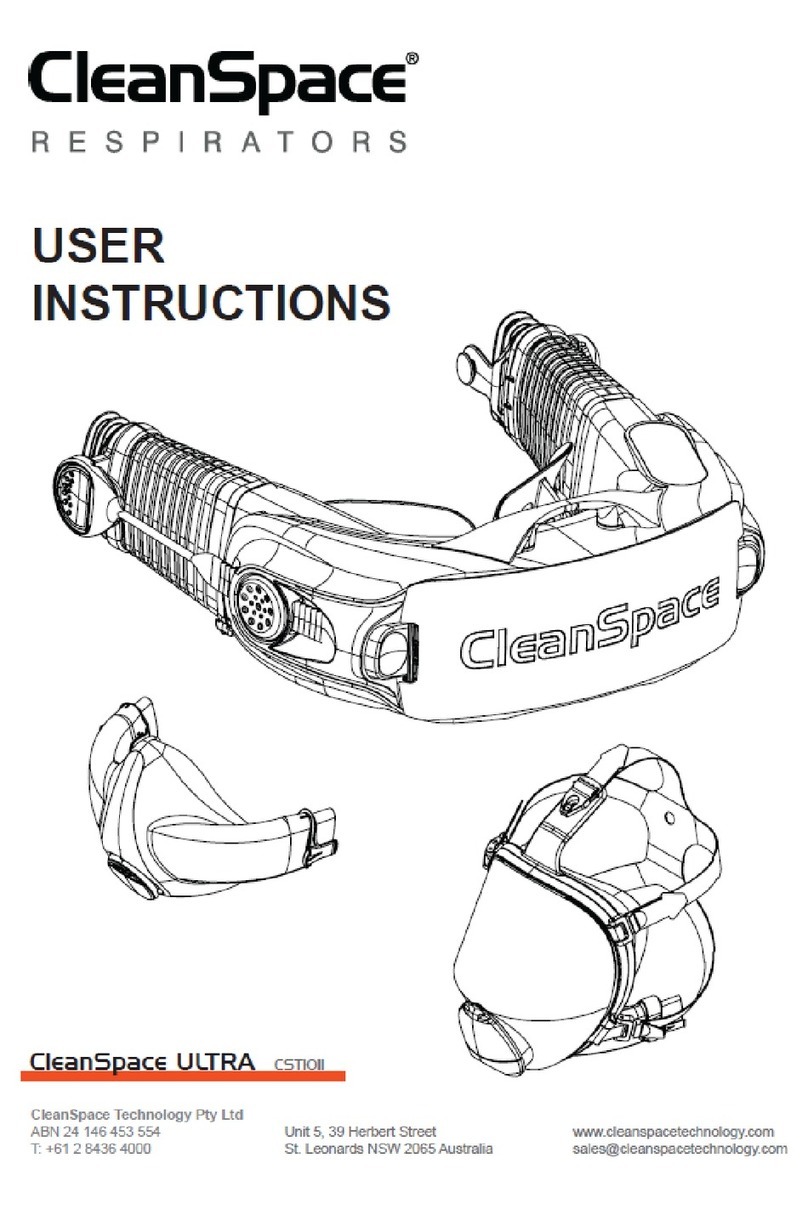
CleanSpace ULTRA Installation instructions
CleanSpace
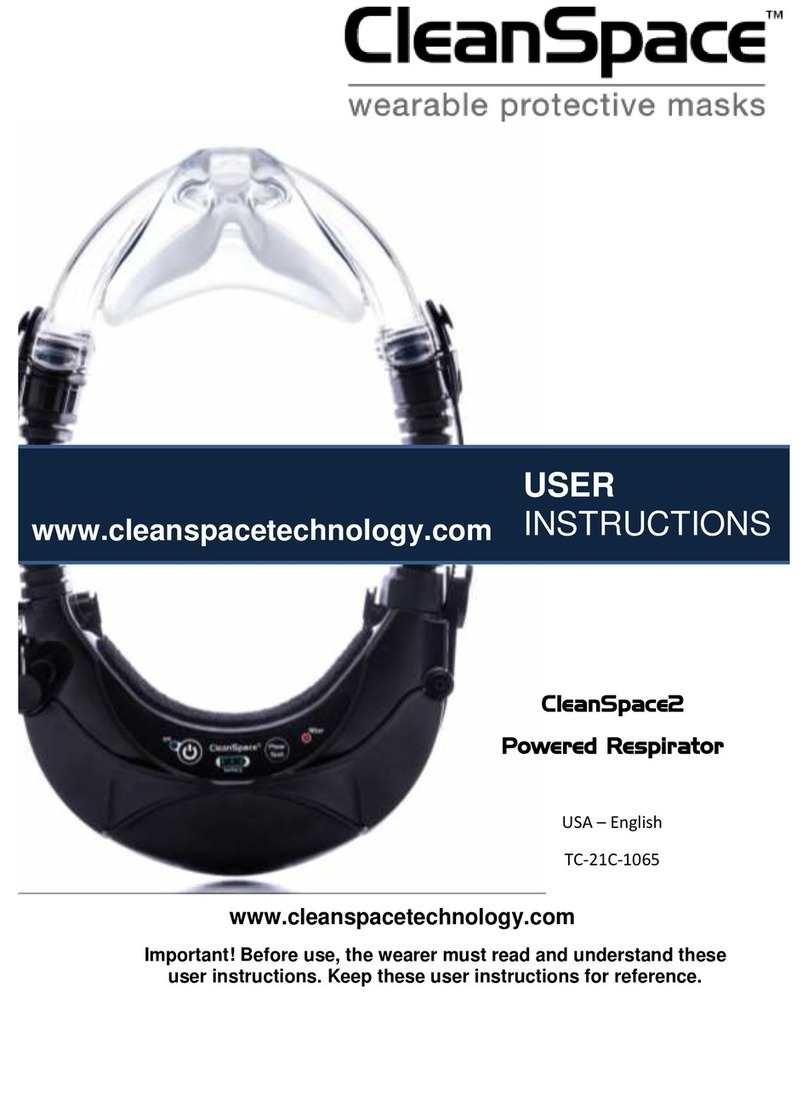
CleanSpace CleanSpace2 User manual
CleanSpace
CleanSpace EX User manual

CleanSpace
CleanSpace PRO User manual
CleanSpace
CleanSpace HALO User manual

CleanSpace
CleanSpace HALO User manual

CleanSpace
CleanSpace HALO User manual
CleanSpace
CleanSpace ULTRA User manual
CleanSpace
CleanSpace CS302 User manual
CleanSpace
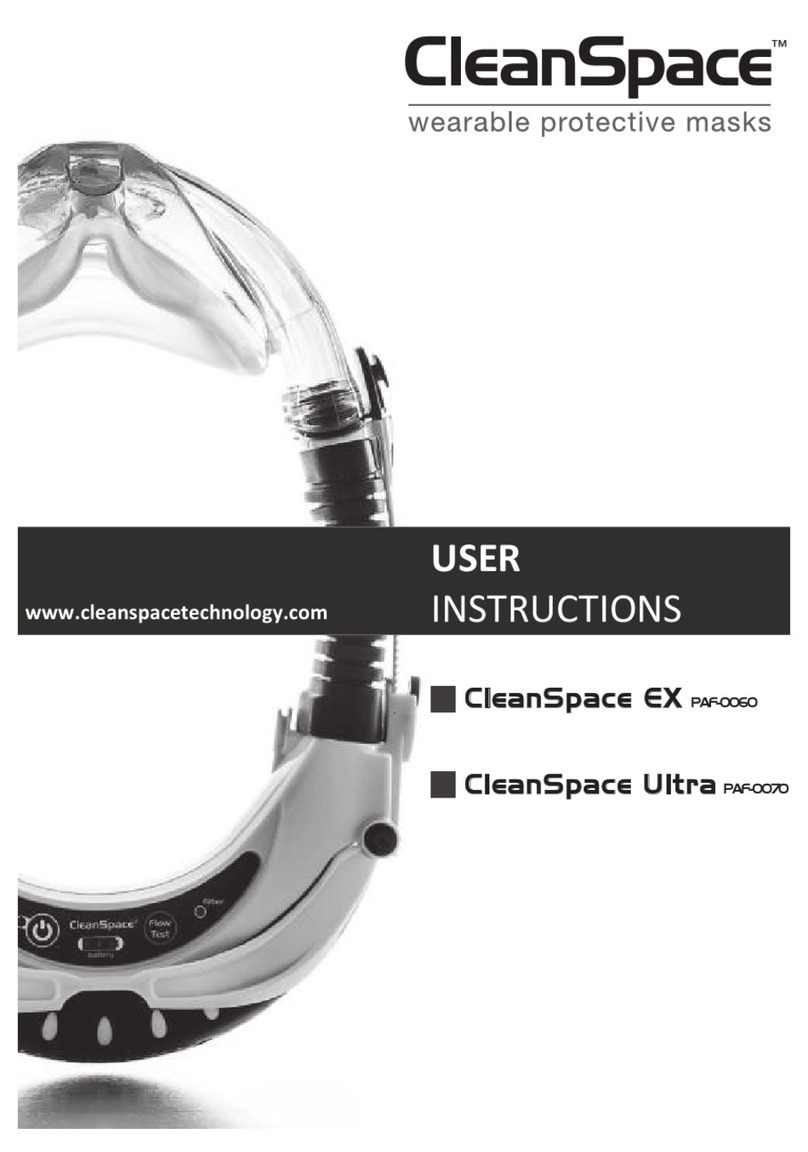
CleanSpace PAF-0060 User manual
