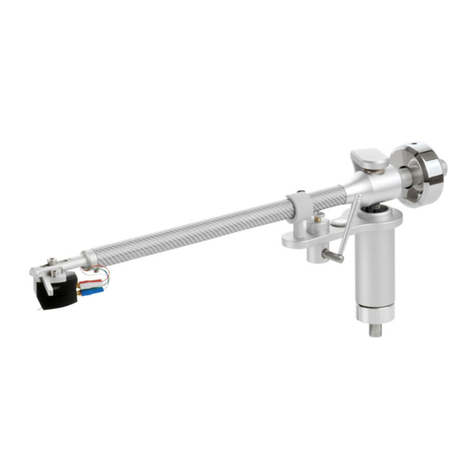
Clearaudio Clarify User manual

User manual
Bedienungsanleitung
© clearaudio electronic GmbH, 2022-01 Made in Germany
Clarify
Pic. similar /
Abb. ähnlich

User manual / Bedienungsanleitung
Page / Seite 2 © clearaudio electronic GmbH, 2022-01
User manual..............................................................2 - 14
Bedienungsanleitung ................................................15 - 27
Dear Clearaudio customer,
Thank you for purchasing the Clearaudio
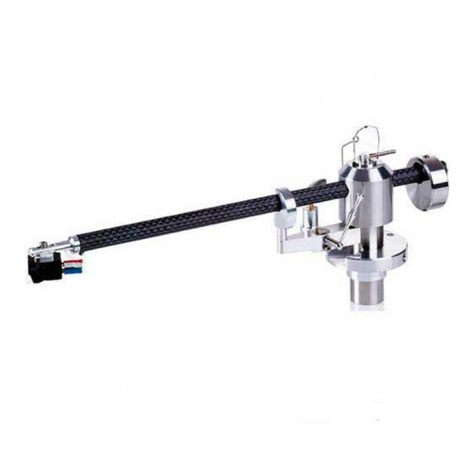
Clarify
radial tonearm.
The innovative
Clarify
tonearm features friction-free magnetic bearing technology, a micrometer-
style adjustable counter weight and an azimuth adjustable headshell, which is especially designed
to allow easy and accurate alignment of the phono cartridge.
Clearaudio recommend the
Clarify
tonearm in combination with the “Ovation” turntable and any of
the Clearaudio MC cartridges.
Made in Germany by true expert craftsmen, the latest Clearaudio technology and a timeless design
combine to ensure the best possible sound enjoyment.
Please read this instruction manual carefully, to avoid any damage or loss of warranty.
This manual will help you achieve an easy setup and guarantees the highest pleasure for a long
time.
We wish you a lot of listening pleasure with your new Clearaudio
Clarify
tonearm.
Clearaudio electronic GmbH

User manual / Bedienungsanleitung
Made in Germany Page / Seite 3
Safety instructions
1. Maintenance
If you don`t use your
Clarify
tonearm for a longer time, please move the tonearm lifter in regular
intervals. This avoid that the tonearm hang in a position when you listen to the music again.
Before using it for the rst time or after a long period of inactivity, the lift should be operated
approximately 4-5 times so that the grease in the tonarm lift can be loosened and the lift bar is able
to evenly lower again.
2. Transportation
Should further transportation of the
Clarify
tonearm be necessary, please alway use the original
packing material. Otherwise serious damage could occur.
3. Service
If any servicing or repair of a Clearaudio product is necessary, please rst contact your dealer or
distributor. Alternatively contact Clearaudio directly and we will advise you of your nearest service
location.
PLEASE RETAIN ALL ORIGINAL PACKAGING. You will need it if this product has to be transported
and/or shipped. Any further questions you may have about this product should be directed to your
local dealer.
4. Safety instructions
Disposal
This product is not allowed to be disposed with household waste.
WEEE Reg.No.: DE26004446
Do not expose the equipment to rain or moisture.
Do not handle the mains lead with wet hands.
No naked ame sources, such as lighted candles, should be placed on the equipment.
Only for use on turntables.

User manual / Bedienungsanleitung
Page / Seite 4 © clearaudio electronic GmbH, 2022-01
Contents
1. List of components.......................................................................... 5
2. Mounting the tonearm base
2.1 Mounting the tonearm base on the Clearaudio Performance DC or Ovation turntable..... 6
2.2 Mounting the clamping ring on a other manufacturers’ turntables...................................7
3. Mounting the
Clarify
tonearm ......................................................... 8
4. Adjustment of the distance between spindle and pivot point .........9
5. Adjustment of the tonearm
5.1 Adjustment of the VTA ....................................................................................................... 10
5.2 Alignment and adjustment of the cartridge.......................................................................11
5.3 Adjustment of the tracking force.......................................................................................12
5.4 Adjustment of the azimuth.................................................................................................12
5.5 Adjustment of the anti-skating..........................................................................................13
6. Technical data ..................................................................................14
Warranty information.......................................................................... 28 - 29

User manual / Bedienungsanleitung
Made in Germany Page / Seite 5
1. List of components
The Clearaudio
Clarify
tonearm is delivered in a customized packing to ensure its safe transport.
Please retain the original packaging for any future potential transportation and shipping.
Please see the list below to check the contents of your Clearaudio
Clarify
tonearm.
1.
Clarify
carbon bre tonearm 5. Without picture:
Additional counterweight: 35.75 g
- at head screw M3 x 8
2. Clamping base 6. Without picture:
Warranty Card, Clearaudio Quality Card,
user manual, return delivery note
3. Hex wrench (#2 /3)
Screw driver
7. Without picture:
Tonearm alignment gauge
4. Screws:
- 3x hex screws M4 x 10
(stainless steel)
- 1x grub screw M6 x 8
(stainless steel)
Pic. 1: Package content (Pic. similar)
Recommended Tools:
• Clearaudio Cartridge alignment gauge (Art. No. AC005/IEC)
• Clearaudio Weight Watcher touch (Art. No. AC163)
• Clearaudio Mini Level Gauge (Art. No. AK001)
This items and more accessories are available through your dealer or at www.analogshop.de.
2 3 4
1

User manual / Bedienungsanleitung
Page / Seite 6 © clearaudio electronic GmbH, 2022-01
2. Mounting the tonearm base
2.1 Mounting the tonearm base on the Clearaudio Performance DC or Ovation turntable
Please check, that the correct tonearm base is mounted on your turntable (Pic. 2).
If the wrong tonearm base is mounted, place the turntable on the edge of a table or similar surface,
so you have access to the tonearm base from below.
Remove the previous tonearm base by loosening the six M4 x 35mm screws with a hex wrench on
the bottom side of the clamping ring.
Exchange the tonearm base for the correct one and loosely tighten it so the tonearm base is still
rotatable. Please make sure that the base sits perfect on the turntable.
Pic. 2: Tonearm base for Performance DC & Ovation (Art. No. AC031-4)

User manual / Bedienungsanleitung
Made in Germany Page / Seite 7
2.2 Mounting the clamping ring on a other manufacturers’ turntables
In order to mount the aluminium clamping ring on the turntable chassis, please rst drill three holes
into the turntable chassis.
To ensure the correct position of the three holes, please use the measurements given in the drawing
template below (Pic. 3).
Please note that this image is not true to scale.
For this step, use a 3.3mm drill. After you have drilled the three holes, thread the holes using an
appropriate tap cutter. If the material of the turntable chassis is not suitable for threading, please
use a 4.5mm drill for the holes. In this case you will need longer screws with nuts to t the tonearm
base.
Pic. 3: Drilling template for mounting the tonearm base on a other manufacturers‘ turntable

User manual / Bedienungsanleitung
Page / Seite 8 © clearaudio electronic GmbH, 2022-01
Pic. 5: Mounting the tonearm
Pic. 4: Assembling the arm base
Pic. 6: Locking the tonearm
3. Mounting the
Clarify
tonearm
Take the clamping ring and place it on the
recess in the tonearm base.
Now you can attach the clamping ring to the
tonearm base with the 3 supplied M4 x 10
screws.
Make sure that the side hole of the clamping
ring (see Pic. 4) remains accessible.
Insert the tonearm cable rst and then the
tonearm foot of the
Clarify
tonearm into the
hole of the clamping ring (Pic. 5).
Now x the tonearm with the screws and the
hex wrench (Pic. 6), do not over-tighten, so
that you can nally adjust it later!

User manual / Bedienungsanleitung
Made in Germany Page / Seite 9
4. Adjustment of the distance between spindle and pivot point
For the exact setting of the tonearm pivot point, we recommend to use the Clearaudio alignment
gauge (Art. No. AC005/IEC, also available from www.analogshop.de).
Make sure that the distance between spindle and the pivot point of the tonearm is exactly 222mm.
You can adjust the distance by rotating the tonearm base.
Please tighten the tonearm base and check the measurement again.
Pic. 7: Distance from pivot to stylus
222 mm
5. Adjustment of the tonearm
The following settings require to mount the cartridge on the headshell.
Always follow the cartridge manufacturer’s instructions.
Leave the stylus protector on your cartridge to avoid
any damages!
Now you can connect the respective signal cable with the
matching color pins of the cartridge.
Please note the following colour coding:
Red: right channel / R+
Green: right channel / R
White: left channel / L+
Blue: left channel / L
Connect the pins of your cartridge to the jacks of the headshell or tonearm cable, taking care not
to use too much force.
If necessary, you can use suitable precision pliers or tweezers for assistance.
Pic. 8: Mounting the cartridge

User manual / Bedienungsanleitung
Page / Seite 10 © clearaudio electronic GmbH, 2022-01
Pic. 9: Fixing the tonearm height
5.1 Adjustment of the VTA
The tonearm remains loose in the clamping ring and is not screwed tight. Now place a record or
the Clearaudio alignment gauge (Art. No. AC005/IEC) on the turntable and remove the stylus
protector from your cartridge.
Make sure that the tracking force is roughly adjusted in order not to damage the cartridge.
Please be extremely careful during the following steps!
Never move the cartridge in the alignment gauge while it is lowered.
Use the lift to lower the tonearm and check if the tonearm tube is parallel to the platter.
The tonearm tube should not touch the lift bracket, but the needle must rest on the record or the
alignment gauge.
If the tonearm tube is not parallel, but shows a slight incline, put the tonearm tube back in the rest
position.
Now carefully lower/raise the entire tonearm in the clamping ring so that the tonearm tube is
parallel to the platter.
While the tonearm is in this position you can hand-tight the clamping ring.
After xing, you can re-check the setting using the Mini Level Gauge and correct if necessary.
If the position is still correct, you can put the tonearm back in the rest position holder and put the
stylus protector back on

User manual / Bedienungsanleitung
Made in Germany Page / Seite 11
5.2 Alignment and adjustment of the
cartridge
For the nal tonearm and cartridge adjustment you
will need the adjustment template which is also
included in the scope of the delivery.
Place it directly on the turntable (without record)
and align it so that the arrow points to the tonearm
pivot point (Pic. 10).
Take the tonearm out of the rest position and align
it in the area of the cross lines.
Lower the tonearm and check the alignment.
The cartridge body must be aligned in the template
grid so that the needle tip is in the cross lines.
Also the side and front edges of the housing have
to be parallel to the grid lines.
To correct the adjustment, you have to loosen the
screws of the cartridge a little so that the cartridge
can be moved in the headshell.
Re-check the setting again after you have tightened
the screws.
Pic. 10: Alignment of the tonearm
Pic. 11: The tonearm tube must be absolutely parallel
Pic. 12: Stylus tip on reference point

User manual / Bedienungsanleitung
Page / Seite 12 © clearaudio electronic GmbH, 2022-01
5.3 Adjustment of the tracking force
To increase or lower the tracking force, you have to turn the adjustment screw at the end of the
tonearm.
red arrow (to the end of the tonearm)
= lower tracking force ->
turn the knob clockwise
green arrow (to the beginning of the tonearm)
= more tracking force ->
turn the knob anti-clockwise
Please follow the instructions of the respective cartridge manufacturer.
Forthe correctsettingwe recommendusing the„Clearaudio WeightWatchertouch“digitalcartridge
scale (Art. No. AC163, also available at www.analogshop.de).
Pic. 13: Adjustment of the tracking force
Pic. 14: Azimuth adjustment
5.4 Adjustment of the azimuth
Please note:
The azimuth is already set at the factory.
To increase or lower the tracking force, you have to turn the adjustment screw at the end of the
tonearm.
The azimuth is the angle of the cartridge stylus to the record surface. Viewed from the front, the
cartridge needle have to be vertical to the record.
If you still want to optimize the azimuth, lower the
cartridge onto the record surface and check the position
of the needle.
To change the azimuth, please proceed as following:
Loosen the screw (hex wrench #2) on the bottom side of
the tonearm tube near the headshell.
Now you can adjust the azimuth by turning the headshell
in the tonearm tube.
After you have found the correct position, carefully tighten the small hex screw again without
changing the previously selected position.
To check this adjustment, we recommend the Clearaudio „Mini Level Gauge“ (Art. No. AK001,
available at www.analogshop.de).

User manual / Bedienungsanleitung
Made in Germany Page / Seite 13
Pic. 15: Adjustment of the Antiskating
Pic. 16: Marking anti-skating screw
5.5 Adjustment of the anti-skating
The anti-skating is already preset by Clearaudio.
There is an adjusting screw on the underside of the
tonearm to adjust the anti-skating.
This setting is marked with a black line on your tonearm
(viewed from below).
You can change the anti-skating as follows:
Turn clockwise (max. 5 turns) = stronger anti-skating
Turn counterclockwise (max. 5 turns) = less anti-skating
For a professional and perfect anti-skating setting, we recommend the Clearaudio Trackablity Test
Record available from www.analogshop.de or from your specialist retailer.
The tonearm adjustment is now complete.
Before connecting the tonearm to your phono pre-amplier, we recommend to re-check all settings
again and correct them if necessary.
We hope you enjoy your new
Clarify
tonearm.
Your Clearaudio team

User manual / Bedienungsanleitung
Page / Seite 14 © clearaudio electronic GmbH, 2022-01
6. Technical data
Construction details: Radial tonearm
With friction free magnetic bearing technology
Material: Aluminium (silver), stainless steel, carbon tonearm tube
(silver)
Cartridge balance range: 2.5g - 17g
Overhang: 17.33mm
Total length: 330mm
Eective length: 239.25mm
Mounting distance
(tonearm pivot to spindle): 222mm
Oset angle: 25.45°
Wiring: 1.1m Clearaudio Direct Wire Plus terminated with RCA
Weight: 410g
Manufacturer’s warranty: 2 years*
* Provided that the warranty card is correctly completed and returned to Clearaudio, or your product is registered
online at https://clearaudio.de/en/service/registration.php, within 14 days of purchase.

User manual / Bedienungsanleitung
Made in Germany Page / Seite 15
Sehr verehrte clearaudio – Kundin, sehr verehrter clearaudio – Kunde,
Der
Clarify
TonarmverfügtübereinereibungsfreieMagnetlagerung,eineFeineinstellungdesGewichts
mittels drehbaren Gegengewicht sowie ranierte Optionen für die Feinjustage des Headshells und
ist so gestaltet, dass Sie diesen sehr einfach und komfortabel montieren können.
Clearaudio empehlt den
Clarify
Tonarm in Kombination mit dem
Ovation
Plattenspieler und einem
MC Tonabnehmer aus der clearaudio Serie. Der Tonarm ist jedoch auch auf den meisten anderen
Plattenspielern montierbar.
Höchste Ansprüche und Made in Germany, kombiniert mit Technologie und einem zeitlosem Design
lassen bestmöglichen High End Musikgenuss zu einem unschlagbaren Preis wahr werden!
Um alle Vorteile des
Clarify
Tonarms nutzen zu können, lesen Sie bitte diese Bedienungsanleitung
aufmerksam durch.
Alle Hinweise dienen dem Ausschöpfen der vollen Klangeigenschaften und bewahren Sie vor
Fehlbedienungen.
Wir wünschen Ihnen viel Freude mit Ihrem neuen clearaudio
Clarify
Tonarm.
clearaudio electronic GmbH

User manual / Bedienungsanleitung
Page / Seite 16 © clearaudio electronic GmbH, 2022-01
Sicherheitshinweise
1. Wartung
Falls Sie Ihren clearaudio
Clarify
Tonarm längere Zeit nicht benutzen, empfehlen wir Ihnen den
Tonarmlift in regelmäßigen Abständen zu bewegen, um das Lagerfett geschmeidig zu halten und ein
mögliches Haken des Tonarms beim Abspielen zu vermeiden.
Vor dem erstmaligen Benutzen oder nach längerem Stillstand muss der Lift ca. 4-5x betätigt werden,
damit sich das Fett im Tonarmlift lösen kann und der Liftbügel somit wieder gleichmäßig abgesenkt
wird.
2. Transport
Sollte ein weiterer Transport des
Clarify
Tonarms erforderlich sein, verwenden Sie immer nur die
Originalverpackung. Andernfalls könnte Ihr Tonarm ernsthafte Schäden davon tragen.
3. Pege
Wenn eine Wartung oder Reparatur an einem clearaudio Produkt erforderlich ist, wenden Sie sich
bitte zuerst immer an Ihren Händler oder Vertriebspartner. Alternativ können Sie clearaudio direkt
kontaktieren und wir werden Sie über Ihre nächstgelegenen Servicestelle informieren.
Bewahren Sie die vollständige Originalverpackung auf. Sie benötigen diese, wenn das Produkt
transportiert und / oder verschickt werden soll.
Alle weiteren Fragen zu diesem Produkt können Sie an ihren örtlichen Fachhändler richten.
4. Sicherheitshinweise
Entsorgung
Dieses Produkt darf nicht zusammen mit Restmüll entsorgt werden.
WEEE Reg.Nr.: DE26004446
Das Gerät nicht Regen oder Feuchtigkeit aussetzen.
Das Netzkabel nicht mit feuchten oder nassen Händen anfassen.
Es dürfen keine Gegenstände mit oener Flamme, wie etwa brennende Kerzen, auf dem
Gerät aufgestellt werden.
Zur ausschließlichen Verwendung auf Plattenspielern.

User manual / Bedienungsanleitung
Made in Germany Page / Seite 17
Inhaltsverzeichnis
1. Verpackungsübersicht .............................................................................18
2. Befestigung der Tonarmbasis
2.1 ...auf einem clearaudio Performance DC / Ovation Laufwerk ......................................19
2.2 Montage des Aluminium-Klemmrings auf einem Laufwerk anderer Hersteller............20
3. Montage des
Clarify
Tonarms ..................................................................21
4. Einstellung des Achsabstands von Tellerspindel zu Tonarmdrehpunkt...22
5. Einstellung des Tonarms
5.1 Einstellung des VTA.......................................................................................................23
5.2 Korrekte Ausrichtung und Einstellung des Tonabnehmers...........................................24
5.3 Einstellen des Auagegewichts ....................................................................................25
5.4 Einstellung des Azimuth................................................................................................25
5.5 Einstellung des Antiskating...........................................................................................26
6. Technische Daten.....................................................................................27
Garantieinformationen.................................................................................28 - 29

User manual / Bedienungsanleitung
Page / Seite 18 © clearaudio electronic GmbH, 2022-01
1. Verpackungsübersicht
Der clearaudio
Clarify
Tonarm wird in einer speziellen Verpackung geliefert, die einen sicheren
Transport gewährleistet. Bitte heben Sie die Verpackung für Transportzwecke unbedingt auf.
Bitte kontrollieren Sie anhand der unten aufgeführten Liste den Lieferumfang Ihres neu erworbenen
Tonarms. Dieser besteht aus:
1.
Clarify
Carbon Tonarm 5. Zusätzliches Gegengewicht: 35,75 g
(ohne Abbildung)
- M3 x 8 Senkkopfschrauben
2.
Clarify
Klemmring 6. Garantie- und Qualitätskarte,
Rücklieferschein (ohne Abbildung)
3. Innensechskantschlüssel:
- 3 mm
- 2 mm
Schraubendreher
7. Tonarmeinstellschablone
(ohne Abbildung)
4. Schrauben:
- 3 x Innensechskantschrauben M4 x
10 DIN912
- 1 x Madenschrauben M6 x 8 V2A
(Edelstahl)
Abb. 1: Verpackungsübersicht
2 3 41
Empfohlenes Zubehör:
• clearaudio Cartridge alignment gauge Art. Nr. AC005/IEC;
• clearaudio Weight Watcher touch Art. Nr. AC163;
• clearaudio Mini Level Gauge Art. Nr. AK001
Diese Produkte und viele weitere Zubehörartikel sind erhältlich über unseren Fachhandel oder unter
www.analogshop.de.

User manual / Bedienungsanleitung
Made in Germany Page / Seite 19
2. Befestigung der Tonarmbasis
2.1 Befestigung der Tonarmbasis auf einem clearaudio Performance DC / Ovation
Laufwerk
Überprüfen Sie zunächst, ob die korrekte Tonarmbasis zur Montage des
Clarify
Tonarmes auf Ihrem
Laufwerk befestigt ist (Abb. 2).
Ist ein Austausch der Tonarmbasis nötig, stellen Sie das Laufwerk z.B. über die Ecke eines Tisches
damit die Tonarmbasis von unten frei zugänglich ist. Nehmen Sie die vorherige Tonarmbasis ab,
indem Sie mithilfe eines Innensechskantschlüssels die sechs M4 x 35 Schrauben auf der Unterseite
des Klemmrings lösen.
Schrauben Sie die korrekte Tonarmbasis wieder locker im Gewinde fest, damit die Tonarmbasis sich
weiterhin zur Feinjustage drehen lässt.
Achten Sie auf passgenauen Sitz und planebene Montageächen.
Abb. 2: Tonarmbasis für Performance DC & Ovation (Art. Nr. AC031-4)

User manual / Bedienungsanleitung
Page / Seite 20 © clearaudio electronic GmbH, 2022-01
2.2 Montage des Aluminium-Klemmrings auf einem Laufwerk anderer Hersteller
Um den Aluminium-Klemmring auf dem Laufwerkchassis anbringen zu können, müssen erst
die Bohrungen zur Befestigung angebracht werden. Die Maße zum Anzeichnen der exakten
Bohrlochabstände entnehmen Sie bitte der unten abgebildeten Bohrschablone (siehe Abb. 3).
Bitte beachten Sie, dass diese Abbildung nicht maßstabsgetreu ist.
Verwenden sie für die Bohrungen einen 3,3 mm HSS-Spiralbohrer. Anschließend schneiden Sie in die
Bohrungen mit einem Gewindebohrer jeweils M4-Gewinde.
Ist das Material des Laufwerkchassis nicht dazu geeignet, es mit Gewinden zu versehen, verwenden
Sie bitte einen 4,5 mm HSS-Spiralbohrer, um die Bohrungen durch das Material zu bohren. In diesem
Fall können Sie den Klemmring mit handelsüblichen Schrauben in der entsprechenden Länge und
den dazu passenden Muttern befestigen (V2A-Inbus).
Abb. 3: Bohrschablone für die Montage des Klemmringes auf einem Laufwerk eines anderem Herstellers
Other manuals for Clarify
3
Table of contents
Languages:
Other Clearaudio Accessories manuals

Clearaudio
Clearaudio Clarify User manual

Clearaudio
Clearaudio Talismann V2 Gold User manual

Clearaudio
Clearaudio TT5 User manual

Clearaudio
Clearaudio Talismann V2 Gold User manual

Clearaudio
Clearaudio Concept User manual

Clearaudio
Clearaudio Satisfy Kardan User manual

Clearaudio
Clearaudio TT5 User manual

Clearaudio
Clearaudio TT3 User manual

Clearaudio
Clearaudio Tangent User manual

Clearaudio
Clearaudio Unify Series User manual