manuals.online logo
Brands
  1. Home
  2. •
  3. Brands
  4. •
  5. Cole Parmer
  6. •
  7. Laboratory Equipment
  8. •
  9. Cole Parmer SPEX SAMPLEPREP 2010 GENO/GRINDER User manual

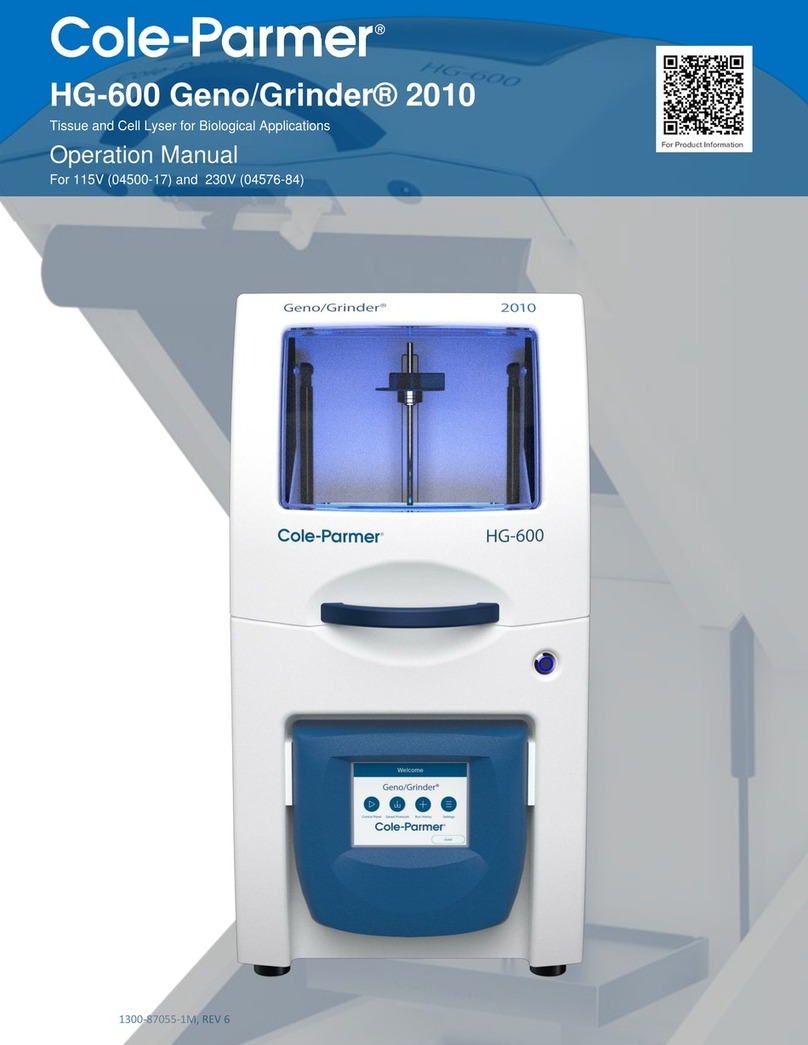
Cole Parmer SPEX SAMPLEPREP 2010 GENO/GRINDER User manual

Other Cole Parmer Laboratory Equipment manuals
Cole Parmer Stuart SM27 User manual

Cole Parmer

Cole Parmer Stuart SM27 User manual

Cole Parmer SC-200 Series User manual

Cole Parmer

Cole Parmer SC-200 Series User manual

Cole Parmer CB-200 Series User manual

Cole Parmer

Cole Parmer CB-200 Series User manual

Cole Parmer HP-400 Series User manual

Cole Parmer

Cole Parmer HP-400 Series User manual

Cole Parmer RV-400A-20 User manual

Cole Parmer

Cole Parmer RV-400A-20 User manual

Cole Parmer WD-200 Series User manual

Cole Parmer

Cole Parmer WD-200 Series User manual

Cole Parmer Geno/Grinder HG-600 User manual

Cole Parmer

Cole Parmer Geno/Grinder HG-600 User manual

Cole Parmer Stable Temp 282A User manual

Cole Parmer

Cole Parmer Stable Temp 282A User manual

Cole Parmer SPEX 8000M User manual

Cole Parmer

Cole Parmer SPEX 8000M User manual

Cole Parmer Electrothermal MH6616 User manual

Cole Parmer

Cole Parmer Electrothermal MH6616 User manual

Cole Parmer RS-250 Series User manual

Cole Parmer

Cole Parmer RS-250 Series User manual

Cole Parmer BH-200 Series User manual

Cole Parmer

Cole Parmer BH-200 Series User manual

Cole Parmer StableTemp 03405-00 User manual
Cole Parmer

Cole Parmer StableTemp 03405-00 User manual

Cole Parmer Stuart SC6PLUS User manual

Cole Parmer

Cole Parmer Stuart SC6PLUS User manual

Cole Parmer WBS-300 Series User manual

Cole Parmer

Cole Parmer WBS-300 Series User manual

Cole Parmer PCRmax Alpha Cycler 1 User manual

Cole Parmer

Cole Parmer PCRmax Alpha Cycler 1 User manual

Cole Parmer EW-04725-60 User manual

Cole Parmer

Cole Parmer EW-04725-60 User manual

Cole Parmer MP-200 Series User manual

Cole Parmer

Cole Parmer MP-200 Series User manual
Cole Parmer CG-500 User manual

Cole Parmer

Cole Parmer CG-500 User manual

Cole Parmer EH-200 Series User manual

Cole Parmer

Cole Parmer EH-200 Series User manual

Cole Parmer CB-200D-IB User manual

Cole Parmer

Cole Parmer CB-200D-IB User manual

Cole Parmer StableTemp CBF Series User manual

Cole Parmer

Cole Parmer StableTemp CBF Series User manual

Cole Parmer HO-200 Series User manual

Cole Parmer

Cole Parmer HO-200 Series User manual

Cole Parmer RV-400 Series User manual

Cole Parmer

Cole Parmer RV-400 Series User manual
Popular Laboratory Equipment manuals by other brands

Radleys Carousel 6 Plus instructions

Radleys

Radleys Carousel 6 Plus instructions

Hemotherm 400MR Operation & technical manual

Hemotherm

Hemotherm 400MR Operation & technical manual

mrclab DVO Series Operation manual

mrclab

mrclab DVO Series Operation manual

CoolLED pE-800 quick start guide

CoolLED

CoolLED pE-800 quick start guide

Luminex Guava easyCyte Maintenance Guide

Luminex

Luminex Guava easyCyte Maintenance Guide

IKA A10 basic operating instructions

IKA

IKA A10 basic operating instructions

Belden HIRSCHMANN RPI-P1-4PoE installation manual

Belden

Belden HIRSCHMANN RPI-P1-4PoE installation manual

Koehler K1223 Series Operation and instruction manual

Koehler

Koehler K1223 Series Operation and instruction manual

Globe Scientific GCM-12 quick start guide

Globe Scientific

Globe Scientific GCM-12 quick start guide

Getinge 86 SERIES Technical manual

Getinge

Getinge 86 SERIES Technical manual

CORNING Everon 6000 user manual

CORNING

CORNING Everon 6000 user manual

Biocomp GRADIENT MASTER 108 operating manual

Biocomp

Biocomp GRADIENT MASTER 108 operating manual

BEVS 2501/2A user manual

BEVS

BEVS 2501/2A user manual

Qiagen DML 3000 user manual

Qiagen

Qiagen DML 3000 user manual

Queensgate NANOSCAN OP400 Quick start instructions

Queensgate

Queensgate NANOSCAN OP400 Quick start instructions

Parr Instrument 4560 Operating instructions manual

Parr Instrument

Parr Instrument 4560 Operating instructions manual

Integra DOSE IT operating instructions

Integra

Integra DOSE IT operating instructions

Agilent Technologies 5800 ICP-OES user guide

Agilent Technologies

Agilent Technologies 5800 ICP-OES user guide

manuals.online logo
manuals.online logoBrands
  • About & Mission
  • Contact us
  • Privacy Policy
  • Terms and Conditions

Copyright 2025 Manuals.Online. All Rights Reserved.

1300-87055QSG-1G, REV 4
SPEX SAMPLEPREP 2010 GENO/GRINDER® QUICK START GUIDE
Lid
2012
Clamp
Manual Lid
Release Latch
Knob
Assembly
How To Operate 2010 Geno/Grinder®
Set up the Geno/Grinder® in a well ventilated,
unconfined space. The unit should be operated on a
flat, hard, stable benchtop due to the vigorous motion
and vibration generated during operation.
To install the clamp, use the 3/16 in Allen wrench
(supplied with power cord and manual). Raise lid and
attach clamp using the lock washers and bolts to the
top of the shaft.
Upright must be
Touchscreen
Display
On/Off
button
Secure clamp base to shaft
using bolts and lock washers
supplied with clamp
AC Inlet
at rear of unit
Do not plug into GFCI outlet
(Ground Fault Circuit Interrupter)
Step 1. Connect the powercord to the AC Inlet located in the back of the unit. Do not plug mill into
GFCI outlet. Power On the 2010 GG. “Please Wait” appears on the screen during start-up as the
software loads followed by the Home Screen.
Step 2. Load samples into the clamp (titer plates or vials). When using 4 or 6 titer plates, place a nesting
tray between them. If using vials (2ml or 5ml), vial holders can be stacked to maximize throughput.
Step 3. Position the clamp lid above the threaded rod with the guide on the upright at the rear of the clamp,
press and hold button on the locking knob while sliding down the threaded rod.
Step 4. Turn knob to tighten (finger tight) and check that the button has popped out.
Note: The threaded rod and knob assembly of the 2012 clamp are considered wear parts and may need to be
replaced after repeated usage.
A)
Slide the clamp lid on top
of the vials. Screw down
the locking knob on the
threaded rod.
B)
Turn knob clockwise to
tighten (finger tight).
C)
Make sure that vial
holders are secure
and cannot be
moved from side
to side.
Double-sided
nesting tray
Single-sided
nesting tray
(bottom only)
Stacking Titer Plates
coleparmer.com
1300-87055QSG-1G, REV 4
From the Home Screen the
Control Panel, Saved Protocols,
and Run History, and Settings
can be accessed by the user.
Programmable operating
commands through a series of
touchscreen displays. USB to
imports/export saved protocols,
run history, diagnostic data, or
upgrade the system software.
Administrative lockout (passcode)
which allows Lab Manager to
restrict user access to specific
protocols. Default code is 0000.
Important: Never run the Geno/Grinder with the 2012 clamp not screw-tightened or with titer plates held
loosely in the clamp. Damage and leakage will result. When processing samples in only one titer plate, load
an empty titer plate on the other half of the clamp assembly. Similarly, if less than a full holder of vials is
used, be sure to place an equal number of vials on the front and rear of the clamp, to ensure that the load is
balanced and tightly clamped. Empty vials can be used as place holders if an uneven number of samples are
run. The maximum recommended total sample load in the clamp assembly is 4 lb. (1.8 kg). The total sample
load includes sample, vials (or titer plates), grinding media, holders (or cryo-blocks), and nesting trays. For
sample loads exceeding 2.0 lb. (0.9 kg), the maximum recommended operating rate is 1500 rpm. Sample
loads less than 2.0 lb. can be run at rates up to the maximum of 1750 rpm. Dynamic loads greater than 2 lb.
can create a rate error. When stacking 4 or 6 titer plates, do not add more than five 4 mm steel balls to a
single titer plate well.
coleparmer.com
USA:
+1.800+323.4340
+1.847.549.7600
Canada: +1.800.363.5900
China: +86.21.5109.9909
France: +33 (0) 1486 37800
Germany: +49 (0) 9377 92030
India: +1.800.266.1244
Italy: +39 (0) 1313 89513
UK: +44 (0) 1480.272279
All other countries:
+1.847.549.7600
THE TOUCHSCREEN DISPLAY
On the Control Panel, runtime
parameters can be set as well
as stored or recalled.
A pop-up keyboard is activated
when editing, adding, or saving
a protocol.
From the Settings Screen the
Diagnostics, System Settings
and Administrative lockout are
accessed.