CompeGPS TwoNav User manual

CompeGPS Team S.L.
http://www.compegps.com
http://support.compegps.com
TwoNav
User‟s Manual
Content
Content..........................................................................................................................................1
1Introduction............................................................................................................................. 5
2Start up and maintenance......................................................................................................6
2.1 Before starting............................................................................................................... 6
2.2 TURN ON and HOLD....................................................................................................7
2.3 Battery Recharge...........................................................................................................7
2.4 Bumps and water...........................................................................................................8
2.5 Autonomy ......................................................................................................................8
2.6 Connection to PC (storage unit).................................................................................... 9
2.7 Using the electronic compass ....................................................................................... 9
2.8 Updating the software ...................................................................................................9
3General description..............................................................................................................10
3.1 The device...................................................................................................................10
3.2 Navigation window.......................................................................................................11
3.3 Menu............................................................................................................................15
3.3.1 On-road/Off-road.....................................................................................................15
3.3.2 Navigate…...............................................................................................................15
3.3.3 Data Lists.................................................................................................................16
3.3.4 Discover...................................................................................................................17
3.3.5 Status.......................................................................................................................17
3.3.6 Settings....................................................................................................................18
3.4 Contextual menus........................................................................................................19
3.5 Shifting over lists .........................................................................................................19
4Settings ................................................................................................................................20
4.1 On-road/Off-road Selector...........................................................................................20
4.2 2D/3D/3D+...................................................................................................................21
4.3 Data fields....................................................................................................................22
4.3.1 Selection of the data fields ......................................................................................25
4.3.2 Special Functions ....................................................................................................25

CompeGPS Team S.L.
http://www.compegps.com
http://support.compegps.com
4.4 Record the track..........................................................................................................26
4.5 Favourites....................................................................................................................26
4.6 Display.........................................................................................................................28
4.6.1 Available commands Default/Advanced..................................................................28
4.6.2 Automaps ................................................................................................................28
4.6.3 Orientate map..........................................................................................................29
4.6.4 Auto zoom ...............................................................................................................30
4.6.5 Night view................................................................................................................30
4.6.6 Re-centring..............................................................................................................31
4.6.7 Rotate screen ..........................................................................................................31
4.6.8 Data Fields ..............................................................................................................31
4.6.9 Tool bar ...................................................................................................................34
4.6.10 3D Reliefs............................................................................................................35
4.6.11 3D mode..............................................................................................................35
4.6.12 Active POIs..........................................................................................................36
4.6.13 Active personal POIs...........................................................................................36
4.6.14 Scale bar .............................................................................................................36
4.6.15 Pointer .................................................................................................................36
4.6.16 List menu.............................................................................................................37
4.7 Vehicle.........................................................................................................................38
4.8 Navigation....................................................................................................................38
4.8.1 Available commands Onroad/Offroad and Default/Advanced.................................38
4.8.2 Auto route................................................................................................................39
4.8.3 Speed limit...............................................................................................................40
4.8.4 Ecocalculator...........................................................................................................41
4.8.5 Smoother.................................................................................................................41
4.8.6 Tracklog...................................................................................................................41
4.8.7 WPT alert.................................................................................................................42
4.8.8 Next WPT................................................................................................................42
4.8.9 Altitude.....................................................................................................................42
4.8.10 Bearing ................................................................................................................43
4.9 System.........................................................................................................................44
4.9.1 Volume ....................................................................................................................44
4.9.2 Brightness................................................................................................................44
4.9.3 Autonomy ................................................................................................................45

CompeGPS Team S.L.
http://www.compegps.com
http://support.compegps.com
4.9.4 Language.................................................................................................................45
4.9.5 Calibrate screen ......................................................................................................45
4.9.6 Barometer calibration ..............................................................................................46
4.9.7 Compass calibration................................................................................................46
4.9.8 Folders.....................................................................................................................47
4.9.9 Units.........................................................................................................................48
4.9.10 Coordinates .........................................................................................................48
4.9.11 Time zone............................................................................................................49
4.9.12 Default settings....................................................................................................49
4.9.13 Device ID.............................................................................................................49
4.9.14 About ...................................................................................................................49
4.9.15 AA batteries.........................................................................................................49
4.9.16 Advanced.............................................................................................................50
5Select destination.................................................................................................................50
5.1 “Navigate…” button .....................................................................................................50
5.2 Waypoints, routes and tracks Lists..............................................................................51
5.3 On the map..................................................................................................................52
6Following indications............................................................................................................52
6.1 ON-road Navigation.....................................................................................................54
6.1.1 Visual information....................................................................................................54
6.1.2 Audible information..................................................................................................55
6.2 Off-road navigation......................................................................................................56
6.2.1 Visual information....................................................................................................57
6.2.2 Audible information..................................................................................................57
7Radar warnings / POIs.........................................................................................................58
7.1.1 Radars.....................................................................................................................58
7.1.2 POIs.........................................................................................................................58
8Data management (waypoints, routes, tracks and maps) ...................................................58
8.1 Waypoints....................................................................................................................58
8.1.1 What is a waypoint? ................................................................................................58
8.1.2Supported formats...................................................................................................59
8.1.3 Waypoints list ..........................................................................................................59
8.1.4 Open and close .......................................................................................................60
8.1.5 Create and edit........................................................................................................60
8.1.6 Search loaded waypoint on screen .........................................................................62

CompeGPS Team S.L.
http://www.compegps.com
http://support.compegps.com
8.1.7 Properties ................................................................................................................62
8.1.8 Navigate ..................................................................................................................63
8.1.9 Waypoints contextual menus ..................................................................................63
8.2 Routes .........................................................................................................................64
8.2.1 What is a route? ......................................................................................................64
8.2.2 Supported formats...................................................................................................64
8.2.3 List of routes............................................................................................................65
8.2.4 Open and close .......................................................................................................66
8.2.5 Create and edit........................................................................................................67
8.2.6 Search loaded route on screen ...............................................................................72
8.2.7 Properties ................................................................................................................72
8.2.8 Route Graph............................................................................................................72
8.2.9 Activate a route (navigate) ......................................................................................73
8.2.10 Routes contextual menus....................................................................................74
8.3 Tracks..........................................................................................................................76
8.3.1 What is a track?.......................................................................................................76
8.3.2 Supported formats...................................................................................................76
8.3.3 Record a track while navigating ..............................................................................76
8.3.4 Track list ..................................................................................................................77
8.3.5 Open and close .......................................................................................................78
8.3.6 Create and edit........................................................................................................78
8.3.7 Search a loaded track on screen.............................................................................84
8.3.8 Properties ................................................................................................................85
8.3.9 Track graph .............................................................................................................87
8.3.10 Activate a track (Navigate) ..................................................................................87
8.3.11 Tracks contextual menu ......................................................................................88
8.4Maps............................................................................................................................89
8.4.1 Supported formats...................................................................................................89
8.4.2 Types of maps.........................................................................................................90
8.4.3 Maps lists.................................................................................................................90
8.4.4 Open and close .......................................................................................................91
8.4.5 Search a loaded map on screen .............................................................................91
8.4.6 Properties ................................................................................................................92
8.4.7 Multi-Maps...............................................................................................................92
8.4.8 Contextual menu of the map ...................................................................................92

CompeGPS Team S.L.
http://www.compegps.com
http://support.compegps.com
9“Simulation” and “Zoom to...” ...............................................................................................93
9.1 Simulation....................................................................................................................93
9.2 Zoom to…....................................................................................................................94
10 Support............................................................................................................................95
11 Accessories .....................................................................................................................95
12 Limited warranty..............................................................................................................98
13 Appendix 1 –Data fields .................................................................................................99
14 Appendix 2 –Equivalences of peculiar signs................................................................101
15 Appendix 3 –Operate with the buttons.........................................................................102
15.1 Navigation window.....................................................................................................102
15.1.1 Buttons description............................................................................................102
15.1.2 Cursor Mode......................................................................................................102
15.2 Menus........................................................................................................................104
15.3 Lists ...........................................................................................................................104
1 Introduction
Thank you for purchasing TwoNav, the dual (for outdoor and in-car) GPS navigating system
that will help you enjoy the best assistance to orientate you in any type of environment while
carrying out any type of activity.
Having an appliance which offers directional assistance, both on-road and off-road, can prove
invaluable for increasing the safety of these journeys.
Despite this, there is the possibility that, under certain circumstances, the user may become
distracted by misuse of this technology, whereby it may in the end become a hazard to him or
her, and to his or her environment.
This possibility of using TwoNav in any type of vehicle makes it particularly important to
consider a series of rules and regulations for using it so, far from being a source of potential
risks, will contribute to personal safety.
Most of these recommendations are concerned with using the system fitted in vehicles,
although the bases of them should also be taken into account for journeys on foot.
Fitting the appliance correctly: The appliance should be fitted in a place where it will
not obstruct the vehicle driver‟s visibility of the road. It should additionally be secured, to
ensure it cannot fall off easily and hinder driving.
Do not handle the appliance whilst driving: The route planning should be completed
before setting out. Any change or clarification required must be made with the vehicle
stopped in a safe place, away from traffic (not on the road or kerbs).
When on the road, you should be guided by the sound signals: The program‟s
voice system will warn you of upcoming manoeuvres and of the distance to when you
will have to carry these out. A glance at the visual information may be useful, but you
CompeGPS Team S.L.
http://www.compegps.com
http://support.compegps.com
should resort to this only if it can be done safely (with the vehicle appropriately
stopped). When driving, you should always keep your eyes on the road.
The front-seat passenger can be a great help: The navigator is normally facing the
driver. If you have a front-seat passenger, we recommend this person be in charge of
handling the appliance, making any clarifications or changes as required.
Getting it wrong is not a problem: Neither navigators nor people are infallible
machines. In the event an indication cannot be followed and a direction other than the
fixed one is taken, the system will automatically calculate a new route, which will adapt
to the new situation and will take you to your destination just the same.
Maps always contain errors: Despite the tremendous updating work done by Tele
Atlas, it is impossible to have 100% accurate information. Recent changes in correct
street directions, new streets or restrictions due to road works are examples of
circumstances that may partially invalidate the route calculation made by TwoNav. It is
very important to be alert to these changes and to adapt to the new situation. As soon
as the program detects that it has not been able to follow the preset route, it will
calculate a new one, which will take you to your destination just the same.
TwoNav assists you in navigation. Traffic regulations have always preference!
2 Start up and maintenance
2.1 Before starting
Before starting up the device for first time, you will have to insert the battery and the SD card:
Battery:
1. Open the battery door making three complete anti-clockwise turns to the opening ring
and pulling strongly to fully remove the backdoor.
2. Place the Li-Ion battery you will find among other included accessories inside the
Aventura box. The three metallic connectors of the battery must contact the three pins
inside battery compartment.

CompeGPS Team S.L.
http://www.compegps.com
http://support.compegps.com
3. Replace battery door taking care that it is correctly fitted in the lower side and turning
the opening ring clockwise until it returns to its original position.
Important: Do not force the opening ring. Trying to screw with excessive strength may harm
plastic.
SD card:
1. Open the SD card cap in the lower part of the device. It is tightly fixed, so you may have
to use your nails or any other sharp object.
2. Take the SD card from its box and insert it in Aventura. The sticker has to be facing the
back side of the device.
3. Close SD card cap again. Check that this rubber cap is correctly fitted, avoiding any
partial insertion which may allow water or dust getting inside the device.
2.2 TURN ON and HOLD
Keep the ON button pressed for 2 seconds to start the system. Carry out the same operation for
turning it off.
When the device is on, you may use the button „hold‟ to block the device on two levels:
Keypad block: With one brief press on the „HOLD‟ button, the keypad and the screen
are blocked, making the use of the device impossible, but leaving the screen on.
Repeat a brief pressure to unblock.
Complete blocking: By pressing for 2 seconds on the „HOLD‟ button, the keypad will
become blocked and the screen won‟t just be blocked, but also will be turned off.
Consequently, the information will not be visible, but the battery energy will be saved.
Press longer once more to unblock.
2.3 Battery Recharge
The TwoNav Aventura Li-on battery is recharged via the USB port. It is normally fitted with 3
power sources:
PC: When connecting the device to a computer, besides allowing you to manage the
data present in the memory from the PC, the battery is also charged. The charging

CompeGPS Team S.L.
http://www.compegps.com
http://support.compegps.com
speed will be considerably lower to the other two charging systems (about 12 hours for
a complete charge).
Charger for car lighter: Included in the TwoNav Aventura kit. If it is charged with the
device turned off, it will take from 4 to 5 hours for a complete charge. If navigation is
being carried out, it will take longer.
AC/DC charger: Not included in the series. It can be purchased separately or use any
other USB charger. A 1000mA/h charger will take about 4 or 5 hours for a complete
charge.
You can operate normally while the TwoNav is connected to the power source, except if it is
connected to a PC, when the device will only operate as a massive storage unit.
Note: In order to enhance the autonomy of your Aventura, you may purchase the AA battery
accessory with which you can substitute the Li-ion battery by three AA batteries.
Important: When unplugging the device from the power source, TwoNav will inform you of the
disconnection. If you do not answer the message within 30 minutes, the system will turn off in
order to avoid accidental discharges (you may deactivate this function form „Configuration >
System > Autonomy)
Warning: Avoid vibrations or rude movements on device while USB port is connected. It may
deform USB port, being reparation out of warranty.
2.4 Bumps and water
TwoNav Aventura is a device prepared to resist the strain of an intensive use during the
practice of outdoor activities and, therefore, its performance must not be affected by exposure
to small bumps or to rain or splashing water.
However, in order to make the most of the system‟s performance it is advised, as far as
possible, to prevent the device from suffering serious bumps and that its permanent exposure to
dust or water.
The resistance to water is based on the correct attachment of the rubber covers that give
access to the slots and ports of the device. It is therefore important to check that these covers
are well sealed prior to beginning our activities.
Never soak the device in water, not even when all the covers are well sealed.
To improve the resistance to bumps, you may fit your Aventura with a Plexiglas screen to cover
one of the most fragile spots of the device: the touch screen. You may find this attachment on
the TwoNav web page or by asking your local dealer.
Avoid vibrations or rude movements on device while USB port is connected. It may deform USB
port, being reparation out of warranty.
Do not charge the battery during your motorbike trips. USB port would suffer deformation
which is not covered by warranty. See next section to know how to optimize autonomy.
2.5 Autonomy
TwoNav Aventura may operate around 8 consecutive hours with the screen ON with no need of
recharging the battery and up to 30 hours with the screen OFF and recording the track.
The screen uses an important part of the energy resources, so turning it off may make the life of
the device longer.
The screen of the device will be turned off by default after 1 minute of inactivity.
You may also turn the screen of manually by a sustained pressure on the „HOLD‟ button.

CompeGPS Team S.L.
http://www.compegps.com
http://support.compegps.com
From “Main Menu > Configuration > System > Autonomy”, you may deactivate or modify this
time, as well as enter other options that may improve the autonomy of the device.
Note: To enhance the autonomy of your Aventura, you may purchase the AA battery
attachment to substitute the Li-on battery by three AA batteries.
2.6 Connection to PC (storage unit)
When TwoNav Aventura is connected to the PC by means of the USB wire, the TwoNav
application is closed and the device becomes a “storage unit”. Two new storage units will then
be shown on your PC:
Local disk: inner memory of the device
Removable disk: SD card that may be inserted into the device.
This way you will be able to transfer data from the PC to the Aventura and vice versa. Please
note that the folders to save data in the TwoNav Aventura in the memory card are:
Maps: TwoNavData\Maps
Data (Waypoints, routes and tracks): TwoNavData\Data
Important: While connected to the PC, TwoNav cannot be operated. If the device is connected
to another external source (car or wall charger) you will be able to do it.
2.7 Using the electronic compass
TwoNav Aventura is fitted with a digital compass so you have accurate information available on
the directions to follow even if you are stopped.
To be able to use the information supplied by the compass you must follow two steps:
1. Adjusting the compass: Go to „Main Menu > Configuration > Off-road > Calibrate
Compass‟. Once inside the adjusting utility, place the device on a horizontal position
and just turn it slowly for a few seconds.
2. Go to „Main Menu > Configuration > Off-road > Bearing‟ and select „Automatic‟. This
way, the information coming from the compass will be considered when you are
stopped or driving very slowly (in these cases, the GPS information is less reliable to
determine orientation).
Note: Adjustments must be made outdoors and far from sources of alterations of the magnetic
field, such as cars, buildings or electric lines. For further safety, it is recommended to adjust the
compass prior to any outings.
2.8 Updating the software
The TwoNav software is continually being improved in order to add new functionalities and
polish possible errors.
Visit regularly the TwoNav (www.twonav.com) and CompeGPS (www.compegps.com) web
pages to be regularly informed about the latest available version for your device and get to
know the steps to follow for installing it.

CompeGPS Team S.L.
http://www.compegps.com
http://support.compegps.com
3 General description
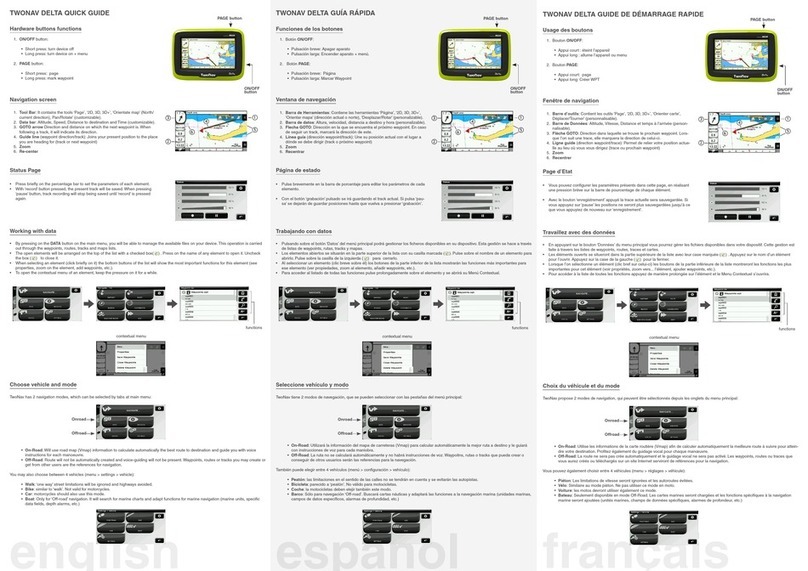
3.1 The device
1. Touch screen: This is TwoNav Aventura main working tool which will allow you to enter
most functions of the device by just a brief click, a long click (to open a contextual
menu) or by drawing a course on it (to move over the map or the lists).
2. ON button: Press for two seconds to turn on the device. The same operation will turn it
off.
3. HOLD button: Press briefly to block the device leaving the screen on. Press longer to
block it and also turn the screen off. Repeat action to unblock it.
4. MENU button: Goes to Main Menu for TwoNav options.
5. PAGE button: Enter Data pages. Each click advances one page. To go back to the
navigation window (map) press „Esc‟ or the „Map‟ icon.
6. MARK button: With a brief click, it creates a Waypoint on your present position. With a
long click, it creates a screen capture that will be saved in the „TwoNav/temp‟ folder in
*bmp format.
7. ESC button: Exits the present situation.
8. Zoom +
9. Zoom –
10. Joystick (OK / Activate cursor mode) (Esc to deactivate cursor): By pressing on the
centre it carries out the OK function, as when pressing the touch screen. If it is pressed
on the navigation window (map), the cursor mode is activated. („Esc‟ to deactivate it).

CompeGPS Team S.L.
http://www.compegps.com
http://support.compegps.com
11. Mini-USB Port: You may connect TwoNav Aventura to an external power source to
recharge the battery or to a PC to use the device as an external storage disk (it will also
charge the battery, but more slowly) (+info).
12. Serial port
13. SD HC memory card reader (up to 32GB): High capacity reader that can read SD
cards of up to 32 GB.
14. Audio output
15. Operative System update button
16. Reset button: When pressing it with the stylus it cuts off power just a second and then
reinitiates the device immediately.
17. Stylus: It may be used to carry out more accurate movements on the screen or to press
the „reset‟ button.
18. Supporting hole: A supporting cord may be attached.
19. External GPS antenna port
20. Opening ring: To open the battery and remove the cover from the rest of the body.
Turn it counter clock-wise several times to open it and then clock-wise to lock it.
3.2 Navigation window
General/On-road
1. Distance to next event: Distance left to next event (roundabout, waypoint, exit).

CompeGPS Team S.L.
http://www.compegps.com
http://support.compegps.com
2. Next manoeuvre: When navigating On-road, the „next event‟ space will display a
representation of the next manoeuvre to be done (right turn, left turn, roundabout,
diversion, etc.).
3. Tool Bar: Its content can be customized from Tool bar manager
4. Show/Hide tools
5. Mute
6. Orient map (north up/track up)*: The map may be fixed on the north or rotate,
depending on our movements.
7. 2D/3D: Changes the perspective between 2D and 3D (+info).
8. Data pages: Enter data pages to check all type of information relating to your present
navigation.
9. Data bar: Shows the data that is set from „Settings > Display > Data fields‟ (+info).
10. Show/Hide Data Bar: You may hide the data bar to get a broader view of the map.
11. Time: It is refreshed with the data received from the GPS
12. Speed
13. Distance to Destination
14. Estimated time of arrival to destination
15. Menu button: Goes to TwoNav Main menu.
16. Status icons (enters status window): To indicate the present battery and GPS
coverage level. The page „Status‟ is entered by pressing on them.
17. Speed limit of present road: Indicates the legal speed limit of the road on which we
are.
18. Re-centring (after sliding the map): Press the „re-centre‟ button to focus on your
present position after sliding over the map.
19. POI: V- map point of interest (petrol station, hotel, cash point, etc).
20. Present position: Indicates your position and present course. Its colour changes
depending on the configured vehicle or if it is in „Simulation‟ mode.

CompeGPS Team S.L.
http://www.compegps.com
http://support.compegps.com
21. Manoeuvre indication: Illustrates the manoeuvres to be carried out on the map and
more accurately.
22. Calculated Route: Shows the automatically calculated route to be followed.
23. Zoom +
24. Zoom -
25. Scale ruler: Visual ruler to quickly evaluate distances on the screen.
26. Next Street: Indicates the next street to be taken following navigation.
27. Present Street: Name of the street where you are.
Off-road
28. Compass: Shows the orientation of the device. The source of this datum (GPS,
electronic compass or „automatic‟) may be set from „menu > Settings > Off-road >
Bearing‟.

CompeGPS Team S.L.
http://www.compegps.com
http://support.compegps.com
29. Currently Recorded Track: If the present track is being recorded, we can see its trace
marks behind us.
30. Guide line (waypoint direction/track): Joins your present position to the place you are
heading for (track or next waypoint)
31. Next waypoint
32. Loaded Track
33. GOTO arrow: Direction on which the next waypoint is. When following a track, it will
indicate its direction (see Off-road navigation).
34. Track name / Next Waypoint: Name of the next waypoint or the track being followed.
35. Loaded route
36. Pan/Rotate map: Choose between two types of movements:
a. Panning: you may move along the map without changing orientation in order to
see some new parts.
b. Rotation: it changes the orientation of the map in a clock-wise or anti clock-wise
sense (horizontal dragging) or up/down (vertical dragging).
You may move the map dragging it by means of the touch screen or the joystick.
37. Altitude
38. Show/hide graph/data bar: You may hide the data bar to get a broader view of the
map.

CompeGPS Team S.L.
http://www.compegps.com
http://support.compegps.com
When navigating a route or a track, or just recording a track, graph will also be available
here and this button will have 3 states:
Data bar
Graph bar
Nothing
3.3 Menu
Most of the options of the program may be entered from the TwoNav Main menu.
The On-road/Off-road mode selectors can be found in it, as well as the access to the different
sections of functions and a direct access to the map.
3.3.1 On-road/Off-road
TwoNav features two navigation modes to meet the needs of any environment.
Press the corresponding tab on the main menu to activate the most suitable mode for you.
For further information, check the section On-road/Off-road selector
3.3.2 Navigate…
TwoNav features three basic ways of activating navigation towards a destination:
By means of the Navigate button…

CompeGPS Team S.L.
http://www.compegps.com
http://support.compegps.com
By means of the waypoints, routes and tracks lists
By means of selection on map
Check the section Select destination for further information
3.3.3 Data Lists
By pressing on the DATA button on the main menu, you will be able to manage the available
files on your device. This operation is carried out through the waypoints, routes, tracks and
maps lists.
The files to be taken into consideration on this lists will be the ones saved in the folders
„TwoNavData/Maps‟ (for maps) and „TwoNavData/Data‟ (tracks, routes and waypoints).
The general functions of these lists are as follows:
Available elements open: The available elements on the data folder can be seen on
this list. The open elements will be arranged on the top of the list with a ticked square.
oPress on the name of any element to open it.
oPress on the left square to close it.
Sub-elements: By briefly clicking on the name of an element (waypoints file or route)
the waypoints which it contains will be displayed. Press again on the name of the
element to hide its contents.
Actions on the elements: You can carry out diverse actions on each element. When
selecting an element (click briefly on it) the bottom buttons of the list will show the most
important functions for this element (see properties, zoom on the element, add
waypoints, etc.).
To enter the list of all the functions keep the pressure on the element for a while Contextual
Menu will open.

CompeGPS Team S.L.
http://www.compegps.com
http://support.compegps.com
To get further knowledge of the elements included in the Data section, check the section
Waypoints, Routes, Tracks and Maps.
3.3.4 Discover
From the option „Discover‟ on the main menu, you may enter useful tools in order to explore the
areas you are going to visit:
Zoom to...: Choose the element (address, POI, favourite, data or coordinates) that you
wish to see on the map and it will be displayed on a new window. (+info)
Simulate: You may select two spots (present position, by address, by map, POI, etc.)
to execute a simulation of a navigation from spot Ato spot B. (+info).
Stop simulation: It stops the ongoing simulation (both from A-B spots as from any
track being animated).
3D Panorama: By using this option you may get an aerial view of the surroundings. In
order to do it, 3D mode must be activated.
3.3.5 Status
The „Status‟ allows you to know the general status of the TwoNav by displaying fields such as
battery level, reception and position of satellites, luminosity of the screen, sound volume or the
recording of a track.
There are two ways of entering the „Status‟ page:
From „Main Menu > Status‟
From the map, with the icons located on the bottom left
Once in the „Status‟ page, you may enter to set the parameters it contains by pressing briefly on
the percentage bar of each element. You will then enter the following items:
Satellites status: enter to see the number of satellites available, their distribution orbiting
over the vault and the coverage they reach.

CompeGPS Team S.L.
http://www.compegps.com
http://support.compegps.com
To disconnect the GPS press on the button. If the GPS is disconnected, TwoNav will not
receive any position signal and many of the options will stop working properly.
TwoNav will attempt to fix the current position. If you are anywhere without GPS cover (e.g.:
inside a building), the GPS status will be “Without position”; i.e.: TwoNav has successfully
established communication with the GPS, but the GPS cannot fix your position because there is
no satellite signal.
GPS possible states:
Disconnected
Connecting...
Error (not found)
Connected without position
Connected and with position
Simulating
Battery: you will be able to see the percentage of load in the battery and, by clicking on
it, you may manage the autonomy options of the device. (+info)
Brightness: percentage of luminosity displayed by the screen. (+info).
Volume: set the general volume and the volume of each audible element individually.
(+info).
Track: by keeping the „record‟ button pressed, the present track will be saved. When
pressing „pause‟ positions will stop being saved until „record‟ is pressed again. (+info).
3.3.6 Settings
The page „Settings‟ enters the main options to customize TwoNav for each type of use (see
section Settings for more details).

CompeGPS Team S.L.
http://www.compegps.com
http://support.compegps.com
These options are grouped in the following sections „Display‟, „Vehicle‟, „Navigation‟, „System‟.
3.4 Contextual menus
TwoNav uses Contextual Menus to enter the most adequate functions for each moment and
option in an easy and quick manner.
To open the Contextual Menu of any element (track, map, waypoint…), press on it for one
second. You may open contextual menus on the following settings of the user interface:
Navigation window (map): Depending on the element on which you open the
Contextual, you may enter different functions. There is a description of the available
functions on the menu of each element on the specific sections for waypoints, routes,
tracks or maps.
Data fields: When opening the Contextual on the data fields (on the data bar or the
data pages) you will be able to modify the available fields, set an alarm or enter other
functions that may change depending on the field (reset, countdown, etc.). (+info)
Lists: The Contextual Menu may be opened to see the different actions to carry out on
any given element (waypoints, routes, tracks and maps) by clicking on its name from
the data lists.
3.5 Shifting over lists
TwoNav uses a system of lists on the various situations: data (tracks, waypoints, routes and
maps), data fields, contextual menus, etc.
A scroll system has been developed in order to facilitate the shifting through these lists, which
allows for the movement around the different options by dragging the pen or finger upwards or
downwards.
If you execute a brief shift, the last displayed element will become the first on the list.

CompeGPS Team S.L.
http://www.compegps.com
http://support.compegps.com
If you execute a long shift, the list will keep scrolling down and it will stop at the end or by
pressing on the screen.
If you want to move along the lists in a more accurate way, you may use the side arrows to
achieve a more controlled movement.
4 Settings
TwoNav is set by default so as to meet the needs of most users. However, it is important that
you spend some time analyzing which are the best options for the use you want to give to it and
to adapt it to the conditions in each moment.
4.1 On-road/Off-road Selector
TwoNav has two navigation modes: On-road and Off-road. You can clearly see the mode you
are on by looking at the colour of the users interface (green or grey). The functionalities of the
program also change in various aspects, which are generally explained in this section and are
detailed in other sections of this manual.
You may change the TwoNav navigation mode by pressing on the tabs on the top of the Main
menu:
Off-road : The areas where open air activities are carried out do not usually have
usable information for the automatic calculation of the route, and therefore cartography
will only be useful as a visual reference. In order to have assistance for orientation you
will have to use positional references (waypoints, routes and tracks) that you can create
yourself or get from diverse sources, such as friends, web pages or Internet forums.
See sections „Waypoints, Routes and Tracks‟.
Other manuals for TwoNav
1
Table of contents
Other CompeGPS GPS manuals

CompeGPS
CompeGPS Twonav Ultra User manual

CompeGPS
CompeGPS Horizon User manual

CompeGPS
CompeGPS TwoNav Ultra 2.6 User manual

CompeGPS
CompeGPS TwoNav Aventura User manual

CompeGPS
CompeGPS TwoNav Delta User manual

CompeGPS
CompeGPS TwoNav Aventura User manual

CompeGPS
CompeGPS TwoNav User manual

CompeGPS
CompeGPS Trail User manual

CompeGPS
CompeGPS TwoNav Sportiva User manual