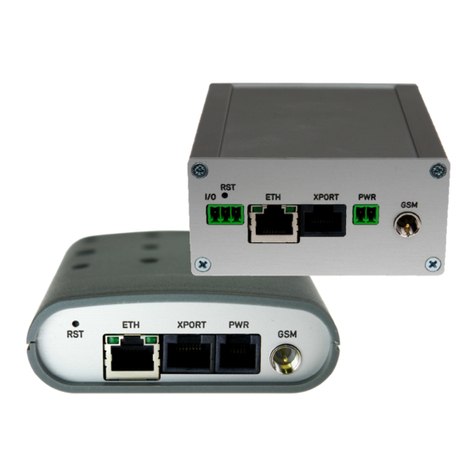
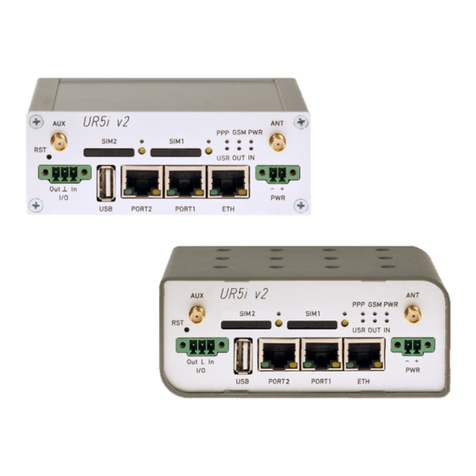
Conel UR5i a User manual

UMTS router UR5i a UR5i SL
USER’S GUIDE

OBSAH
2
Contents
1. Safety instruction 5
2. Description of the router 6
2.1. Introduction 6
2.2. UMTS technology 6
2.3. HSxPA technology (High Speed Packet Access) 7
2.4. Delivery Identification 7
2.5. Antenna Connection 8
2.6. SIM Card Reader 9
2.7. Power Supply 9
2.8. Technical parameters 10
2.9. Description of the individual components of the router 11
2.9.1. UMTS module 11
2.9.2. Control microcomputer 11
2.10. User interfaces (Connectors) 12
2.10.1. Connection of the PWR Supply Connector 14
2.10.2. Connection of the XPORT Connector – RS232 15
2.10.3. Connection of the XPORT Connector – RS485 16
2.10.4. Connection of the XPORT Connector – RS422 17
2.10.5. Connection of the XPORT Connector – MBUS 18
2.10.6. Connection of the XPORT Connector – CNT 19
2.10.7. Connection of the ETH Connector 21
2.10.8. Connection of the I/O Connector 21
2.10.9. Connection of the Connector USB 22
2.11. Technical specification of I/O port 23
2.12. Technical specification of optional XPORT 23
2.13. Modem status indication 25
2.14. Putting into operation 26
2.15. Mechanical external dimensions and mounting recommendations 27
3. Expansion port mounting 31
3.1. Expansion port mounting for UR5i 31
3.2. Expansion port mounting for UR5i SL 33
4. Change of the SIM cards 35
5. Configuration setting over web browser 36
5.1. Network Status 36
5.2. DHCP Status 38
5.3. IPsec status 38
5.4. UMTS/GPRS Status 39
5.5. DynDNS status 39
5.6. System Log 39
5.7. LAN Configuration 40
5.8. VRRP Configuration 43
5.9. UMTS/GPRS Configuration 44
5.10. Firewall Configuration 47
5.11. NAT Configuration 48
5.12. OpenVPN Tunnel Configuration 50
5.13. IPSec Tunnel Configuration 52
5.14. GRE Tunnels Configuration 54
5.15. L2TP Configuration 56

CONTENTS
3- 3 - 30.7.2009
5.16. DynDNS Client Configuration 57
5.17. NTP Client Configuration 58
5.18. SNMP Configuration 58
5.19. SMS Configuration 60
5.20. External Port Configuration 65
5.21. USB Port Configuration 66
5.22. Startup Script 67
5.23. Automatic update configuration 68
5.24. Change password 68
5.25. Set real time clock 68
5.26. Set SMS service center address 69
5.27. Unlock SIM card 69
5.28. Send SMS 69
5.29. Backup Configuration 70
5.30. Restore Configuration 70
5.31. Update firmware 70
5.32. Reboot 70
5.33. Default settings 71
5.33.1. LAN Configuration 71
5.33.2. VRRP Configuration 71
5.33.3. Firewall Configuration 71
5.33.4. UMTS/GPRS Configuration 72
5.33.5. NAT Configuration 72
5.33.6. OpenVPN Tunnel Configuration 73
5.33.7. IPsec Tunnel Configuration 74
5.33.8. GRE Tunnels Configuration 75
5.33.9. L2TP Tunnel Configuration 75
5.33.10. DynDNS Configuration 75
5.33.11. NTP Configuration 75
5.33.12. SNMP Configuration 76
5.33.13. SMS Configuration 76
5.33.14. Expansion Port Configuration 77
5.33.15. USB Port Configuration 77
5.33.16. Startup script 78
5.33.17. Automatic update 78
6. Configuration setting over Telnet 79
7. Possible problems 80
8. Reference 80
9. FAQ 80
10. Customers support 81
11. Product disposal instructions 82
12. Guarantee Claim Guidelines 83
13. Guarantee certificate 86

CONTENTS
4- 4 - 30.7.2009
Symbols used
Danger – important notice, which may have an influence on the user’s safety or the function
of the device.
Attention – notice on possible problems, which can arise to in specific cases.
Information, notice – information, which contains useful advices or special interest.
GPL licence
Source codes under GPL licence are available free of charge by sending email
Conel s.r.o., Sokolska 71, 562 04 Usti nad Orlici, Czech Republic
Issue in CZ, 7/30/2009

SAFETY INSTRUCTION
5
1. Safety instruction
Please, observe the following instructions:
•The communication router must be used in compliance with all applicable international and
national laws and in compliance with any special restrictions regulating the utilization of the
communication router in prescribed applications and environments.
•To prevent possible injury to health and damage to appliances and to ensure that all
the relevant provisions have been complied with, use only the original accessories.
Unauthorised modifications or utilization of accessories that have not been approved may
result in damage to the communication router and in a breach of applicable regulations.
Unauthorized modifications or utilization of accessories that have not been approved may
result in the termination of the validity of the guarantee.
•The communication router must not be opened. Only the replacement of the SIM card is
permitted.
•Caution! The SIM card could be swallowed by small children.
•Voltage at the feed connector of the communication router must not be exceeded.
•Do not expose the communication router to extreme ambient conditions. Protect
the communication router against dust, moisture and high temperature.
•It is recommended that the communication router should not be used at petrol stations. We
remind the users of the duty to observe the restrictions concerning the utilization of radio
devices at petrol stations, in chemical plants, or in the course of blasting works in which
explosives are used.
•Switch off the communication router when travelling by airplane. Utilization
of the communication router in a airplane may endanger the operation of the airplane
or interfere with the mobile telephone network, and may be unlawful. Failure to observe
these instructions may result in the suspension or cancellation of telephone services for
the respective client, or, it may result in legal sanctions; it may also result in both
eventualities.
•When using the communication router in the close proximity of personal medical devices,
such as cardiac pacemakers or hearing aids, you must proceed with heightened caution.
•If it is in the proximity of TV sets, radio receivers and personal computers, the telephone
may cause interference.
•It is recommended that you should create an appropriate copy or backup
of all the important settings that are stored in the memory of the device.

DESCRIPTION
6
2. Description of the router
2.1. Introduction
The UMTS router is a compact electronic device based on the UMTS module which
enables data transfers using UMTS/HSDPA/HSUPA/EDGE/GPRS/GSM technologies.
Primarily, the router expands the capabilities of the UMTS module by the option
of connecting more PC’s by means of the built-in Ethernet interface. In addition, the firmware
of the router provides automatic establishment and maintenance of UMTS/HSDPA/
HSUPA/EDGE/GPRS/GSM PPP connection. By means of the integration of a DHCP server it
provides the user with simple installation and Internet access.
In addition, the router is equipped with a two USB 1.1 Host interfaces which is designed
only for connection to a USB device.
By customer request it is possible to equip the router with the XPORT module
and extend the function of the UMTS router about RS232, RS485/RS422, M-BUS or CNT (I/O
module).
The UMTS router has two versions. The first version is basic UR5i and the second
version is UR5i SL in the aluminum box.
Examples of Possible Applications
•mobile office
•fleet management
•security system
•telematic
•telemetric
•remote monitoring
•vending and dispatcher machines
2.2. UMTS technology
For radio terrestrial part UMTS (Universal Mobile Telecommunication System), which is
marked as UTRA (UMTS Terrestrial Radio Access), is warranted 155 MHz band in frequency
band about the 2 GHz. It are bands 1900–1980 MHz, 2010–2025 MHz and 2110–2170 MHz.
The UMTS system is based on code division of carried channels – use the access
method WCDMA (Wideband Code Division Multiple Access). WCDMA exploit direct spread
spectrum DS (Direct Spread). For transmission the UMTS network exploits two duplex
techniques – transmission modes FDD (Frequency Division Duplex), which is based
on separate frequency channels (i.e. uplink and downlink uses different channels) and TDD
(Time Division Duplex), which is based on separate time (i.e. uplink and downlink uses one
channel, in which both direction are changes in time).
UMTS network consists of three basic entities:
•Basic network CN (Core Network) – own core of network UMTS,
•network UTRAN (UMTS Terrestrial Radio Access Network) – the radio access
network,
•users part UE (User Equipment) – entity, which allows the user to access
the UMTS network.
DESCRIPTION
7
2.3. HSxPA technology (High Speed Packet Access)
High Speed Download Packet Access and High Speed uploďPacket Access are an
improved and extended version of the UMTS-TDD. HSDPA/HSUPA is available for both
UMTS FDD and for UMTS TDD. HSDPA/HSUPA raises significantly bit rate for downlink. It is
attained on the programmer level. It doubles capacity on BTS (Base Transceiver Station),
which allows process of data and signals from more users at one time. HSDPA/HSUPA are
based on a few innovations of network architecture; thanks to this, it has lower latency, faster
reaction on channel change quality and processing of H-ARQ (Hybrid automatic repeat
request) on transmission repeat. Transport channel for HSDPA/HSUPA effectively uses
available frequencies, on which transmits data packets together. Afterwards these packets
are divides between individual users according to specific algorithms.
2.4. Delivery Identification
Specimen Label:
Trade name Type name Other
UR5i UR-5i Basic version
UR5i SL UR-5i-SL Version in the aluminum box
Example of expansion port XPORT:
Trade name Type name Power supply
Expansion port RS232 XC-232 Internal power supply
Expansion port RS485-RS422 XC-485-422 Internal/external power supply
Expansion port MBUS XC-MBUS External power supply
Expansion port CNT XC-CNT Internal power supply

DESCRIPTION
8
Basic delivered set of router includes:
•UMTS router,
•power supply,
•crossover UTP cable,
•external antenna,
•plastic clips for the DIN rail with fixing screws,
•installation CD containing instructions.
In addition to the basics it is possible to deliver:
•expansion port RS232, RS485/RS422, M-BUS or CNT (separation columns are in
distribution).
The router standard designed for:
•possibility to be put on a work surface,
•for mounting onto a DIN rail, the plastic clips are included.
2.5. Antenna Connection
The antenna is connected to the router using the FME connector on the back panel.
External antennas:

DESCRIPTION
9
2.6. SIM Card Reader
The SIM card readers for 3 V and 1.8 V SIM cards are located on the front panel
of the router. To initiate the router into operation it is necessary to insert an activated SIM card
with unblocked PIN in the reader. The SIM cards might be of different adjusted APN (Access
Point Name).
2.7. Power Supply
The router requires +10 V DC to +30 V DC supply. Protection against reversed polarity
without signaling is built into the router.
The power consumption during receiving is 1 W. The peak power consumption during
data sending is 5,5 W. The peak power consumption when USB port used is 15 W.
For correct operation it is necessary that the power source is able to supply a peak current
of 1,3 A.

DESCRIPTION
10
2.8. Technical parameters
UMTS/HSDPA/HSUPA/EDGE/GPRS/GSM module
Complies with standards EN 301 511, v9.0.2,
EN 301 908-1&2, v3.2.1,
ETSI EN 301 489-1 V1.8.1,
EN 60950-1:06 ed.2
HSDPA parameters 3GPP rel. 5 standard
bitrate 7,2 Mbps
UE CAT. 1 to 6, 8, 12
HSDPA parameters 3GPP rel. 5 standard
bitrate 2,0 Mbps
UE CAT. 1 to 3, 5, 6
UMTS parameters W-CDMA FDD standard
PS bitrate – 384/384 kbps
CS bitrate – 64/64 kbps
GPRS parameters GPRS multislot class 12, CS 1 to 4
EGPRS multislot class 12, CS 1 to 4,
MCS 1 to 9
Transmit power Class 3 (+23dBm) for UMTS 2100MHz
Recommended antenna return loss ≤10 dB
Temperature range Function
Storage
-20 oC to +55 oC
-40 oC to +85 oC
Supply voltage 10 to 30 V DC
Consumption Reception
GPRS
UMTS/HSDPA
300 mW
to 3,5 W (GPRS transmission)
to 5,5 W (UMTS/HSDPA transmission)
Dimensions 42x86x94 mm (DIN rail 35 mm)
Weight 250 g
Antenna connector FME – 50 Ohm
User interface ETH
USB
XPORT
Ethernet (10/100 Mbit/s)
2x USB 1.1 type A host
Optional RS232/RS485-422/M-BUS
or inputs/outputs (I/O)

DESCRIPTION
11
2.9. Description of the individual components of the router
2.9.1. UMTS module
The UMTS module is used for UMTS/HSDPA/HSUPA/EDGE/GPRS/GSM UMTS
network wireless communication. It is integrated in the printed circuit board. The slide-out SIM
card reader is accessible from the front panel. The FME antenna connector is accessible from
the back panel.
UMTS Module
•Communicates in UMTS band 2100MHz
•CS bitrate – 64/64 kbps
•PS bitrate – 384/384 kbps
•Supports W-CDMA FDD (Wideband - Code Division Multiple Access Frequency Division
Duplex) standard
2.9.2. Control microcomputer
The core of the router is a 32-bit microprocessor with 64 MB RAM, 32 MB FLASH
EEPROM, serial interface RS-232 and an Ethernet interface 10/100 Mbit/s.
The microcomputer is connected to the UMTS OEM module through the USB interface and
controls the communication via UMTS/HSDPA/HSUPA/EDGE/GPRS/GSM. Towards to the
user it is connected on the Ethernet interface.
The software is built on the Linux operating system.
The router support services as like DHCP, NAT, GRE, IPsec tunnels, etc.
The modem settings are saved in the FLASH EEPROM memory. All modem
configurations can be done through a web interface (HTTP), which is protected by security
password.

DESCRIPTION
12
2.10. User interfaces (Connectors)
On the back panel of router the following connectors are located:
•one RJ12 or MRT9 connector (PWR) – for connection of the power supply adapter,
•one RJ45 connector (ETH) – for connection into the local equipment,
•one RJ45 connector (optional XPORT) – for connection of the local any arrangement,
•one MRT9 (I/O) – interface with one binary input and with one binary output
(only version UR5i SL)
•one FME or SMA connector (GSM) – for connection of the antenna,
•two USB-A Host connectors (USB) – for connection of the devices to the router, USB’s
supports equipments with PL-2303 and FTDI USB/RS232 converter.
Front panel UR5i
Rear panel UR5i

DESCRIPTION
13
Front panel UR5i SL
Rear panel UR5i SL

DESCRIPTION
14
2.10.1. Connection of the PWR Supply Connector
Panel socket RJ12.
Pin
number
Signal
mark Description
1 +UN Positive pole of DC supply voltage (+10 to +30 V)
2 NC Signal not connected
3 NC Signal not connected
4 +UN Positive pole of DC supply voltage (+10 to +30 V)
5 GND Negative pole of DC supply voltage
6 GND Negative pole of DC supply voltage
Circuit example:
•Panel socket MRT9.
Pin
number
Signal
mark Description
1 +UN Positive pole of DC supply voltage (+10 to +30 VDC)
2 GND Negative pole of DC supply voltage
Circuit example:
The positive pole +UN is marked by a red socket on the power supply.
Pin 1 – +UN
Pin 2 – GND Router
DC
+
Pin 1 – +UN
Pin 2 – NC
Pin 3 – NC
Pin 4 – +UN
Pin 5 – GND
Pin 6
–
GND
Router UR 5
DC
+

DESCRIPTION
15
2.10.2. Connection of the XPORT Connector – RS232
Panel socket RJ45 (RS232 – DCE – Data Communication Equipment).
Pin
number
Signal
mark Description Data flow direction
1 RTS Request To Send Input
2 CTS Clear To Send Output
3 DTR Data Terminal Ready Input
4 DSR Data Set Ready – connected to +4 V through
330 Ohm
Output
5 GND GROUND – signal ground
6 RXD Receive Data Output
7 CD Carrier Detect Output
8 TXD Transmit Data Input
Circuit example:
The router connection to the PC:
•cable KD2 is connected to serial port PC (example COM1)
The router connection to equipment with full-value RS232 interface:
Router
ETH
XPORT
PWR
Cable KD-2
Router
ETH
XPORT
PWR
Cable KD-2
Pin 1 – RTS
Pin 2 – CTS
Pin 3 – DTR
Pin 4 – DSR
Pin 5 – GND
Pin 6 – RXD
Pin 7 – CD
Pin 8 – TXD
Router
Meter GND
RXD
TXD

DESCRIPTION
16
2.10.3. Connection of the XPORT Connector – RS485
Panel socket RJ45.
Pin
number
Signal
mark Description Data flow direction
1 GND Signal and supply ground
2 GND Signal and supply ground
3 TxRx- RS485 B (-) Input/Output
4 TxRx+ RS485 A (+) Input/Output
5 TxRx- RS485 B (-) Input/Output
6 TxRx+ RS485 A (+) Input/Output
7 +12 V EXT External power supply
8 +12 V EXT External power supply
ATTENTION! Power supply is selected on the expansion port RS485 by help
of a jumper, 2.12. If galvanic separation is required the converter must have an external
power supply.
Circuit example of the equipment with a router with data length less then 10 m:
Circuit example of the equipment with a router with data length more than 10 m:

DESCRIPTION
17
At RS485 data cable more then 10m it is need to use overvoltage protection
on the router side!
2.10.4. Connection of the XPORT Connector – RS422
Pin
number
Signal
mark Description Data flow direction
1 SGND Signal and power supply ground
2 SGND Signal and power supply ground
3 RxD- Receive Data (-) Output
4 RxD+ Receive Data (+) Output
5 TxD- Transmit Data (-) Input
6 TxD+ Transmit Data (+) Input
7 +12V EXT External power supply
8 +12V EXT External power supply
ATTENTION! Power supply is selected on the expansion port RS422 by help
of a jumper, 2.12. If galvanic separation is required the converter must have an external
power supply.
Circuit example of the equipment with router with data length less then 10 m:

DESCRIPTION
18
Circuit example of the equipment with a router with data length more than 10 m:
At RS422 data cable more then 10m it is need to use overvoltage protection
on the router side!
2.10.5. Connection of the XPORT Connector – MBUS
Panel socket RJ45.
Pin
number
Signal
mark Description Data flow direction
1 GND Signal and supply ground
2 GND Signal and supply ground
3 TxRx- MBUS B (-) Input/Output
4 TxRx+ MBUS A (+) Input/Output
5 TxRx- MBUS B (-) Input/Output
6 TxRx+ MBUS A (+) Input/Output
7 +12 V EXT External power supply
8 +12 V EXT External power supply
ATTENTION! External supply is for converter MBUS!
If galvanic separation is required the converter must have external power supply.
Circuit example of the equipment with a router with data length less than 10 m:

DESCRIPTION
19
Circuit example of the equipment with a router with data length more than 10 m:
If an M-BUS data cable more then 10m it is need to use overvoltage protection
on the router side!
2.10.6. Connection of the XPORT Connector – CNT
Panel socket RJ45.
Pin
number Signal mark Description Data flow direction
1 BIN1/CNT1 Binary input/counter input Input
2 BIN2/CNT2 Binary input/counter input Input
3 BIN3 Binary input Input
4 BIN4 Binary input Input
5 GND Signal ground
6 OUT1 Binary output (open collector) Output
7 AN1 Analogy input Input
8 AN2 Analogy input Input
The user interface CNT is for monitoring and processing of analogy and binary
signals and to control (settings) of binary signal. To disposition are 2 counter and 2 binary
inputs or 4 binary inputs, 2 analogy inputs a 1 binary output. The settings of binaries
and counters inputs by the help of firmware in which it is defined the singles inputs
and output.

DESCRIPTION
20
Typical connection of the router measuring circuits:
This manual suits for next models
2
Table of contents
Other Conel Network Router manuals

Conel
Conel RR75i v2 User manual

Conel
Conel UCR11 User manual

Conel
Conel xr5i sl User manual

Conel
Conel LR77 v2 SL Instruction sheet

Conel
Conel XR5i v2 User manual

Conel
Conel UR5 User manual

Conel
Conel EDGE ER75i User manual

Conel
Conel CR10 v2 SL User manual

Conel
Conel SPECTRE v3 LTE User manual

Conel
Conel ER75i v2 SL User manual

Conel
Conel CR10 v2 SL User manual

Conel
Conel UR5i v2 SL User manual

Conel
Conel Bivias v2 User manual

Conel
Conel Bivias v2 User manual

Conel
Conel UR5i v2 SL User manual

Conel
Conel ER75i v2 SL Guide

Conel
Conel LR77 v2 SL User manual

Conel
Conel ER75i v2 SL User manual

Conel
Conel LR77 v2 SL User manual

Conel
Conel UR5 User manual