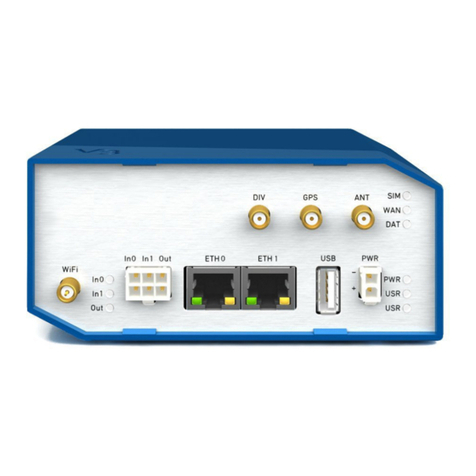
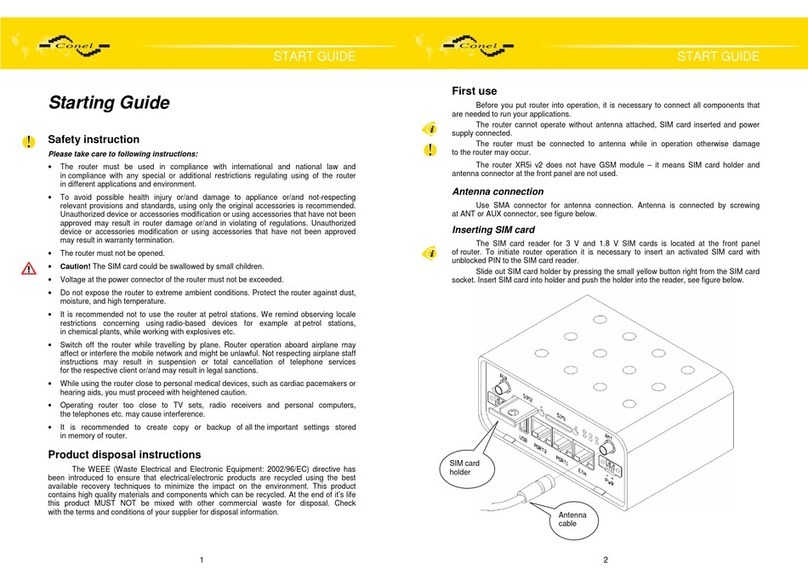
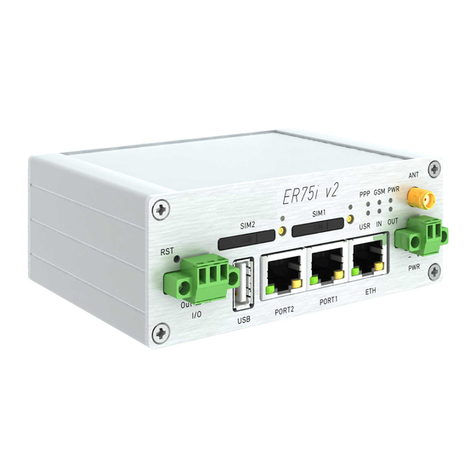
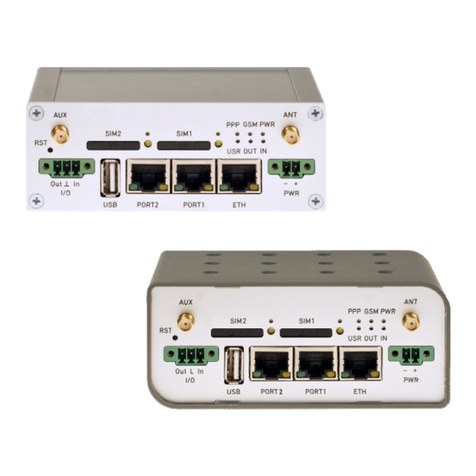
Conel XR5i v2 User manual

Industrial router XR5i v2
and XR5i v2 SL
USER’S GUIDE

USED SYMBOLS
Used symbols
Danger – important notice, which may have an influence on the user s safety or the function
of the device.
Attention – notice on possible problems, which can arise in specific cases.
Information, notice – information, which contains useful advice or special interest.
GPL license
Source codes under GPL license are available free of charge by sending an email
Conel s.r.o., Sokolska 71, 562 04 Usti nad Orlici, Czech Republic
Manual issued in CZ, 4/17/2012
ii
Declared quality system
IS 9001

CONTENTS
Contents
1.Safety instruction 1
2.Product disposal instructions 2
3.Router description 3
4.Contents of package 4
5.Router design 5
5.1.Version 5
5.2.Delivery identification 5
5.3.Ordering code 6
5.4.Basic dimensions plastic box 7
5.5.Basic dimensions metal box 7
5.6.Mechanical external dimensions and mounting recommendations 8
5.7.User interfaces (connectors) 10
5.7.1.Status indication 11
5.7.2.Power connector PWR 12
5.7.3.Ethernet port 13
5.7.4.PORT1 15
5.7.5.PORT2 15
5.7.6.USB port 16
5.7.7.I/O port 17
5.7.8.Reset 18
6.First use 19
6.1.Connecting the router before first use 19
6.2.Start router 20
6.3.Router configuration 20
6.3.1.Configuration over web browser 20
6.3.2.Configuration over Telnet 20
7.Technical parameters 21
7.1.Technical parameters of router 21
7.2.Technical parameters of processor 21
7.3.Technical parameters of I/O port 21
7.4.Technical parameters of expansion port 21
8.Recommended literature 22
9.Possible problems 22
10.FAQ 23
11.Customers support 24
iii

IMAGE LIST
Image list
Fig. 1: Contents of package 4
Fig. 2: Front panel XR5i v2F SL 5
Fig. 3: Front panel XR5i v2F SL 5
Fig. 4: Label XR5i v2F 5
Fig. 5: Label XR5i v2F SL 5
Fig. 6 Basic dimensions plastic box 7
Fig. 7: Basic dimensions metal box 7
Fig. 8: Cable routing 8
Fig. 9: Cable routing for SL version 8
Fig. 10: Space in front connectors 9
Fig. 11: Space in front connectors SL version 9
Fig. 12: Front panel XR5i v2F 10
Fig. 13: Front panel XR5i v2F SL 10
Fig. 14: Power connector 12
Fig. 15: Connection of power supply connector 12
Fig. 16: Connection of power supply 12
Fig. 17: Ethernet connector 13
Fig. 18: Connection Ethernet cable 13
Fig. 19: Example of router connection 14
Fig. 20: Connection PORT1 cable 15
Fig. 21: Connection PORT2 cable 15
Fig. 22: USB connector 16
Fig. 23: Connection PLC to the router 16
Fig. 24: Connection flash memory to the router 16
Fig. 25: I/O connector 17
Fig. 26: Connection I/O cable 17
Fig. 27: Connection input and output of router 17
Fig. 28: Router reset 18
Fig. 29: Router connection 19
iv

TABLE LIST
Table list
Table 1: Expansion port possibilities 4
Table 2: Router version 5
Table 3: Delivery identification 5
Table 4: Ordering code of full version 6
Table 5: Front panel description 10
Table 6: Router status indication 11
Table 7: Connection of power connector 12
Table 8: Connection of Ethernet connector 13
Table 9: Connection of USB connector 16
Table 10: Connection of I/O port 17
Table 11: Description of reset and restart router 18
Table 12: Technical parameters of router 21
Table 13: Technical parameters of processor 21
Table 14: Technical parameters of I/O 21
v

SAFETY INSTRUCTION
1. Safety instruction
Please, observe the following instructions:
• The router must be used in compliance with all applicable international and national laws and
in compliance with any special restrictions regulating the utilization of the router in
prescribed applications and environments.
• To prevent possible injury to health and damage to appliances and to ensure that all
the relevant provisions have been complied with, use only the original accessories.
Unauthorised modifications or utilization of accessories that have not been approved may
result in damage to the router and in a breach of applicable regulations. Unauthorized
modifications or utilization of accessories that have not been approved may result in the
termination of the validity of the guarantee.
• The router can not be opened.
• Caution! The SIM card could be swallowed by small children.
• Voltage at the feed connector of the router must not be exceeded.
• Do not expose the router to extreme ambient conditions. Protect the router against dust,
moisture and high temperature.
• The router should not be used at petrol stations. We remind the users of the duty to observe
the restrictions concerning the utilization of radio devices at petrol stations, in chemical
plants, or in the course of blasting works in which explosives are used.
• Switch off the router when travelling by plane. Utilization of the router in a plane may
endanger the operation of the plane or interfere with the mobile telephone network, and
may be unlawful. Failure to observe these instructions may result in the suspension or
cancellation of telephone services for the respective client, or, it may result in legal
sanctions; it may also result in both eventualities.
• When using the router in the close proximity of personal medical devices, such as cardiac
pacemakers or hearing aids, you must proceed with heightened caution.
• If it is in the proximity of TV sets, radio receivers and personal computers, the telephone may
cause interference.
• It is recommended that you should create an appropriate copy or backup of all the important
settings that are stored in the memory of the device.
1
PRODUCT DISPOSAL INSTRUCTIONS
2. Product disposal instructions
The WEEE (Waste Electrical and Electronic Equipment: 2002/96/EC) directive has
been introduced to ensure that electrical/electronic products are recycled using the best
available recovery techniques to minimize the impact on the environment. This product
contains high quality materials and components which can be recycled. At the end of it s life
this product MUST NOT be mixed with other commercial waste for disposal. Check the terms
and conditions of your supplier for disposal information.
2

ROUTER DESCRIPTION
3. Router description
Industrial router XR5i v2 is used to a secure connection of two local networks (LAN) via
two Ethernet interfaces 10/100. Connection is secured by use tunnels IPSec, OpenVPN
or L2TP. The other use of XR5i v2 is converter from serial line RS232, RS485, M-BUS... to IP
local area network (LAN EHTERNET 100/10).
As standard features, the industrial router XR5i v2 includes one Ethernet port 10/100,
one USB host port the I/O port. The wide range of interface options on the industrial router
further expands two optional ports selected by the customer – for example Ethernet port
10/100, serial interface ports RS232/RS485/RS422/MBUS or (I/O) ports. The industrial router
is supplied either in a plastic or metal casing, based on the requirements of the customer.
Configuration is done via web interface protected by password. The router supports
creation of VPN tunnels using technologies IPsec, OpenVPN and L2TP to ensure safe
communication. Web interface provides detail statistics about the router activities.
Other diagnostic functions ensuring continuous communication include automatic
functionality inspection, or hardware watchdog which monitors the status of the router. With the
help of a special window (start up script window) you may insert Linux scripts for various
actions. For some applications the key option to create several different configurations for one
wireless router, the so-called profiles (maximum of 4), and the option to switch between them
(for example via binary input status, web interface, etc.) is essential.
The industrial routers XR5i v2 may be bulk-configured within the network and also
additional software may be used - VPN server Digicluster or software for router monitoring R-
SeeNet.
Examples of possible applications
• security system
• remote monitoring
• vending and dispatcher machines
3

ROUTER DESCRIPTION
4. Contents of package
Basic delivered set of router includes:
• router,
• power supply,
• crossover UTP cable,
• clips for the DIN rail,
• installation CD containing instructions,
• paper start guide.
Fig. 1: Contents of package
The router box and DIN mount are supplied in a metal case in the SL version of the router.
In addition to the basics it is possible to deliver:
• two expansion ports RS232, RS485/RS422, ETHERNET, M-BUS, CNT or XC-SW.
Separation columns for mounting expansion boards are included.
Module can be connected only as follows.
PORT1 RS232, RS485/422, ETHERNET, M-BUS, CNT, XC-SW (together with PORT2)
PORT2 RS232, RS485/422, M-BUS (together with PORT1)
Table 1: Expansion port possibilities
4

ROUTER DESCRIPTION
5. Router design
5.1. Version
Box I/ USB P RT1 P RT2 ETH
XR5i v2F set Plastic
XR5i v2F SL set Metal
Table 2: Router version
Fig. 2: Front panel XR5i v2F SL Fig. 3: Front panel XR5i v2F SL
5.2. Delivery identification
Trade name Type name ther
XR5i v2F XR-5i-v2 Full version
XR5i v2F SL XR-5i-v2 Full version in the metal box
Table 3: Delivery identification
Fig. 4: Label XR5i v2F
Fig. 5: Label XR5i v2F SL
5

ROUTER DESCRIPTION
5.3. Ordering code
ptional port Possible participation rdering code
Version without optional port XR5i v2F set
Version with optional Ethernet port PORT1 XR5i v2F ETH set
Version with optional RS232 port PORT1 a PORT2 XR5i v2F RS232 set
Version with optional RS485 port PORT1 a PORT2 XR5i v2F RS458 set
Version with optional MBUS port PORT1 a PORT2 XR5i v2F MBUS set
Version with optional CNT port PORT1 XR5i v2F CNT set
Version with optional XC-SW port PORT1 + PORT2 XR5i v2F SWITCH set
Table 4: Ordering code of full version
Second optional port is written after first optional port in the ordering code.
Example:
•Full version with Ethernet and RS232 port: XR5i v2F ETH RS232 set.
•Full version with Ethernet and RS232 port in metal box:
XR5i v2F SL ETH RS232 set.
6

ROUTER DESCRIPTION
5. . Basic dimensions plastic box
Fig. 6 Basic dimensions plastic box
5.5. Basic dimensions metal box
Fig. 7: Basic dimensions metal box
7

ROUTER DESCRIPTION
5.6. Mechanical external dimensions and mounting recommendations
Mounting recommendations:
• possibility to be put on a work surface,
• DIN rail with clips CPD2 (Elpac clip SL for SL version) are included.
For the most of applications with a built-in router in a switch board it is possible
to recognize two kinds of environments:
•no public and industry environment of low voltage with high interference,
•public environment of low voltage without high interference.
For both of these environments it is possible to mount router to a switch board,
the following there is no need to have examination immunity or issues in connection with
EMC according to EN 60439-1 ed.2:00 + A1:04.
•for every cables we recommend to bind the bunch according to the following picture,
we recommend for this use:
length of the bunch (combination of power supply and data cables) can
be maximum 1,5 m, if the length of data cables exceeds 1,5 m
or in the event of, the cable leads towards the switch - board, we
recommend installing over - voltage protectors (surge suppressors),
with data cables they mustn't carry cables with reticular tension
~ 230 V/50 Hz,
all signals to sensors must be twisted pairs
Fig. 8: Cable routing Fig. 9: Cable routing for SL version
•sufficient space must be left before individual connectors for handling of cables
8

ROUTER DESCRIPTION
Fig. 10: Space in front connectors Fig. 11: Space in front connectors SL version
•for correct function of the router we recommend to use in the switch-board earth-
bonding distribution frame for grounding of power supply of router, data cables and
antenna,
9

ROUTER DESCRIPTION
5.7. User interfaces (connectors)
On the front panel is located:
Label Connector Description
PWR 2-pin Connector for connection the power supply adapter.
ETH RJ45 Connector for connection into the local computer network.
PORT1 RJ45 Connector for connection equipment over RS232, RS458/422,
ETHERNET, M-BUS, CNT or XC-SW.
PORT2 RJ45 Connector for connection equipment over RS232, RS485/422,
M-BUS or XC-SW (only FULL version).
USB USB-A Host Connector– for connection the devices with the router, USB supports
equipments with PL-2303 and FTDI USB/RS232 converter.
I/O 3-pin Connector for connection of the binary input and output.
Table 5: Front panel description
Fig. 12: Front panel XR5i v2F
Fig. 13: Front panel XR5i v2F SL
10

ROUTER DESCRIPTION
5.7.1. Status indication
About router status inform four led indicators on the front panel and on every port are
two LED indicators, which inform about port status.
Label Color Description
PWR Green Blinking ......................... router is ready
Permanently on ………..starting of the router
USR Yellow Function selected by user
OUT Green On......................Binary output active
IN Green On...................... Binary input active
ETH Green On ...................... selected 100 Mbit/s
Off ...................... selected 10 Mbit/s
ETH Yellow
On........................ the network cable is connected
Blinking ……….... data transmission
Off.........................the network cable is not connected
PORT Green Description by port (viz. Technical specification)
PORT Yellow Description by port (viz. Technical specification)
Table 6: Router status indication
11

ROUTER DESCRIPTION
5.7.2. Power connector PWR
Panel socket 2-pin.
Pin
number
Signal
mark Description
1 VCC (+) Positive pole of DC supply voltage (+10 to +30 VDC)
2 GND (-) Negative pole of DC supply voltage
Table 7: Connection of power connector
Fig. 14: Power connector
Power supply for router is required between +10 V to +30 V DC supply. Protection
against reversed polarity without signaling is built into the router.
The power consumption during receiving is 1W. The peak power consumption during
data sending is 5,5W. For correct operation it is necessary that the power source is
able to supply a peak current of 600mA.
Connector on the power cable connects into the power connector on the router head
and tightens locking screws. (See bellow picture)
Fig. 15: Connection of power supply connector
Circuit example:
Fig. 16: Connection of power supply
The positive pole VCC is marked by a red socket on the power.
12

ROUTER DESCRIPTION
5.7.3. Ethernet port
Panel socket RJ45.
Pin
number Signal mark Description Data flow direction
1 TXD+ Transmit Data – positive pole Input/Output
2 TXD- Transmit Data – negative pole Input/Output
3 RXD+ Receive Data – positive pole Input/Output
4 --- ---
5 --- ---
6 RXD- Receive Data – negative pole Input/Output
7 --- ---
8 --- ---
Table 8: Connection of Ethernet connector
Fig. 17: Ethernet connector
Ethernet cable plug into the RJ45 connector labeled as ETH. (See bellow picture)
Fig. 18: Connection Ethernet cable
ATTENTI N! Port ETH is not P E (Power ver Ethernet) compatible!
13

ROUTER DESCRIPTION
The ETH router connection:
Fig. 19: Example of router connection
14

ROUTER DESCRIPTION
5.7.4. P RT1
The PORT1 is equipped with one of the offered options ports. For PORT1 are
available on the interface.
PORT1 RS232, RS485/422, ETHERNET, M-BUS, CNT, XC-SW (together with PORT2)
Description, connection and examples of optional connection ports can be found
in separate manuals expansion ports.
PORT1 cable plug into the RJ45 connector labeled as ETH. (See bellow picture)
Fig. 20: Connection PORT1 cable
5.7.5. P RT2
The PORT2 is equipped with one of the offered options ports. For PORT2 are
available on the interface.
PORT2 RS232, RS485/422, M-BUS, XC-SW (together with PORT1)
PORT2 is fitted only in the FULL version of the router
Description, connection and examples of optional connection ports can be found
in separate manuals expansion ports.
PORT2 cable plug into the RJ45 connector labeled as ETH. (See bellow picture)
Fig. 21: Connection PORT2 cable
15
This manual suits for next models
1
Table of contents
Other Conel Network Router manuals

Conel
Conel LR77 v2 SL User manual

Conel
Conel RR75i v2 User manual

Conel
Conel UR5i a User manual

Conel
Conel ER75i v2 SL User manual

Conel
Conel UR5i v2 SL User manual

Conel
Conel EDGE ER75i User manual

Conel
Conel SPECTRE v3 LTE User manual

Conel
Conel EDGE ER75i User manual

Conel
Conel UR5i v2 SL Instruction sheet

Conel
Conel UR5 v2 User manual

Conel
Conel UR5 User manual

Conel
Conel CR10 v2 SL User manual

Conel
Conel UR5i v2 SL User manual

Conel
Conel ER 75i SL User manual

Conel
Conel ER75i v2 SL User manual

Conel
Conel Bivias v2 User manual

Conel
Conel UR5 User manual

Conel
Conel LR77 v2 SL Instruction sheet

Conel
Conel UCR11 v2 SL User manual

Conel
Conel UCR11 User manual