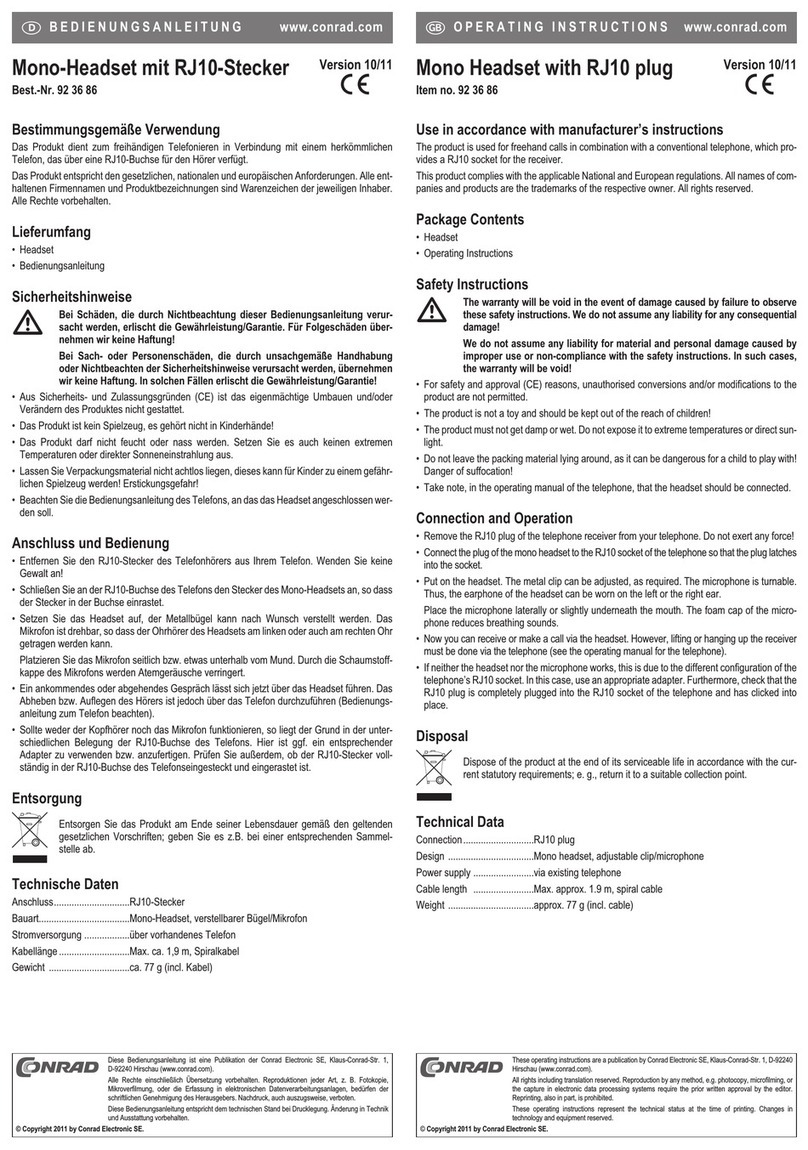
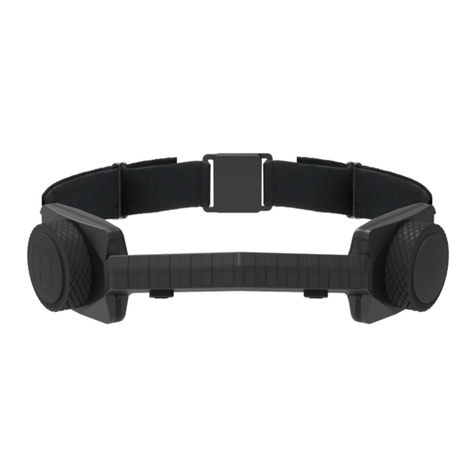
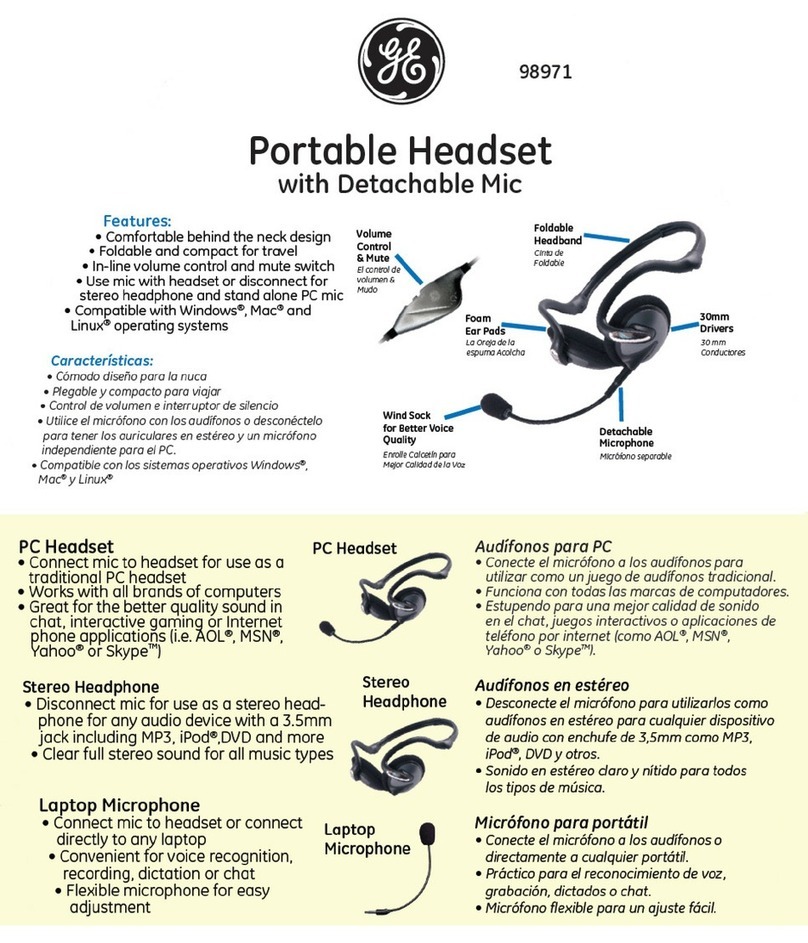
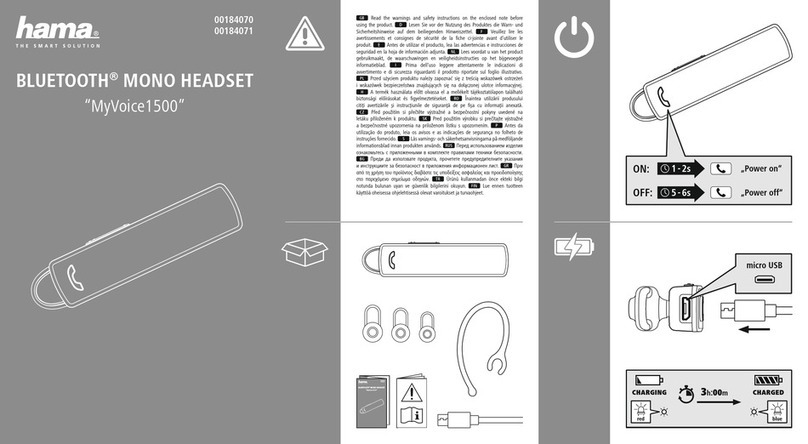
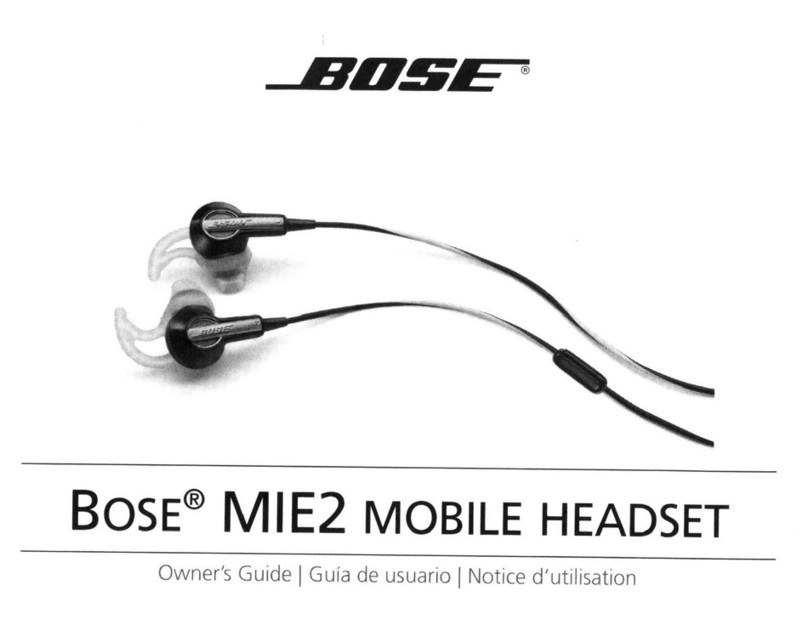
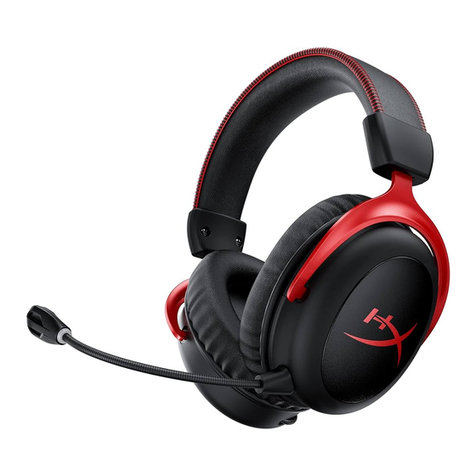
Conrad AW-430 User manual

Version 05/10
DECT Headset AW-430 Seite 03 -10
DECT Headset AW-430 Page 11- 18
Casque DECT AW-430 Page 19 - 26
Best.-Nr. / Item-No. / No de commande.: 92 20 17
BEDIENUNGSANLEITUNG OPERATING INSTRUCTIONS
NOTICE D’EMPLOI

2
Diese Bedienungsanleitung gehört zu diesem Produkt. Sie enthält wichtige Hinweise zur
Inbetriebnahme und Handhabung. Achten Sie hierauf, auch wenn Sie dieses Produkt an
Dritte weitergeben.
Heben Sie deshalb diese Bedienungsanleitung zum Nachlesen auf!
Eine Auflistung der Inhalte finden Sie in dem Inhaltsverzeichnis mit Angabe der entsprechenden
Seitenzahlen auf Seite 4.
These operating instructions belong with this product. They contain important informati-
on for putting it into service and operating it. This should be noted also when this pro-
duct is passed on to a third party.
Therefore look after these operating instructions for future reference!
A list of contents with the corresponding page numbers can be found in the index on page 12.
Ce mode d'emploi appartient à ce produit. Il contient des recommandations en ce qui
concerne sa mise en service et sa manutention. Veuillez en tenir compte et ceci égale-
ment lorsque vous remettez le produit à des tiers.
Conservez ce mode d'emploi afin de pouvoir vous documenter en temps utile.!
Vous trouverez le récapitulatif des indications du contenu à la table des matières avec mention
de la page correspondante à la page 20.

3
Einführung
Sehr geehrter Kunde,
wir bedanken uns für den Kauf des DECT Headsets!
Damit haben Sie ein Produkt erworben, welches nach dem heutigen Stand der Technik gebaut wurde.
Um einen gefahrlosen Betrieb sicherzustellen, müssen Sie als Anwender diese Bedienungsanleitung
beachten!
Das Produkt erfüllt die Anforderungen der geltenden europäischen und nationalen Richtlinien. Die Kon-
formität wurde nachgewiesen, die entsprechenden Erklärungen und Unterlagen sind beim Hersteller
hinterlegt.
Um diesen Zustand zu erhalten und einen gefahrlosen Betrieb sicherzustellen müssen Sie als Anwender
diese Bedienungsanleitung beachten!
Bei technischen Fragen wenden Sie sich bitte an:
Deutschland: Tel. 0180/5 31 21 11,
Fax 0180/5 31 21 10
E-Mail: Bitte verwenden Sie für Ihre Anfrage unser Formular im Internet.
www.conrad.de unter der Rubrik: Kontakt
Mo. - Fr. 8.00 bis 18.00 Uhr
Österreich: www.conrad.at
Schweiz: Tel.-Nr.: 0848/80 12 88
Fax-Nr.: 0848/80 12 89
e-mail: [email protected]
Mo. - Fr. 8.00 bis 12.00 Uhr, 13.00 bis 17.00 Uhr

4
Bestimmungsgemäße Verwendung
Dieses DECT Headset ist ein tragbares und kabelloses Kommunikationssystem basierend auf der
DECT-GAP Technology. Das Headset verbindet auf einfache Weise schnurlose Telefone ohne den
Gebrauch irgendwelcher Kabelverbindungen. Damit haben Sie Ihre Hände frei für andere Aufgaben.
Dieses Headset kann auf jeder DECT/GAP-fähigen Basisstation eines schnurlosen Telefons angemel-
det werden, welches dem DECT/GAP-Profil entspricht. Beachten Sie hierzu auch die Bedienungsanlei-
tung des Telefons an dem dieses Headset verwendet werden soll und folgen Sie Schritt für Schritt den
dort beschriebenen Anweisungen!
Bei Verwendung im Freien ist darauf zu achten, dass das Headset keiner Feuchtigkeit, wie z.B. Regen,
Schnee, Nebel etc. ausgesetzt werden darf!
Eine andere Verwendung als zuvor beschrieben, führt zur Beschädigung dieses Produktes. Die Sicher-
heitshinweise sind unbedingt zu beachten!
Inhaltsverzeichnis
Einführung . . . . . . . . . . . . . . . . . . . . . . . . . . . . . . . . . . . . . . . . . . . . . . . . . . . . . . . . . . . . . . . . . . . . . . . .3
Bestimmungsgemäße Verwendung . . . . . . . . . . . . . . . . . . . . . . . . . . . . . . . . . . . . . . . . . . . . . . . . . . . . .4
Inhaltsverzeichnis . . . . . . . . . . . . . . . . . . . . . . . . . . . . . . . . . . . . . . . . . . . . . . . . . . . . . . . . . . . . . . . . . .4
Sicherheitshinweise . . . . . . . . . . . . . . . . . . . . . . . . . . . . . . . . . . . . . . . . . . . . . . . . . . . . . . . . . . . . . . . . .5
Bedienungselemente . . . . . . . . . . . . . . . . . . . . . . . . . . . . . . . . . . . . . . . . . . . . . . . . . . . . . . . . . . . . . . . .6
Akku laden . . . . . . . . . . . . . . . . . . . . . . . . . . . . . . . . . . . . . . . . . . . . . . . . . . . . . . . . . . . . . . . . . . . . . . . .6
Headset aufsetzen . . . . . . . . . . . . . . . . . . . . . . . . . . . . . . . . . . . . . . . . . . . . . . . . . . . . . . . . . . . . . . . . . .7
Headset ein-/ ausschalten . . . . . . . . . . . . . . . . . . . . . . . . . . . . . . . . . . . . . . . . . . . . . . . . . . . . . . . . . . . .7
Headset anmelden . . . . . . . . . . . . . . . . . . . . . . . . . . . . . . . . . . . . . . . . . . . . . . . . . . . . . . . . . . . . . . . . . .7
Anrufe annehmen . . . . . . . . . . . . . . . . . . . . . . . . . . . . . . . . . . . . . . . . . . . . . . . . . . . . . . . . . . . . . . . . . .8
Behebung von Störungen . . . . . . . . . . . . . . . . . . . . . . . . . . . . . . . . . . . . . . . . . . . . . . . . . . . . . . . . . . . .8
Reinigung . . . . . . . . . . . . . . . . . . . . . . . . . . . . . . . . . . . . . . . . . . . . . . . . . . . . . . . . . . . . . . . . . . . . . . . . .9
Entsorgung . . . . . . . . . . . . . . . . . . . . . . . . . . . . . . . . . . . . . . . . . . . . . . . . . . . . . . . . . . . . . . . . . . . . . . .9
Technische Daten . . . . . . . . . . . . . . . . . . . . . . . . . . . . . . . . . . . . . . . . . . . . . . . . . . . . . . . . . . . . . . . . .10
Konformitätserklärung . . . . . . . . . . . . . . . . . . . . . . . . . . . . . . . . . . . . . . . . . . . . . . . . . . . . . . . . . . . . . .10

5
Sicherheitshinweise
Bei Schäden, die durch Nichtbeachten dieser Bedienungsanleitung verursacht werden,
erlischt der Garantieanspruch! Für Folgeschäden übernehmen wir keine Haftung!
Bei Sach- oder Personenschäden, die durch unsachgemäße Handhabung oder Nichtbeach-
ten der Sicherheitshinweise verursacht werden übernehmen wir keine Haftung! In solchen
Fällen erlischt jeglicher Garantieanspruch!
Aus Sicherheits- und Zulassungsgründen (CE) ist das eigenmächtige Umbauen und/oder Verändern
des Headsets nicht gestattet!
Überprüfen Sie alle länderspezifischen Bestimmungen und Beschränkungen bezüglich der Nutzung die-
ses Headsets!
Bitte beachten Sie, dass nur ein autorisierter Fachhändler den wiederaufladbaren Akku oder andere
Komponenten des Headsets auswechseln darf!
Bei diesem Produkt handelt es sich nicht um ein Kinderspielzeug!
Setzen Sie das Headset auf keinen Fall mechanischen Belastungen, hohen oder niedrigen Temperatu-
ren, starken Vibrationen, starken Temperaturschwankungen oder Feuchtigkeit aus!
Falls Sie das Headset für längere Zeit nicht benutzen, bewahren Sie es bitte an einem trockenen, staub-
freien Ort auf!
Einige medizinische, elektronische Geräte können durch die Nutzung des Headsets gestört werden.
Benutzen Sie deshalb das Headset nicht in der Nähe von medizinischen, elektronischen Einrichtungen!
Benutzen Sie das Headset auch nicht in explosionsgefährdeten Umgebungen!
Das Headset kann in Hörgeräten einen unangenehmen Brummton verursachen.
Das Ladegerät ist nur für den Innengebrauch vorgesehen!
Verwenden Sie zum Laden des Akkus nur das mitgelieferte Steckernetzgerät! Der Akku könnte sonst
beschädigt werden.
Berühren Sie nicht die Lade- und Steckerkontakte mit spitzen oder metallischen Gegenständen!

6
Bedienungselemente
Akku laden
Das Headset ist mit einem wiederaufladbaren Akku ausgerüstet. Laden Sie den Akku ca. 6 - 8 Stunden
auf, bevor Sie das Headset das erste Mal verwenden! Das Headset funktioniert nicht optimal, wenn der
Akku nicht ausreichend aufgeladen ist.
Schalten Sie das Headset aus! Zum Laden des Akkus müssen Sie den Klinkenstecker des Steckernetz-
gerätes in die Ladebuchse des Headsets stecken! (Siehe Abbildung!) Danach stecken Sie das Stecker-
netzgerät in eine Netzsteckdose (230 Volt 50 Hz) des öffentlichen Versorgungsnetzes!
Die LED leuchtet kurz grün und dann dauernd rot. Sie hören auch einen kurzen Piepton. Ist der Akku
vollständig geladen, blinkt die LED rot. Sie können nun das Ladegerät wieder aus der Netzsteckdose
und den Klinkenstecker aus der Ladebuchse ziehen!
Blinkt oder erlischt die rote bzw. grüne LED (nach der Anmeldung blinkt diese LED grün), muss der Akku
wieder nachgeladen werden!

7
Headset aufsetzen
Sie können die Kopfhörermuschel des Headsets sowohl auf Ihr linkes, als auch auf Ihr rechts Ohr set-
zen. Der Mikrofonbügel lässt sich entsprechend in die jeweilige Richtung drehen/schwenken.
Headset ein- bzw. ausschalten
Drücken und halten Sie die Ein-/ Aus Taste solange bis die LED blinkt und Ihnen ein kurzer Piepton
bestätigt, dass das Headset nun eingeschaltet ist.
Zum Ausschalten drücken Sie diese Taste wieder solange bis die LED erlischt und ein kurzer Piepton
ertönt.
Headset anmelden
Bevor Sie das Headset zum ersten Mal benutzen, müssen Sie das Headset bei der zu verwenden-
den Basisstation anmelden!
Überprüfen Sie zunächst den PIN-Code der Basisstation des schnurlosen Telefons! Der PIN-Code des
Headsets ist „0 0 0 0“. Daher muss auch der PIN-Code der Basistation auf „0 0 0 0“ programmiert wer-
den.
Beachten Sie hierzu die Bedienungsanleitung des schnurlosen Telefons an dem dieses Headset
verwendet werden soll und folgen Sie Schritt für Schritt den dort beschriebenen Anweisungen!
Begeben Sie sich in einem Abstand von ca. 1-2 Meter zur Basisstation Ihres Telefons! Schalten Sie das
Headset ein, die rote LED blinkt! Jetzt befindet sich das Headset im inaktiven Zustand.
Drücken Sie nun einmal mit einem spitzen Gegenstand, z.B. mit einer aufgebogenen Büroklammer die
„PARK“-Taste! (Siehe Abbildung!) Diese Taste sitzt etwas vertieft in der Öffnung, damit diese nicht ver-
sehentlich gedrückt werden kann. Sie müssen daher den spitzen Gegenstand vorsichtig in diese Öff-
nung führen und dann nur leicht auf diese Taste (= Mykroschalter) drücken (leiser Klick)!
Die rote LED blinkt jetzt schnell und geht auf ein blinkendes grün über wenn der Anmeldevorgang posi-
tiv an der Basisstation des Telefons abgeschlossen wurde. Das Headset befindet sich nun im Standby-
Modus. Ist der Anmeldevorgang missglückt, wiederholen Sie den gesamten Vorgang!

8
Anrufe annehmen
Schalten Sie das Headset mit der Ein-/Aus Taste ein (Standby-Modus)! Die grüne LED blinkt. Wenn Sie
einen Anruf erhalten hören Sie den Klingelton Ihres Telefons, bzw. einen Piepton im Kopfhörer. Die grü-
ne LED blinkt jetzt schneller.
Drücken Sie nun nochmals auf die Ein-/Aus Taste! Die LED leuchtet nun dauernd. Sie haben jetzt das
Gespräch angenommen und können nun mit dem Anrufer über das Mikrofon sprechen und über den
Kopfhörer hören. Sie können sich dabei ca. 30 Meter (nur im Innenbereich) von der Basisstation entfer-
nen.
Wenn Sie die Ein-/Aus Taste leicht nach rechts oder links drücken, können Sie die Lautstärke entspre-
chend (lauter oder leiser) einstellen. Ist das Gespräch beendet drücken Sie erneut die Ein-/Aus Taste!
Das Headset ist nun wieder im Standby-Modus.
Behebung von Störungen
Mit diesem Headset haben Sie ein Produkt erworben, welches nach dem heutigen Stand der Technik
gebaut wurde. Dennoch kann es zu Problemen öder Störungen kommen. Deshalb möchten wir Ihnen
hier einige Möglichkeiten aufzeigen, wie Sie mögliche Störungen selbst beheben können.
Beachten Sie hierzu auch Sicherheitshinweise!
Fehler Mögliche Ursache Lösung
Keine Verbindung Keine korrekte Anmeldung Melden Sie das Headset
zwischen Headset erneut an und achten Sie
und Basisstation darauf, dass der Abstand
zwischen Headset und
Basisstation nicht mehr
als 30 Meter beträgt!
Headset lässt sich PIN-Code der Basisstation . Siehe Bedienungsanleitung
nicht anmelden ist falsch der Basisstation und
Akkuzustand ist zu niedrig. ändern Sie den PIN-Code
Telefon ist nicht GAP-fähig. auf „0 0 0 0“!
Headset laden!

9
Fehler Mögliche Ursache Lösung
Keine Ladeanzeige Headset wurde längere Akku aufladen!
Zeit nicht mehr verwendet;
der Akku könnte leer sein.
Lautstärke ist zu Falsche Lautstärkeeinstellung Regeln Sie die Lautstärke
niedrig oder zu laut mit der Ein-/Aus Taste!
Zu geringe Reichweite Stahlbetonwände, bzw.
Leuchtstoffröhren, etc.
können die Reichweite
minimieren
Reinigen
Reinigen Sie das Headset mit einem leicht feuchten Tuch oder mit einem Antistatiktuch! Verwenden Sie
niemals Reinigungsmittel oder gar aggressive Lösungsmittel!
Entsorgung
Entsorgen Sie das defekte Headset und den Akku, gemäß den geltenden Vorschriften!
Entsorgung von gebrauchten Batterien/Akkus!
Sie als Endverbraucher sind gesetzlich (Batterieverordnung) zur Rückgabe aller gebrauchten Batte-
rien und Akkus verpflichtet; eine Entsorgung über den Hausmüll ist untersagt!
Schadstoffhaltige Batterien/Akkus sind mit nebenstehenden Symbolen gekennzeichnet,
die auf das Verbot der Entsorgung über den Hausmüll hinweisen.Die Bezeichnungen für
das ausschlaggebende Schwermetall sind: Cd = Cadmium, Hg = Quecksilber, Pb = Blei.
Ihre verbrauchten Batterien/Akkus können Sie unentgeltlich bei den Sammelstellen Ihrer
Gemeinde unseren Filialen oder überall dort abgeben, wo Batterien/Akkus verkauft wer-
den!
Sie erfüllen damit die gesetzlichen Verpflichtungen und leisten Ihren Beitrag zum Umweltschutz!

10
Technische Daten
Standard : DECT GAP
Spannungsversorgung : 6V/DC, 1A
Steckernetzgerät : Eingang: 230 Volt AC / 50 Hz
Ausgang: 6 V/DC / 1000mA
Sendeleistung : 10 mW bis zu einer Reichweite von 30 m
Pin-Code : 0 0 0 0
Konformitätserklärung
Hiermit erklären wir, Conrad Electronic SE, Klaus-Conrad-Straße 1, 92240 Hirschau, dass sich dieses
Produkt in Übereinstimmung mit den grundlegenden Anforderungen und den anderen relevanten Vor-
schriften der Richtlinie 1999/5/EG befindet.
☞Die Konformitätserklärung zu diesem Produkt finden Sie unter www.conrad.com.

11
Introduction
Dear Customer,
Thank you for purchasing the DECT headset.
You purchased a product the design of which corresponds to the state-of-the-art. To ensure risk-free
operation, you, as the user, must observe these operating instructions!
This product meets the requirements of the applicable European and national guidelines. Its conformity
has been verified, the corresponding declarations and documents deposited with the manufacturer.
To maintain this status and ensure safe operation, you, as the user, must observe these operating
instructions.
In case of technical questions please contact us:
Germany: Tel. 0180/5 31 21 11,
Fax 0180/5 31 21 10
E-mail: Please use our contact form in the Internet:
www.conrad.de in the category "Contact"
Mon to Thurs 8.00am to 4.30pm Fri 8.00am to 2.00pm

12
Intended Use
This DECT Headset is a portable and wireless communication system based on the DECT GAP techno-
logy. In the simplest manner, the headset combines cordless telephones without the use of any cable
connections. This means that your hands are free for other tasks.
This headset can be plugged in to any DECT/GAP-compliant base station of a cordless telephone which
corresponds to the DECT/GAP profile. For this, observe the operating instructions of the telephone on
which this headset is to be used and follow the instructions described there step for step!
When using it in the open-air, take note that the headset may not be exposed to dampness such as, for
example, rain, snow, fog etc.!
Use other than that described above can lead to damage to the product. The safety instructions have to
be observed without fail!
Table of Contents
Introduction . . . . . . . . . . . . . . . . . . . . . . . . . . . . . . . . . . . . . . . . . . . . . . . . . . . . . . . . . . . . . . . . . . . . . .11
Intended Use . . . . . . . . . . . . . . . . . . . . . . . . . . . . . . . . . . . . . . . . . . . . . . . . . . . . . . . . . . . . . . . . . . . . .12
Table of Contents . . . . . . . . . . . . . . . . . . . . . . . . . . . . . . . . . . . . . . . . . . . . . . . . . . . . . . . . . . . . . . . . . .12
Safety instructions . . . . . . . . . . . . . . . . . . . . . . . . . . . . . . . . . . . . . . . . . . . . . . . . . . . . . . . . . . . . . . . . .13
Operating elements . . . . . . . . . . . . . . . . . . . . . . . . . . . . . . . . . . . . . . . . . . . . . . . . . . . . . . . . . . . . . . . .14
Charging accumulators! . . . . . . . . . . . . . . . . . . . . . . . . . . . . . . . . . . . . . . . . . . . . . . . . . . . . . . . . . . . . .14
Putting on headset . . . . . . . . . . . . . . . . . . . . . . . . . . . . . . . . . . . . . . . . . . . . . . . . . . . . . . . . . . . . . . . .15
Switching headset on/off . . . . . . . . . . . . . . . . . . . . . . . . . . . . . . . . . . . . . . . . . . . . . . . . . . . . . . . . . . . .15
Plugging in headset . . . . . . . . . . . . . . . . . . . . . . . . . . . . . . . . . . . . . . . . . . . . . . . . . . . . . . . . . . . . . . . .15
Accepting calls . . . . . . . . . . . . . . . . . . . . . . . . . . . . . . . . . . . . . . . . . . . . . . . . . . . . . . . . . . . . . . . . . . . .16
Troubleshooting . . . . . . . . . . . . . . . . . . . . . . . . . . . . . . . . . . . . . . . . . . . . . . . . . . . . . . . . . . . . . . . . . . .16
Cleaning . . . . . . . . . . . . . . . . . . . . . . . . . . . . . . . . . . . . . . . . . . . . . . . . . . . . . . . . . . . . . . . . . . . . . . . . .17
Disposal . . . . . . . . . . . . . . . . . . . . . . . . . . . . . . . . . . . . . . . . . . . . . . . . . . . . . . . . . . . . . . . . . . . . . . . . .17
Technical data . . . . . . . . . . . . . . . . . . . . . . . . . . . . . . . . . . . . . . . . . . . . . . . . . . . . . . . . . . . . . . . . . . . .18
Declaration of conformity . . . . . . . . . . . . . . . . . . . . . . . . . . . . . . . . . . . . . . . . . . . . . . . . . . . . . . . . . . . .18

13
Safety instructions
The warranty will lapse in case of damage caused by failure to comply with these ope-
rating instructions! We shall not be liable for any consequent damage!
We do not accept liability for personal injury or damage to property caused by incor-
rect handling or non-observance of the safety instructions! The warranty will lapse in
such cases!
For safety and licensing (CE) reasons, unauthorised modification and/or alterations to the headset are
not permitted.
Check all country-specific provisions and restrictions with respect to the use of this headset!
Please note that only an authorised specialist dealer may replace the rechargeable accumulator or other
components of the headset!
This product is not a toy!
Do not expose the device to heavy mechanical load, high or low temperatures, strong vibration or strong
fluctuation in temperature or dampness.
If you do not use the headset for longer periods, please keep it in a dry and dust-free place!
Some medical, electronic devices can be disturbed through the use of the headset. Therefore, do not
use the headset in the vicinity of medical, electronic installations! Do not use the headset in environ-
ments endangered by explosion.
The headset can cause an unpleasant buzzing tone in hearing aids.
This charger is intended for indoor use only.
Only use the supplied plug-in power unit for charging the accumulator. The accumulator could otherwise
be damaged.
Do not touch the charging and plug-in contacts with sharp or metal objects!

14
Operating elements
Charging accumulators!
The headset is equipped with a rechargeable accumulator. Charge the accumulator for approx. 6 - 8
hours before using the headset for the first time! The headset will not function optimally if the accumula-
tor is not sufficiently charged.
Switch the headset off. To charge the accumulator, the jack bushing of the plug-in power unit has to be
inserted into the charging jack of the headset! (See illustration!) Then insert the plug-in power unit into a
mains socket (230V~/50Hz) of the public supply grid!
The green LED will light up briefly and then the red one permanently. You will also hear a beep tone. If
the accumulator is fully charged, the re LED will flash. You can now pull out the charging device from the
mains socket and the jack bushing from the charging jack!
If the red or green LED go out (after plugging in, the green LED flashes), the accumulator has to be
recharged!

15
Putting on headset
You can put the headphone shell of the headset both on your left or your right ear. The microphone bra-
cket can be turned/swivelled in the direction concerned.
Switching headset on/off
Press and hold the on/off button so long until the LED flashes and a beep tone confirms that the headset
is now switched on.
To turn it off, press this button again so long until the LED goes out and a short beep sounds.
Plugging in headset
Before you use the headset for the first time, you have to plug the headset into the base station
which is to be used!
First of all, check the PIN code of the base station of the cordless telephone! The PIN code of the head-
set is “0 0 0 0“. Therefore, the PIN code of the base station has to be programmed to “0 0 0 0“.
For this, observe the operating instructions of the cordless telephone on which this headset is to
be used and follow the instructions described there step for step!
Take up a position approx. 1-2 metres from the base station of your telephone! Switch on the headset,
the red LED flashes! The headset is now in an inactive condition.
Press the “PARK“ button once again with a sharp object, e.g. with an unbent paper clip! (See illustration!)
This button is seated somewhat deeper in the opening so that this is not pressed by mistake. You there-
fore have to insert the sharp object carefully into the opening and then just press this button lightly (=
micro switch) (soft click)!
The red LED now flashes quickly and goes over to a flashing green one when the plug-in process on the
base station of the telephone has been completed positively. The headset is now in standby mode. If the
plug-in process has failed, repeat the complete process!

16
Accepting calls
Switch on the headset using the on/off button (standby mode)! The green LED flashes. When you recei-
ve a call, you can hear the ringing tone of your telephone or a beep in the headphone. The green LED
now flashes more quickly.
Now press the on/off button again. The LED now lights up permanently. You have now accepted the call
and can speak to the caller over the microphone and hear him/her on the headset. You can go around 30
metres away from the base station (only indoors).
If you press the on/off button slightly to the right or left, you can set the volume correspondingly (louder
or softer). When the conversation has been finished, press the on/off button again. The headset is now
in standby mode.
Troubleshooting
With this headset, you have purchased a product the design of which complies with state-of-the-art.
However, problems and malfunctions can occur. Therefore we should like to explain some possibilities to
you as to how you can eliminate possible faults.
Observe the safety instructions for this also!
Fault Possible cause Solution
No connection bet- Connection not successful Plug in the headset again and
ween the headset make sure that the distance
and base station between the headset and the
base station is not longer
than 30 metres!
Headset cannot be The PIN code of the base See the operating instruc-
switched on. station is incorrect. tions of the base station and
The accumulator is too low. alter the PIN code to “0 0 0 0“!
Telephone is not GAP- Charge headset!
conform.
No charging display Headset has not been used Charge accumulator!
for a longer period; the
accumulator could be flat.

17
Fault Possible cause Solution
Volume is to low Incorrect volume setting Control the volume using the of
too loud on/off button.
Range too short Reinforced concrete walls
or luminescent pipes etc.
can minimise the range
Cleaning
Clean the headset with a slightly damp cloth or with an anti-static cloth! Never use cleaning agents or
aggressive solvents!
Disposal
Dispose of the defective handset and the accumulator according to the currently valid regulations!
Disposal of flat batteries / accumulators
You, as the ultimate consumer, are legally obliged (Battery Ordinance) to return all used batteries and
accumulators; disposal with the domestic rubbish is prohibited!
Pollutant-containing batteries/accumulators are identified by the symbols alongside
which also draw attention to the prohibition of disposal with domestic waste. The
names for the decisive heavy metals are: Cd=cadmium, Hg=mercury, Pb=lead (the
designation is written on the accumulator e.g. under the rubbish can symbols depicted
at the left). You can hand in your used batteries/accumulators at the official collection
points of your community at no cost or everywhere where batteries/accumulators are
sold.
You thus fulfil your statutory obligations and make your contribution to the protection of the environment.

18
Technical data
Standard : DECT GAP
Voltage supply : 6V/DC, 1A
Plug-in power unit : Input: 230 V AC / 50 Hz
Output: 6 V DC / 1000mA
Transmission output : 10 mW up to a range of 30 m
Pin code : 0 0 0 0
Declaration of conformity
We, Conrad Electronic SE, Klaus-Conrad-Straße 1, 92240 Hirschau, hereby declare that this product
adheres to the fundamental requirements and the other relevant regulations of Directive 1999/5/EC.
☞You can find the declaration of conformity for this product at www.conrad.com.

19
Introduction
Cher client,
Nous vous remercions d´avoir acheté ce casque DECT.
Vous venez d'acquérir un produit conçu selon l’état actuel de la technique. Afin d´assurer un fonctionne-
ment sans risque de l´appareil, vous êtes tenu de respecter, en tant qu´utilisateur, cette notice d´utilisa-
tion.
Ce produit répond aux exigences des directives européennes et nationales en vigueur. La conformité a
été prouvée, les documents et déclarations correspondants ont été déposés chez le constructeur.
Afin de maintenir le produit dans son état actuel et d’assurer un fonctionnement sans risques, les utilisa-
teurs sont tenus d’observer les instructions contenues dans le présent mode d’emploi.
Pour toutes vos questions techniques, veuillez vous adresser au numéro suivant :
Allemagne : téléphone: 0180/5 31 21 11, télécopie: 0180/5 31 21 10
Email : Veuillez utiliser notre formulaire pour votre demande dans Internet
www.conrad.de sous la rubrique Contact
France: Tél. 0 892 897 777
Fax 0 892 896 002
e-mail: [email protected]
du lundi au vendredi de 8h00 à 18h00
le samedi de 8h00 à 12h00
Suisse: Tél 0848/80 12 88
Fax 0848/80 12 89
e-mail: [email protected]
du lundi au vendredi de 8h00 à 12h00, 13h00 à
17h00

20
Utilisation conforme
Ce casque DECT est un système de communication portatif et sans fil qui est basé sur la technologie
DECT-GAP. Le casque relie des téléphones sans fil de façon simple et sans qu'il y ait besoin de quel-
conques liaisons câblées. Vous avez donc les mains libres pour remplir d´autres tâches.
Ce casque peut être s'inscrire sur n'importe qu'elle base supportant la technologie DECT/GAP d'un télé-
phone sans fil qui correspond au profil DECT/GAP. Veuillez vous référer à ce sujet au mode d'emploi du
téléphone avec lequel ce casque sera utilisé et suivez étape par étape les consignes qu'il contient.
En cas d´utilisation à l´extérieur, assurez-vous que le casque n´est pas exposé à l´humidité telle que
pluie, neige, brouillard etc.
Toute utilisation autre que celle décrite précédemment provoque l'endommagement de ce produit.
Observer impérativement les consignes de sécurité !
Table des matières
Introduction . . . . . . . . . . . . . . . . . . . . . . . . . . . . . . . . . . . . . . . . . . . . . . . . . . . . . . . . . . . . . . . . . . . . . .19
Utilisation conforme . . . . . . . . . . . . . . . . . . . . . . . . . . . . . . . . . . . . . . . . . . . . . . . . . . . . . . . . . . . . . . . .20
Table des matières . . . . . . . . . . . . . . . . . . . . . . . . . . . . . . . . . . . . . . . . . . . . . . . . . . . . . . . . . . . . . . . . .20
Consignes de sécurité . . . . . . . . . . . . . . . . . . . . . . . . . . . . . . . . . . . . . . . . . . . . . . . . . . . . . . . . . . . . . .21
Eléments de commande . . . . . . . . . . . . . . . . . . . . . . . . . . . . . . . . . . . . . . . . . . . . . . . . . . . . . . . . . . . .22
Charger l´accumulateur . . . . . . . . . . . . . . . . . . . . . . . . . . . . . . . . . . . . . . . . . . . . . . . . . . . . . . . . . . . . .22
Mise en place du casque . . . . . . . . . . . . . . . . . . . . . . . . . . . . . . . . . . . . . . . . . . . . . . . . . . . . . . . . . . . .23
Allumer/éteindre le casque . . . . . . . . . . . . . . . . . . . . . . . . . . . . . . . . . . . . . . . . . . . . . . . . . . . . . . . . . .23
Inscrire le casque . . . . . . . . . . . . . . . . . . . . . . . . . . . . . . . . . . . . . . . . . . . . . . . . . . . . . . . . . . . . . . . . . .23
Recevoir des appels . . . . . . . . . . . . . . . . . . . . . . . . . . . . . . . . . . . . . . . . . . . . . . . . . . . . . . . . . . . . . . .24
Dépannage . . . . . . . . . . . . . . . . . . . . . . . . . . . . . . . . . . . . . . . . . . . . . . . . . . . . . . . . . . . . . . . . . . . . . .24
Nettoyage . . . . . . . . . . . . . . . . . . . . . . . . . . . . . . . . . . . . . . . . . . . . . . . . . . . . . . . . . . . . . . . . . . . . . . .25
Elimination . . . . . . . . . . . . . . . . . . . . . . . . . . . . . . . . . . . . . . . . . . . . . . . . . . . . . . . . . . . . . . . . . . . . . . .25
Caractéristiques techniques . . . . . . . . . . . . . . . . . . . . . . . . . . . . . . . . . . . . . . . . . . . . . . . . . . . . . . . . .26
Déclaration de conformité . . . . . . . . . . . . . . . . . . . . . . . . . . . . . . . . . . . . . . . . . . . . . . . . . . . . . . . . . . .26
This manual suits for next models
1
Table of contents
Languages:
Other Conrad Headset manuals

Conrad
Conrad G-Star HS-343XP User manual

Conrad
Conrad HS-334UV User manual

Conrad
Conrad BT-923686 User manual

Conrad
Conrad TW-260A User manual

Conrad
Conrad G-Star HS-317UV User manual

Conrad
Conrad multi 44 User manual

Conrad
Conrad 91 41 70 User manual

Conrad
Conrad 91 39 51 User manual

Conrad
Conrad 93 03 04 User manual

Conrad
Conrad BT 20 User manual