manuals.online logo
Brands
  1. Home
  2. •
  3. Brands
  4. •
  5. Contec
  6. •
  7. Medical Equipment
  8. •
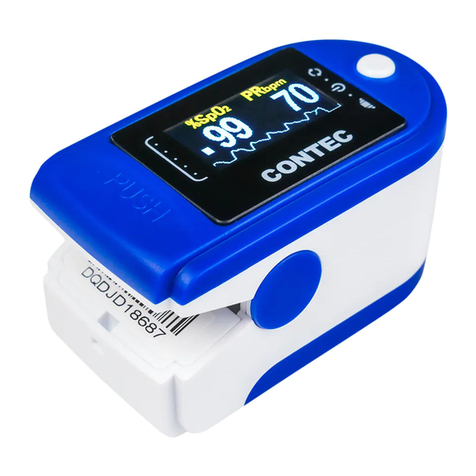
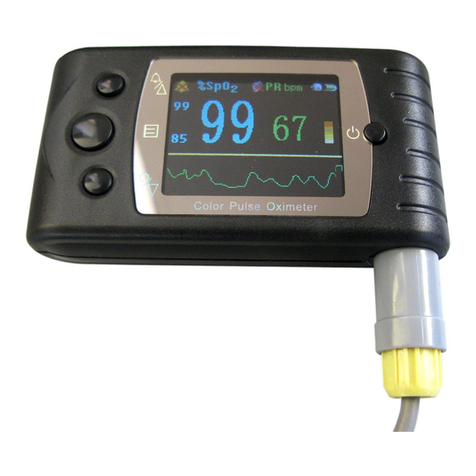
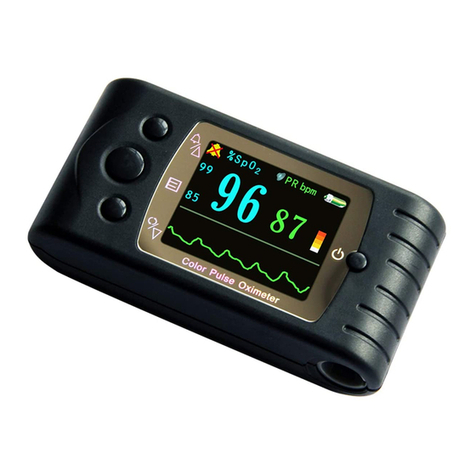
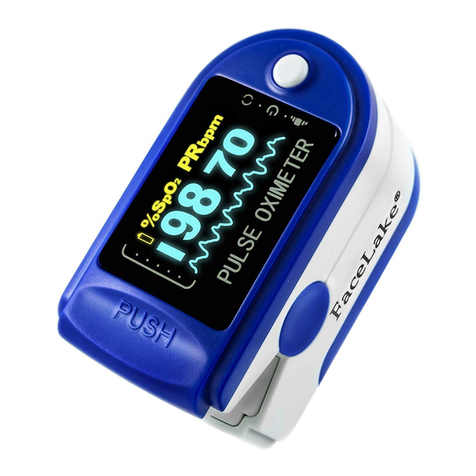
  9. Contec CMS50D User manual

Contec CMS50D User manual

Instructions to User
Dear users, thank you for purchasing the Acc U Rate® CMS 50D Pulse O imeter.
In case of modifications and software upgrades, the information contained in this document is subject to
change without notice.
The Manual describes, in accordance with the Pulse O imeter's features and requirements, main structure,
functions, specifications, correct methods for transportation, installation, usage, operation, repair, maintenance
and storage, etc. as well as the safety procedures to protect both the user and equipment. Refer to the respective
chapters for details.
Please read the Manual very carefully before using this equipment. These instructions describe the operating
procedures to be followed strictly. Failure to follow these instructions can lead to measurement abnormality,
equipment damage and personal injury. The manufacturer is NOT responsible for the safety, reliability and
performance issues and any monitoring abnormality, personal injury and equipment damage due to user's
negligence of the operation instructions. The manufacturer’s warranty service does not cover such faults.
Due to constant revision, the specific products you received may not be totally in accordance with the
description of this User Manual. We sincerely apologize for that.
WARNING:
 User might experience discomfort if the device is used for a prolong period of time. It is
recommended that the sensor should not be applied to the same finger for over 2 hours.
 he device should not be clipped on tender tissue.
 he light (infrared is invisible) emitted from the device is harmful to the eyes. he user should not
stare at the light.
 User should not use apply enamel or other makeup on the fingertip.
 Warning: Keep unit and lanyard away from children as the included lanyard may present an
entanglement or choking hazard to small children. Adult supervision required; never leave children
unattended with unit or lanyard
 he user’s fingernail should not be too long.
 his device is not intended to diagnose or treat any medical condition or disease. It is intended for
non-medical use in healthy people to monitor their pulse and blood oxygen levels during sports
and/or aviation only.
People who need SpO2 and pulse rate measurements because of a medical
condition should not use the device and should consult with their physician.
1 Safety
1.1 Instructions for Safe Operations
 Check the main unit and all accessories periodically to make sure that there is no visible damage that may
affect your safety and monitoring performance. It is recommended that the device should be inspected
once a week at least. When there is obvious damage, stop using the monitor.
 Necessary maintenance must be performed by qualified service engineers ONLY. Users are not permitted
to maintain it by themselves.
 The o imeter should not be used together with devices not specified in User’s Manual. Only
accompanied accessories should be used with this device.
 This product is calibrated before leaving factory.
1.2 Warnings
 E plosive hazard—DO NOT use the o imeter in environment with inflammable gas.
 Individuals who are allergic to rubber should not use this device.
 This pulse o imeter has no SpO
2
alarms and it is not meant for continuous monitoring.
 The disposal of the pulse o imeters, accessories and packing material (including battery, plastic bags,
foams and paper bo es) should follow local laws and regulations.
 Please make sure that the device and accessories are in complete accordance with the packing list, or the
device might not function normally.
1.3 Attentions
֠ Keep the o imeter away from dust, vibration, corrosive substances, e plosive materials, high temperature
and moisture.
֠ If the o imeter gets wet, please stop operating it.
֠ When the pulse o imeter is moved from a cold environment to a warm and/or humid environment, please
do not use it immediately.
֠ DO NOT operate keys on front panel with sharp materials.
֠ High temperature or high pressure steam disinfection of the o imeter is not permitted. Refer to User
Manual in the relative chapter for instructions of cleaning and disinfection.
֠ Do not immerse the o imeter in liquid. When it needs cleaning, please wipe its surface with medical
alcohol by soft material. Do not spray any liquid on the device directly.
֠ When cleaning the device with water, the temperature should be lower than 60°C.
֠ For fingers which are too thin or too cold, it would probably affect the normal measurement of the users'
SpO
2
and pulse rate. Please clip on a thicker finger such as the thumb, inde or middle finger deeply into
the probe.
֠ Do not use the device on infant or new born child.
֠ The product is suitable for children above four years old and adults (Weight should be between 15kg to
110kg).
֠ The device may not work for everyone. If you are unable to achieve stable readings, discontinue use.
֠ The update period of data is less than 5 seconds but might change based on different individual pulse
rate.
֠ If abnormal conditions appear on the screen during the test process, pull out the finger and reinsert to
restore normal use.
֠ The normal shelf life of the device is three years.
֠ The lanyard attached the product is made from non-allergic material. If you are sensitive to it, stop using
it. In addition, the lanyard could present a choking hazard. Please use e treme caution when using it.
֠ The instrument does not have a low-voltage alarm function. It only shows the low-voltage on the LED
screen. Please change the battery when the battery is used up.
֠ The instrument does not have alarm functions. Do not use the device in situations where alarms are
required.
֠ Batteries must be removed if the device is going to be stored for more than one month, or the batteries
may leak.
֠ A fle ible circuit connects the two parts of the device. Do not twist or pull on the connection.
1.4 Indication for Use
The Fingertip Pulse O imeter is a non-invasive device intended for the spot-check of o ygen saturation of
arterial hemoglobin (SpO
2
) and the pulse rate of adult and children. This device is not intended for continuous
monitoring.
2 Overview
SpO
2
stands for peripheral capillary o ygen saturation. O ygen saturation is defined as the ratio of
o yhemoglobin (HbO
2
) to the total concentration of hemoglobin (i.e. O yhemoglobin + reduced hemoglobin)
present in the blood. It is an important physiological parameter involved in respiration and circulation. For that
purpose, our company developed the Pulse O imeter which can measure your SpO
2
and pulse rate
simultaneously. The Pulse O imeter feature herein is small, portable, non-invasive and easy to use. The user
only needs to insert a finger into the chamber to measure his/her SpO
2
and Pulse Rate.
2.1 Features
 Operation of the product is simple and convenient.
 The product is small, light (total weight is about 50g including batteries) and easy to use.
 Power consumption of the product is low and the two originally equipped AAA batteries can be operated
continuously for 20 hours.
 The product will automatically be powered off when no signal is in the product within 5 seconds.
 Includes Plethymosgraph to indicate strength of blood flow.
 Rotational OLED display for viewing convenience.
2.2 Major Applications and Scope of Application
The Pulse O imeter can be used to measure human Hemoglobin Saturation and pulse rate through finger, and
indicate the pulse intensity by the bar-display. The product is designed to be used by athletes, pilots or anyone
who wants to obtain their SpO
2
and pulse rate on the go.
he product is not suitable for continuous use.
he device is inaccurate if the user is suffering from toxicosis by carbon monoxide. he device should
not be used under such circumstance.
2.4 Environment Requirements
Storage Environment
a) Temperature: -40°C~+60°C
b) Relative humidity: ≤95%
c) Atmospheric pressure: 500hPa~1060hPa
Operating Environment
a) Temperature: 10°C ~40°C
b) Relative Humidity: ≤75%
c) Atmospheric pressure:700hPa~1060hPa
3 Principle and Caution
3.1 Principle of Measurement
O ygenated blood absorbs light at 660nm (red light), whereas deo ygenated blood absorbs light preferentially
at 880nm (infra-red). A pulse o imeter works by passing a beam of red and infrared light through a pulsating
capillary bed and then measure the amount of red and infrared light emerging from the human nail tip via a
sensor. The relative absorption of light by o yhemoglobin (HbO) and deo yhemoglobin is then processed
according to the Beer-Lambert's law and the result is a qualitative measurement of the users’ o yhemoglobin
status i.e. O ygen saturation level (SpO
2
).
Figure 1 Operating principle
3.2 Caution
1. The finger should be placed properly such that it is e actly in between the infra-red Emission tube and
infra-red sensor (see the attached illustration of this manual, Figure 1 & 5), or else it may cause inaccurate
measurement.
2. The pulse o imeter should not be used on any finger where blood flow might be restricted. For e ample,
a limb tied with arterial canal or blood pressure cuff or receiving intravenous injection.
3. Make sure the optical path is free from any optical obstacles like rubberized fabric.
4. E cessive ambient light may affect the measuring result. It includes fluorescent lamp, dual ruby light,
infrared heater, direct sunlight and etc.
5. Strenuous action of the subject or e treme electrosurgical interference may also affect the accuracy.
6. Testee cannot use enamel or other makeup on the finger.
3.3 Limitations
1. As the measurement is taken on the basis of the arteriole pulse, substantial pulsating blood flow of
subject is required. For a subject with weak pulse due to shock, low ambient/body temperature, major bleeding,
or use of vascular contracting drug, the pulse o imeter might not be able to take a reading. In this case, the
measurement will also be more sensitive to interference.
2. For those with a substantial amount of staining dilution drug (such as methylene blue, indigo green and
acid indigo blue), or carbon mono ide hemoglobin (COHb), or methionine (Me+Hb) or thiosalicylic
hemoglobin, and some with icterus problem, the SpO
2
determination by this monitor may be inaccurate.
3. The drugs like dopamine, procaine, prilocaine, lidocaine and butacaine may also affect the accuracy of
your SpO
2
levels.
4 echnical Specifications
1) Display Format: OLED Display;
SpO
2
Measuring Range: 0% ~ 100%;
Pulse Rate Measuring Range: 30 bpm ~ 250 bpm;
Pulse Wave Display: columniation display and the waveform display.
2) Power Requirements: 2×1.5V AAA alkaline battery, adaptable range: 2.6V~3.6V.
3) Power Consumption: Less than 30mA.
4) Resolution: 1% for SpO
2
and 1 bpm for Pulse Rate.
5) Measurement Accuracy: ±2% in stage of 70%-100% SpO
2
, and meaningless when stage being smaller
than 70%. ±2 bpm during the pulse rate range of 30-99 bpm and ±2% during the pulse rate range of
100~250 bpm .
7) Measurement Performance in low blood perfusion condition: SpO2 and pulse rate can be shown during
low blood perfusion. However, SpO2 error is ±4%, pulse rate error is ±2 bpm or ±2% (select larger).
8) Resistance to surrounding light: The deviation between the value measured in the condition of man-made
light or indoor natural light and that of darkroom is less than ±1%.
8) Equipped with a function switch. The O imeter will automatically power off if the finger is removed after 5
seconds
9) Optical Sensor
Red light (wavelength is 660nm, 6.65mW)
Infrared (wavelength is 880nm, 6.75mW)
5 Accessories
 One hanging rope;
 Two AAA batteries;
 One silicon cover;
 One User Manual.
6 Installation
6.1 View of the Front Panel
Figure 2 Front view Figure 3 Batteries installation Figure 4
Mounting the hanging rope
6.2 Battery
Step 1. Refer to Figure 3 and insert two AAA size batteries properly in the right direction.
Step 2. Replace the cover.
Please take care when you insert the batteries. Improper insertion may damage the device.
6.3 Mounting the Hanging Rope
Step 1. Put the end of the rope through the hole.
Step 2. Put another end of the rope through the first one and then tighten it.
7 Operating Guide
1) Insert the two batteries properly to the direction, and then replace the cover.
2) Open the clip as shown in Figure 5.
Figure 5 Put finger in position
3) Put your finger into the rubber cushions of the clip (make sure the finger is in the right position) and then
clip the finger.
4) Press the switch button once on front panel.
5) Do not move the finger and try to keep the body stationary.
6) Get the information directly from screen display.
7) The button has three functions.When the device is powered off, pressing the button will power it
on; When the device is powered on, pressing the button quickly (<1 sec) will change the direction of the
screen (See Figure 6-11), holding the button for longer than a second will change the brightness of the
screen.
8) Wait for the wavelength and amplitude of the plethysmograph wave to stabilized before taking reading.
Figure 6 Display mode one Figure 7 Display mode two Figure 8 Display mode three
Figure 9 Display mode four Figure 10 Display mode five Figure 11 Display mode si
Fingernails and the luminescent tube should be on the same side.
8 Repairing and Maintenance
 Please change the batteries when the low-voltage symbol is displayed on the screen.
 Please clean the surface of the device before use. Wipe the device with medical alcohol first, and then let it dry in air or
clean it by dry clean fabric.
 Use medical alcohol to disinfect the product after use
 Please take out the batteries if you are not planning to use the o imeter for a long time.
 The best storage environment of the device is between 10ºC to 60ºC and lower than 95% humidity.
High-pressure sterilization cannot be used on the device.
Do not immerse the device in liquid.
It is recommended that the device should be kept in a dry environment. Humidity may reduce the useful life of the
device, or even damage it.
9 roubleshooting
rouble Possible Reason Solution
he SpO
2
and Pulse
Rate cannot be
displayed normally
1. The finger is not properly positioned.
2. The user’s SpO
2
is too low to be detected.
1. Place the finger properly and try again.
2.Try again; Make sure nothing is
impeding your blood flow
he SpO
2
and Pulse
Rate values change
erratically
1. The finger is not placed deep enough into the
device.
2. The finger or the user is moving.
1. Place the finger properly and try again.
2. Keep stationary as much as possible
during measurement
he device cannot be
turned on
1. The batteries are drained or almost drained.
2. The batteries are not inserted properly.
3. The malfunction of the device.
1. Change batteries.
2. Reinstall batteries.
3. Please contact the local service center.
he display turns off
suddenly
1. The device will power off automatically if the
finger is withdrawn after 5 seconds.
2. The batteries are almost drained.
1. Press the power button to turn it back on.
2. Change batteries.
10 Key of Symbols
Symbol Description
Type BF
Warning – See User Manual
Blood o ygen saturation (%)
PRbpm Pulse rate (bpm)
The battery voltage indication is deficient (change the battery in time avoiding the ine act measure)
1. no finger inserted
2. An indicator of signal inadequacy
battery positive electrode
battery cathode
1.Power switch
2.change direction of the screen
3.Change brightness of the screen
SN Serial number
Alarm inhibit
WEEE (2002/96/EC)
IP22 International Protection
This item is compliant with Medical Device Directive 93/42/EEC of June 14, 1993, a directive of the
European Economic Community. However,
this is not a medical device and is not intended
to diagnose or treat any medical condition or disease.
11 Function Specification
Display Information Display Mode
The Pulse O ygen Saturation (SpO
2
) OLED
Pulse Rate (PR) OLED
Pulse Intensity (bar-graph) OLED bar-graph display
Pulse wave OLED
SpO
2
Parameter Specification
Measuring range 0%~100%, (the resolution is 1%).
Accuracy 70%~100%:±2%, Below 70% unspecified.
Optical Sensor Red light (wavelength is 660nm)
Infrared (wavelength is 880nm)
Pulse Parameter Specification
Measuring range 30bpm~250bpm (the resolution is 1 bpm)
Accuracy ±2bpm or±2% select larger
Pulse Intensity
Range Continuous bar-graph display. Increased height indicates stronger pulse.
Battery Requirement
1.5V (AAA size) alkaline batteries × 2 or rechargeable battery
Battery Useful Life
Two batteries can work continuously for 20 hours
Dimensions and Weight
Dimensions 57(L) × 31(W) × 32(H) mm
Weight About 50g (with the batteries)
Appendix
Guidance and manufacture’s declaration-electromagnetic emission
for all EQUIPMEN and SYS EMS
Guidance and manufacture’s declaration –electromagnetic emission
The CMS50D Pulse Oximeter is tended for use in the electromagnetic environment specified below. The customer of the user
of the CMS50D Pulse Oximeter should assure that it isused in such an environment.
Emission test compliance Electromagnetic environment-guidance
RF emissions
CISPR 11
Group 1 The CMS50D Pulse Oximeter uses RF energy only for their
internal function. Therefore, its RF emissions are very low and are
not likely to cause any interference in nearby electronic
equipment.
RF emissions
CISPR 11
Class B The CMS50D Pulse Oximeter is suitable for use in all
establishments, including domestic establishments and those
directly connected to the public low-voltage power supply
network that supplies buildings used for domestic purposes.
Harmonic emissions
IEC 61000-3-2
Not applicable
Voltage fluctuations/
flicker emission
IEC 61000-3-3
Not applicable
Guidance and manufacture’s declaration-electromagnetic immunity
for all EQUIPMEN and SYS EMS
Guidance and manufacture’s declaration-electromagnetic immunity
The CMS50D Pulse Oximeter is intended for use in the electromagnetic environment specified specified below. The the user of
CMS50D Pulse Oximeter should assure that it is used in such an environment.
Immunity test IEC60601 test level Compliance level Electromagnetic
environment-guidance
Electrostatic discharge
(ESD) IEC 61000-4-2
±6KV contact
±8KV air
±6KV contact
±8KV air
Floors should be wood, concrete or
ceramic tile. If floor are covered with
synthetic material, the relative
humidity should be at least 30%.
Power frequency
(50Hz) magnetic field
IEC 61000-4-8
3A/m 3A/m Power frequency magnetic fields
should be at levels characteristic of a
typical location in a typical
commercial or hospital environment
Guidance and manufacture’s declaration-electromagnetic immunity
for EQUIPMEN and SYS EMS that are not LIFE-SUPPOR ING
Guidance and manufacture’s declaration-electromagnetic immunity
The CMS50D Pulse Oximeter is intended for use in the electromagnetic environment specified below. The customer or the
user of CMS50D Pulse Oximeter should assure that it is used in such an environment.
Immunity
test
IEC60601 test
level
Compliance
level Electromagnetic environment -guidance
Radiated RF
ICE
61000-4-3
3V/m
80MHz to
2.5GHz
3V/m
Portable and mobile RF communication equipment should be used no
closer to any part of the CMS50D Pulse Oximeter
, including cables, than
the recommended separation distance c
alculated from the equation
applicable to the frequency of the transmitter.
recommended separation distance
P
E
d





=
1
5.3
80MHz to 800MHz
P
E
d





=
1
7
800MHz to 2.5GHz
Where P is the ma imum output power rating of the transmi
tter in watts
(W) according to the transmitter manufacturer and d
is the recommended
separation distance in meters (m).
Field strengths from fi ed RF transmitters, as determined by an
electromagnetic site survey,
a
should be less than the compliance level
in
each frequency range.
b
Interference may occur in the vicinity of equipment marked with the
following symbol:
NOTE 1 At 80MHz and 800MHz, the higher frequency range applies.
NOTE 2 These guidelines may not apply in all situations. Electromagnetic propagation is affected by absorption and
reflection from structures, objects and people.
a
Field strengths from fi ed transmitters, such as base stations for radio (cellular/cordless) telephones and land mobile
radios
, amateur radio, AM and FM radio broadcast and TV broadcastcannot be predicted theoretically with accuracy. To
assess the electromagnetic environment due to fi ed RF transmitters, an electromagnetic site survey should be considered. If
the measured field strength in the location in which The CMS50D Pulse O imeter is used e ceeds the applicable RF
compliance level above, the CMS50D Pulse O imeter should be observed to verify normal operation. If abnormal
performance is observed, additional measures may be necessary, such as reorienting or relocating the CMS50D Pulse
O imeter.
b
Over the frequency range 150 KHz to 80 MHz, field strengths should be less than 3V/m.
Recommended separation distances between portable and mobile
RF communications equipment and the EQUIPMEN or SYS EM
for EQUIPMEN or SYS EM that not LIFE-SUPPOR ING
Recommended separation distances between
portable and mobile RF communications equipment and the CMS50D Pulse Oximeter
The CMS50D Pulse Oximeter is intended for use in the electromagnetic environment in which radiated RF disturbances are
controlled. The customer or the user of the CMS50D Pulse Oximeter can help prevent electromagnetic interference by
maintaining a minimum distance between portable and mobile RF communications equipment (transmitters) and the CMS50D
Pulse Oximeter as recommended below, according to the ma imum output power of the communications equipment.
Rated maximum output power
of transmitter
(W)
Separation distance according to frequency of transmitter
(m)
150KHz to 80MHz
P
E
d





=
1
5.3
80MHz to 800MHz
P
E
d





=
1
5.3
800MHz to 2.5GHz
P
E
d





=
1
7
0.01 0.12 0.12 0.23
0.1 0.37 0.37 0.74
1 1.17 1.17 2.33
10 3.69 3.69 7.38
100 11.67 11.67 23.33
For transmitters rated at a ma imum output power not listed above, the recommended separation distanced in meters (m) can
be estimated using the equation applicable to the frequency of the transmitter, where P is the ma imum output power rating of
the transmitter in watts (W) according to the transmitter manufacturer.
NOTE 1 At 80MHz and 800MHz, the separation distance for the higher frequency range applies.
NOTE 2 These guidelines may not apply in all situations. Electromagnetic propagation is affected by absorption and
reflection from structures, objects and people.

Other Contec Medical Equipment manuals

Contec MDD93EEC Instruction Manual

Contec

Contec MDD93EEC Instruction Manual

Contec ABPM 50 Reference guide

Contec

Contec ABPM 50 Reference guide

Contec CMS-50f User manual

Contec

Contec CMS-50f User manual

Contec 300G User manual

Contec

Contec 300G User manual

Contec CMS50M User manual

Contec

Contec CMS50M User manual

Contec CMS8000 User manual

Contec

Contec CMS8000 User manual

Contec CMS800G User manual

Contec

Contec CMS800G User manual

Contec SP10W User manual

Contec

Contec SP10W User manual

Contec CMS50DL1 User manual

Contec

Contec CMS50DL1 User manual

Contec CMS-50f User manual

Contec

Contec CMS-50f User manual

Contec KT88-3200 User manual

Contec

Contec KT88-3200 User manual

Contec CMS60D User manual

Contec

Contec CMS60D User manual

Contec CMS50DL User manual

Contec

Contec CMS50DL User manual

Contec CMS-50f User manual

Contec

Contec CMS-50f User manual

Contec CMS-50E User manual

Contec

Contec CMS-50E User manual

Contec CMS-50f User manual

Contec

Contec CMS-50f User manual

Contec CMS50EW User manual

Contec

Contec CMS50EW User manual

Contec CMS50QB Instruction Manual

Contec

Contec CMS50QB Instruction Manual

Contec CMS-50E User manual

Contec

Contec CMS-50E User manual

Contec CMS50D User manual

Contec

Contec CMS50D User manual

Contec PM-60A User manual

Contec

Contec PM-60A User manual

Contec CMS8000 User manual

Contec

Contec CMS8000 User manual

Contec CMS 50IW User manual

Contec

Contec CMS 50IW User manual

Contec CMS-50D Plus User manual

Contec

Contec CMS-50D Plus User manual

Popular Medical Equipment manuals by other brands

Xenios AG Deltastream ME DPHC 0001 Brief instructions

Xenios AG

Xenios AG Deltastream ME DPHC 0001 Brief instructions

Orliman 8102 Use and maintenance instructions

Orliman

Orliman 8102 Use and maintenance instructions

TALARMADE HeadUp Collar Instructional manual

TALARMADE

TALARMADE HeadUp Collar Instructional manual

Zymo Research ZymoBIOMICS D4300T instruction manual

Zymo Research

Zymo Research ZymoBIOMICS D4300T instruction manual

BIO-MED DEVICES MVP-10 instruction manual

BIO-MED DEVICES

BIO-MED DEVICES MVP-10 instruction manual

YONGKANG YK-80A user manual

YONGKANG

YONGKANG YK-80A user manual

Flaem Pro OxyLast Med Easy P0613EM User instruction manual

Flaem

Flaem Pro OxyLast Med Easy P0613EM User instruction manual

Weinmann Oxygen MODULE Servicing and Repair Instructions

Weinmann

Weinmann Oxygen MODULE Servicing and Repair Instructions

Pari LC series user manual

Pari

Pari LC series user manual

Fillauer Utah Arm U3 user guide

Fillauer

Fillauer Utah Arm U3 user guide

Zimmer Soleoline Service

Zimmer

Zimmer Soleoline Service

ROHO HARMONY Operation manual

ROHO

ROHO HARMONY Operation manual

Air Liquide Aidal emergency operating instructions

Air Liquide

Air Liquide Aidal emergency operating instructions

Konica Minolta Ultra KDR Configuration and Calibration Guide

Konica Minolta

Konica Minolta Ultra KDR Configuration and Calibration Guide

Prestige 24i LQ MG manual

Prestige

Prestige 24i LQ MG manual

Medin C-NAIL Information on use

Medin

Medin C-NAIL Information on use

Dräger Polaris 600 manual

Dräger

Dräger Polaris 600 manual

GE Datex-Ohmeda Aisys Carestation Reference manual

GE

GE Datex-Ohmeda Aisys Carestation Reference manual

manuals.online logo
manuals.online logoBrands
  • About & Mission
  • Contact us
  • Privacy Policy
  • Terms and Conditions

Copyright 2025 Manuals.Online. All Rights Reserved.