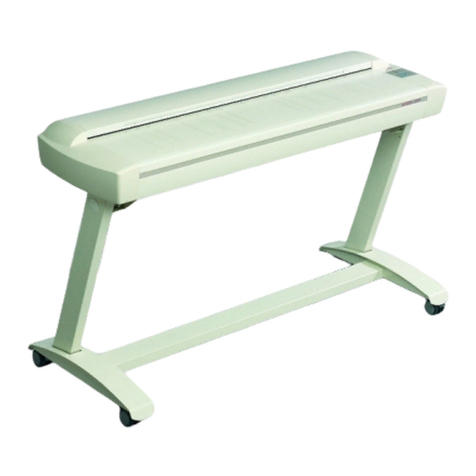
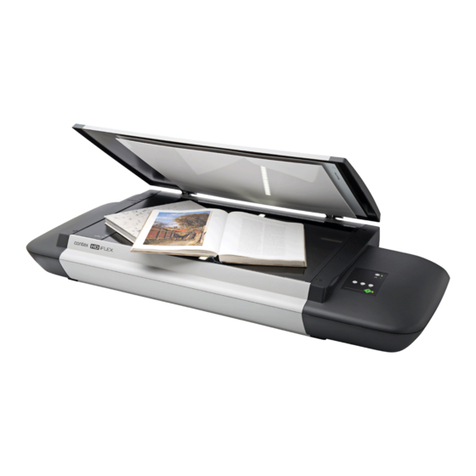
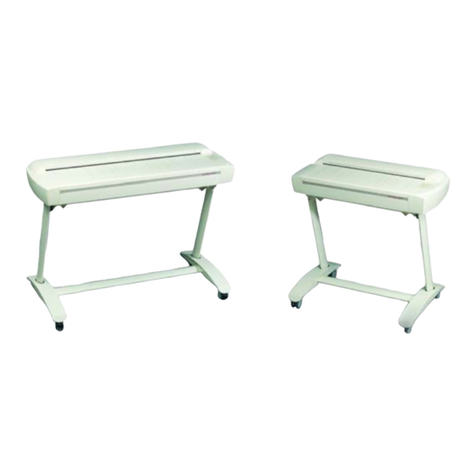
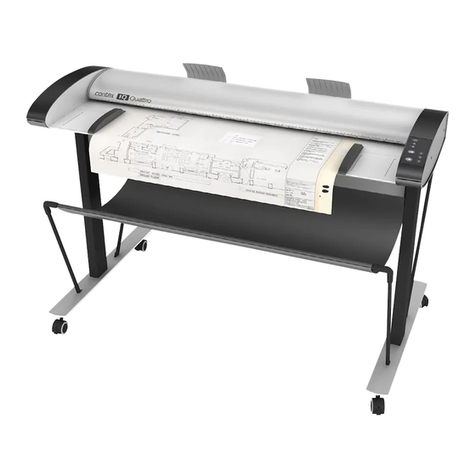
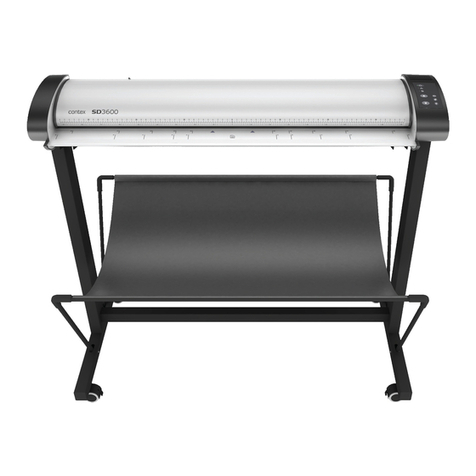
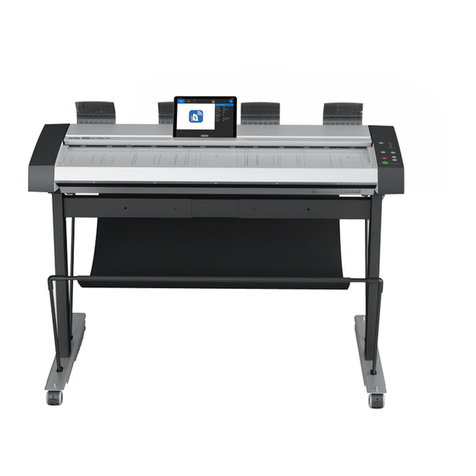
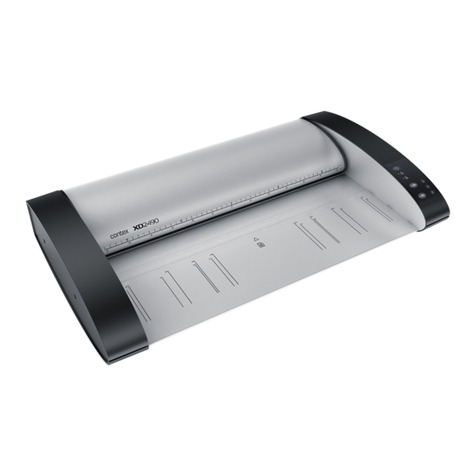
Contex AA51A Manual

Operator’s Guide
Wide Format
Copy Scanners
with iJET Panel
MODELS:
18” - AA51A
36” - KA67E
February 2006

Table of Contents
1. About This Guide 1-1
2. Using the iJET Panel 2-1
2.1 To make a simple copy 2-2
2.2 To perform a simple Scan-to-File 2-2
2.3 Operations on the iJET Panel 2-2
2.4 Power ON/OFF 2-3
2.5 The iJET Panel Buttons - Overview 2-4
2.6 How do I Navigate the iJET Panel Menus? 2-6
3. Scanner Configuration and Setup Instructions 3-1
3.1 Connect the scanner directly to printer(s) - Stand Alone Copier 3-2
3.2 Connect the Scanner to LAN – Network Scan/Copy Device 3-5
3.3 Connect the Scanner to a PC - Scan/Copy workstation 3-9
3.4 Combining Configuration Types for Multiple Functionality 3-12
3.5 Physical Placement of the Scanner 3-13
3.6 Locating the Interface Cable Connector-Panel 3-16
3.7 Personalizing and Localizing Your System 3-18
3.7.1 Setting the iJET Panel’s Display Language 3-18
3.7.2 Setting the Paper Series Preference 3-19
3.7.3 Setting the Media Handling (load) Method Preference 3-20
3.8 Printer Setup on the Scanner 3-21
3.9 Creating Media Profiles – For Color Printer Setup 3-24
3.10 Scanner on Network Setup 3-26
3.11 Setup to Share the Scanner (Use from PCs on the LAN) 3-28
4. Loading Originals for Copying and Scanning 4-1
4.1 How do I Load Originals into the Scanner? 4-1
4.2 Loading and Scanning Thick Media 4-2
5. How do I Make a Copy? 5-1
5.1 Copy Using the iJET Panel – The Basic Steps 5-1
5.2 Main Copy Options - Quick buttons 5-3
5.2.1 How do I… Set Copy Lightness?5-4
5.2.2 How do I… Set a Scale factor? – Output size 5-5
5.2.3 How do I…Set Copy Quality?5-6
5.2.4 How do I… Set number of Copies?5-8
5.3 Other Copy Options – Menu Button 5-9
5.3.1 How do I… Set Original Type Color? 5-9
5.3.2 How do I… Set Original Type B&W? 5-11
5.3.3 How do I… apply the Sharpen filter? 5-12
5.3.4 How do I… apply the Background (Backg.) Clean filter?5-13
5.3.5 How do I… Set the Media Type? 5-14
5.3.6 How do I… Mirror the Image? 5-16
5.3.7 How do I… Reset Copy defaults? 5-17
5.3.8 The Advanced option 5-18
5.4 Using Copy Software with the scanner (local or network PC) 5-19
6. How do I Scan to File? 6-1
6.1 Scan to Local or Network PC with the iJET Panel 6-2
6.2 Scan-to-File Menu Options – iJET Panel 6-4
6.2.1 Enter the iJET Panel Scan-to-File Menu 6-4
6.2.2 Set the Scan Mode 6-5
6.2.3 Set the Scan Mode Parameters – Level or Gamma 6-6
6.2.4 Set the Scan-to-File Resolution 6-7
6.2.5 Set the Scan-to-File Size (input size) 6-8
6.2.6 Set the File Format ( TIFF, JPEG, PDF ) 6-9
6.2.7 Set the File Format Quality 6-10
6.2.8 Using Scan Software – From Local PC or Network PC 6-11

7. Maintenance 7-1
7.1 Preliminary Maintenance – scanner setup 7-1
7.2 Regular Scanner Maintenance 7-1
7.3 Cleaning the Scan Area 7-2
7.4 Running the Scanner Maintenance Program 7-5
7.4.1 Starting Scanner Maintenance from the iJET Panel 7-5
7.4.2 Starting Scanner Maintenance from a PC on the LAN 7-5
7.4.3 Starting Scanner Maintenance from a Local PC 7-5
7.4.4 Running Scanner Maintenance - Steps 7-6
7.5 Replacing Scanner Parts 7-8
7.5.1 Replacing the Glass-plate 7-9
7.5.2 Replacing the White-Background 7-11
7.5.3 Replacing the Scanner Lamp-Unit 7-13
7.5.4 Replacing the Dust-Filters 7-17
7.6 Locate / Change the Smart Card 7-19
7.7 Downloading New Firmware 7-21
8. Appendix A: Important Safety Instructions 8-1
9. Appendix B: Regulations 9-1
FCC Regulations 9-1
10. Appendix C: iJET Panel Quick Reference Guide 10-1
About the Quick Reference Guide 10-2
iJET Panel Buttons Overview 10-3
iJET Panel Menu diagrams 10-5
Option Description Tables 10-19

About This Guide 1-1
1. About This Guide
This guide explains how to maintain and operate your wide format copy (iJET) scanner and its
iJET Panel. The guide assumes basic knowledge of other optional configuration components
such as printer, computer and operating system and does not repeat material from their
documentation.
Be sure to refer to:
•The Installation Guide – accessed from the menu on the WIDEsystem TOOLS CD-ROM
– describes installation of your driver if interfacing your scanner with a PC.
•The readme.htm file in the ws folder on the WIDEsystem TOOLS CD-ROM – contains the
most current installation and OS compatibility issues.
•WIDEsystem TOOLS Help – Press F1 after installing and opening WIDEsystem. –
Contains information on using the WIDEsystem application, Scan2Net functionality and
Scanner Maintenance software if interfacing your scanner with a PC.
Scope
This guide covers installation, operation and maintenance of your scanner. The guide covers
only copying and scanning operation through the iJET Panel.
The scanner can also be operated and controlled though compatible scan and copy software
installed on a PC that is either directly connected with the scanner or on the same network.
While this guide will provide instructions on setting up the scanner with a PC, it will not describe
in detail how to operate the scanner from that PC. Operation of scan and copy software is not
within the scope of this guide. Please refer to the software’s documentation and on-line help for
instructions on using the specific software application with the scanner.
Identify your scanner model icon
This operator’s guide covers several scanner models, although there are individual differences
between the models. Use the guide’s scanner type icons to direct you to descriptions about
your specific scanner model. Topics describing scanner functions that apply solely for specific
models will be marked with one or several of the icons shown in the table below. Topics
describing functions that apply for all models will be marked with all the icons.
Before proceeding, identify the icon that applies to your scanner model. You can then use the
icon throughout this guide to find the function description that applies for your specific scanner.
If in doubt as to which icon refers to your scanner model, see the Model ID on the sticker on the
back of the scanner. Models not listed in the table below are not within the scope of this guide.
Icon in Guide Applies for scanners… Main Characteristics Model IDs
18” (A2) wide format
copy scanners •Top fed - Flatbed
•iJET Panel AA51A
36” wide format copy
scanners
•Sheet fed - Insertion slot
•iJET Panel
•ATAC (Automatic Thickness
Adjustment Control)
KA67E

About This Guide 1-2
Additional Guide Icons:
•Reference additional Details within this guide – Look for the “Manual” icon
The Manual Icon: marks a reference to another section in this guide where you can
find more instructions on a certain function just named.
•Operation from the panel – Look for the “On the iJET Panel” icon
The On the iJET Panel Icon: marks instructions to actions you perform by pressing the
buttons on the scanner’s copy operator’s panel.
•Actual iJET Panel Button – Look for the “Button” icon
The Button Icon will often appear in this guide together with the iJET Panel Icon. The
Button Icon marks which button to look for and press on the iJET Panel to initiate an
action. The icon will contain the button name as seen on the iJET Panel. For example,
instructions describing an action reached through the menu button will be marked with the
button icon:
Menu

The iJET Panel 2-1
2. Using the iJET Panel
Before setting up your copy/scan configuration, you will need to familiarize yourself with the
iJET Panel. A number of setup tasks are performed through the iJET Panel and will require that
you know how to navigate the iJET Panel’s menus.
Instructions on making specific settings will be described under each configuration type in
the chapter “Copy Scanner Configuration and Setup”.
Scan Option Area
Copy Option Area
Control Buttons
Size Button
Menu Button
Display Window
Stop Button
The iJET Panel enables you to perform advanced copy and scan-to-file jobs straight from the
scanner (and not from a PC and scanning software interface). The panel contains a display
window, control buttons and option buttons.
•The Display Window contains the current selections as you make them and useful
messages from the scanner regarding maintenance and operation.
•The Menu button leads to a options for copy settings and an Advanced submenu for
configuration settings.
•The control buttons arrow up, arrow down, Back, Enter, are for navigating the menus
and for selecting menu options.
•The Stop button is for interrupting a copy or scan process.
•The Size button is for setting the original’s size (input size) for both copy and scan jobs.
•Below the control and menu buttons, are a Copy Option Area and a Scan Option Area,
each with its own set of quick option buttons. These buttons are described below.
A complete overview of the panel’s buttons follows at the end of this section.

The iJET Panel 2-2
2.1 To make a simple copy
The following procedure for making a copy presumes the following:
•The scanner and printer(s) are setup correctly as described in this Operator’s guide.
•The Size button option is set to Auto.
•Options such as Lightness, Scale, Original Type, Quality and so on are all set to your
standard settings and the job does not require special adjustments.
1. Load the original
2. Press the Color Copy button for color jobs or B&W copy button for B&W jobs.
Color
Copy or
B&W
Copy
For jobs that require adjusting the copy parameters, see the section “How do I make a Copy?”
See also relevant sections for setting up the system and setting options.
2.2 To perform a simple Scan-to-File
The following procedure for making a copy presumes the following:
•The scanner is setup correctly with a local or network PC as described in this Operator’s
guide.
•The Size button option is set to Auto.
•Scan-to button options such as Scan Mode, File Format, Resolution and so on are all set to
your standard settings and the job does not require special adjustments.
1. Load the original
2. Press the Scan to button and select a scan target. A (USB) target is a local PC.
Scan to
3. Press the Scan button to start the job.
Scan
For jobs that require adjusting the Scan to parameters, see the section “How do I Scan to File?”
See also relevant sections for setting up the system and setting options.
2.3 Operations on the iJET Panel
•Turn the scanner power ON/OFF (Soft Power ON/OFF)
•Make quick settings for Copying – Lightness, Quality, Copies (no. of..) and Scale.
•Make additional high level copy settings through the Menu button.
•Apply scanner and printer setup options through the Menu button - Advanced.
•Apply personal and local preferences through the Menu button - Advanced.
•Select a scan-to-file target through the Scan to button.
•Make advanced scan-to-file settings through the Scan to button
•Start a Copy (BW or Color) job.
•Start a Scan-to-file job.

The iJET Panel 2-3
2.4 Power ON/OFF
These power on/off instructions apply only after you have setup and configured your
system as described in the relevant sections under “Scanner Configuration and setup”.
First time during setup (hard power ON)
1. Connect the scanner to the power outlet and turn on the outlet switch (scanner’s back).
2. The scanner runs a self-test and init procedure and after warming up it is ready to scan.
3. The text in the display window will tell you what the scanner is doing and when the
scanner is ready to scan. Prior to the “Ready” message the scanner will need to self adjust.
Normally, after powering up for the first time as described above, you will leave the outlet switch
permanently in the ON position, and turn scanner power on and off in the “soft” manner from
the iJET Panel as described below. This is the method recommended for daily use as it is faster
than hard power on.
To turn power ON from the iJET Panel (soft power ON)
1. The scanner must be in Soft Power OFF mode. When the scanner is in soft power OFF
mode, you will see the 3 Print Quality LEDS flashing alternately as shown below.
Press and hold down the STOP button for a few seconds until the iJET Panel’s display
window becomes active (lights up).
2. The text in the display window will tell you what the scanner is doing and when the scanner
is ready to scan. Prior to the “ready” message the scanner may need to initialize itself and
warm up.
To turn power OFF from the iJET Panel (soft power OFF)
1. Press and hold down the Stop button for a few seconds until the iJET Panel’s display
window light goes off.
When the scanner goes in soft power OFF mode, the 3 Print Quality LEDS light alternately
as shown below.
NOTE: The outlet switch at the back of the scanner must be constantly flipped to the ON
position in order to use Soft Power ON/OFF.
Sto
p
Initializing
FW:xxxx ……. Ready
Fast Normal Best Fast Normal Best Fast Normal Best
Sto
p
Fast Normal Best Fast Normal Best Fast Normal Best
Initializing
FW:xxxx Adjusting
Ready
…….

The iJET Panel 2-4
2.5 The iJET Panel Buttons - Overview
The Menu button
Menu button - The Menu button leads to the total range of options for copying and also the
Advanced menu with all the system setup and configuration functions.
Menu
A complete description on how to navigate the menu and select options follows below.
The Back button
Control Button – for moving one level up when in a menu or for returning to an option’s current
(active) setting while in the process of editing the option’s value.
Back
The Enter button
Control Button – for entering the menu functionality for changing an option’s value and for
setting (accepting) the value once it is selected.
Ente
r
The Size button
Settings button - For setting the size of the original. The Size button is used for both copy and
scan-to-file operation. Press the button to activate option setting. You then change the value
each time you again press the button or with the arrow up/down buttons. You can select Auto
detection or a standard size setting.
NOTE that Size is a global system variable that can be changed in 3 different ways: 1. With the
Size button 2. With the Menu button > Size option and 3. With the Scan-to button > Size option.
This means that when you change the size for a copy job, it will also apply for a scan-to-file job
and vise versa unless you change it again.
Size
The Lightness button
Settings (quick) button - For increasing or decreasing lightness in the copy. Press the button to
activate option setting. You then change the value each time you again press the button or with
the arrow up/down buttons.
Lightness
The Quality button
Qualit
y
Settings (quick) button - For setting copy quality to Fast, Normal or Best. Press the button to
activate option setting. You then change the value each time you again press the button or with
the arrow up/down buttons.
The Copies button
Copies

The iJET Panel 2-5
(…Copies button) Settings (quick) button - For setting the number of (how many) copies you
want output. Press the button to activate option setting. You then change the value each time
you again press the button or with the arrow up/down buttons.
The Scale button
Option button - For setting a value that defines the output size in relation to the input size. For
making copies larger or smaller than the original. Press the button to activate option setting.
You then change the value to predefined scale ratios each time you again press the button. Use
Scale
the arrow up/down buttons for fine tuning - 1 step increments of the currently displayed value.
Press the Enter button to save.
The B&W Copy button
Action Button: The B&W C
B&W
Copy opy button will start the copy job using the settings made for B&W
Menu button and the Size, Quality, Copies, Lightness and Scale buttons.
copying through the
The Color Copy button
Action Button: The Color C
Color
Copy
opy button will start the copy job using the settings made for Color
Menu button and the Size, Quality, Copies, Lightness and Scale buttons..
copying through the
cting a scan-to-file target (PC on the network) and for setting scan-to-file
You change the scan target each time you press the button. Keep pressing until you
see the right target in the window. Then, pressing will lead to the Scan Menu with its
The Scan to button.
Menu Button - For sele
Scan to
options.
wide range of scan-to-file options you can select for the job. Scan-to-file options include modes,
formats, and resolution.
The Scan button
Ente
r
Action button - The
Scan
Scan button will start a scan job using the settings made for scanning
Scan To button.
through the
is button has 2 functions: 1. For interrupting and terminating a scan or copy
hed. 2. For turning the scanner ON, OFF in soft power mode.
The Stop button
Action Button – Th
job before it is finis
Stop
More details on using the iJET Panel buttons with copy and scan-to-file tasks are
described in the relevant sections in the chapters “How do I Make a Copy” and “How do I Scan
to File?”.

The iJET Panel 2-6
2.6
You will learn here how menu options and values are shown in the display
d arrows up/down to reach them for
menu option items
option item can be shown at a time in the
t menu option item and its current value is
shown in the display window as shown below for the Menu button.
4.
hoto”. The “>” marks which one of the two lines is currently active for changing with the
rrow up/down buttons. In the example above, the first line, i.e the menu option item line is
5. The “>” marker in the example above shows that the menu option item “Org, Type B&W” is
now active and “Sepia” is its current setting. To enter the menu option in order to make
changes to its setting, you press the Enter button.
6. The “>” marker now indicates that the setting for “Org. Type B&W” option can be changed.
Pressing the up/down arrow buttons will move through the available settings. Press the
Enter button when the right setting is displayed to the right of the “>” marker. The
selected setting will then become the option’s active setting and the “>” marker will hop
How do I Navigate the iJET Panel Menus?
This section explains how you find and set the many options behind the Menu button and the
Scan to button.
window and how you use the control buttons Back, Enter an
setting and changing their values.
2. When you press the one of these buttons you start its underlying menu.
or…
3. A menu contains an ordered list of menu option items and each of these
can be set to different values. Only one menu
display window. When you start a menu, its firs
“P
a
The first line in the display is the menu option item and the second line is its current value.
In the example above, the current menu option item is “Org. Type Color” and its value is
active.
Pressing the down arrow button in this case will move the menu forward to the next
menu option item and that option’s own current setting as shown below:
In the display panel the “>” mark will move down to the next line as shown below.
back to the menu level (top line) so you can resume leafing through the menu option items
with the arrow up/down buttons.
Org. Type B&W
>Se
p
ia
Menu option item
Current settin
g
for the o
p
tion item
> Org
Se
. Type B&W
p
ia
Menu Scan to
> Org. Type Color
Photo
Menu option item
Current setting for the option item
Menu option item
Current settin
g
for the o
p
tion item
Ente
r
Ente
r

The iJET Panel 2-7
7. bove to the display window below: The user pressed the
arrow down button until the value “Line” was displayed and then pressed to accept
that value as the new setting for the “Org. type B&W” option. The “>” marker moved back to
8.
9. Press the Stop button if you need to cancel a started scan-to-file or copy job.
ts to option
Menu button. Their values can be changed through repeated pressing of
the quick button or else in the traditional manner with the arrow up/down buttons as with
other menu option items.
From the display window shown a
Ente
r
the menu option item level enabling the user to continue navigating the menu with the arrow
up/down buttons.
When in a menu, you can press the Back button to return to a previous menu
level or to reset the active option item to its last saved value.
> Org. Type B&W
Line
Menu option item
Current settin
g
for the o
p
tion item
Back
Stop
10. The copy area quick buttons Lightness, Quality, Copies and Scale are shortcu
items behind the
The quick buttons Lightness, Quality, Copies and Scale are described in detail in the
relevant sections of the chapter “How do I Make a Copy”.

Configuration and Setup 3-1
3. Scanner Configuration and Setup Instructions
Your Copy scanner supports iJET technology for copy and scan-to-file functionality. The iJET
panel enables you to set options on the scanner so you can copy straight from the device
without a controller-PC and software. Furthermore, your scanner can be connected directly to
the LAN enabling it to function with other devices such as printers and PCs that are on the
same network. Finally, your scanner supports both USB device (input) and USB host (output)
interfaces for direct connection to a printer and to a PC that can control the scanner through
scan/copy software.
This wide range of connection and operation capabilities means that your scanner can be set
up in many different ways or “configurations” to match the needs of your business. For clarity,
we have termed the main configuration possibilities and their components as follows:
Configuration Type Components - Description
1 Stand Alone Copier Configuration Scanner connected directly (no PC) to one or two printers.
2 Network Scan/Copy Device
Scanner connected directly (no PC) to the network. The
scanner is set up to be recognized on the network by
network PCs and also setup to recognize/use network PCs
as scan targets. The scanner is setup to use network
printers.
3 Scan/Copy Station on Local PC Scanner connected to a PC through USB interface.
Scan/copy software is installed on the PC.
4 Combinations of the above for Multiple Functionality
The scanner is connected to a local PC and a local printer.
The scanner is also connected directly to the network in
order to be shared by network PCs and to use network
PCs as scan targets. The scanner can also use network
printers.
This operator’s guide section describes each of these configurations, including its components,
requirements and step-by-step installation instructions. Please note that combinations of the
first three configurations (present in above list as configuration nr. 4) are not only possible, but
in many cases also recommended in order to get the full range of scan-to-file and copy
functions out of your device and maximum flexibility for your business .
More on combining configurations in the section “Combining Configuration Types for
Multiple Functionality.”
NOTE: About interface connection cables: Your scanner came with a number of interface
cables. Refer to the supplied document: “NOTE ON INTEFACE CABLES” for instructions on
which cables to use with your specific configuration.
All the configurations described in the following sections apply…
On All Scanners

Configuration and Setup 3-2
3.1 Connect the scanner directly to printer(s) - Stand Alone Copier
Components: Wide format copy scanner and one or two large format printers. The Scanner is
connected directly (no PC or network) to one or two printers.
Usage: For copying large format documents. This configuration can create printed output only.
All operation takes place from the iJET Panel (scanner).
System Requirements:
•Wide Format Copy scanner
•Compatible large format printer(s)
•USB cable or twisted LAN cable or both. - for connecting the scanner to the printer(s)
Printers are connected throu
g
h USB or LAN interface
Step Description – Stand Alone Copier Configuration
1 Set up your scan station and control the smart card
Your wide format copy scanner should be placed either on the specially designed stand-alone floor stand or on
a sturdy table. For sheet-feed models, make sure there is enough space behind the scanner to allow the media
to run out.
Make sure that the scanner’s smart card is in place.
See the sections “Physical Placement of the Scan Station” and “Maintenance-Locate the Smart Card” for
detailed instructions for your specific scanner model.
2 Connection – scanner end
Connect the USB cable or LAN cable to the scanner. Check your printer’s interface options to select which of
these to use. For USB use the USB host (output) port which is the flat rectangle shaped socket. See the
document: “NOTE ON INTERFACE CABLES” for instructions on the specific interface cable types to use with
this configuration.
You can attach two printers at a time – a B&W printer and a Color printer. Note that the scanner has only one
USB out connection so a second printer will have to be able to use the LAN connection.
LAN
p
ort
USB host port
(output to printer)
See the section “Locating the Interface Cable Connector Panel” for instructions regarding your specific
scanner model.

Configuration and Setup 3-3
3 Connection - printer end
Connect the other end of the USB interface cable or LAN cable to the large format printer.
See the section “Locating the Interface Cable Connector Panel” for detailed instructions for your specific
scanner model.
4 Connect scanner power cable
At back of the scanner, you will find the scanner-end power cable socket, just below an Outlet switch. Connect
the cable to the scanner plug socket and the grounded power source. Do not yet turn on the Outlet switch on
the scanner.
Scanner-end power socket
Caution: The scanner is equipped with a three-wire (pin) grounding type plug. If you cannot insert the
plug into your outlet, contact your electrician to replace the outlet and ensure a grounded power connection. Do
not try to defeat or ignore the purpose of the grounding-type plug.
5 Connect the printer’s power cable.
6 Perform Preliminary Maintenance – Cleaning
Clean your scanner’s flat surface so dirt and dust are not dragged into the scan area with the original. Clean the
internal Scan area.
See the section “Scanner Maintenance” for instructions on accessing the scan area and cleaning for your
specific scanner model.
7 Turn (power) on the scanner and the printer
To turn on the scanner - at back of the scanner, above the scanner-end power cable plug you will find an Outlet
switch. Flip the Outlet Switch to ON. The scanner starts the init and self test sequence and you must wait until
these are finished.
Power outlet and switch is found at the back of the scanner
Perform Preliminary Maintenance - Calibration
Some scanner models support calibration from the iJET panel. For other models you will need to use a PC with
WIDEsystemNET and Scanner Maintenance software installed.
To run scanner maintenance:
On the iJET Panel
Select Menu > Advanced > Options > Calibrate Scanner > Yes to start calibration. If the option is not present in
the iJET panel menu:
Use a local or LAN connected PC with WIDEsystem and Scanner Maintenance installed. Left click on the
WIDEsystem scanner Icon and select Launch Scanner Maintenance from the menu. Follow the instructions on
your screen.
See the section “Scanner Maintenance” for detailed instructions.
Menu

Configuration and Setup 3-4
8 Set localization Preferences
On the iJET Panel - Select Menu > Advanced > Options >… to set preferences for language, paper series and
media handling (loading).
See the section on options for ”Personalizing and localizing the system” for details.
Menu
9 Make Printer Setup settings on the scanner
You can setup for two printer types – a B&W printer and a color printer. After you setup your printers, pressing
the Color Copy button will send the output to your color printer and pressing the B&W Copy button will send the
output to your B&W printer.
On the iJET Panel
Printer set up is described for Color Printer below. The same rules and method applies for B&W Printer setup.
Select Menu > Advanced > Printer Setup > Color Printer to make settings.
Select Menu > Advanced > Printer Setup > Color Printer > Interface > USB if you used a USB connection
between the scanner and the printer and LAN if you used a LAN connection. If you selected LAN, use the arrow
up/down buttons to enter the printer’s IP address.
Select the Printer Model setup method – Auto Configure, Printer List or Custom Setup and apply the additional
setting(s) attached to the Printer Model setup method you selected.
See the section on “Printer Setup on the Scanner” for more details.
10
Menu
Turn On and Prepare the Printer
Perform actions and settings on the printer device such as check that the right paper is loaded and the printer is
ON. See your printer’s documentation for help.
11 Create a system media type for your printers media (Closed Loop Calibration)
For the color printer only - You must create a system media type profile in order to color match paper media,
printer and scanner before using the system. Identify the media type (Coated, Glossy, Semi-Glossy) you use
with the printer then perform closed loop calibration (3 steps).
On the iJET Panel
Select Menu > Advanced > Options > Closed Loop Cal.
Press Enter and then use the arrows up/down buttons to reach the right media type and Enter to select.
On “Print Sheet” select Enter. The system will print a color patch sheet.
Feed the sheet into the scanner
On “Scan Sheet” select Enter. The system will scan the color patch sheet and calculate color matching values
for future jobs with the current media type.
See the section on “how do I… Create a New Media Type” for more details.
…..
12 Test your system
Make a simple copy to test your system.
See the section on “how do I… Make a Copy” for details.

Configuration and Setup 3-5
3.2 Connect the Scanner to LAN – Network Scan/Copy Device
Components: Wide format copy scanner and Local network. Peripheral devices such as PCs
and printers are setup and active on the network. The scanner will be setup to recognize PCs
on the network as scan-to-file targets. The scanner will also be setup to be recognized and
accessed by PCs on the network (sharing). The scanner will be setup to recognize and use
network printers.
Usage: For copying and digitizing large format documents. For creating both printed and file
(digitized) output. Operation is from the iJET Panel (scanner) or from network PCs. Users
operating from the panel can copy to printers on the network and scan-to-file to PCs on the
network. Network PCs with compatible scan or copy software installed can “share” the scanner
and use it with network printers or for scan-to-file tasks.
System Requirements:
•Wide Format Copy scanner
•Compatible large format printer on the network (for copy functionality).
•LAN cable connecting the scanner to the network.
•One or more PCs on the network (for scan to file and shared scanner functionality).
•The PCs need: compatible operating system (see ws/readme.htm on WIDEsystem TOOLS
CD).
Scanner’s LAN interface
Step Description
1 Set up your scan station and control the smart card
Your wide format copy scanner should be placed either on the specially designed stand-alone floor stand or on
a sturdy table. For sheet feed models, make sure there is enough space behind the scanner to allow the media
to run out.
Make sure that the scanner’s smart card is in place.
See the sections “Physical Placement of the Scan Station” and “Maintenance-Locate the Smart Card” for
detailed instructions for your specific scanner model.
2 Connection – scanner end
Connect the LAN cable to the scanner’s LAN port. See the document: “NOTE ON INTERFACE CABLES” for
instructions on the specific interface cable type to use with this configuration.

Configuration and Setup 3-6
LAN port
See the section “Locating the Interface Cable Connector Panel” for instructions regarding your specific
scanner model.
3 Connection – network end.
Connect the other end of the LAN cable to the network or switch.
4 Connect scanner power cable
At back of the scanner, you will find the scanner-end power cable socket, just below an Outlet switch. Connect
the cable to the scanner plug socket and the grounded power source. Do not yet turn on the Outlet switch on
the scanner.
Scanner-end power socket
Caution: The scanner is equipped with a three-wire (pin) grounding type plug. If you cannot insert the
plug into your outlet, contact your electrician to replace the outlet and ensure a grounded power connection. Do
not try to defeat or ignore the purpose of the grounding-type plug.
5 Perform Preliminary Maintenance – Cleaning
Clean your scanner’s flat surface so dirt and dust are not dragged into the scan area with the original. Clean the
internal Scan area.
See the section “Scanner Maintenance” for instructions on accessing the scan area and cleaning for
your scanner model.
6 Turn (power) on the scanner and the printer
To turn on the scanner - at back of the scanner, above the scanner-end power cable plug you will find an Outlet
switch. Flip the Outlet Switch to ON. The scanner starts the init and self test sequence and you must wait until
these are finished.
Power outlet and switch is found at the back of the scanner

Configuration and Setup 3-7
Perform Preliminary Maintenance – Calibration
Some scanner models support calibration from the iJET panel. For other models you will have to use a PC with
WIDEsystem and Scanner Maintenance software installed. To run scanner maintenance:
On the iJET Panel
Select Menu > Advanced > Options > Calibrate Scanner > Yes to start calibration. If the option is not present in
the iJET panel menu:
Use a local or LAN connected PC with WIDEsystem and Scanner Maintenance installed. Left click on the
WIDEsystem scanner Icon and select Launch Scanner Maintenance from the menu. Follow the instructions on
your screen.
See the section “Scanner Maintenance” for detailed instructions.
7
Menu
Set localization Preferences
On the iJET Panel - Select Menu > Advanced > Options >… to set preferences for language, paper series and
media handling (loading).
See the section on options for ”Personalizing and localizing the system” for details.
Menu
8 Make Printer Setup settings on the scanner
You can setup for two printer types – a B&W printer and a color printer. After you setup your printers, pressing
the Color Copy button will send the output to your color printer and pressing the B&W Copy button will send the
output to your B&W printer. In this configuration, both printers are on the network.
On the iJET Panel
Printer set up is described for Color Printer below. The same rules and method applies for B&W printer setup.
Get the network id information for the printer(s) you want to use from your network administrator.
Select Menu > Advanced > Printer Setup > Color Printer to make settings.
Select Menu > Advanced > Printer Setup > Color Printer > Interface > LAN. Use the arrow up/down buttons to
enter the printer’s IP address.
Select the Printer Model setup method – Auto Configure, Printer List or Custom Setup and apply the additional
setting(s) attached to the Printer Model setup method you selected.
See the section on “Printer Setup on the Scanner” for more details.
Menu
9 Make Scanner Network Setup settings on the scanner
On the iJET Panel
Select the Menu > Advanced > Network Setup. You can use DHCP network setup if your network supports it.
Otherwise you need to enter the network address information manually. Contact your network administrator for
the correct address values. Select Menu > Advanced > Network Setup > Share Scanner > Yes if you want to
enable PCs on the network to use the scanner.
See the section on “Scanner on Network Setup Settings” for details.
Menu
10 Turn On and Prepare the Printer
Perform actions and settings on the printer device such as check that the right paper is loaded and the printer is
ON. See your printer’s documentation for help.
11 Create a system media type for your printers media (Closed Loop Calibration)
You must create a system media type profile in order to color match paper media, printer and scanner before
using the system. Identify the media type (Coated, Glossy, Semi-Glossy) you use with the printer then perform
closed loop calibration (3 steps).

Configuration and Setup 3-8
On the iJET Panel
Select Menu > Advanced > Options > Closed Loop Cal.
Press Enter and then use the arrows up/down buttons to reach the right media type and Enter to select.
On “Print Sheet” select Enter. The system will print a color patch sheet.
Feed the sheet into the scanner
On “Scan Sheet” select Enter. The system will scan the color patch sheet and calculate color matching values
for future jobs with the current media type.
See the section on “how do I… Create a New Media Type” for more details.
Menu
12 Test your system
Make a simple copy to test your system.
See the section on “how do I… Make a Copy” for details.
13 Verify Scan to File functionality
Scan to a network PC to test Scan to file functionality. The PC must have WIDEsystemNET installed and must
be setup for network scanning.
See instructions on setting up a PC for scan2net in WIDEsystemNET on-line help. See more on
scanning to a PC in the section “How do I… Control from the iJET Panel – Scan to local or network PC”
14 Verify Shared Scanner functionality
The netwok PC must have WIDEsystemNET and compatible scan/copy software installed. Check that you can
identify the scanner from the PC and perform a test scan.
See instructions on setting up a PC for scan2net in WIDEsystemNET on-line help. See more on using a
shared scanner in the scan or copy application’s on-line help.
This manual suits for next models
1
Table of contents
Other Contex Scanner manuals

Contex
Contex IQ 4400 Series User manual

Contex
Contex HD Ultra X 6000 Series User manual

Contex
Contex SD One+ How to use

Contex
Contex SD One 36 User manual

Contex
Contex FLEX50i User manual

Contex
Contex HD iFLEX User manual

Contex
Contex Chroma 8040 Manual

Contex
Contex HD Ultra X 6000 Series How to use

Contex
Contex SD One MF 44 User manual

Contex
Contex IQ FLEX User manual

Contex
Contex AB51A Manual

Contex
Contex HD Ultra Series User manual

Contex
Contex FSS4300 Manual

Contex
Contex XD2490 User manual

Contex
Contex GX67D Manual

Contex
Contex IQ 2400 Series How to use

Contex
Contex GX67D Manual

Contex
Contex HD5450 User manual

Contex
Contex XD2490 User manual

Contex
Contex SD One+ User manual