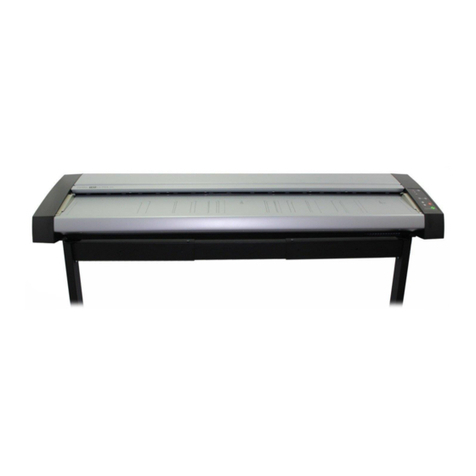
Contex IQ FLEX User manual

User Guide
Wide Format Flatbed Scanner
Model: IQ FLEX UG13523-2 EN IQFLEX MAR 2021

Contents 1
Table of Contents
About this Guide .........................................................................................3
Main Specification ......................................................................................4
Installation ...................................................................................................5
Scanner requirements .............................................................................5
Assistance and Safety .............................................................................5
Unpacking ...................................................................................................6
Packaging observations ..........................................................................6
Placing the scanner on a suitable surface ...............................................7
Lifting the scanner ...................................................................................8
Cleaning .......................................................................................................9
Checking the glass area ..........................................................................9
Cleaning the glass area ........................................................................ 10
Preparing the scanner for first use ......................................................... 11
Connecting power ................................................................................. 11
Touch screen preparation ..................................................................... 13
Connecting to a local area network (LAN) ............................................. 14
Turning on the power ............................................................................ 15
Startup Wizard ...................................................................................... 16
IQ FLEX touch screen interface ............................................................ 17
Running the Wizard ............................................................................... 18
Wi-Fi ...................................................................................................... 18
Configuring for a local area network (LAN) ........................................... 19
LAN settings .......................................................................................... 19
Language .............................................................................................. 20
Setting Date and Time .......................................................................... 21
Configuring the scan to email settings .................................................. 22
Setting up the printer ............................................................................. 23
Activating the scanner (online method) ................................................. 25
Activating your scanner (offline method) ............................................... 26
Secure FTP server settings................................................................... 28
Turning the scanner ON and OFF ........................................................... 30
Main power switch ................................................................................ 30
Sleep mode ........................................................................................... 30
Scanning ................................................................................................... 31
Basic steps............................................................................................ 31
Scan preparation ................................................................................... 32
Normal scan mode ................................................................................ 33
Oversize scan mode ............................................................................. 34
Book scan mode ................................................................................... 35
Adjusting the lid for thick originals ......................................................... 36
Positioning originals .............................................................................. 37
Paper sizes and guides ......................................................................... 38
Scanning oversize documents .............................................................. 41
Positioning oversize documents ............................................................ 42
Book positioning .................................................................................... 43
Book scanning without software ............................................................ 44
Book scanning using Nextimage ........................................................... 45
Further notes about input size ............................................................... 46
Using the USB socket ........................................................................... 47
Scanning to email ................................................................................. 48
Scanning thick media ............................................................................ 50
Scanning to personal PC and Cloud destinations ................................. 51
Scan to file settings ............................................................................... 52

Contents 2
Color Validation (draw line) ................................................................... 53
Color Validation (add text) ..................................................................... 54
Color Validation (change brightness) .................................................... 55
Gray Validation (change brightness) ..................................................... 56
Black and White Validation (darken lines) ............................................. 57
Contex LINK scan client ........................................................................ 58
Scanning to the cloud ............................................................................ 59
Copying ..................................................................................................... 60
The basic steps of copying .................................................................... 60
Copy settings ........................................................................................ 61
Wi-Fi – Connecting to a wireless network ............................................. 63
Settings and preferences ......................................................................... 64
WIDEsystem ......................................................................................... 65
Nextimage ............................................................................................. 65
Administrator console ............................................................................ 66
Scanner maintenance tasks .................................................................... 67
Cleaning the scan area ......................................................................... 68
Cleaning the glass ................................................................................ 69
Replacing the white background platen ................................................ 70
Preparing to calibrate the scanner ........................................................ 71
Calibrating the scanner ......................................................................... 72
Updating your scanner software ........................................................... 74
Updating the Contex LINK client software ............................................ 75
Troubleshooting your scanner ................................................................ 76
Technical Service .................................................................................. 76
Problems with the scanner installation .................................................. 78
Problems operating the scanner ........................................................... 79
Problems with the scan result ............................................................... 80
IMPORTANT SAFETY INSTRUCTIONS .............................................. 81
REGULATIONS .................................................................................... 82
FCC Regulations ................................................................................... 82

Overview 3
About this Guide
This user guide applies to the following model(s):
Scanner Model Description
IQ FLEX 18” / A2 flatbed color scanner
ENERGY STAR® compliant
This guide explains how to operate and maintain your wide format
flatbed scanner.
The guide assumes basic knowledge of your computer and
operating system and does not repeat information that would be
covered in their own user documentation.
Be sure to refer to:
1. The Installation section that describes how to correctly install
and activate your scanner.
2. The Safety Instructions.
3. The Scanner Maintenance section that describes how to get
the best results from your scanner.

Overview 4
Main Specification
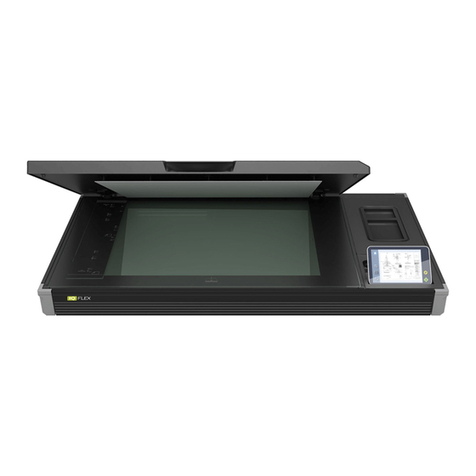
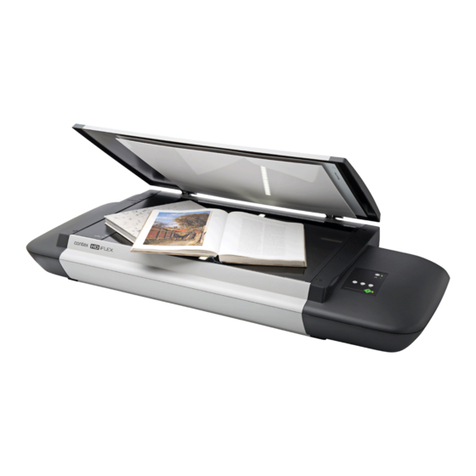
The IQ FLEX is an A2 flatbed scanner with integrated touch screen controller designed to capture images from flat documents which are either too fragile, irregularly
shaped or too thick to be scanned by other scanners. The scanner will allow oversize scans up to A1 to be made. Connecting to Ethernet networks allows
convenient scan to cloud operation while the onboard USB socket permits the operator to save any scan direct to portable memory.
Connectivity
Gb Ethernet
Scan to USB
USB3 on scanner
Color Speed (200dpi)
Full scan bed in 6 seconds
Mono Speed (200 dpi)
Full scan bed in 6 seconds
Scan size
A2 / C-size
Over size scanning
A1 / D size
Scan width Arc C +30mm = 18”+30mm = 487,2mm
Scan length Arc C +30mm = 24”+30mm = 639,6mm
Optical Resolution
1200x1200 dpi
Max Resolution
9600 dpi
Accuracy
0.1% +/- 1 pixel
CIS
Canon CIS
Power Consumption : (Ready / Sleep Mode / Scanning)
Max 10W / 0.5W / 23W
Unpacked Weight / Dimensions (W x L x H*) 35kg (77lbs) / 661mm (26”) x 1176mm (46”) x 194mm (8”)
Packed Weight / Dimensions (W x L x H) 43kg (95lbs) / 840mm (33”) x 1310mm (52”) x 290mm (11.3”)
Packaging method Foam shock protection frame inside thick cardboard box
Operating Maximum Ambient Temperature This product has been submitted and evaluated for use at the maximum ambient
temperature (Tma) permitted by the manufacturer’s specification of 40°C.
*Touch panel in raised position

Scanner Setup 5
Installation
Scanner requirements
Firm, flat surface or table at least 75cm x 135cm with an area at least 80cm of free space above the surface.
Grounded power outlet.
Network connected pc to run Contex Link software (supplied).
Gigabit Ethernet wall socket.
Internet support for connection to cloud services.
Assistance and Safety
Ensure you have adequate help to unpack and position the scanner
Make sure that you do not trip over any packing material while carrying the scanner

Scanner Setup 6
Unpacking
Packaging
Packaging observations
Be sure to retain the packing material if you
intend to move the scanner to another site.
Do not leave empty packaging blocking a right of
way or fire exit
Always dispose of the packing material
responsibly if you no longer require it.
Make sure you remove the accessories kit and
any documentation from the packing before
discarding.
1

Scanner Setup 7
Placing the scanner on a suitable surface
Important
Your wide format flatbed scanner should be placed on a single, stable, level and
completely flat (plane) surface like a well-made table. If convenient, you can place the
back end of the scanner against a wall leaving space for the cables to be connected
at the back. Make sure there is room above the scanner to raise the lid completely
into the upright position. It is a good idea to have at least 900mm available so that the
lid can be removed for maintenance if necessary.
The surface underneath the scanner should not impart tension on the scanner’s
frame caused by unevenness. THIS IS VERY IMPORTANT. Failure to ensure the
surface is flat may produce poor scanning results and could cause damage to the
scanner device over time.
2

Scanner Setup 8
Lifting the scanner
Taking care
The scanner rests on four rubber feet positioned on the underside of
the scanner.
1. CAUTION. The scanner is heavy (35kg/77lbs). Never attempt to
lift the scanner on your own. Always seek the help of a second
person when lifting the scanner from its packaging material or
when you want to move the unit.
2. Find a sturdy table or surface on which to use the scanner.
3. The sides of the table or surface must be easily accessible by
those installing the scanner so as to avoid possible back injury
when lowering and maneuvering the scanner into position.
4. The small height of the scanner feet means that the case of the
scanner rests close to the surface it used on. This is a potential
finger trap when lowering the scanner into position.
TAKE CARE NOT TO TRAP YOUR FINGERS WHEN
PLACING THE SCANNER!
SEE THE SAFETY INSTRUCTIONS AT THE END OF THIS
OPERATOR GUIDE
3

Scanner Setup 9
Cleaning
Checking the glass area
Open the scanner lid
The internal scan area (glass plate) should be wiped clean of
any dust that may have accumulated from the packaging or
during the shipping process.
Lift up the scanner lid to expose the glass scan area.
4

Scanner Setup 10
Cleaning the glass area
Clean the internal scan area
Lightly wipe the internal scan area’s glass plate free of dust.
Use a dry lint-free cloth.
If you detect difficult smudges on the glass that cannot be
wiped clean with a dry cloth, refer to this guide’s section
Cleaning the scan area
for instructions on thoroughly cleaning
the scan area.
Close the lid after cleaning the internal scan area.
5

Scanner Setup 11
Preparing the scanner for first use
Connecting power
Connect the power cable
to the scanner
Locate the power supply which is already wired
with a special plug ready to be inserted into the
round socket in the panel on the back of the
scanner. Take care to insert with the flat side of
the plug facing upwards. Do not force the plug into
the socket.
Now locate the separate supplied mains power
cable.
6

Scanner Setup 12
Connecting the power supply to the
power outlet
Connect the female end of the mains cable into the power supply
then connect the power plug end to a suitable power outlet.
CAUTION: The scanner is equipped with a three-wire (pin)
grounding type plug. If you cannot insert the plug into your outlet it
means your outlet is not earthed. Contact your electrician to
replace the outlet with a grounded power connection or use a
different earthed outlet. Do not try to defeat or ignore the purpose
of the grounding-type plug.
7

Scanner Setup 13
Touch screen preparation
Lift up the touch screen
Grasp the top edge of the screen and fold it up and into the upright
position.
NOTE: Avoid using extreme force when raising or lowering
the screen.
8

Scanner Setup 14
Connecting to a local area network (LAN)
Connect to the network
Connect the scanner to the network. The network socket is on the panel
located at the back of the scanner.
The USB ports outlined in red are for maintenance and future upgrade
purposes only. These should not be used. Do not insert any cables or USB
memory drives into these sockets.
9

Scanner Setup 15
Turning on the power
Turn ON scanner power
Turn ON the scanner power switch on the back of the scanner by
moving the switch the left.
10

Scanner Setup 16
Startup Wizard
Turning the scanner ON for the first time
Turn on the main power switch on the panel at the back of the scanner.
NOTE: When the scanner is switched on for the first time the IQ FLEX Wizard will
take the user through a series of configuration pages on the touch screen.
The Wizard sets up:
Network Connection (for communication to printer(s), cloud and network
computers)
Languages (keyboard and screen can be different)
Date and Time
Email Server settings (for sending scans to recipients via email)
Activation of the scanner
Any of these settings can be skipped and returned to at a later time by touching the
Settings icon on the front screen.
11

Scanner Setup 17
IQ FLEX touch screen interface
Reset
To reset from any state and go back to start
Go button
To start a scan or copy after making any settings changes
(if required)
Scroll menu
Scroll on the touch screen in both
directions to view and select

Scanner Setup 18
Running the Wizard
The Installation Wizard starts
The IQ FLEX welcome screen signals that the scanner installation process
has begun.
The following screens contain the various installation steps required to set
up the scanner. Follow the screens shown in [path] below to return to this
area after the wizard has completed.
Press the Next button >> to proceed.
Use the Back << button to go back a step (where displayed).
Wi-Fi
Scanner installation
Using Wi-Fi
If a Wi-Fi network is in range and the physical LAN is disconnected, the
scanner will automatically display a highlighted ‘Select Wi-Fi Network’
button. Touch the highlighted button to connect using Wi-Fi. See Using the
Wi-Fi Connection later in this manual for more information.
[Settings > System > Wifi]
12
13

Scanner Setup 19
Configuring for a local area network (LAN)
LAN network settings (DHCP)
By default the scanner will automatically try to obtain an IP address using
DHCP if cable connected to a local area network (LAN).
[Settings > System > Network]
Press the Next button >>
LAN settings
LAN network settings (STATIC)
To manually set a static network IP address follow the screens shown in [path]
below to uncheck ‘Automatically obtain IP address’. A static address and subnet
mask can now be set. Consult your IT person if necessary.
[Settings > System > Network]
Press the Next button >>
14
15
Other manuals for IQ FLEX
1
Table of contents
Other Contex Scanner manuals

Contex
Contex Chroma 8040 Manual

Contex
Contex AB51A Manual

Contex
Contex IQ 4400 Series User manual

Contex
Contex FLEX50i User manual

Contex
Contex SD One 36 User manual

Contex
Contex HD Ultra X 6000 Series How to use

Contex
Contex XD2490 User manual

Contex
Contex Wide Format Color Manual

Contex
Contex SD One MF 44 User manual

Contex
Contex IQ FLEX How to use

Contex
Contex SD One MF Assembly instructions

Contex
Contex HD Ultra X Series Guide

Contex
Contex HD5450 User manual

Contex
Contex GX67D Manual

Contex
Contex SD One+ User manual

Contex
Contex SD 3600 series User manual

Contex
Contex XD2490 User manual

Contex
Contex IQ 2400 Series How to use

Contex
Contex AA51A Manual

Contex
Contex GX67D Manual