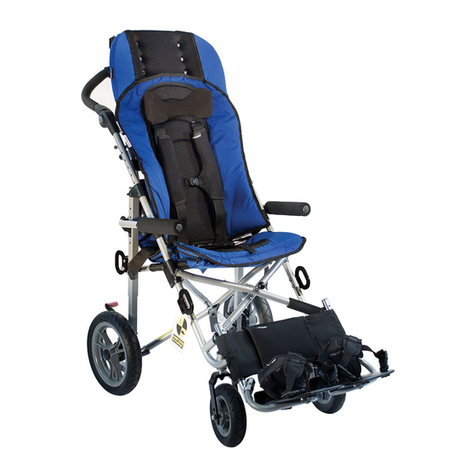
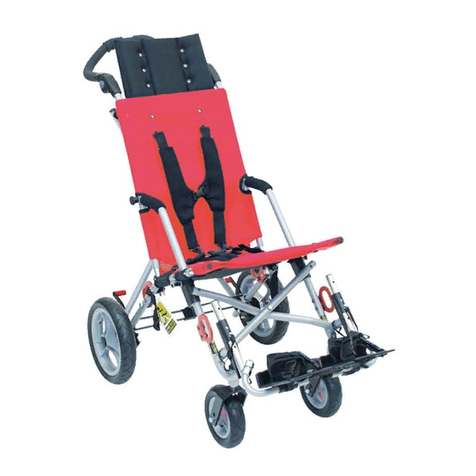
Convaid CuddleBug User manual

ENGLISH
User’s Guide
CuddleBug
Tilt-In-Space Wheelchair
SAVE THIS BOOK FOR FUTURE REFERENCE
READ INSTRUCTIONS BEFORE USING

CONVAID USER’S GUIDE
i
Notice:
The information contained in this document is subject to change without notice.
No part of this document may be photocopied, reproduced, transmitted,
transcribed, stored in a retrieval system or translated to another language
or computer language, in any form or by any means, electronic, mechanical,
magnetic, optical, chemical, manual or otherwise without the prior written
consent of Convaid, Inc.
Use only Convaid accessories and parts on Convaid products. Convaid parts
are not interchangeable with other manufacturers’ products. Replace any
worn parts immediately.
Customer Service Support
Toll Free: 1-888-Convaid (266-8243)
Phone: (310) 618-0111
Fax: (310) 618-8811
Email: [email protected]
Website: www.convaid.com
Technical assistance or repair information hours are:
Monday-Friday, 7 a.m. to 5 p.m. PST
Before Calling:
Please fill in the following information. Customer Service
will be able to help you more quickly if the information
indicated below is readily available.
Serial number: ________________________________________
Date purchased: ______________________________________
Dealer name: _________________________________________
© Copyright 2008 by Convaid, Inc. All rights reserved.

Unpacking . . . . . . . . . . . . . . . . . . . . . . . . . . . . . . . . . . . . . . . . . . . . . 1
Unfolding . . . . . . . . . . . . . . . . . . . . . . . . . . . . . . . . . . . . . . . . . . . . . . .1
Folding . . . . . . . . . . . . . . . . . . . . . . . . . . . . . . . . . . . . . . . . . . . . . . . 3
Seat depth. . . . . . . . . . . . . . . . . . . . . . . . . . . . . . . . . . . . . . . . . . . . . . 5
Seat width . . . . . . . . . . . . . . . . . . . . . . . . . . . . . . . . . . . . . . . . . . . . . 5
Seat back height. . . . . . . . . . . . . . . . . . . . . . . . . . . . . . . . . . . . . . . . . 6
Seat-to-footplate height adjustment . . . . . . . . . . . . . . . . . . . . . . . . 7
Footplate depth adjustment . . . . . . . . . . . . . . . . . . . . . . . . . . . . . . . 8
Positioning belt . . . . . . . . . . . . . . . . . . . . . . . . . . . . . . . . . . . . . . . . . 9
Depth adjustable crotch strap . . . . . . . . . . . . . . . . . . . . . . . . . . . . 10
Anterior trunk support vest . . . . . . . . . . . . . . . . . . . . . . . . . . . . . . 11
Lateral thoracic supports . . . . . . . . . . . . . . . . . . . . . . . . . . . . . . . . 12
Hip inserts . . . . . . . . . . . . . . . . . . . . . . . . . . . . . . . . . . . . . . . . . . . . 13
Medial thigh support (pommel). . . . . . . . . . . . . . . . . . . . . . . . . . . 13
Adjustable contour headrest. . . . . . . . . . . . . . . . . . . . . . . . . . . . . . 14
Height adjustable armrest. . . . . . . . . . . . . . . . . . . . . . . . . . . . . . . . 15
Foot positioner. . . . . . . . . . . . . . . . . . . . . . . . . . . . . . . . . . . . . . . . . 15
Height adjustable push handle. . . . . . . . . . . . . . . . . . . . . . . . . . . . 16
Tilt-in-space. . . . . . . . . . . . . . . . . . . . . . . . . . . . . . . . . . . . . . . . . . . 17
Recline. . . . . . . . . . . . . . . . . . . . . . . . . . . . . . . . . . . . . . . . . . . . . . . 17
Hi/Lo. . . . . . . . . . . . . . . . . . . . . . . . . . . . . . . . . . . . . . . . . . . . . . . . . 18
Upper extremity support suface (tray). . . . . . . . . . . . . . . . . . . . . 18
Under seat storage tray. . . . . . . . . . . . . . . . . . . . . . . . . . . . . . . . . . 19
Oxygen Tank Bag . . . . . . . . . . . . . . . . . . . . . . . . . . . . . . . . . . . . . 19
Headrest cover. . . . . . . . . . . . . . . . . . . . . . . . . . . . . . . . . . . . . . . . . 20
Removal . . . . . . . . . . . . . . . . . . . . . . . . . . . . . . . . . . . . . . . . . . . . . . 21
Cleaning. . . . . . . . . . . . . . . . . . . . . . . . . . . . . . . . . . . . . . . . . . . . . . 22
Specifications . . . . . . . . . . . . . . . . . . . . . . . . . . . . . . . . . . . . . . . . . 22
Locking and unlocking . . . . . . . . . . . . . . . . . . . . . . . . . . . . . . . . . . 23
Wheel lock adjustment . . . . . . . . . . . . . . . . . . . . . . . . . . . . . . . . . . 24
Anti-shimmy . . . . . . . . . . . . . . . . . . . . . . . . . . . . . . . . . . . . . . . . . . 24
Operating and Safety instructions . . . . . . . . . . . . . . . . . . . . . . . . 25
Warranty . . . . . . . . . . . . . . . . . . . . . . . . . . . . . . . . . . . . . Back cover
ii
Table of Contents
Setting Up
Fitting Guide
Accessories
Positioning
Guide
Frame
Positioning
Options
Upholstery
Wheels
Important
Information

1. Lay chair down with seat
facing upward. Fig. 1
2. Push in grey detent buttons
on the footplate, and swing
footplate out and upward
until parallel with the ground.
Fig. 2
3. Squeeze the recline lever
on the right side of the
chair’s handle and lift seat
back into full upright
position. Fig. 3
CONVAID USER’S GUIDE
1
Setting Up
Unpacking
Unfolding
Check to see that the following items are included with the chair:
• Left and right footplates.
• Accessories as ordered.
• Hex wrench (5/32”).
SIZE / MODEL
CHART
CuddleBug
Size Model No.
1 CB-size 1
2 CB-size 2
Caution:
Keep fingers
free of folding
mechanism.
!
Fig.1
Fig.3
Fig.2

4. Squeeze the lever located
on the back of the seat and
pull up on chair. Fig 4
5. Adjust handles and foot
plate into desired position.
6. Apply wheel locks before
placing individual in chair.
Fig. 5
SETTING UP
Fig.4
Fig.5
2

CONVAID USER’S GUIDE
3
Folding
Fig.7
Fig.6
Fig.8 Fig.9
1. Before folding, the front wheels of
chair should be in a forward facing
position for best results. Fig. 6
2. Tilt chair in upright position.
3. Push in grey detent buttons on the
footplate, and swing footplate out
and upward until parallel with the
ground. Fig. 7
4. Apply wheel locks. Fig. 8
5. Squeeze the lever located on the back of the seat and push forward and down.
Fig. 9 Release the lever when the chair is at its lowest position.

4
SETTING UP
Fig.10 Fig.11
Fig.12
Fig.13
6. Once the chair is in the Lo position, locate the red loop next to the Hi/Lo lever
and pull to the far left with an index finger. Fig. 10
7. While holding the red loop, squeeze the recline lever on the right side of the
chair's handle and recline the back all the way down. Fig. 11& 12
8. Push in grey detent buttons
on the handle, and rotate
handle back into chair.
9. Push in grey detent buttons
on the footplate, and rotate
footplate back under chair.
Fig. 13
10. With a straight back, bend
knees and lift chair.

Seat Depth
To Adjust:
1. Apply wheel locks.
2. Loosen adjustment levers under the
seat by rotating them once in a
counter clockwise direction.
Fig 14b
3. Position yourself facing the chair
and turning the round knobs on the
side of the seat to desired position.
4. Tighten adjustable levers under the
seat by rotating them in a clockwise
direction. Fig. 14c
Measure from the most posterior
portion of the buttocks to the back of
the knee. Subtract from that measure-
ment 1-2” to allow adequate clearance
between the seat and the back of the
knee. Fig.14a
CONVAID USER’S GUIDE
5
Fitting Guide
Correct seating and positioning encourages good posture, which in turn aids cir-
culation, breathing and digestion. Please take the time
to properly adjust the chair to fit the user.
Fig.14a
Fig.14c
view from bottom of chair
Fig.14b
Seat depth

6
FITTING GUIDE
Seat Back Height
Proper seat width enables the user to sit comfortably and
prevents problems from developing. While user is seated on
a flat surface, measure from hip to hip. Fig. 15a
The user should have enough room to prevent hips and
thighs from rubbing against the frame. However, the chair
should not be too wide or the user will slide around and
posture could be affected.
Fig.15a
Fig.15b
Seat width is measured
from the inside walls of
the seat pan. Fig. 15b
Seat Width
Seat back height varies according to chair size. Headrest
extensions are available when extra height is needed to
support the head.
To determine the seat back height, measure from the seat
to the upper part of the head. Fig. 16
Fig.16
Seat back height

CONVAID USER’S GUIDE
7
Seat-to-Footplate Height Adjustment
The soles of the feet or heels should
rest comfortably on top of the foot-
plates. To achieve this, remove detent
pins on the front of the leg tubes, slide
the footplate to the desired position
and reinsert the pins. Fig. 17b In case
of an especially short seat-to-footplate
adjustment, the excess material of the
calf flap may be wrapped under the
footplate and attached with Velcro®.
Foot
support
height
Fig.17a
Fig.17b
Seat-to-footplate height is measured
from the back of the knee to the
bottom of the heel. Soles of the feet or
heels should rest comfortably on top
of footplates. Fig. 17a

FITTING GUIDE
8
To achieve comfortable foot place-
ment, the footplate angle may be
adjusted. First loosen the four bolts on
the outer edge of the leg rest where
the footplate tubes are located. Angle
the footplate for maximum comfort
and tighten the bolts. Fig. 17c
Footplate Depth Adjustment
To adjust the depth of the footplate,
loosen the four bolts on the bottom of
the footplate and slide the footplate
into desired position, then tighten the
bolts. Fig. 18
Fig.17c
Fig.18

CONVAID USER’S GUIDE
9
Positioning Belts
Positioning Guide
The Cuddle Bug comes with either a two-point or a three-point positioning belt.
Both can be attached to the back of the seat (to achieve a 45 degree lap belt
angle) or to the sides of the seat pan (to achieve a 60 degree lap belt angle)
Fig. 19-20. To attach the belts to the chair, open the plastic clip located at the
ends of the positioning belts and thread it through the desired fabric loop, then
press clip together until it clicks shut. Fig. 20-22
Fig.19 Two-point positioning belt Fig.20 Three-point positioning belt
Fig.22 Seat BackFig.21 Seat Pan

10
POSITIONING GUIDE
To tighten:
Tighten the positioning by pulling on the metal loop located on
the end of the strap. Fig. 23
To loosen:
Grasp buckle and pull away from chair. Fig. 24
Depth Adjustable
Crotch Strap
The 3-point positioning belt comes with a
depth adjustable crotch strap.
To adjust:
1. Locate the small metal retainer on the
crotch strap. Push it through the slot
under the seat until crotch strap is
removed. Fig. 25
2. Push metal retainer through proper hole in
seat and back into the desired slot. Avoid
twisting the strap. Fig 26
Fig.23
Fig.26
Fig.24
Fig.25

CONVAID USER’S GUIDE
11
Anterior Trunk Support Vest
The Anterior Trunk Support helps the user to retain upright trunk position, and
prevents forward slumping. Fig. 27-28
Anterior Trunk Support Height Adjustment:
Locate the two small metal retainers on the upper portion of the shoulder straps
behind the seat back. Push them through the slots in the seat to the front. Once you
have established the desired shoulder height, push each metal retainer back through
the appropriate hole in the back pan. (Make sure the metal retainers are through
both the plastic back and the metal back.) Avoid twisting straps. Fig. 29
Anterior Trunk Support Width Adjustment:
Locate the two small metal retainers on the lower portion of the shoulder straps
behind the seat back. Push them through the slots in the seat to the front. Once
you have established the desired shoulder width, push each metal retainer back
through the appropriate hole in the back pan. Avoid twisting straps.
Fig.27 Fig.28
Fig.29

12
POSITIONING GUIDE
Lateral Thoracic Spports
Lateral thoracic supports are used to maintain midline positioning of the trunk.
To Open: Press latch located at top of thoracic support and pull outward until it
snaps into place. Fig. 30
Height Adjustment: Loosen two adjustable levers on the back of the chair by
rotating them counter clockwise. Slide thoracic support vertically to desired posi-
tion, and tighten levers. Fig. 31
Width Adjustment: Loosen two adjustable levers on the back of the chair, slide
thoracic support horizontally to desired position, and tighten levers. Fig. 32
To Fold: Press latch located at the top of the thoracic support and fold inward
Fig. 33.
Fig.30 Fig.31
Fig.32 Fig.33

CONVAID USER’S GUIDE
13
Hip Guides
Medial Thigh Support (Pommel)
Hip guides help to stabilize the pelvis.
To adjust the width: Velcro the
desired number of foam positioning
pads to each side of the seat to
achieve desired width. Fig. 34
The pommel separates the legs at the
knees for proper seating.
Depth adjustment: Use a wrench to
loosen the two nuts located under the
pommel. Slide pommel to desired posi-
tion and tighten the nuts. Fig. 35
To swing pommel up: Rotate up
until pommel snaps into place. Fig. 36
To swing pommel down: Press snap
button on the right side of the pommel
and swing pommel under the seat.
Fig. 37
Fig.34
Fig.35
Fig.36 Fig.37

14
POSITIONING GUIDE
Adjustable Contour Headrest
Depth adjustment: Loosen the two nuts located on the upper portion of the
headrest. Slide the front bracket to the desired depth and retighten the nuts. (A)
Height adjustment: Loosen the two nuts located behind the back pan and slide
the back bracket to the desired height then retighten the nuts. (B) Or loosen the
two screws behind the headrest pad and slide the headrest pad your desired
height then retighten the screws. (C)
To achieve a higher headrest height: Loosen and remove the two nuts located
on the upper portion of the headrest. Rotate the front bracket 90-degrees so that
the bracket points upward. Then retighten the nuts. (A)
(A)
(B)
(C)

CONVAID USER’S GUIDE
15
Height Adjustable Armrest
Foot Positioner
To adjust height of armrests, loosen
the two round knobs and slide armrest
to desired position, re-tighten knobs.
Fig. 38
The foot positioner holds the foot securely in place. To attach, select desired
location on the footplate and press down to Velcro. Fig. 39a & 39b
Fig.38
Fig.39a
Fig.39b

16
POSITIONING GUIDE
Height Adjustable Push Handle
Angle Adjustment:
Press and hold the grey detent button. Fig. 40 While holding the detent button,
adjust the handle to desired angle and release button. Fig. 41
Height Adjustment:
Pull the black knob located on the bottom of the push handle’s arms and
turn one quarter of the way. Fig. 42 Swing the push handle forward or backward
to desired height, and turn black knob back into original position. Fig. 43
Fig.40 Fig.41
Fig.42 Fig.43

CONVAID USER’S GUIDE
17
Frame Positioning Options
Tilt:
To tilt, squeeze the lever on the left side of the chair's handle and push down.
Fig. 44 Release the lever when desired angle of tilt has been achieved. Fig. 45
Recline:
Squeeze the lever on the right side of the chair's handle and recline to desired
position. Fig. 46 To recline past 115-degrees, grasp the red loop with your left
index finger and pull to the furthest left. Fig. 47 While holding the red loop,
squeeze the recline lever and recline to desired position.
Fig.44
Fig.45
Fig.46
Fig.47
Table of contents
Other Convaid Wheelchair manuals

Convaid
Convaid Safari Tilt User manual

Convaid
Convaid Trekker User manual

Convaid
Convaid Rodeo Transit Kit User manual

Convaid
Convaid Rodeo Troubleshooting guide

Convaid
Convaid Cruiser 12 Manual

Convaid
Convaid Cruiser CX10 User manual

Convaid
Convaid EZ Rider 18 User manual

Convaid
Convaid Rodeo User manual

Convaid
Convaid Rodeo RD10 User manual

Convaid
Convaid Cruiser User manual

Convaid
Convaid Rodeo RD12 User manual

Convaid
Convaid Flyer User manual

Convaid
Convaid Trekker User manual

Convaid
Convaid Vivo User manual

Convaid
Convaid Metro User manual

Convaid
Convaid Trekker User manual

Convaid
Convaid Rodeo Q2 2014 User manual

Convaid
Convaid Cruiser CX10T User manual

Convaid
Convaid WC19 User manual