Copernicus Tech Tub2 User manual

FTT1000_FTT1000-USB - PATENT PENDING - Version D - Released December 15, 2017 - Copernicus Educational Products Inc.
For assistance, please contact us:
1-800-267-8494
Email [email protected]om
Have your packing slip ready for reference
®
2
Tech Tub - 10 Device Setup
FTT1000
FTT1000-USB
Please Recycle
PLEASE KEEP THIS GUIDE WITH THE PRODUCT
Cable Pocket
Door x2
Power Box
Door x2
Shelf x9
Surface Mount
Lock x2
Top Handle x1
Cable Hooks x4
Flip Lock x2
ŸThis product is meant to be assembled by an adult.
ŸIn its unassembled state, small parts present a hazard.
ŸTo be used under direct supervision of an adult.
WARNING
®
2
10 Device Tech Tub
Main Body x1
Assembly Guide
FTT1000_FTT1000-USB_2017_D
Check out our other products online at
www.copernicused.com

FTT1000_FTT1000-USB - PATENT PENDING - Version D - Released December 15, 2017 - Copernicus Educational Products Inc.
2
To validate your warranty, submit the ON-LINE form at www.copernicused.com
Enter a draw to win a Copernicus Product for your classroom at the same time!
Validate Your Warranty
Component
Warranty
1
Year
Frame
Jim Phillips
Chief Cook and Bottle Washer
Dear Educator,
®
2
Thank you for purchasing one of our products. I hope that the Tech Tub is useful in your classroom.
If you have any questions, concerns, or ideas please contact us by telephone at 1-800-267-8494 or email at
info@copernicused.com.
Enjoy using your new product and happy teaching.
We do not inherit the
earth from our ancestors,
we borrow it from our
children.
NORTH AMERICAN
PROVERB
Change is the end result
of all true learning.
LEO BUSCAGLIA
What you leave behind is
not what is engraved in
stone monuments, but
what is woven into the
lives of others.
PERICLES
Education is the most
powerful weapon which
you can use to change the
world.
NELSON MANDELA
®
2
Tech Tub - 10 Device Setup
FTT1000
FTT1000-USB
Life
®
2
Tech Tub
Time
Warranty
For assistance, please contact us:
1-800-267-8494
Email [email protected]om
Have your packing slip ready for reference
Assembly Guide
FTT1000_FTT1000-USB_2017_D
Check out our other products online at
www.copernicused.com

FTT1000_FTT1000-USB - PATENT PENDING - Version D - Released December 15, 2017 - Copernicus Educational Products Inc.
3
Warning! Hazard Risks!
This product is to be used under the supervision of an adult.
Indoor Use
Only
This product is intended for indoor use only. To reduce the risk of fire or electric shock, do not expose
this product to rain or moisture. The internal components are not sealed from the environment.
Read your power strip electrical specifications. Only plug in devices that are approved for use with this
power strip. Connect the supplied power strip directly to a wall outlet. Do not connect to another
power strip or use an extension cord. Unplug when not in use. Do not leave this product plugged in
for more than 72 consecutive hours. Turn off power strip before unplugging.
Power Strip
Specifications
Do not install or use the electrical components of this unit during a lightning storm.
Electrical Shock
In its unassembled state, this product contains parts that can be hazardous to small children. This
product should be assembled by an adult.
Small
Parts
Ensure that any cables extending across the floor to your product are properly bundled and marked to
avoid tripping or falling which may lead to personal injury.
Cable Trip
Hazard
Climb Hazard
Do not climb on, hang from or suspend objects from any components of your product unless otherwise
specified.
Read the electrical specifications of any electronic equipment you are using with your Copernicus
products. Failure to read these specifications and follow their instructions could result in damage to your
equipment or personal injury.
Electronic
Equipment
Adult
Supervision
Please read the warnings below for important safety information regarding your product. Failure to
read these warnings or to follow the instructions below could result in personal injury or damage to
your product that could void your warranty.

FTT1000_FTT1000-USB - PATENT PENDING - Version D - Released December 15, 2017 - Copernicus Educational Products Inc.
4
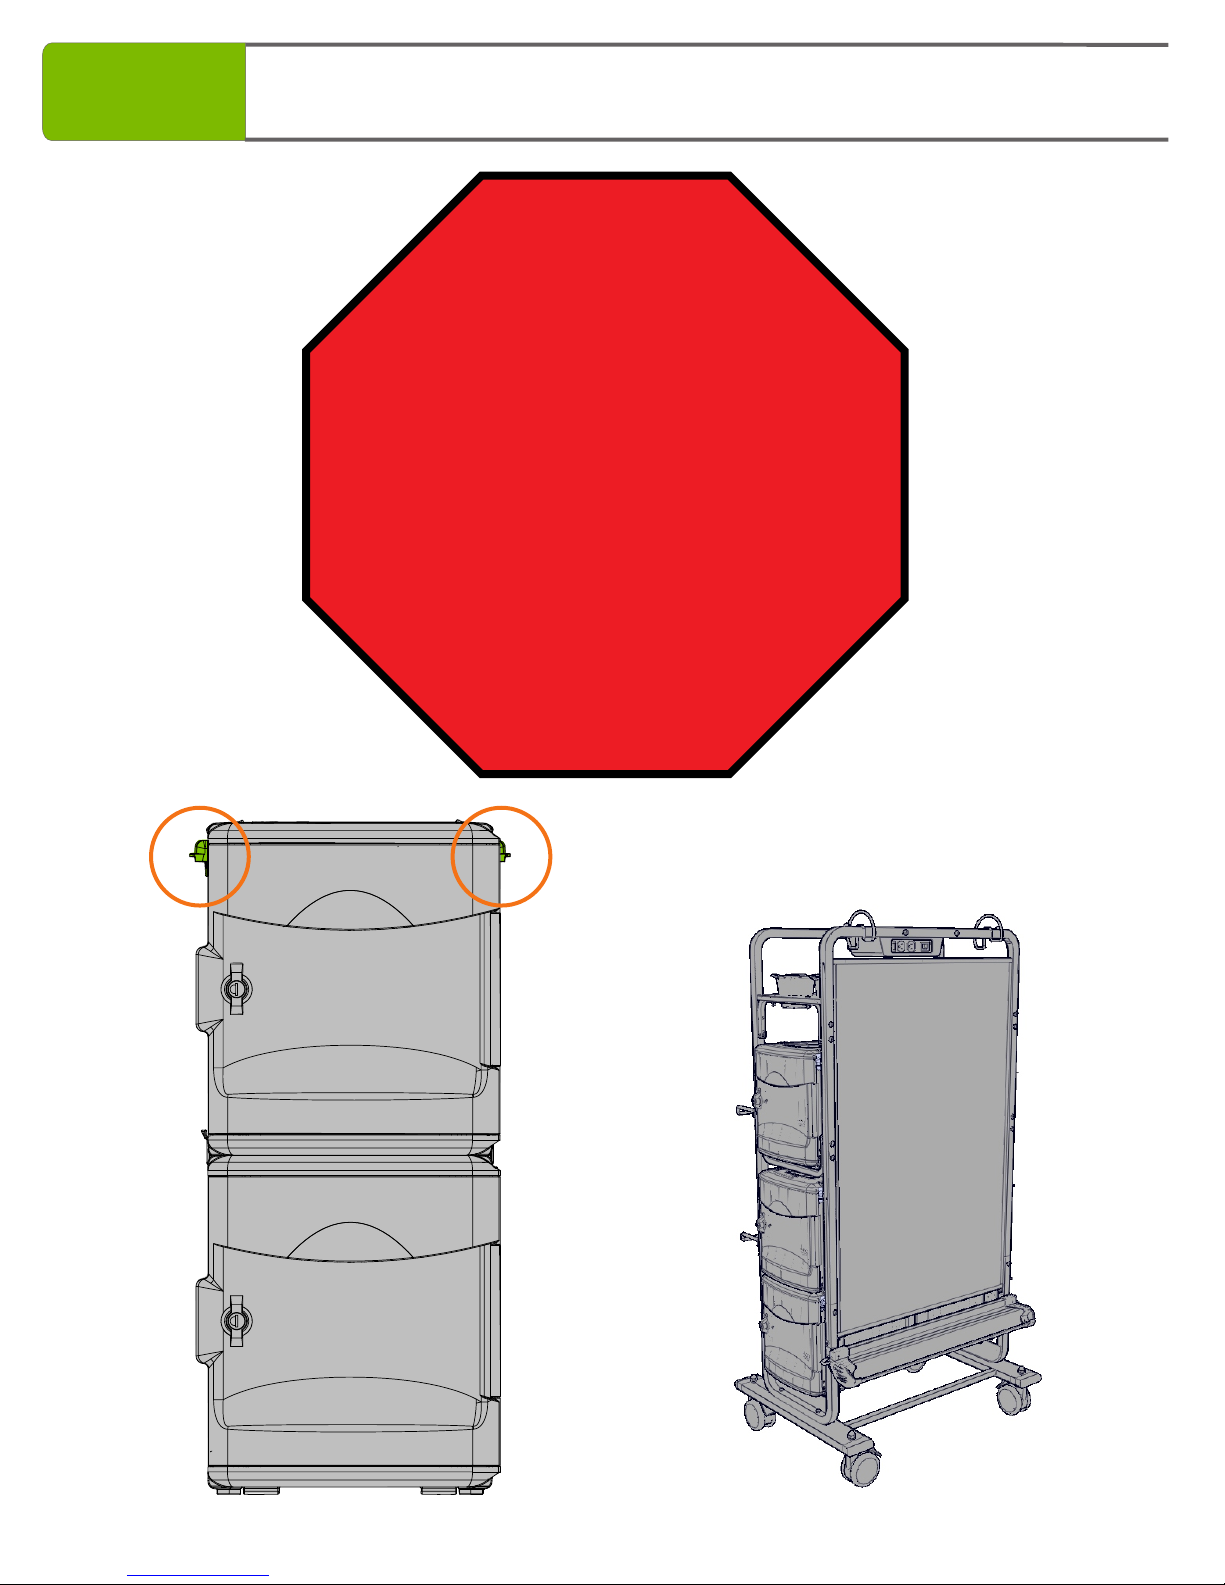
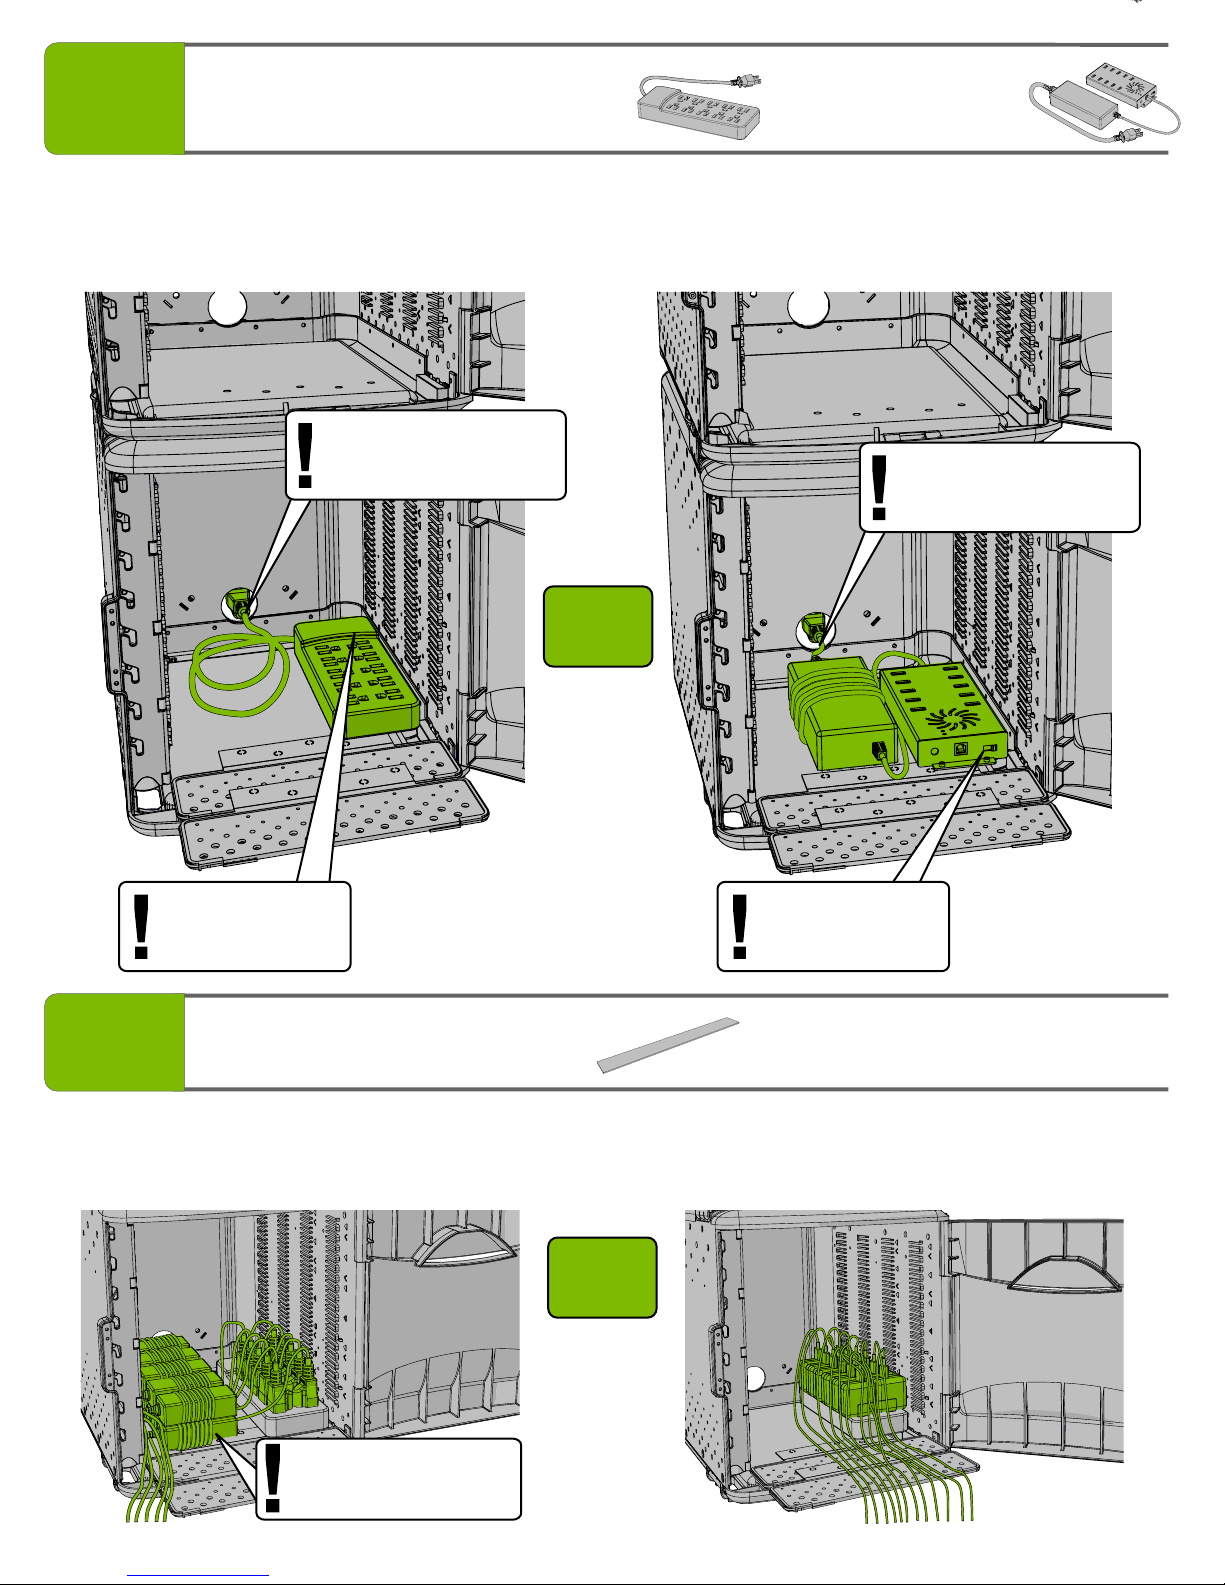
This symbol denotes a 2 Person Task. For safety, please ensure that there are the
suggested number of people working on steps displaying this symbol.
Watch for this symbol throughout the Assembly Guide. Wherever you see it, pay close
attention. The symbol denotes a step needing extra attention to ensure it is done
correctly.
The star symbol highlights an advisory note.
!
Watch for These Helpful Symbols
Before You Begin
As You Assemble the Unit
Lay out and identify all of the included parts.
The hardware has been packed according to step.
Read the assembly guide over once to familiarize yourself with them.
Please note that in its unassembled state, this product contains parts that can be
hazardous to small children. This product should be assembled by an adult.
Follow the steps in sequence.
Before beginning each step, find the part(s) that you need for that step.
Pay attention to the labels on the parts; they are there to help direct you at certain stages.
The title of each step states what you will be doing. Review the text and the pictures as you build the unit.
2-Person Task
Tips for Assembly
Customer Service - FAQ’s
For missing parts and other issues regarding this product:
Please call Copernicus Customer Service, where we will be happy to help.
1-800-267-8494. Monday - Friday 8:30am - 4:30 pm EST.
OR
Email our Tech Support Service at info@copernicused.com
Need Tech Support?
Have a Question?
Email our Tech Support Service
www.copernicused.com
Check out some of our
other great products!
!
?
?
?

FTT1000_FTT1000-USB - PATENT PENDING - Version D - Released December 15, 2017 - Copernicus Educational Products Inc.
5
®
2
Tech Tub - 10 Device Setup
FTT1000
10 Outlet Power Strip
x1
(255159)
Screwdriver
+
Additional tools required:
Before beginning, you should have:
Adjustable wrench x1
8mm or 5/16”,
10mm or 7/16”
Wrench
OR
Back Foot Anchor Pin
x2
A
M4 x 15mm
x4
D
CM5 Lock Nut
x2
Power Box Door
x2
®
2
10 Device Tech Tub
Main Body
x1
Hook & Loop
Straps
x10
BM5 Washer
x2
Hardware
Actual Size
FTT1000
5mm Driver
Allen Key
Not to Scale
x1
Front Pin Bracket
Not to scale
x1
Keys
Not to scale
x2
In Box
Shelf
x9

FTT1000_FTT1000-USB - PATENT PENDING - Version D - Released December 15, 2017 - Copernicus Educational Products Inc.
6
®
2
Tech Tub - 10 Device Setup
FTT1000-USB
10 outlet USB Hub
x1
(TEC-USB)
Back Foot Anchor Pin
x2
A
M4 x 15mm
x4
D
CM5 Lock Nut
x2
Screwdriver
+
Additional tools required:
Before beginning, you should have:
Adjustable wrench x1
8mm or 5/16”,
10mm or 7/16”
Wrench
OR
BM5 Washer
x2
Hardware
Actual Size
FTT1000 - USB
5mm Driver
Allen Key
Not to Scale
x1
Front Pin Bracket
Not to scale
x1
Keys
Not to scale
x2
In Box
Hook & Loop
Straps
x10
®
2
10 Device Tech Tub
Main Body
x1
Power Box Door
x2
Shelf
x9

FTT1000_FTT1000-USB - PATENT PENDING - Version D - Released December 15, 2017 - Copernicus Educational Products Inc.
7
®
2
Tech Tub - Installing Tub Rails
FTT-AC1
Dual Duty
Teaching Easel
STOP!
If you purchased the Dual Duty Teaching
Easel you will need to install the Tub Rails on
®
2
your Tech Tub before proceeding with this
assembly guide. Please look inside one of the
easel boxes for the Tub Rails and the Tub Rails
assembly guide.
If you did not purchased the Dual Duty
Teaching Easel please proceed to the
next page to begin setting up
your Tech Tub .
2®

FTT1000_FTT1000-USB - PATENT PENDING - Version D - Released December 15, 2017 - Copernicus Educational Products Inc.
9
®
2
Tech Tub - Trolley Setup
FTT-1010,
FTT1010-USB
®
2
If you purchased the Tech Tub Trolley
®
2
you will need to mount your Tech Tub onto
the Trolley Frame before proceeding. Please look
inside the Trolley Frame box for the assembly
guide that explains how to do this.
®
2
If you did not purchased the Tech Tub Trolley
please proceed to the next page to continue
®
2
setting up your Tech Tub .
STOP!

FTT1000_FTT1000-USB - PATENT PENDING - Version D - Released December 15, 2017 - Copernicus Educational Products Inc.
10
Attach Power Box Doors together then install in Tub
You will need: (Not to Scale)
21
Power Box Door
x2
Snap door into corresponding holes found on floor of tub
Hook doors together (rotate as shown) Slide doors together
43 Rotate flap down against lower door Press all snaps firmly into place
Push bottom of door into holes
until you hear a SNAP!
Look at the underside of the tub
to ensure all the Power Door
snaps are fully engaged.
T shaped rail on bottom
of upper door slides
into grooves on the top
of the lower door.
1
5

FTT1000_FTT1000-USB - PATENT PENDING - Version D - Released December 15, 2017 - Copernicus Educational Products Inc.
11
Install Power Strip or 10 Outlet USB Hub
Feed excess cable through hole on back of tub
2
Install 10 Outlet USB HubInstall 10 Outlet Power Strip
10 Outlet Power Strip
x1
(255159)
10 Outlet USB Hub
x1
(TEC-USB)
Plug device power cords into Power Strip, if using a USB Hub go to Step 4
3
You will need: (Not to Scale) Hook & Loop
Straps
x10
Chromebooks
Start from the back of the power strip and work forwards
Leave some slack on the
cord so it is easier to access
the outlets. Leave some slack on the
cord so it is easier to access
the outlets.
TURN POWER
SWITCH ON
TURN POWER
SWITCH ON
Wrap excess cord
around power adapter.
OR
iPads/Tablets
You will need: (Not to Scale)
OR
OR

FTT1000_FTT1000-USB - PATENT PENDING - Version D - Released December 15, 2017 - Copernicus Educational Products Inc.
12
5
4
Wrap up Power Strip or 10 Outlet USB Hub power cable
Plug device USB cords into 10 Outlet USB Hub
Start from the back of the 10 Outlet USB Hub and work forwards
iPads/Tablets
Use the Cable Clip to
keep the Power Strip
cord secure.
Push Power Strip or USB Hub to back of tub before wrapping power cable

FTT1000_FTT1000-USB - PATENT PENDING - Version D - Released December 15, 2017 - Copernicus Educational Products Inc.
13
1
2
®
2
Tech Tub 10 Device Cable Management
Feed power cables through cable management system
Slide cable through the opening.
6
3
Set up is the same for iPads/Tablets or Chromebooks plugged into a Power Strip or 10 Port USB Hub
Feed 6 of the 10 cables through
the opening between tubs.
Hook cables into Cable Pocket
Door slots leaving enough
cable outside to plug into device.
Top Tub:
Use the middle six slots to ensure
the cables line up with your devices.
Bottom Tub:
Use the top four slots to ensure the
cables line up with your devices.

FTT1000_FTT1000-USB - PATENT PENDING - Version D - Released December 15, 2017 - Copernicus Educational Products Inc.
14
BOTTOM TUB:
The Shelf spacing in the bottom tub
can accommodate 4 devices up to a
maximum thickness of 30mm (1.18”).
Insert Shelves into bottom Tub
Top of Shelf Bottom of Shelf
1Slide Shelves into slots indicated below
and push in until you hear a SNAP!
2Close Power Box Door
Insert shelves into tub right side up.
SNAP!
SNAP!
You will need: (Not to Scale)
7A
TOP TUB
BOTTOM
TUB
Shelf
x4

FTT1000_FTT1000-USB - PATENT PENDING - Version D - Released December 15, 2017 - Copernicus Educational Products Inc.
15
7B
Insert Shelves into top Tub
TOP TUB:
The Shelf spacing in the top tub can
accommodate 6 devices up to a
maximum thickness of 44mm (1.73”).
Slide Shelves into slots indicated below
and push in until you hear a SNAP!
SNAP!
Top of Shelf Bottom of Shelf
Insert shelves into tub right side up.
You will need: (Not to Scale)
TOP TUB
BOTTOM
TUB
Shelf
x5

FTT1000_FTT1000-USB - PATENT PENDING - Version D - Released December 15, 2017 - Copernicus Educational Products Inc.
16
Place devices onto Shelves and plug in power cables
8®
2
Adding Devices to Tech Tub
Press cable into Shelf Clip
Push extra cable behind Cable Pocket
Door once device is installed.
Chromebooks
Push extra cable behind Cable
Pocket Door once device is installed.
iPads/Tablets
Insert the devices so the power port
is on the right side of the tub,
opposite the cable clips. You may
have to insert your device upside
down to achieve this.
Press cable into Shelf Clip

FTT1000_FTT1000-USB - PATENT PENDING - Version D - Released December 15, 2017 - Copernicus Educational Products Inc.
17
Lock Tub to surface using Locking Pin
First, complete the installation of surface mounting hardware using the attached template;
®
2
then complete the steps below to secure your Tech Tub onto the surface.
®
2
Surface Mounting Tech Tub
12
Hook the rear feet onto the pins, slide tub
all the way back.
®
2
The slot on the front underside of the Tech Tub
fits over the metal tab.
®
2
Open the Tech Tub front door and slide the locking pin through the metal tab.
®
2
After sliding pin through bracket, lock front door of Tech Tub to secure devices.
4
3
Other manuals for Tech Tub2
7
This manual suits for next models
2
Table of contents
Other Copernicus Batteries Charger manuals

Copernicus
Copernicus Tech Tub Premium User manual

Copernicus
Copernicus Tech Tub2 FTT699 User manual

Copernicus
Copernicus Tech Tub2 User manual

Copernicus
Copernicus Tech Tub2 FTT1000 User manual

Copernicus
Copernicus Tech Tub2 FTT706 User manual

Copernicus
Copernicus Tech Tub TEC601C User manual

Copernicus
Copernicus FTT706 User manual