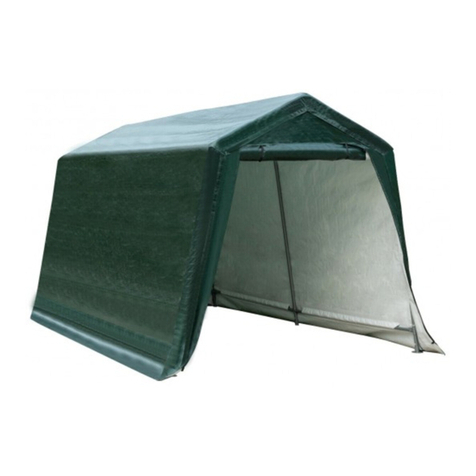
Costway NP10848 User manual

NP10848
If you're having difficulty, our friendly
customer team is always here to help.
THIS INSTRUCTION BOOKLET CONTAINS IMPORTANT SAFETY INFORMATION. PLEASE READ AND KEEP FOR FUTURE REFERENCE.
Pop Up Canopy/Pop Up Vordach/
Pavillon/Pabellón/
Gazebo Pieghevole/Składany pawilon ogrodowy
AUS:cs.au@costway.com
FRA:cs.fr@costway.com
DEU:cs.de@costway.com
ITA:cs.it@costway.com ESP:cs.es@costway.com
POL:sklep@costway.com
GBR:cs.uk@costway.com
DEU office: FDS GmbH, Neuer Höltigbaum 36, 22143 Hamburg, Deutschland
ITA office: Milano
FRA office: Saint Vigor d'Ymonville
POL office: GdańskGBR office: IpswichAUS office: TruganinaUSA office: Fontana

Before You Start
Please read all instructions carefully.
Retain instructions for future reference.
Separate and count all parts and hardware.
Read through each step carefully and follow the proper order.
We recommend that, where possible, all items are assembled near to the area in
which they will be placed in use, to avoid moving the product unnecessarily once
assembled.
Always place the product on a flat, steady and stable surface.
Keep all small parts and packaging materials for this product away from babies
and children as they potentially pose a serious choking hazard.
EN
DE
Bitte lesen Sie alle Anweisungen sorgfältig durch.
Bewahren Sie die Anweisungen zum zukünftigen Verwendung auf.
Überprüfen Sie, ob alle Teile und Zubehörteile vorhanden sind.
Lesen Sie jeden Schritt sorgfältig durch und befolgen Sie die richtige Reihenfolge.
Wir empfehlen, alle Teile möglichst in der Nähe des Aufstellungsortes zu
montieren, um unnötige Bewegungen nach der Montage zu vermeiden.
Stellen Sie den Artikel immer auf eine ebene, feste und stabile Fläche.
Halten Sie alle kleinen Teile und Verpackungsmaterialien fern von Babys und
Kindern, ansonsten besteht Erstickungsgefahr.
Vor dem Beginnen
FR
Veuillez lire attentivement toutes les instructions.
Conservez les instructions pour vous y référer ultérieurement.
Vérifiez toutes les pièces et les accessoires.
Lisez attentivement chaque étape et suivez l’ordre correct.
Nous recommandons que, dans la mesure du possible, tous les produits soient
assemblés à proximité de la zone où ils seront utilisés, afin d’éviter tout
déplacement inutile du produit une fois assemblé.
Placez toujours le produit sur une surface plane et stable.
Conservez toutes les petites pièces de ce produit et les matériaux d’emballage
hors de portée des bébés et des enfants, car ils pourraient présenter un risque
d’étouffement.
Lea atentamente todas las instrucciones.
Conserve las instrucciones para futuras consultas.
Separe y cuente todas las piezas y los accesorios.
Lea detenidamente cada paso y siga el orden correcto.
Recomendamos que, siempre que sea posible, todos los elementos se monten
cerca de la zona en la que se van a utilizar, para evitar mover el producto
innecesariamente una vez montado.
Coloque siempre el producto sobre una superficie plana, estable y firme.
Mantenga todas las piezas pequeñas y los materiales de embalaje de este
producto lejos de los bebés y los niños, ya que pueden representar un grave
riesgo de asfixia.
ES
Avant de Commencer
Antes de Empezar
02 03

Si prega di leggere attentamente tutte le istruzioni.
Conservare le istruzioni per riferimento futuro.
Separare e contare tutte le parti e gli accessori.
Leggere attentamente ogni passo e seguire l'ordine corretto.
Si consiglia, ove possibile, di assemblare tutti gli articoli vicino alla zona in cui
verranno posti in uso, per evitare di spostare inutilmente il prodotto una volta
assemblato.
Posizionare sempre il prodotto su una superficie piana, stabile.
Tenere tutte le piccole parti e i materiali di imballaggio di questo prodotto lontano
dalla portata di neonati e bambini, in quanto possono costituire un serio pericolo
di soffocamento.
Zapoznaj się z instrukcją.
Zachowaj instrukcję do wglądu.
Posortuj części i upewnij się, że zestaw jest kompletny.
Zapoznaj się ze sposobem montażu i postępuj zgodnie z instrukcją.
Zalecamy, aby montaż odbywał się możliwie najbliżej miejsca docelowego
położenia produktu, aby uniknąć niepotrzebnego przesuwania.
Upewnij się, że produkt znajdzie się na płaskiej i stabilnej po wierzchni.
Upewnij się, że materiały wykorzystane podczas pakowania produktu.
oraz jego elementy znajdują się poza zasięgiem dzieci.
IT
PL
Prima di Iniziare
Zanim Zaczniesz
Spare Parts
A
C
EB
D
F
G
H
A
FG
B
I
H
DE
C
J
Part
A
B
C
D
E
F
Description
Central Pole
Central Bottom Hub
Legcap-25
Slider
Ceiling Assembly
Eave Assembly
Part
G
H
I
J
Description
Leg Assembly
Plastic Foot
Top Fabric-White
Top Fabric-Pink
Top Fabric-Navy Blue
Carry Bag
EN
04 05

Setting Up the Canopy
1 OPENING THE CANOPY FRAME
□With a person on each end, lift and partially pull the canopy
frame apart.
3LOCKING THE FRAME
□
□
From under the canopy, place one hand on the upper frame
and use the other hand to push the central hub straight up
until it clicks into the central pole.
Finish attaching the large canopy inside the canopy frame
using the Velcro loops.
2 ATTACHING THE CANOPY TOP
□
□
Unfold the canopy top and place on top of the canopy frame.
Secure the canopy top to the corners of the canopy frame using
the Velcro connections. 5 SECURING THE CANOPY IN PLACE
□
□
Insert a stake into the foot of each canopy leg.
Measure out from the each leg to a proper distance and secure
four stakes to the ground. Tie the pre-attached ropes to the
stakes in the ground. Ensure that the rope has the proper
tension by adjusting the plastic adjusters on the ropes.
4 ADJUSTING THE CANOPY HEIGHT
□
□
□
Lift up one side. Grasp the outer or upper leg with one hand and
pull out the inner leg with the other.
Extend until the spring button engages.
Set legs to desired height.
Setting Up the Canopy
WARNING
KEEP ALL FLAME AND HEAT SOURCES AWAY FROM
THIS TENT FABRIC.
Take care not to pinch your fingers in the frame during
set up and take down.
Never set up or continue to use in any rain, wind, or
storm conditions, especially lightning storms.
CLICK!
06 07

Taking Down the Canopy
1
□
□
REMOVING THE STAKES AND RETRACT THE LEGS
Pull up all stakes from the ground.
Press the push button to lower all legs.
2
□
UNLOCK THE CENTRAL LOCK
Get in the underneath of canopy, press in the red lock button.
Pull down on the central hub until it is separated from the central
pole.
3
□
FOLDING THE FRAME
Lift one corner of the frame until all legs are raised off the ground
except for the 1 leg on the opposite corner. Push inward until the
frame is fully closed.
4
□
□
PACKING THE CANOPY IN THE STORAGE BAG
With the canopy feet facing the end, slide the carry bag over the
closed canopy frame.
Close the zipper on the carry bag.
Taking Down the Canopy
CLICK!
08 09

Aufstellen des Vordachs
1 ÖFFNEN DES VERDECKGESTELLS
□Heben Sie den Haubenrahmen mit einer Person an jedem Ende
an und ziehen Sie ihn teilweise Rahmen auseinander.
3VERRIEGELUNG DES RAHMENS
□
□
Legen Sie unter der Kabinenhaube eine Hand auf den oberen
Rahmen und drücken Sie mit der anderen Hand die zentrale
Nabe gerade nach oben bis sie in der zentralen Stange
einrastet.
Befestigen Sie die große Kabinenhaube im
Kabinenhaubenrahmen mit Hilfe der Klettverschlussschlaufen.
2 ANBRINGEN DES VERDECKS
□
□
Falten Sie das Verdeck auf und legen Sie es auf den
Verdeckrahmen.
Befestigen Sie das Verdeck an den Ecken des Verdeckrahmens
mit den Klettverschlüssen.
Ersatzteile
A
C
EB
D
F
G
H
A
FG
B
I
H
DE
C
J
Teil
A
B
C
D
E
F
Beschreibung
Zentraler Pol
Zentrale untere Nabe
Beinkappe-25
Schieberegler
Montage an der Decke
Traufenmontage
Teil
G
H
I
J
Beschreibung
Montage der Beine
Plastikfuß
Oberteil-Stoff-Weiß
Oberteil Stoff-Rosa
Oberteil Stoff-Marineblau
Tragetasche
DE
10 11

Das Vordach Abnehmen
1
□
□
DIE PFÄHLE ENTFERNEN UND DIE BEINE EINZIEHEN
Ziehen Sie alle Pfähle aus dem Boden.
Drücken Sie den Druckknopf, um alle Beine abzusenken.
2
□
ENTRIEGELN SIE DIE ZENTRALVERRIEGELUNG
Steigen Sie unter die Kabinenhaube und drücken Sie auf den
roten Verriegelungsknopf. Ziehen Sie an der zentralen Nabe
nach unten, bis sie von der zentralen Stange getrennt wird.
5 BEFESTIGUNG DER KABINENHAUBE
□
□
Stecken Sie einen Pflock in den Fuß eines jeden Vordachbeins.
Messen Sie von jedem Bein einen angemessenen Abstand aus
undbefestigen Sie vier Pflöcke im Boden. Binde die
vormontierten Seile an den Pflöcken im Boden fest. Stellen Sie
sicher, dass das Seil die richtige Spannung, indem Sie die
Plastikversteller an den Seilen.
4 EINSTELLUNG DER HÖHE DER HAUBE
□
□
□
Heben Sie eine Seite an. Fassen Sie das äußere oder obere
Bein mit einer Hand und ziehen Sie das innere Bein mit der
anderen Hand heraus.
Ausfahren, bis der Federknopf einrastet.
Stellen Sie die Beine auf die gewünschte Höhe ein.
Aufstellen des Vordachs
WARNUNG
HALTEN SIE ALLE FLAMMEN UND WÄRMEQUELLEN
VON DIESEM ZELTSTOFF FERN.
Achten Sie darauf, dass Sie sich beim Auf- und Abbau
nicht die Finger im Rahmen einklemmen.
Stellen Sie das Gerät niemals bei Regen, Wind oder
Sturm auf und Sturm, insbesondere bei Gewitter.
KLICK!
KLICK!
12 13

3
□
FALTEN DES RAHMENS
Heben Sie eine Ecke des Rahmens an, bis alle Beine vom
Boden abgehoben sind, außer dem 1 Bein an der gegenüberlieg-
enden Ecke. Nach innen drücken, bis der Rahmen vollständig
geschlossen ist.
4
□
□
VERPACKEN DER KABINENHAUBE IN DER STORAGE BAG
Schieben Sie die Tragetasche mit den Füßen des Verdecks zum
Ende hin über den geschlossenen Verdeckrahmen.
Schließen Sie den Reißverschluss der Tragetasche.
Das Vordach Abnehmen Liste des Pièces
A
C
EB
D
F
G
H
A
FG
B
I
H
DE
C
J
Pièce
A
B
C
D
E
F
Pièce
G
H
I
J
Description
Bâton central
Moyeu central inférieur
Glissière
Montage de la toiture
Assemblage de l'avant-toit
Description
Assemblage desjambes
Pied en plastique
Tissu du dessus -blanc
Tissu du dessus - rose
Tissu du dessus - bleu marine
Sac de transport
FR
14 15
Support de la partie
supérieure de la jambe

Monter le Pavillon
1 OUVRIR LE CADRE DU PAVILLON
□Avec une personne à chaque extrémité, soulevez et séparez
partiellement le cadre de la verrière.
3VERROUILLER LE CADRE
□
□
Sous l'auvent, placez une main sur le cadre supérieur et
utilisez l'autre pour pousser le moyeu central vers le haut
jusqu'à ce qu'il s'enclenche dans le montant central.
Finissez de fixer la grande verrière à l'intérieur du cadre de la
verrière à l'aide des attaches velcro
2 FIXER LE HAUT DU PAVILLON
□
□
Dépliez le haut de la verrière et placez-le sur le cadre de la
verrière.
Fixez le haut de l'auvent aux coins du cadre de l'auvent à l'aide
des connexions velcro. 5 FIXER LE PAVILLON EN PLACE
□
□
Insérez un piquet dans le pied de chaque pied de la canopée.
Mesurez à partir de chaque jambe une distance appropriée et
enfoncez quatre piquets dans le sol. Attachez les cordes
pré-attachées aux piquets dans le sol. Assurez-vous que les
cordes ont la bonne tension en ajustant les régleurs de cordes
en plastique.
4 AJUSTER LA HAUTEUR DE L'AUVENT
□
□
□
Soulevez un côté. Saisissez la jambe extérieure ou supérieure
d'une main et tirez la jambe intérieure avec l'autre.
Étendez la jambe intérieure jusqu'à ce que le bouton à ressort
s'enclenche.
Réglez les pieds à la hauteur souhaitée.
Monter le Pavillon
AVERTISSEMENT
GARDEZ TOUTES LES FLAMMES ET SOURCES DE
CHALEUR LOIN DU TISSU DE L'AUVENT.
Veillez à ne pas vous coincer les doigts dans le cadre
lors du montage et du démontage.
Ne montez jamais l'auvent ou ne continuez pas à
l'utiliser dans des conditions pluvieuses, venteuses ou
orageuses, en particulier en cas d'orage électrique.
CLIC!
16 17

Démonter le Pavillon
1
□
□
ENLEVER LES PIQUETS ET RÉTRACTER LES PIEDS
Relevez tous les piquets du sol.
Appuyez sur le bouton pour abaisser toutes les jambes.
2
□
DÉVERROUILLER LA SERRURE CENTRALE
Passez sous le pavillon et appuyez sur le bouton de verrouillage
rouge. Tirez sur le moyeu central jusqu'à ce qu'il se sépare du
montant central.
3
□
PLIER LE CADRE
Soulevez un coin du cadre jusqu'à ce que tous les pieds ne
touchent plus le sol, sauf le pied d'angle opposé. Poussez
jusqu'à ce que le cadre soit complètement plié.
4
□
□
RANGEZ LE PAVILLON DANS LE SAC DE RANGEMENT
Avec les pieds de la verrière orientés vers l'extrémité, faites
glisser le sac de transport sur le cadre plié de la verrière.
Fermez la fermeture éclair du sac de transport.
Démonter le Pavillon
CLIC!
18 19

Montar el Pabellón
1 ABRIR EL MARCO DEL PABELLÓN
□Con una persona en cada extremo, levante y separe
parcialmente el marco del pabellón.
3BLOQUEAR EL MARCO
□
□
Bajo el pabellón, coloque una mano en el marco superior y
utilice la otra para empujar el cubo central hacia arriba hasta
que encaje en el poste central.
Termine de fijar el pabellón grande dentro del marco del
pabellón utilizando los lazos de velcro.
2 FIJAR LA PARTE SUPERIOR DEL PABELLÓN
□
□
Despliegue la parte superior del pabellón y colóquela sobre el
marco del pabellón.
Fije la parte superior del pabellón a las esquinas del marco del
pabellón utilizando las conexiones de velcro.
Lista de Piezas
A
C
EB
D
F
G
H
A
FG
B
I
H
DE
C
J
Pieza
A
B
C
D
E
F
Descripción
Poste central
Cubo central inferior
Soporte superior de pata
Deslizador
Conjunto de techo
Conjunto de alero
Pieza
G
H
I
J
Descripción
Conjunto de patas
Pie de plástico
Tejido superior - blanco
Tejido superior - rosa
Tejido superior - azul marino
Bolsa de transporte
ES
20 21

Desmontar el Pabellón
1
□
□
RETIRAR LAS ESTACAS Y RETRAER LAS PATAS
Levante todas las estacas del suelo.
Presione el botón para bajar todas las patas.
2
□
DESBLOQUEAR EL BLOQUEO CENTRAL
Pase por debajo del pabellón y presione el botón rojo de
bloqueo. Tire hacia abajo del cubo central hasta que se separe
del poste central.
5 ASEGURAR EL PABELLÓN EN SU LUGAR
□
□
Inserte una estaca en el pie de cada pata del pabellón.
Mida desde cada pata una distancia adecuada y fije cuatro
estacas al suelo. Ate las cuerdas preconectadas a las estacas
en el suelo. Asegúrese de que las cuerdas tienen la tensión
adecuada ajustando los reguladores de plástico de las cuerdas.
4 AJUSTAR LA ALTURA DEL PABELLÓN
□
□
□
Levante un lado. Agarre la pata exterior o superior con una
mano y saque la pata interior con la otra.
Extienda la pata interior hasta que el botón de resorte encaje.
Ajuste las patas a la altura deseada.
Montar el Pabellón
ADVERTENCIA
MANTENGA TODAS LAS LLAMAS Y FUENTES DE
CALOR ALEJADAS DE LA TELA DEL PABELLÓN.
Tenga cuidado de no pillarse los dedos en el marco durante
el montaje y desmontaje.
No monte nunca el pabellón ni continúe utilizándolo en
condiciones de lluvia, viento o tormenta, especialmente en
caso de tormenta eléctrica.
¡CLIC!
¡CLIC!
22 23

3
□
PLEGAR EL MARCO
Levante una esquina del marco hasta que todas las patas se
levanten del suelo, excepto la pata de la esquina opuesta.
Empuje hacia dentro hasta que el marco esté completamente
plegado.
4
□
□
GUARDAR EL PABELLÓN EN LA BOLSA DE ALMACENAMIENTO
Con las patas del pabellón orientadas hacia el extremo, deslice
la bolsa de transporte sobre el marco del pabellón plegado.
Cierre la cremallera de la bolsa de transporte.
Desmontar el Pabellón Elenco delle Parti
A
C
EB
D
F
G
H
A
FG
B
I
H
DE
C
J
Parte
A
B
C
D
E
F
Descrizione
Polo Centrale
Mozzo centrale inferiore
Coprigambe-25
Dispositivo di scorrimento
Palo a baldacchino
Telaio del tetto
Parte
G
H
I
J
Descrizione
Gamba
Piedino in plastica
Tessuto superiore bianco
Tessuto superiore rosa
Tessuto superiore blu navy
Borsa per il trasporto
IT
24 25

Installazione del Gazebo
1 APERTURA DEL TELAIO DEL GAZEBO
□Con una persona su ciascuna estremità, sollevare e separare
parzialmente il telaio del gazebo.
3BLOCCARE DEL TELAIO
□
□
Da sotto il gazebo, mettere una mano sul telaio superiore e
usa l'altra mano per spingere il mozzo centrale verso l'alto
finché non scatta nel palo centrale.
Finire di attaccare il gazebo grande all'interno del telaio del
gazebo usando i passanti in velcro.
2 FISSAGGIO DELLA PARTE SUPERIORE DEL GAZEBO
□
□
Aprire la parte superiore del tettuccio e posizionarlo sopra il telaio
del gazebo.
Fissare la parte superiore del gazebo agli angoli del telaio del
gazebo utilizzando le connessioni in velcro. 5 FISSARE LA COPERTURA IN POSIZIONE
□
□
Inserire un paletto nel piede di ciascuna gamba del gazebo.
Misurare da ciascuna gamba a una distanza adeguata e fissare
quattro paletti a terra. Legare le corde pre-attaccate ai paletti nel
terreno. Assicurarsi che la fune abbia la giusta tensione
regolando i regolatori di plastica sulle corde.
4 REGOLARE L'ALTEZZA DEL COPERCHIO
□
□
□
Alzare un lato. Afferra la gamba esterna o superiore con una
mano ed estrarre la gamba interna con l'altra.
Estendere finché il pulsante a molla non si innesta.
Impostare le gambe all'altezza desiderata.
Installazione del Gazebo
AVVERTENZA
TENERE TUTTE LE FIAMME E LE FONTI DI CALORE
LONTANO DA QUESTO TESSUTO DELLA TENDA.
Fare attenzione a non schiacciarsi le dita nel telaio durante il
montaggio e lo smontaggio
Non installare o continuare a utilizzare in qualsiasi condizione
di pioggia, vento o tempesta, in particolare i temporali.
CLICK!
26 27

Smontare il Gazebo
1
□
□
RIMUOVERE I PALI E RETRARE LE GAMBE
Sollevare tutti i paletti da terra.
Premere il pulsante per abbassare tutte le gambe.
2
□
SBLOCCARE LA CHIUSURA CENTRALE
Entrare nella parte inferiore del gazebo, premere il pulsante di
blocco rosso. Abbassare il mozzo centrale fino a separarlo dal
polo centrale.
3
□
PIEGARE IL TELAIO
Sollevare un angolo del telaio fino a quando tutte le gambe non
sono sollevate da terra eccetto la gamba 1 sull'angolo opposto.
Spingere verso l'interno fino a quando il telaio non è completa-
mente chiuso.
4
□
□
IMBALLAGGIO DEL GAZEBO NELLA BORSA DI CONSERVAZIONE
Con i piedini del gazebo rivolti verso l'estremità, far scorrere la
borsa per il trasporto sul telaio del gazebo chiuso.
Chiudere la cerniera sulla borsa per il trasporto.
Smontare il Gazebo
CLICK!
28 29

Lista części
A
C
EB
D
F
G
H
A
FG
B
I
H
DE
C
J
Część
A
B
C
D
E
F
Nazwa
Główny drążek
Element rozporowy
Górny wspornik nogi
Prowadnica
Drążek zadaszenia
Stelaż zadaszenia
Część
G
H
I
J
Nazwa
Noga
Plastikowa stopka
Zadaszenie z tkaniny - białe
Zadaszenie z tkaniny - różowe
Zadaszenie z tkaniny - ciemnoniebieskie
Torba do przechowywania
PL
Rozkładanie pawilonu ogrodowego
1 ROZKŁADANIE RAMY
□Wraz z drugą osobą złapcie ramę z obu jej stron. Następnie
unieście i pociągnijcie ramę na zewnątrz.
3BLOKOWANIE RAMY
□
□
Wejdź pod zadaszenie i pchnij element rozporowy w górę, aż
zablokuje się na głównym drążku.
Aby zakończyć montaż zadaszenia, przymocuj je w środkowej
części ramy za pomocą pasków na rzepy.
2 MONTAŻ ZADASZENIA
□
□
Rozłóż zadaszenie pawilonu ogrodowego, a następnie umieść je w
górnej części ramy.
Przymocuj zadaszenie w narożnikach ramy za pomocą pasków
na rzepy.
30 31

Składanie pawilonu ogrodowego
1
□
□
DEMONTAŻ KOTEW I SKŁADANIE NÓG
Wyjmij wszystkie kotwy z ziemi.
Wciśnij zatrzask sprężynowy na każdej nodze i wsuń nogi.
2
□
OBLOKOWANIE RAMY
Wejdź pod zadaszenie i naciśnij czerwoną blokadę na elemencie
rozporowym, aby odblokować ramę.
Pociągnij element rozporowy w dół, aby zsunął się z głównego
drążka.
5 MOCOWANIE PAWILONU DO PODŁOŻA
□
□
Zamocuj kotwę na każdej nodze pawilonu.
Odmierz odpowiednią odległość od każdej nogi, a następnie
przymocuj cztery kotwy do podłoża. Przymocuj liny, które są
zamocowane w górnej części pawilonu do kotew w ziemi.
Wyreguluj plastikowe elementy na linach, aby upewnić się, że
liny są odpowiednio naprężone.
4 REGULACJA WYSOKOŚCI
□
□
□
Unieś jedną stronę pawilonu ogrodowego. Chwyć jedną ręką
górną część, a drugą ręką dolną część nogi.
Pociągnij, aż zatrzask sprężynowy zablokuje się w otworze.
Wyreguluj nogi na żądaną wysokość.
Rozkładanie pawilonu ogrodowego
OSTRZEŻENIE
TRZYMAJ PRODUKT Z DALA OD ŹRÓDEŁ CIEPŁA I
OGNIA.
Uważaj na palce podczas rozkładania i składania
produktu.
Nie rozkładaj ani nie używaj produktu podczas deszczu,
silnego wiatru, a zwłaszcza podczas burzy itd.
CLICK!
□
CLICK!
32 33

3
□
SKŁADANIE RAMY
Unieś ramę z jednej strony, tak aby trzy nogi pawilonu ogrodo-
wego znalazły się w górze.
Pchnij ramę do wewnątrz, tak aby złożyła się całkowicie.
4
□
□
UMIESZCZANIE PAWILONU W TORBIE
Nasuń torbę na złożoną ramę, tak aby nogi pawilonu były
skierowane w górę.
Zapnij zamek błyskawiczny torby.
Składanie pawilonu ogrodowego
In case a return is required, the item must be returned in original box. Without this
your return will not be accepted.
DO NOT discard the box / original packaging.
Take a photo of the box markings.
Take a photo of the damaged part (if applicable).
Send us an email with the images requested.
A photo of the markings (text) on the side of the box is required in case a part is
needed for replacement. This helps our staff identify your product number to
ensure you receive the correct parts.
A photo of the damage is always required to file a claim and get your replacement
or refund processed quickly. Please make sure you have the box even if it is
damaged.
Email us directly from marketplace where your item was purchased with the
attached images and a description of your claim.
Falls eine Rücksendung erforderlich ist, muss der Artikel in der
Originalverpackung zurückgeschickt werden. Andernfalls wird Ihre Rücksendung
nicht angenommen.
Werfen Sie den Karton / die Originalverpackung NICHT weg.
Machen Sie ein Foto von der Beschriftung des Kartons.
Machen Sie ein Foto des beschädigten Teils (falls zutreffend).
Schicken Sie uns eine E-Mail mit dem gewünschten Foto.
Für den Fall, dass ein Ersatzteil benötigt wird, benötigen wir ein Foto der
Beschriftung (Text) auf der Seite des Kartons. So können unsere Mitarbeiter Ihre
Artikelnummer identifizieren und sicherstellen, dass Sie die richtigen Teile
erhalten.
Ein Foto des beschädigten Teils ist immer erforderlich, um eine Reklamation
einzureichen und eine schnelle Bearbeitung Ihres Ersatzteils oder Ihrer
Rückerstattung zu gewährleisten. Bitte stellen Sie sicher, dass Sie den Karton
haben, auch wenn er beschädigt ist.
Schicken Sie uns eine E-Mail direkt vom Marktplatz, auf dem Sie den Artikel
gekauft haben, mit den angehängten Fotos und einer Beschreibung Ihrer
Reklamation.
EN
DE
Return / Damage Claim Instructions
Rücksendung / Beschädigung Anweisungen
□
34 35

Instructions De Retour / Réclamation De Dommages
Dans le cas où un retour est requis, l'article doit être retourné dans sa boîte
d'origine. Sans cela, votre retour ne sera pas accepté.
NE PAS jeter la boîte/l'emballage d'origine.
Prenez une photo des marquages de la boîte.
Prenez une photo des dommages (le cas échéant).
Envoyez-nous un e-mail avec les images demandées.
Une photo des marquages (texte) sur le côté de la boîte est requise au cas où une
pièce serait nécessaire pour le remplacement. Cela aide notre personnel à
identifier votre numéro de produit pour s'assurer que vous recevez les bonnes
pièces.
Une photo des dommages est toujours requise pour déposer une réclamation et
obtenir rapidement votre remplacement ou votre remboursement. Assurez-vous
d'avoir la boîte même si elle est endommagée.
Envoyez-nous un e-mail directement depuis le marché où votre article a été
acheté avec les images ci-jointes et une description de votre réclamation.
Instrucciones de Devolución / Reclamación de Daños
En caso de que se requiera una devolución, el artículo debe ser devuelto en la
caja original. Sin esto su devolución no será aceptada.
NO deseche la caja/embalaje original.
Tome una foto de las marcas de la caja.
Tome una foto de los daños (si procede).
Envíenos un correo electrónico con las imágenes solicitadas.
Se requiere una foto de las marcas (texto) en el lado de la caja en caso de que se
necesite una pieza para reemplazarla. Esto ayuda a nuestro personal a identificar
su número de producto para asegurarse de que recibe las piezas correctas.
Una foto de los daños es siempre necesaria para presentar una reclamación y
conseguir que su reemplazo o reembolso sea procesado rápidamente. Por favor,
asegúrese de tener la caja aunque esté dañada.
Envíenos un correo electrónico directamente desde el mercado donde se compró
su artículo con las imágenes adjuntas y una descripción de su reclamación.
FR
ES
Nel caso in cui sia richiesto un reso, l'articolo deve essere restituito nella scatola
originale. Senza la scatola originale il tuo reso non sarà accettato.
NON scartare la scatola / confezione originale.
Fare una foto dei contrassegni sulla scatola.
Fare una foto di Danno (se è applicabile).
Inviarci una mail con le immagini richieste.
È necessaria una foto dei contrassegni (testo) sul lato della scatola nel caso in
cui la parte debba essere sostituita. Questo aiuta il nostro staff a identificare il
numero del tuo prodotto per assicurarti di ricevere le parti corrette.
Una foto del danno è sempre necessaria per presentare un reclamo e ottenere
rapidamente la sostituzione o il rimborso. Assicurati di avere la scatola anche se
è danneggiata.
Inviarci un’e-mail direttamente dal mercato in cui è stato acquistato il tuo articolo
con le immagini allegate e una descrizione del tuo reclamo.
Jeśli chcesz zwrócić produkt, musi znajdować się on w oryginalnym opakowaniu.
Towar zwrócony w nieoryginalnym opakowaniu nie zostanie przyjęty.
Nie wyrzucaj oryginalnego opakowania.
Zrób zdjęcie oznaczeń na opakowaniu.
Zrób zdjęcie uszkodzonej części (jeśli dotyczy).
Skontaktuj się z nami.
Jeśli jakakolwiek część wymaga wymiany, zrób zdjęcie oznaczeń kodu produktu,
który znajduje się na opakowaniu. Pozwoli nam to zidentyfikować produkt i
dostarczyć ci właściwą część.
Jeśli chcesz złożyć reklamację, zrób zdjęcie uszkodzonej części. Pozwoli nam to
zatwierdzić reklamację i zlecić zwrot środków na twoje konto. Do złożenia
reklamacji potrzebne będzie oryginalne opakowanie.
Skontaktuj się z nami telefonicznie, mailowo lub poprzez formularz kontaktowy.
Załącz zdjęcia produktu i opis roszczenia.
IT
PL
Istruzioni Per La Restituzione / Reclamo Per Danni
Zwroty i reklamacje
36 37
Table of contents
Other Costway Tent manuals

Costway
Costway NP10849 User manual

Costway
Costway NP10835 User manual

Costway
Costway HW65758 User manual

Costway
Costway NP11460 User manual

Costway
Costway NP10846 User manual

Costway
Costway GOPLUS NP10950 User manual

Costway
Costway GP11706 User manual

Costway
Costway NP10845 User manual

Costway
Costway AW10004 User manual

Costway
Costway NP10828 User manual

Costway
Costway NP10843 User manual

Costway
Costway PATIOJOY OP70818 User manual

Costway
Costway NP10702 User manual

Costway
Costway AW10002 User manual

Costway
Costway GT3838 User manual

Costway
Costway NP10024 User manual

Costway
Costway GP11707 User manual

Costway
Costway NP10836WH User manual

Costway
Costway NP10301 User manual

Costway
Costway NP10951 User manual