Coway AP-0510IH User manual

AP-0510IH
AIR PURIFIER
Owner’s
Instructions
Before operating the unit, please read this manual thoroughly,
and retain it for future reference.
- English
- Français
- Español
To Buy: Visit www.sylvane.com or call (800) 934-9194
For Product Support: Contact Coway USA at 1-888-960-5747

1
FEATURES.......................................01
CONTENTS......................................01
SAFETY INFORMATION..................02
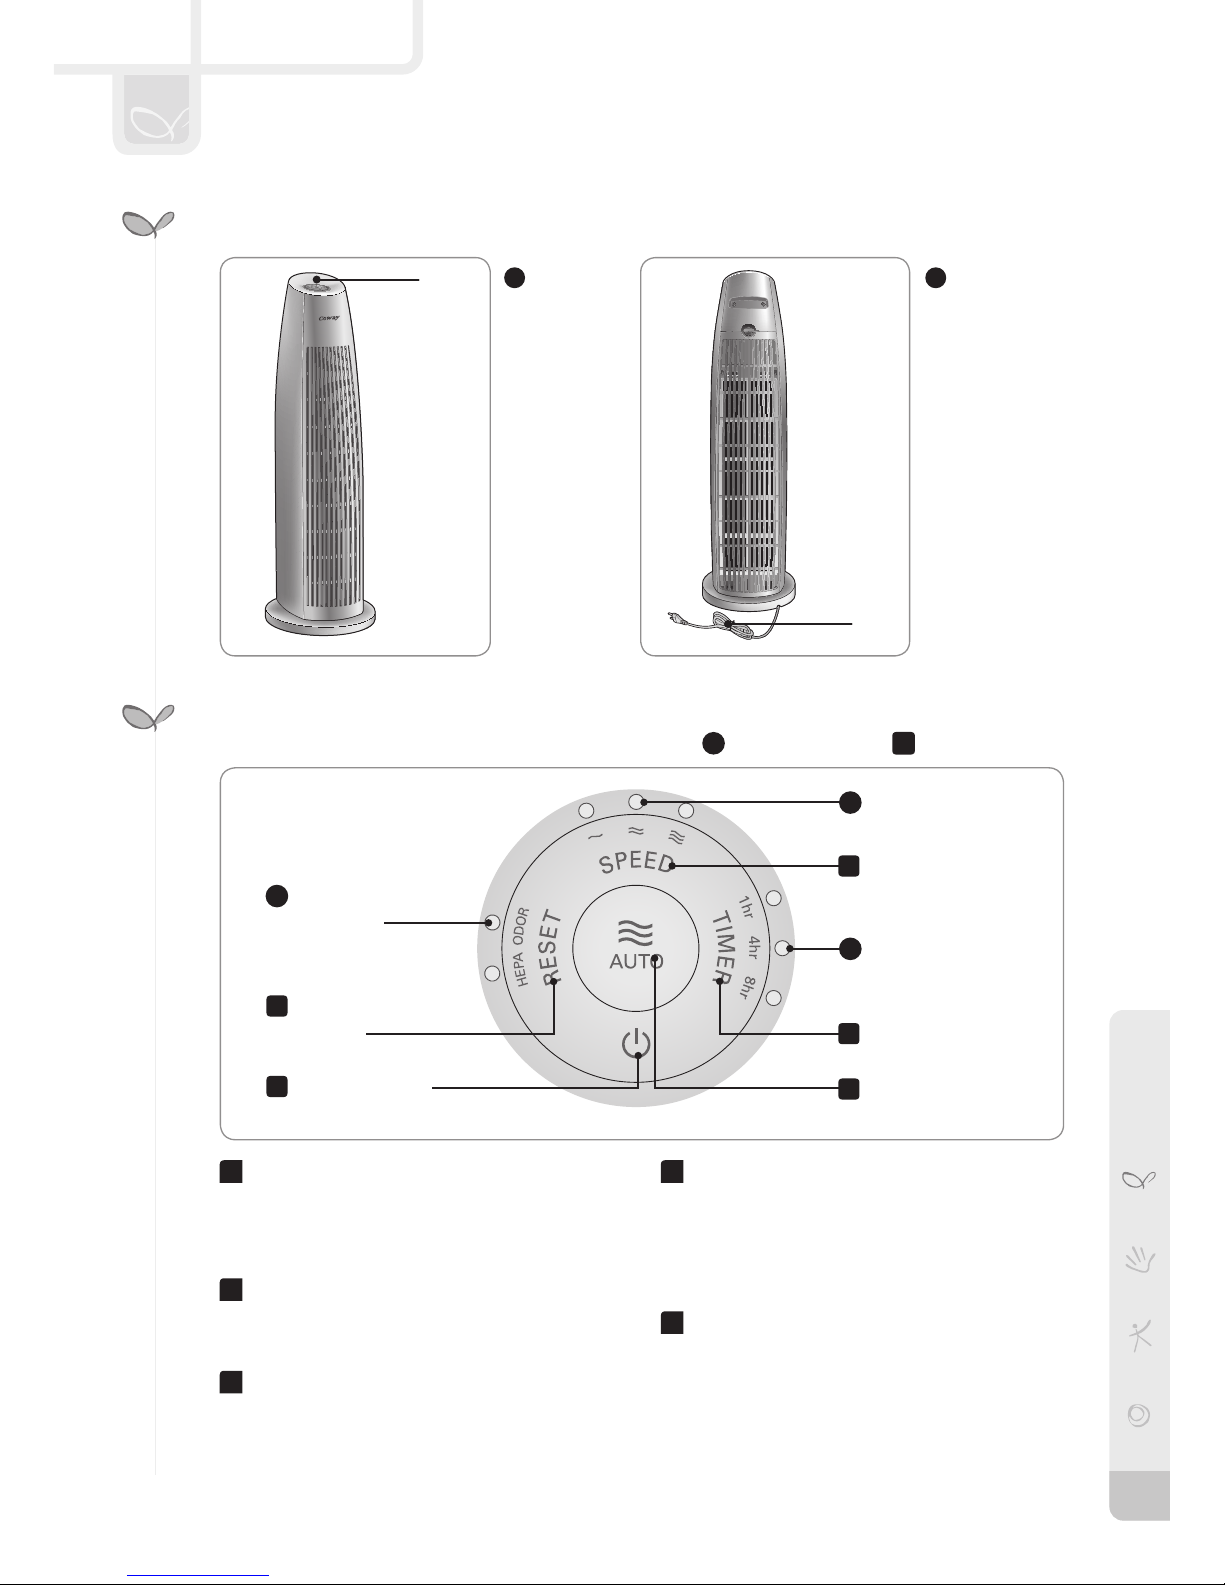
PARTS NAME...................................04
- Front / Rear................................04
- Indication part / Operation part...04
AIR PURIFICATION PROCESS.......05
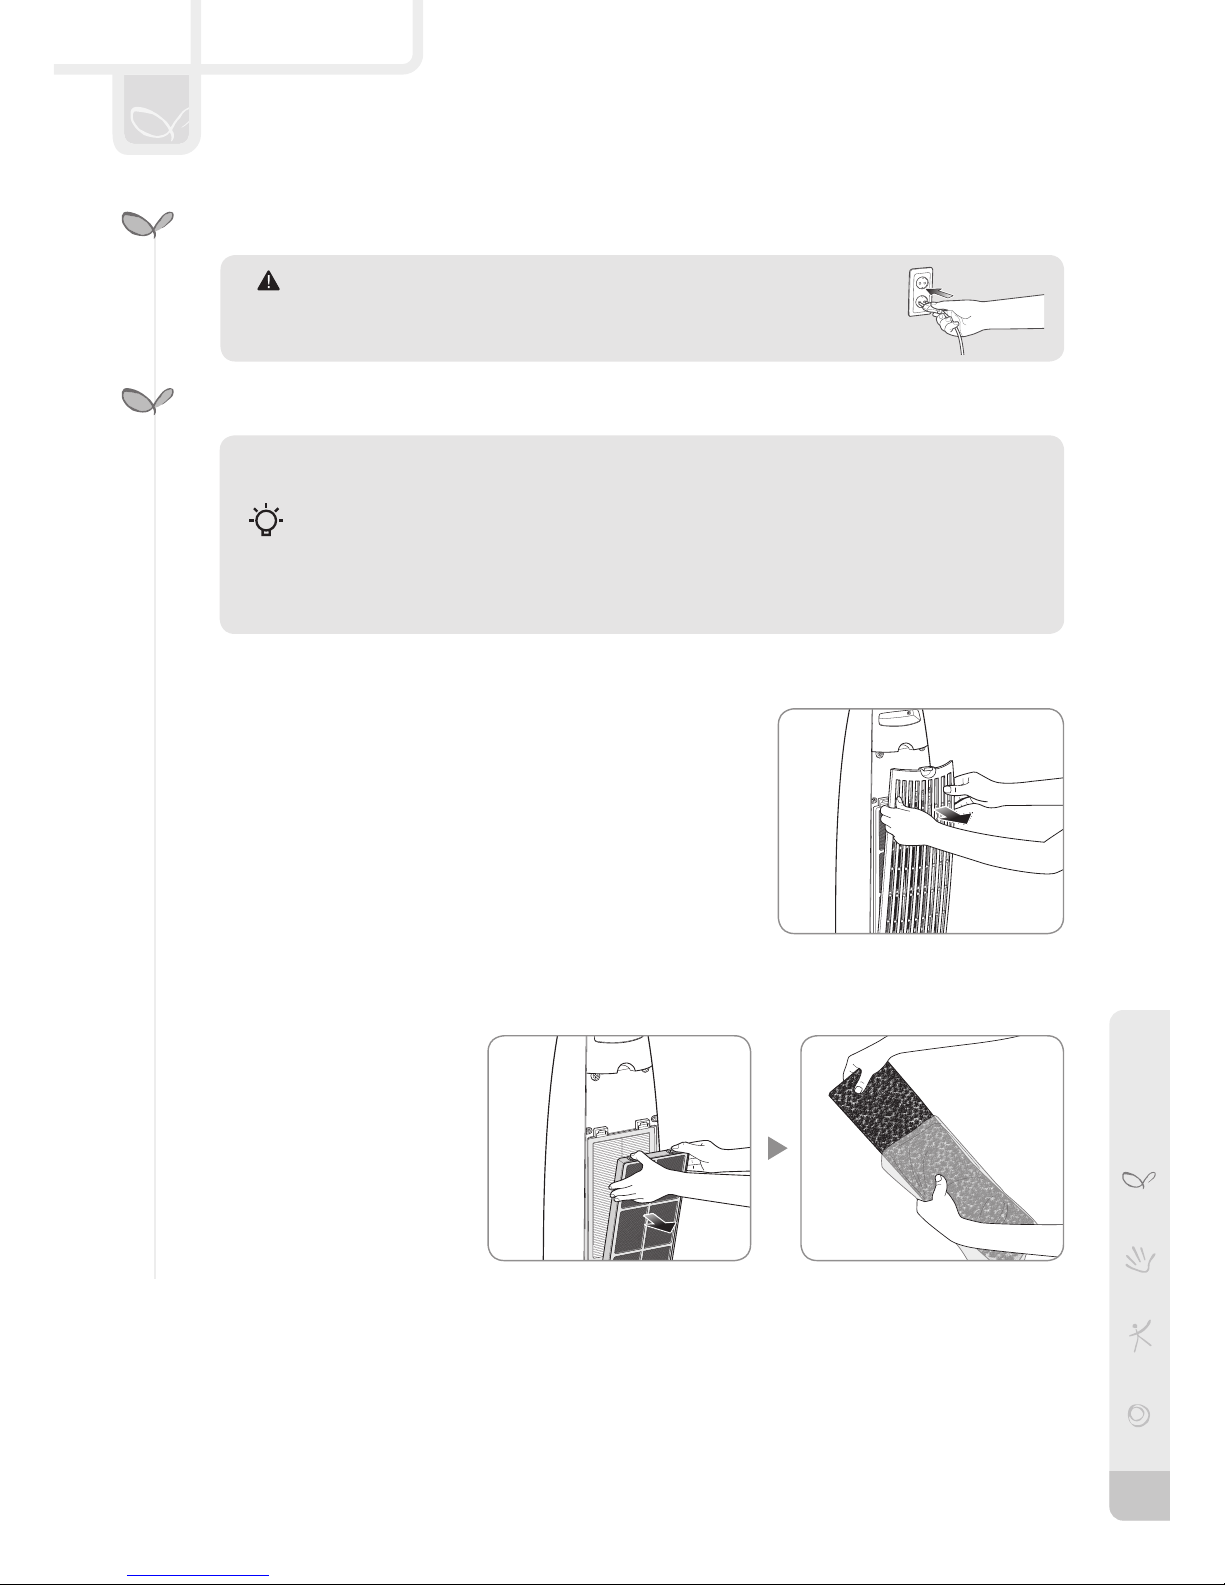
PREPARATIONS..............................06
- How to Install Filter.....................06
HOW TO USE...................................07
- Manual mode .............................07
- Timer Activation/Deactivation.....07
- Auto speed mode .......................07
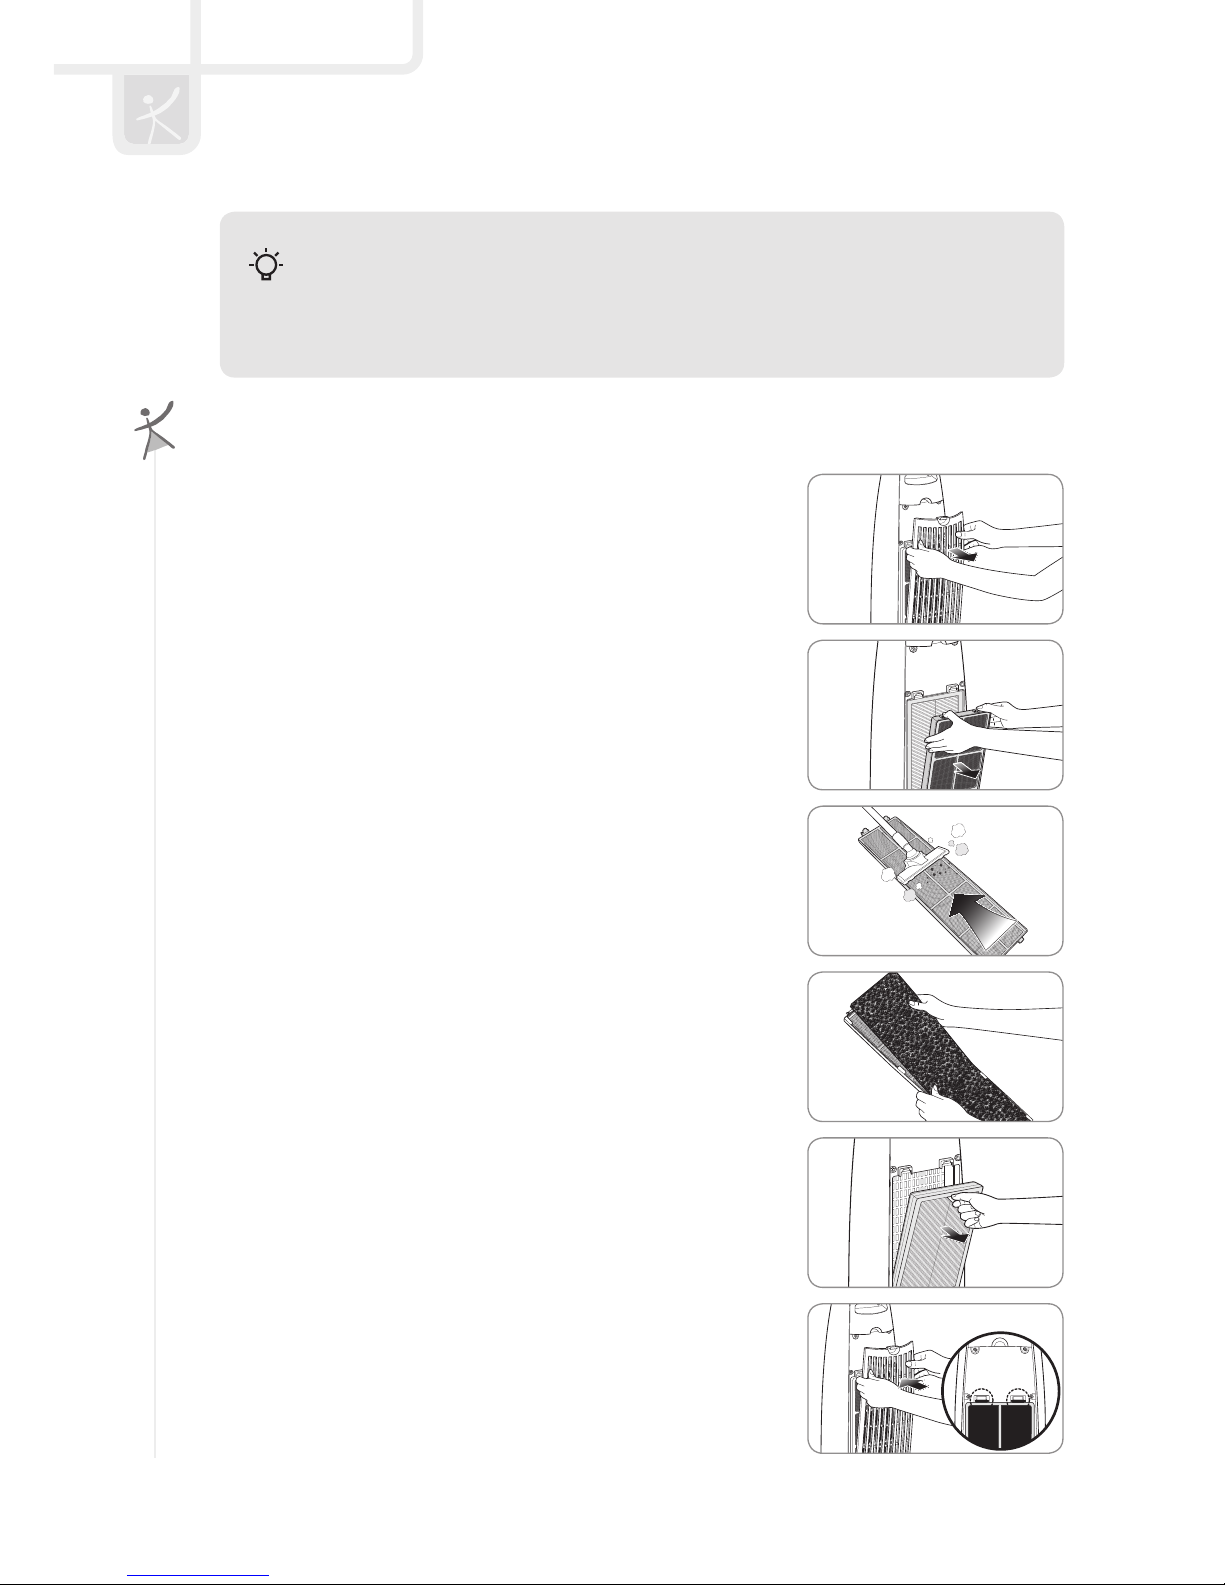
CLEANING METHOD.......................08
- Cleaning the air outlet ...............08
- Cleaning the rear cover..............08
- Cleaning the product body ........08
- Cleaning the lter .......................09
FILTER REPLACEMENT..................10
- Filter Cleaning and Replacement
Cycles ....................................... 10
- Resetting the lter replacement
indicator..................................... 10
- Forcible Reset Mode..................10
TROUBLE SHOOTING .................... 11
SPECIFICATIONS............................12
WARRANTY CARD..........................14
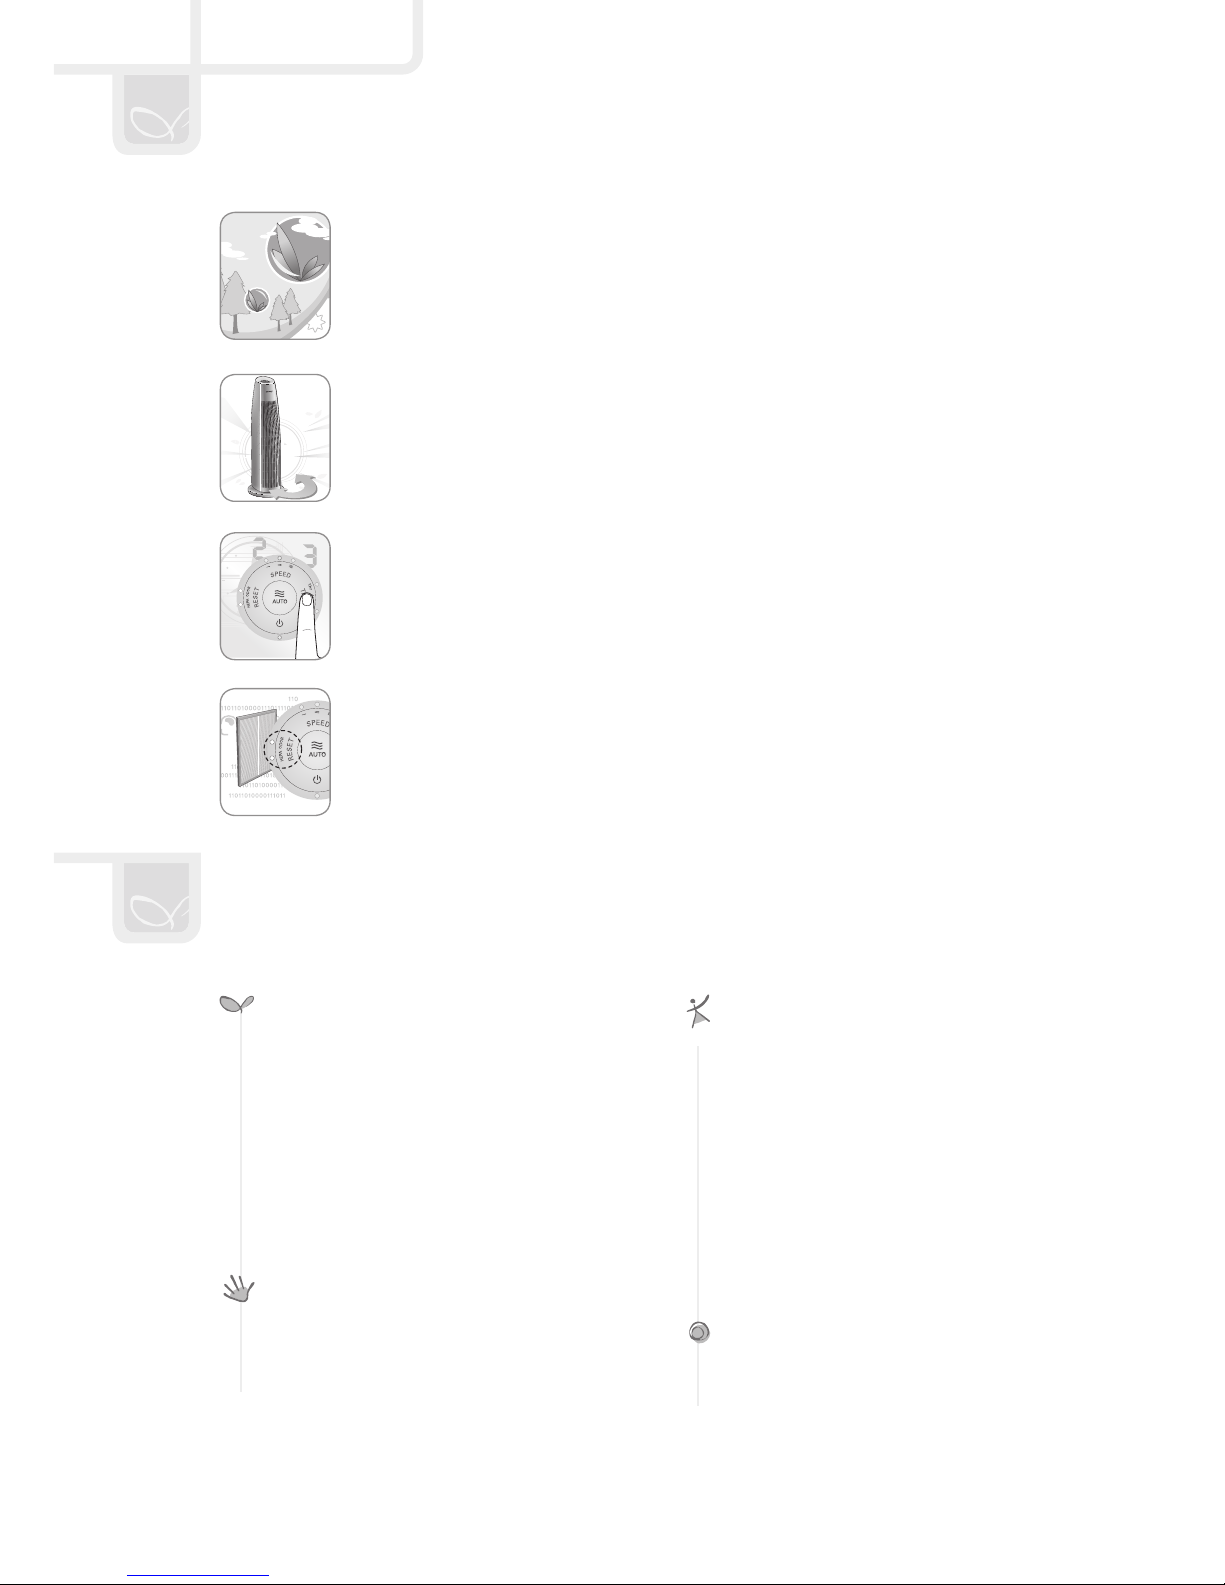
FEATURES
The True HEPA lter is capable of trapping airborne allergens and contaminants
down to 0.3 microns. It reduces airborne bacteria, mold spores and particles
that carry viruses. The unit’s lter system has been optimized to remove indoor
pollutants fast and effectively.
Auto Speed Mode automatically adjusts air ow(level 1~3) corresponding to the
time intervals to obtain a maximum circulation of fresh air.
The Timer feature allows you to control how long you want the air purier to run
before automatically powering off.
The product checks the lter replacement cycle and turns on the relevant indicator,
improving customer convenience with regard to lter replacement.
CONTENTS

2
English
DANGER :
• Do not use a damaged power plug or loose electric outlet.
• Please connect the power plug to a dedicated grounded electrical outlet for 120 V, 60 Hz.
• Do not move the product by pulling only the power cord.
• Do not handle the power plug with wet hands.
• Do not forcefully bend the power cord or place it under a heavy object to prevent it from being
damaged or deformed.
• Do not repeatedly connect and disconnect the power plug.
• If the electrical outlet is wet, carefully unplug the product and let the electric outlet dry
completely before subsequent use.
• Make sure to unplug the product before repairing, inspecting or replacing a part.
• Remove any dust or water from the power plug.
• Do not plug the product into an electrical outlet or power strip that is being used by several other
appliances. Use an electrical outlet dedicated to the product.
• Unplug the system if it is not used for a long time.
• Do not attempt to repair or modify the power cord yourself.
• If the power cord is damaged, do not replace the cord yourself. Call a service center to have it
replaced.
• Do not install the product near a heating device.
• Do not install the product in locations exposed to moisture or water (rainwater).
• Do not use the product in areas where ammable gases or combustible materials are used or
stored.
• Do not insert sharp objects such as a gimlet into the pollution sensor.
• If the product produces a strange noise, burning smell or smoke, unplug it from the electrical
outlet immediately and call our service center.
• Never place the product in water.
• Do not spray any ammable materials such as insecticides or air fragrances near or into the air
inlet.
• Do not disassemble, repair, or modify the product at your own discretion.
• Do not place any containers with water, medicine, food, metallic objects or ammable material
on top of the product.
• Unplug the system before cleaning it.
• Clean by spraying water directly and do not clean the product using benzene or thinner.
• Use the product for home or business use according to the model.
• Do not use the air purier in a factory or industrial setting where machine oil may be present in
the air.

3
• Do not insert ngers or foreign objects into the air inlet or outlet.
• Do not let children hang on to the product or climb on it.
• When removing the front cover, exercise caution that a part of your body or any kind of object
does not become stuck in the top part of the product.
• This appliance has a polarized plug(one blade is wider than the other). To reduce the risk of
electric shock, this plug is intended to t in a polarized outlet only one way. If the plug does not
t fully in the outlet, reverse the plug. If it still does not t, contact a qualied electrician. Do not
attempt to defeat this safe feature.
• Do not operate any fan with a damaged cord or plug. Discard fan or return to an authorized
service facility for examination and/or repair.
• Do not run cord under carpeting. Do not cover cord with throw rugs, runners, or similar
coverings. Arrange cord away from trafc area and where it will not be tripped over.
• Do not install the product on a sloped surface.
• Do not apply force or impact to the product.
• When the product is in use, maintain a distance of at least 20 cm from the walls or adjacent
objects and 30 to 60 cm above the product.
• Install the product so that no obstacles block the circulation of air around the product.
• Install the air purier away from strong articial lighting or direct sunlight.
• Install the air purier at least 2 m away from electronic appliances such as a TV.
• Do not install the air purier in a location exposed to direct sunlight.
• Replace the lters according to the lter replacement cycles.
• Clean the Pre-lter with water regularly and dry it completely before use.
• Suitable for use with solid-state speed controls.
• Cleaning and user-maintenance, such as lubrication, may result in re, electric shock, or injury
to persons.
• Unplug or disconnect the appliance from the power supply before servicing.

4
English
1
1
2
4
5
3
2
3
1
Use this button to adjust the fan speed.
Available settings for the fan speed are
1→ 2→ 3.
2
When the lter replacement cycle is
reached, the indicator is turned on.
3
Use this button to turn off the air purier
after a predetermined period of time.
Available timer settings are 1H, 4H, and 8H.
4
Use this button to turn the air purier on
or off.
- To power off, press and hold the power
button for one second.
5
Use this button to select Auto speed mode.
The air ow will rise and fall continuously. It
will stay at level 1 for 6 minutes, level 2 for
2.5minutes and level 3 for 0.5 minutes.
1 1
1
1

5
It removes relatively large dust and mold, human hair, pet hair, and so on.
Features a granular active carbon which is particularly effective at trapping odors and harmful
gases to keep your home smelling fresh.
The high-performance composite True HEPA lter effectively removes ne dust and cigarette
smoke up to 99.97%. It reduces airborne bacteria, mold spores and particles that carry viruses.
▶ ▶

6
English
- Pull the top of the rear cover toward you and lift up
slightly to remove.
- Remove the plastic packing of the lters and install the lters by proper order.
Make sure to connect the power plug to a grounded electric outlet
(120 V~, 60 Hz) dedicated to the product.
- Make sure to remove each lter’s plastic packing before installing lters.
- The product is for household use. Use the product indoors only.
- When the product is not in use, remove the power plug from the electric outlet.
- When installing lters, make sure that lter direction is correct(Front/Back).
► Order of lters : Pre-lter → Deodorization Filter → True HEPA lter
Tips

7
HOW TO USE
Press the power button and then select the air speed
by pressing the speed button.
The Timer feature instructs the air purier to
automatically power off after 1, 4, or 8 hours.
- To deactivate the timer, press and hold the Timer
button until the indicator is no longer lit.
- 1H → 4H → 8H → Timer Off
To activate this feature, simply press Auto button.
When Auto Speed is activated, LED indicator for
all air levels(1,2,3) will stay lit. To de-activate this
feature, simply press hold ‘Auto’ or ‘Speed’ button.
Once Auto Speed is de-activated, it will return to air
level 1.
- Before operating the product, connect the power plug to a dedicated electric outlet.
- Once the power is turned on, you will see the previously used operation mode,
already set for you to use.
Tips

8
English
Clean the air outlet with a soft brush.
- Exercise caution not to have dust fall inside the air purier.
Separate the rear cover from the product and remove the dust attached
to the surface with a soft dry brush or cloth.
- Use lightly wet cloth if the contamination is serious but do not use
abrasives.
Clean the air inlet and outlet with a soft brush.
- Exercise caution not to have dust fall inside the air purier.
- Always unplug the air purier before cleaning the product.
- Do not use detergents that contain organic solvents (solvent, thinner, etc), bleach,
chlorine, or abrasives.
- Do not put the air purier in water or spray water directly on it.
Tips

9
- To prevent dust from falling off, remove the lter carefully
without exerting a shock.
- When retting the Pre-lter to the product, t in the hook
correctly.
- Always unplug the product before cleaning the lter.
- The pre-lter is reusable by removing dust or cleaning it with water.
- If the pre-lter is not cleaned for a long time, the product performance may deteriorate.
- The Deodorization lter and True HEPA lter cannot be cleaned and reused. Never
clean them with water.
Tips

English
Filter
Pre-lter Every 2~4 weeks Cleaning
Deodorization lter 1 year Replacement
True HEPA lter 3 years Replacement
- Each service life is based on 8-hour use in maximum air speed.
- The recommended lter replacement cycles may differ depending on the operating environment.
1. After replacing lter, turn on the power.
2. To begin reset mode, press and hold the reset button for approximately 2 seconds.
3. Select replaced lter, press and hold the reset button for approximately 2 seconds again.
When you have replaced a lter before the lter replacement cycle is reached, you can forcibly
reset the lter replacement cycle back to the factory default setting.
1. When the reset function is not activated, press and hold the reset button for 2 seconds.
2. Press the reset button to select the desired lter to forcibly reset.
Press once : Odor LED (Deodorization Filter)
Press twice : HEPA LED (True HEPA lter)
3. After you select the lter to reset, press and hold the reset button for 2 seconds. And then,the
accumulated time in electronic time counter is erased.
- If there is no input for 10 seconds in forcible reset mode, the reset mode is cancelled.
- Check that the ‘front’ sides of lters are in the correct direction.
- To maintain optimal performance of the product, use original Coway lters.
- Always unplug the air purier before replacing lters.
Tips

11
No air is blowing.
•Is the power cord connected? Connect the power cord to an electric
outlet for right voltage.
•Is the display part all turned off? Press the power button and then select the
desired function.
• Isn’t the power gone out? Use the air purier after the power
comes back on.
• Is the rear-cover closed? Close the rear-cover properly.
The airow speed is
signicantly weaker
than before.
• Isn’t the lter cleaning or replacement
time passed?
Check the lter cleanliness and
replacement cycles and then clean/replace
the lter(s) if necessary.
A bad smell comes out
of the air outlet.
• Isn’t the lter cleaning or replacement
time passed?
Check the lter cleanliness and
replacement cycles and then clean/replace
the lter(s) if necessary.
When other functional
problems are
detected.
• Check the symptoms, unplug the product, and then ask service center.
The air purier may operate abnormally not because of the product malfunction but
because of minor causes or the fact that the user is not familiar with the product use. In
such a case, problems can be solved easily even without the help from the service center
just by checking the following. If the problem still persists after you check the following,
contact the service center.

12
English
Product Name Air Purier
Model AP-0510IH
Rated voltage 120 V~ 60 Hz
Phase 1
Power consumption 59 W, 0.5 A
Product insulation grade Grade 2 device
Dust collection mode Mechanical dust collection method (True HEPA lter)
Safety feature Power is shut down when the rear cover is opened
Installation place Indoor use
Maximum volume of air 88.28 ft3/min
Size 9.13 inch(W) X 31.42 inch(H) X 10.75 inch(D)
Weight 13.66 Lbs
- Specications are subject to change without notice.

1
FONCTIONNALITÉS........................01
SOMMAIRE......................................01
CONSIGNES DE SÉCURITÉ...........02
NOM DES PIÈCES...........................04
- Vues avant et arrière..................04
- Composants d’afchage/
Composants de commande .......04
PROCESSUS DE PURIFICATION DE L’AIR
05
AVANT UTILISATIO..........................06
- Installation du ltre .....................06
UTILISATION DE L’APPAREIL.........07
- Pour faire fonctionner l’appareil
en mode manuel.........................07
-
Activation/Désactivation de la minuterie
07
- En mode de vitesse automatique .07
NETTOYAGE DE L’APPAREIL.........08
- Nettoyage de la sortie d’air ......08
- Nettoyage du capot arrière.........08
-
Nettoyage du corps de l’appareil
08
- Nettoyage du ltre......................09
REMPLACEMENT DU FILTRE ........10
- Fréquence de nettoyage et de
remplacement des ltres........... 10
- Réinitialisation de l’indicateur de
remplacement du ltre............... 10
- Mode de réinitialisation forcée ...06
DÉPANNAGE ................................... 11
CARACTÉRISTIQUES TECHNIQUES
12
CARTE DE GARANTIE....................14
Le ltre True HEPA peut capturer jusqu’à 0,3 micron de particules allergènes et de
contaminants. Il réduit les bactéries en suspension, les spores de moisissure et
les particules véhiculant des virus. Le système de ltre de l’appareil a été optimisé
pour retirer les polluants intérieurs rapidement et efcacement.
Le mode de vitesse automatique permet de régler automatiquement le débit d’air
(niveau 1 à 3) correspondant aux intervalles de temps an d’obtenir une circulation
maximale d’air pur.
La fonction de minuterie permet de contrôler la durée de fonctionnement du
puricateur d’air avant son arrêt automatique.
Le produit vérie la fréquence de remplacement du ltre et active le voyant
approprié, facilitant ainsi le remplacement du ltre par le client.

2
DANGER :
• N’utilisez jamais une che ou une prise électrique endommagée ou défectueuse.
• Branchez la che d’alimentation dans une prise murale (que vous réserverez exclusivement à
cet appareil) reliée à la terre de 120 V, 60 Hz.
• Ne déplacez pas le produit en tirant seulement sur le cordon électrique.
• Ne manipulez pas la che électrique avec les mains mouillées.
• Ne pliez pas avec force le cordon d’alimentation ou ne le placez pas sous un objet lourd an
d’éviter qu’il ne soit endommagé ou déformé.
• Évitez de brancher et de débrancher le cordon d’alimentation de façon répétée.
• Si la prise murale est humide, débranchez l’appareil avec précaution et laissez la prise sécher
complètement avant de le rebrancher.
• Veillez à débrancher l’appareil avant toute opération de réparation, maintenance ou
remplacement de pièces.
• Retirez toute trace de poussière ou d’eau de la prise murale.
• Ne branchez jamais l’appareil sur une prise ou multiprise utilisée par plusieurs autres appareils.
Utilisez une prise réservée exclusivement à cet appareil.
• Débranchez le système s’il n’est pas utilisé pendant une durée prolongée.
• Ne tentez pas de réparer ou de modier vous-même le cordon d’alimentation.
• Si le cordon d’alimentation est endommagé, ne tentez pas de le remplacer vous-même. Appelez
un centre de réparation pour le faire remplacer.
• N’installez pas l’appareil à proximité d’une source de chaleur.
• N’installez pas l’appareil dans un endroit exposé à l’humidité ou à l’eau (ex. : eau de pluie).
• N’installez pas l’appareil à proximité de gaz inammables ou de matières combustibles.
• N’insérez pas d’objets pointus comme une vrille dans le capteur de pollution.
• Si l’appareil émet des bruits étranges, une odeur de brûlé ou de la fumée, débranchez-le
immédiatement de la prise murale et appelez notre centre de réparation.
• N’immergez jamais l’appareil dans l’eau.
• Ne vaporisez pas de matériaux inammables (ex. : insecticides ou parfums) à proximité de ou
dans l’entrée d’air.
• Ne tentez jamais de démonter, réparer ou modier l’appareil vous-même.
• Ne posez pas de récipients remplis d’eau, de médicaments, de nourriture, d’objets métalliques
ou de matériaux inammables sur le dessus de l’appareil.
• Débranchez l’appareil avant de le nettoyer.
• Nettoyez l’appareil en pulvérisant directement de l’eau et non avec du benzène ou du diluant.
• Utilisez l’appareil dans un cadre domestique ou professionnel selon le modèle.
• N’utilisez pas le puricateur d’air dans une usine ou une entreprise où l’huile des machines peut
être présente dans l’air.

3
• N’insérez pas le doigt ou tout corps étranger dans les entrées et sorties d’air.
• Ne laissez pas les enfants se suspendre au produit ou grimper dessus.
• Lorsque vous retirez le capot avant, faites attention à ce qu’aucune partie de votre corps ni
aucun objet ne se coince dans la partie supérieure de l’appareil.
• Cet appareil est muni d’une che polarisée (une lame plus large que l’autre). An de réduire
les risques d’électrocution, cette che a été conçue de manière à ne pouvoir être insérée que
d’une seule façon dans une prise murale polarisée. Si la che n’entre pas parfaitement dans la
prise, retournez-la. Si la che ne paraît toujours pas adaptée à la prise, contactez un électricien
qualié. Ne tentez pas de contourner cette mesure de sécurité.
• Ne faites jamais fonctionner un ventilateur quel qu’il soit si le cordon d’alimentation ou la prise
murale est endommagé(e). Ne l’utilisez plus ou remettez-le à un centre de réparation agréé
pour examen et/ou réparation.
• Ne faites pas passer le cordon sous un tapis ou une moquette. Ne le recouvrez pas non plus
d’un revêtement de ce type. Faites cheminer le cordon à l’écart des zones de passage an
d’éviter tout accident.
• N’installez pas l’appareil sur une surface inclinée.
• Évitez de soumettre l’appareil à un choc brutal.
• Pendant l’utilisation, placez l’appareil à au moins 20 cm des murs ou des objets situés à
proximité et assurez un espace libre de 30 cm à 60 cm au-dessus de celui-ci.
• Installez l’appareil de façon à ce que rien ne puisse entraver la circulation de l’air.
• Installez le puricateur d’air à l’écart des éclairages puissants ou des rayons directs du soleil.
• Installez le puricateur d’air à au moins 2 m des appareils électroniques tels qu’un téléviseur.
• N’installez pas le puricateur d’air dans un lieu exposé aux rayons directs du soleil.
• Remplacez les ltres en fonction de leur cycle de remplacement.
• Nettoyez le pré-ltre régulièrement à l’eau et séchez-le complètement avant de l’utiliser.
• Adapté à une utilisation avec des commandes de vitesse à semi-conducteurs.
• Le nettoyage et l’entretien effectués par l’utilisateur, tels que la lubrication, peuvent provoquer
des incendies, des électrocutions ou des blessures.
• Débranchez ou déconnectez l’appareil de son alimentation avant toute réparation ou entretien.

4
1
1
2
4
5
3
2
3
1
Ce bouton permet de régler la vitesse du
ventilateur. Les réglages disponibles pour
la vitesse du ventilateur sont 1→ 2→ 3.
2
Lorsque le cycle de remplacement du ltre
est atteint, ce voyant s’allume.
3
Ce bouton permet d’éteindre le puricateur
d’air après une période prédéterminée.
Les réglages disponibles pour la minuterie
sont 1h, 4h et 8h.
4
Ce bouton permet d’allumer ou d’éteindre
le puricateur d’air.
- Ce bouton permet d’allumer ou
d’éteindre le puricateur d’air.
5
Utilisez ce bouton pour sélectionner le
mode de vitesse automatique. Le débit
d’air augmente et diminue en continu. Il
reste au niveau 1 pendant 6 minutes, au
niveau 2 pendant 2,5 minutes et au niveau
3 pendant 0,5 minute.
1 1
1
1

5
Le pré-ltre permet de capturer les petites et grosses particules en suspension dans l’air (ex. :
poussière, moisissure, cheveux ou poils d’animaux, etc.).
Comporte un charbon actif en granulés particulièrement efcace pour emprisonner les
mauvaises odeurs et les gaz nocifs. Il permet à votre domicile de sentir le frais.
Filtre True HEPA
Le ltre composite haute performance True HEPA permet d’éliminer efcacement jusqu’à
99,97 % de poussières nes et de fumée de cigarette. Il réduit les bactéries en suspension, les
spores de moisissure et les particules véhiculant des virus.
▶ ▶

6
- Tirez le haut du capot arrière vers vous et soulevez-le
légèrement pour le retirer.
- Retirez les emballages plastique des ltres et installez les ltres dans l’ordre indiqué.
- Retirez tous les emballages plastique des ltres avant d’installer ces derniers.
- Cet appareil est destiné à un usage domestique et en intérieur.
- Lorsque vous n’utilisez pas l’appareil, débranchez-le.
- Lors de l’installation des ltres, assurez-vous que le sens est approprié (Avant/Arrière).
►Ordre de montage des ltres : Pré-ltre → Filtre de désodorisation → Filtre True HEPA
Conseils
Assurez-vous de brancher le cordon d’alimentation sur une prise
120 V~, 60 Hz reliée à la terre et uniquement réservée à cet appareil.

7
Appuyez sur le bouton de mise en marche, puis
sélectionnez le débit d’air à l’aide du bouton de
réglage du débit.
La fonction de minuterie permet de régler l’arrêt
automatique du puricateur d’air après 1, 4 ou 8
heures.
- Pour désactiver la minuterie, maintenez le bouton
de minuterie enfoncé jusqu’à ce que l’indicateur
s’éteigne.
- 1H → 4H → 8H → Minuterie désactivée
Pour activer cette fonctionnalité, appuyez
simplement le bouton Auto (Automatique). Lorsque la
vitesse automatique est activée, la DEL pour tous les
niveaux d’air (1, 2, 3) reste allumée. Pour désactiver
cette fonctionnalité, appuyez simplement sur le
bouton Auto (Automatique) ou Speed (Vitesse).
Une fois que la vitesse automatique est désactivée,
il repasse en niveau d’air 1.
- Avant de faire fonctionner l’appareil, branchez la che d’alimentation dans une prise
électrique appropriée.
- Une fois l’appareil sous tension, celui-ci se règle automatiquement sur le dernier
mode sélectionné.
Conseils
Table of contents
Languages:
Other Coway Air Cleaner manuals

Coway
Coway AP-0512NH User manual

Coway
Coway AP-1018F User manual

Coway
Coway AP-1216L Use and care manual

Coway
Coway airmega 300 User manual

Coway
Coway AIRMEGA Icon User manual

Coway
Coway AP-1503CHE User manual

Coway
Coway Airmega 250 User manual

Coway
Coway AP-1216L User manual

Coway
Coway AP-1012GH User manual

Coway
Coway airmega 400S User manual

Coway
Coway AP-1717A User manual

Coway
Coway AP-1019C User manual

Coway
Coway AP-1512HH User manual

Coway
Coway Airmega ProX User manual

Coway
Coway Airmega 150 User manual

Coway
Coway Airmega 160 User manual

Coway
Coway AP-1516D User manual

Coway
Coway Airmega 240 User manual

Coway
Coway APM-1010DH User manual

Coway
Coway AP-1512HH User manual