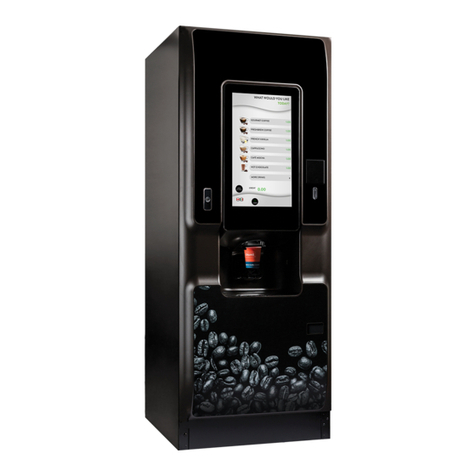
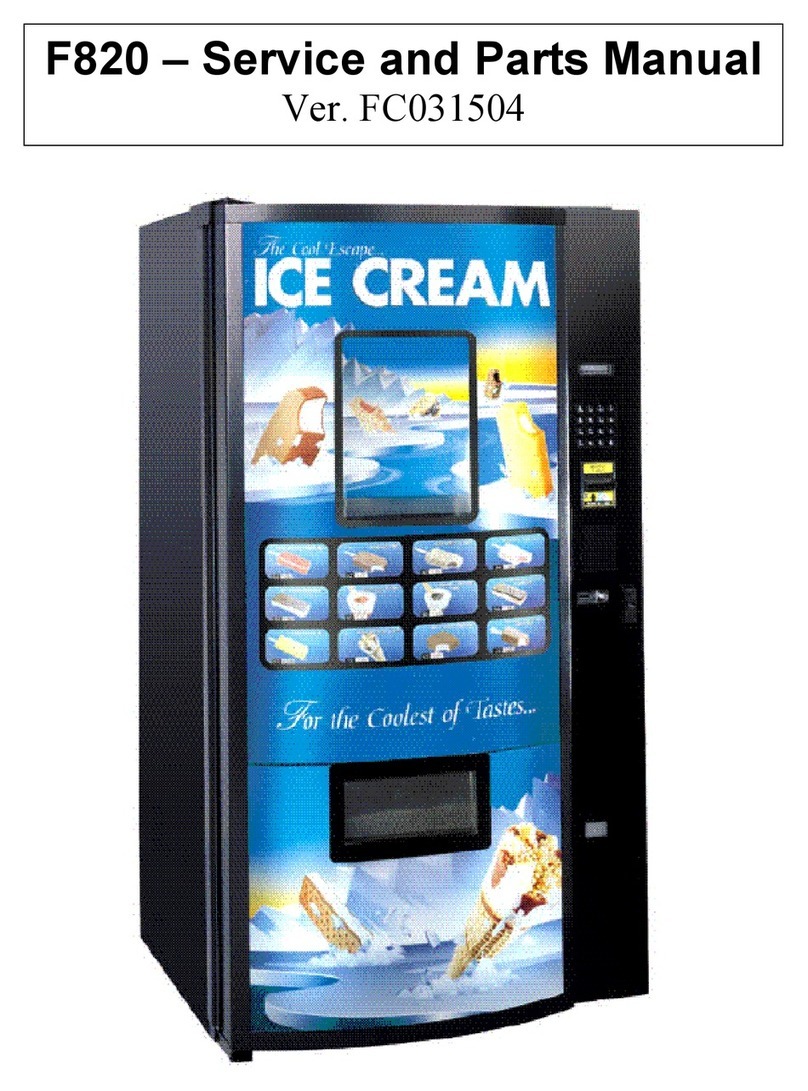
CPI Merchant Media 2 Combo Operating instructions

403542 Rev 0.0

1
Table of Contents
CAUTIONS & WARNINGS.............................................................................................2
NUTRITIONAL CONTENT INFORMATION........................................................................... 3
Initial Start Up…………………………………………………………………………………………………………….3
Loading the Coin Mechanism………………………………………………………………………………………….3
THE SHOPPING EXPERIENCE ........................................................................................4
The Touch Screen ................................................................................................................4
Idle Loop Screen..................................................................................................................4
Main Menu Screen Features .............................................................................................. 5
Making Selections and Navigating the Shopping................................................................5
PROGRAMMING................................................................................................................. 7
General Information............................................................................................................7
Normal Operation Messages...............................................................................................7
Driver Menu ........................................................................................................................8
Planogram Management.....................................................................................................8
OPERATOR / TECHNICIAN MAIN MENU.......................................................................... 11
Merchant Media 2–Programming Map............................................................................11
Monetary...........................................................................................................................13
Price Menu ........................................................................................................................17
Data Recall.........................................................................................................................18
System Settings .................................................................................................................22
Test....................................................................................................................................32
Product Configuration.......................................................................................................36
Special Vend Modes ..........................................................................................................39
Security Codes...................................................................................................................44
Firmware Information .......................................................................................................44
Telemetry ..........................................................................................................................45
Diagnostics ........................................................................................................................46
Timed Events.....................................................................................................................46

2
Cautions & Warnings
High Voltage Warning / Electrical Warning Danger electricity, electric shock.
A Generic Warning.
Hazard Warning: Beware of moving machinery –Entanglement hazard.
Keep hands, loose clothing, and long hair away from moving parts.
CAUTION: The Machine is a heavy item. Ensure that sufficient personnel are available for
moving and transporting the Machine. Use proper lifting procedures and equipment to
prevent injury or damage.
CAUTION: This Machine is designed to dispense a variety of snack, food
and cold drink beverage products.
CAUTION: If this Machine is used to dispense perishable products, local health codes require
that the Machine monitor the cabinet temperature, and prevent vending when the
temperature exceeds a defined limit for a period of time, then the Health Code function must
be enabled for those affected selections –see Health Code Setup.
CAUTION: The electronic system components in this Machine utilize static sensitive
components. Precautions for handling sensitive devices should be observed when
handling these items.
The charge amount in this machine is 114 grams of R290 refrigerant. The lower
flammability limit (LFL) of R290 is 38 grams. At three times the LFL (3 x 38g = 114g), this
machine meets all applicable UL and ASHRAE placement conditions

3
This guide contains programming information for the Merchant Media 2. For detailed information surrounding
the components, installation and operation of the vender, refer to the Operations Guide.
Nutritional Content Information
Crane Merchandising Systems is providing the nutritional content information, based on information provided by the
product manufacturers, and Crane Merchandising Systems cannot accept responsibility for content created by others
Initial Start Up
The following is a list of menu items that should be set up or checked prior to operating the machine:
1. When opening the service door on the machine you will be prompted for a PIN, enter 3333 on the touchpad.
2. Set the Prices by selecting button Price Menu Bar in the service mode.
3. Make sure the Shopping Cart Size (max 3) and Shopping Cart Max Value is set to three times the highest price in
Product Configuration. Touch: Product Configuration > Shopping Cart Setup.
4. If you have added, moved or removed any motors touch: Product Configuration > Selection Configuration >
Perform Auto Configuration.
5. If any motors are being coupled on the candy tray or squat tray, Touch Product Configuration>Couple Motors.
6. Verify your Coin Mechanism; Bill Validator and Card Reader are enabled in the Monetary Menu.
7. Verify the bills you want to accept are enabled in the Monetary Menu > Bill (Note) Acceptance.
8. Set the Time and Date in the System Setting Menu > Set Time and Date.
9. Verify or set the Machine Configuration, go to System Settings > the top menu is the current machine
configuration.
10. To change the Configuration type touch the Machine Configuration menu bar, your options are Ambient,
Refrigerated, European Control, Non-perishable and Chilled. Do not choose European Control unless your area is
within the region covered by these requirements.
11. Press Accept to save your choice.
12. Next select Refrigeration Settings, this menu does not appear if the machine is set to Ambient.
13. Touch Adjust Temperature if required and press Accept to lock in any changes or Cancel to exit without making
changes.
14. If set to Refrigerated or European Control, Touch Health Control to assign the selections to work with Health
Control. The health control menu will not appear if your machine is set to anything other than Refrigerated.
15. If Refrigerated or European Control is selected, all selections in the machine are enabled for Health Control. If you
are not using perishable products in all selections, non-perishable products should have the Health Code disabled
Loading the Coin Mechanism
Prior to placing the machine in service, you must add an initial amount of change to the coin mechanism to prevent a “Use
Correct Change” condition. Initial loading of coins should be done through the menu provided to insure the coin mech
accurately counts all change available for payback to the customer. Recommended minimum amount is $17.00 (one roll
each of 5¢,10¢,25¢ coins). This minimum amount of change should remain in the machine at all times.

4
Adding Initial Change Load
1. Enter the required PIN: 3333,
2. Touch the Monetary menu bar on the screen.
3. Touch the Coins In/Out menu Bar
4. Increase the amount of Change Available by inserting coins to thru the chute on the top of the coin mech. Totals
(count and value) for each coin should increase as coins are added.
Press the left arrow to exit and return to the main menu.
The Touch Screen
•Offers the latest capacitive touch screen technology providing scratch resistance,
high durability and a rich consumer experience.
•Is an industrial screen that can withstand medium hard hits w/ hammer similar to
gorilla glass used in mobile phones
•Has full motion video Capability
•Self-Calibrating
•Provides instructions and information required by the customer to make a purchase.
•Is utilized in the service mode to set up the machine.
Idle Loop Screens
When the machine is not being used, the Touch Screen is showing the Idle loop. The Idle Loop screens will vary depending
on what peripherals you have installed and the promotions that are enabled. To enable or disable specific Idle Screens
and credit card logos, see System Settings > Advertisements. Touching any of these screens will take you to the Main
Menu.
3333
+
+
=

5
Main Menu Screen Features
The Main Menu allows your customer to view promotions when enabled
and view nutritional facts when a Product Library or Planogram is present
by pressing the apple icon
If multiple Languages are enabled a change Language icon will be shown
on the top of the section screen.
On the bottom right corner of the screen there is a Handicap Icon.
Pressing this Icon will move the selection keypad down the bottom of the
screen meeting the wheelchair accessibility requirements.
There is an X icon on the top right corner allowing you to cancel a
transaction.
The bottom of the screen will show both the Credit and Cash Price.
When entering a selection there is a backspace key that allows you to delete one character at a time if a mistake
is made entering a selection number.
The Selection Process
Use the Keypad to make a selection. Your selection will be placed in a shopping cart. The Media 2 will suggest another
product (programmable if desired) allowing you to select the + key to add that selection.
Choose Keep Shopping to add additional selections (maximum 3) to your cart.
Press Check Out when finished.
Note: The shopping cart can be disabled by enabling Rapid Vend under the Special Vend Modes menu and the machine
will immediately go to checkout after making a selection.

6
Nutrition Facts
If you have a UPC code associated with that
selection an image of the product will appear on
the screen
Pressing the information Icon next to the product
image will show a popup with nutritional
information for that product
If you do not have a planogram installed, or a UPC
code assigned, an image of a generic product will
appear on the screen
To remove a product from the shopping cart press
the X as shown to the right
Any Discounts or Surcharges will be shown to the
top right of the shopping cart as well as the total
of all products in the cart.
At any time you can press the cancel icon to
cancel the entire sale. If nothing happens for 30
seconds (settable) the machine will cancel the
transaction and return to the idle screen

7
Completing the Transaction
Any type of payment, cards, coin or bills can be inserted any
time during the transaction. Pressing checkout will cause the
settlement screen to appear if money has not already been
inserted
The settlement screen(s) will communicate to the customer
their payment options
Accessing the Service Mode Menu
When the monetary compartment is opened, the display will prompt the operator to
enter a PIN number on the Touch Screen to gain access to the service modes.
The default PIN for route driver access is 1111 (limited access). The Drivers Menu has
very limited functionality.
The default PIN for programming access is 3333.
If errors exist, an will appear on the bottom right corner of the screen.
Pressing the allows the user to view the existing errors without entering one of
the pin number above.
Initial Screens
If Active Errors Exist, an error list will be shown on the display that includes the time and
date of each error.
The errors do not need to be cleared, once corrected the error will be erased
automatically.
To escape to Error list press the Back or Home Icon
The reason for the last reboot and the uptime since last reboot are shown for
informational and troubleshooting purposes.
3 3 3 3

8
Driver Menu
If PIN 1111 was entered and No Errors Exist, the home screen for the Driver menu will
appear. This menu allows limited access to the service modes. Touching an icon or Menu
bar on the screen will provide access to that menu.
Driver access allows you to:
Data Recall - View sales data.
Home all Un-homed Motors.
Planogram - Manage or Audit the existing.
View the Firmware information
Telemetry - Send a wireless DEX read.
Diagnostics Menu –View existing errors
For access to all other service modes use PIN # 3333
The Data Recall, Firmware Information and Telemetry Menus are duplicated in the
service Menu. See the Service Menu for detailed descriptions of these menus.
Planogram and Home Un-homed Motors
Although there are ways to manage the Planogram and Home Un-homed Motors in the
Service Menu, in the Driver Menu there are specific icons that allow quick access to these
menus.
Planogram Management
The Planogram Management Icon allows you to assign the UPC code on the product
package to a selection.
Once a UPC code is assigned to a selection, the consumer will see an image of that
product when that selection is made.
Pressing the information Icon next to the product image will show the nutritional
information for that product.
For a UPC code to be valid The UPC Code must be in the Library or Planogram loaded in
the machine.
Deleting a UPC Code will cause that selection to show a generic picture on the display
and information icon will not be shown.
You can use the same UPC Code for multiple selections if you have two or more selections
of the same product Cashless customers can create and push planograms over the air or
a planogram can be loaded onto a USB and uploaded into the machine.

9
Planogram Management (continued)
Select Planogram Management to enter the
Planogram Menu
Select a menu bar to View, Audit or Edit the
Planogram
Touch View Planogram to View the current
Planogram information.
If a Planogram has been loaded into the
machine, an image, price and selection
number for each selection will be shown. If
not a generic picture will be shown
Select Planogram Audit to enter the
Planogram Menu,
Choose a Tray you wish to Audit,
The screen will show the current Product
and UPC assigned to the selections on that
tray.

10
Edit the Planogram
Select Edit Planogram to make changes to the
Planogram Menu
Choose the tray you wish to Edit
Choose the selection you wish to Edit.
Select Product to enter a new UPC code
If you choose Select from the Product List all
products will be listed and you can scroll
through to choose a product. If you choose
Edit Current Code, a numeric box will appear
allowing you to enter a new UPC code. This
code must be in the current Planogram or
Library. You must choose Save to lock in the
changes
Selecting the Home Un-homed icon will home any motors that are not in the
home position. Typically, this would be pushed before servicing the machine
because any motors that are not at home will most likely drop a product when
rotating to the home position. Most of the time when a motor is not at
home, it is because there was an issue with a product dropping and the SureVend feature was activated because a product
did not drop; therefore, the spiral was advanced until the product dropped. If motors are not homed when servicing the
machine and a motor is not in the home position, the next time that selection is attempted the spiral will stop in the home
position if a product drops essentially correcting itself.

11
Operator/Technician Menu
If PIN 3333 is entered and No Errors Exist, the Operators
/ Technician menu appears allowing access to the
service Menu bars. Each of the Menu Bars provides
access to detailed menus under the corresponding
heading. Pressing a Menu on the screen provides
access to that menu. Press the down arrow at the
bottom or top of the screens to toggle between the
screens shown.
Across the top of the Main Service Menu is a series of
three icons that will always be present when in the
service menu. The Back icon returns you to the prior
menu; The Home icon returns you to the Main Service
Menu, The Test icon is not currently used.
The content of the Main Menu area will change
depending what menu you are working in.
All the features normally associated with a touch screen, its icons and menu bars are possible, including:
Touching an icon or menu bar to toggle its current state (On to Off, Yes to No, etc.), or touching a menu item to access
another level of the tiered menu system. Alpha & numeric keypads will pop up when required for input. Confirmation
boxes will appear to confirm an item to be added or deleted. Another feature of this screen is that it shows the current
time, date, temperature and current Atlas LE board software revision at the bottom of the screen.
The following programming information is based on software version 11.4.1 b34
Service Mode Menu
MDB Level Entire Machine Non Resettable Sales Data
Bill Validator Tray #1 Resettable Sales Data
Stack Bills Tray #2 Events
Bill Acceptance Tray #3 Identification Numbers
Coin Mechanism Tray #4 SureVend Corrected Vends
Coins In/Out Tray #5
Card Reader A Individual Prices
Card Reader B
Onboard Cashless Enable
MDB Cashless Cart
MDB Cashless Postpay Only
Show Currency Symbol
Decimal Separator
Correct Change Parms
Cash Discount

12
Service Mode Menu (continued)
Machine Configuration Screen Test Selection Configuration
Refrigerated Settings Touchscreen Test Remove Product Library
UI Theme Refrigeration System UPC/EAN Codes
Machine Information Coin Return Motor Shopping Cart Setup
Time and Date NFC/MagTek Head Test Space to Sales (FIFO)
Language Test Vend View Planogram
Custom Message Motor Test Summary Edit Planogram
Idle Timeout SureVend Calibration Browse Categories
Start Screen Renewal Detailed Motor Test SureVend
Software Updates Cabinet Lighting Test Couple Motors
Backup/Restore Surround Lighting Test Update Planogram
Clone Configurations
Clone Board
CAB Lights When OOS
Advertisements
High Contrast Service Mode
DTS
Screen Brightness
Automatic Reboot Settings
LED Color
Alternative Vending Enter PIN Monetary
Free Vend Change Drive PIN OTA/USB Activity
Token Enabled Change Operator PIN Cashless
Winner Mode Change Engineer PIN Machine Information
Combo Vends Change Manufacturer PIN
Trade Show Vend Bypass Route Driver Price Menu
Rapid Vend
Skip Main Menu
MultiVend Discount
Get Network Status Active Errors Time of Day Events
Ping Server Last Reboot Reason Backup Events
Assign Unit Uptime since Last Reboot Power Saving Events
Load Network Config Refrigeration Storage Mode
Show Network Configuration Suggestion Engine Events

13
Monetary Menu
The Monetary menu allows the operator/technician access to program the settings for all credit devices and related
functions. To access this menu touch Monetary on the screen. There are three separate screens associated with the
Monetary menu, to switch between the screens, press the up or down arrow located at the top and bottom right of the
screen.
MDB Level
When MDB Level is selected, the display will show the MDB devices currently
communicating and the level at which they are currently communicating. This
menu is only active when MDB peripherals are installed.
Bill Validator
When selected it will toggle the bill validator On or Off if no validator is installed. When the Bill Validator is set to Off, the
machine will not accept bills. When the Bill Validator is set to On, the Bill Acceptance and Stack Bill menus will be shown
allowing you additional bill handling options.
Stack Bills
When selected the Stack Bill option will toggle between On (bills will be stacked) or Off (Not stacked).
When set to ON, all bills will be stacked, and if the coin return is depressed, change will be paid back.
When Set to OFF, the machine will accept bills to the highest vend price, If the coin return is pressed, the last bill inserted
will be returned and all previous bills inserted will be returned in change.

14
Monetary Menu (continued)
Bill Acceptance
When Bill Acceptance is selected, all denominations the validator is capable of
accepting will be shown. Select the value on the display to select or unselect the
bill/note denominations you wish to accept or not accept. The switches on the
Validator must also be enabled. Token must be enabled to accept Tokens or
Coupons. You will also need to choose what selections work with tokens or coupons
in the Special Vend Modes Menu.
Coin Mechanism
Use this function to set the coin mechanism type. Current setting will be shown
without entering the menu. Select the desired coin mechanism option, and then
Accept in order to save you selection. NOTE: Exec Coin Mechanism is not used in
the US.
Coins In/Out
Select this option to view the amount of coins in each tube. Selecting a specific tube,
the coin mech will start dispensing coins from that tube.
Card Reader/Cashless Options
5.00
10.00
20.00

15
There are three menu Bars as shown on the right for card reader and/or cashless options. There are two menus for MDB
card reader and one for an onboard reader.
MDB is an add on card reader that plugs into the MDB harness in the machine. Your options in
this menu are MDB card reader or no MDB card reader.
Onboard is a swipe built into the front of the machine. When using Onboard Cashless, an NFC
(Tap and Go) option is available.
Crane Onboard cashless interfaces with other online systems so in many cases we can accept
credit and other cards College, work id etc., eliminating the need for a second card reader. It
is possible to have two MDB card readers or one MDB and one Onboard reader in the machine
at the same time. An example would be a college where you accept both credit cards and a
college ID cards that are tied to student’s accounts.
Card Reader/Cashless Options (continued)
Select the Menu item for Card Reader A or B to turn on your MDB card reader option.
If you have one MDB card reader choose card reader A. If you have two card readers
make sure card reader B is both capable of and set to communicate as card reader B.
Once you turn on either card reader A or B an additional menu will appear allowing
you to choose an option to adding value to a card. This is seldom used and currently
is only available in a closed network and not used with credit cards.
Onboard Cashless Enable
Select the Onboard Cashless Menu Bar Enable to
toggle between Yes and No. An Onboard card
reader is a built in card swipe on the front of the
machine that plugs directly into the Atlas controller at J42.
Crane Onboard Cashless accepts NFC (tap and go) transactions. If you have a
separate NFC reader installed, as long as the onboard card reader is assigned and
enabled and the NFC reader cable is connected to a USB port on the Atlas controller
the NFC reader will work.
MDB Cashless Cart
Select the menu item for MDB Cashless Cart to turn it on. When turned on it will allow the MDB card reader(s) to be used
with the shopping cart.
MDB Cashless Post pay Only
Select the menu item for MDB Post Pay to toggle it between on and off. Select On only if Post Pay is to be enabled.

16
Show Currency Symbol
Select the menu item for Show Currency Symbol to turn it on or off. When turned on the currency symbol will display
when applicable.
Decimal Separator
Select this menu item to change the decimal point that is displayed to a comma.
Correct Change Parms
Select this menu item to gain access to set the payback parameters in the machine.
Force Vend
Declining Balance
Accept on Low Change
Credit for Failed Vend
Allow Customer Overpay
Force Vend
Touch Force Vend to Toggle Between Yes and No.
When Force Vend is set to No: All money inserted can be paid back by pressing
cancel to end the transaction.
When Force Vend is set to Yes, a consumer will not be able to receive their
credit back when:
The established credit meets or exceeds the minimum price of the selections
in the machine.
Any bills are stacked in establishing credit.
Any non-tube coins are inserted in establishing credit
A “No Change Without Purchase” message will be displayed when a consumer
attempts to return credit.
Declining Balance
Touch Declining Balance to toggle between Off and On.
If Declining Balance is set to Off at the end of vend any change due back to the
customer will be paid back immediately.
If Declining Balance is set to On the change due back after a vend occurs, will remain on the display allowing the customer
to add more money to make an additional purchase. Note: If set to Yes, customer may touch Cancel to return remaining
credit.
Accept on Low Change
Used to set acceptance of a bill depending on how much change is available in the coin mechanism.
If set to default $0.00, the machine will only accept a bill when the coin mechanism has enough change to pay back full
credit. If a value is set to anything other than $0.00 bills will be accepted to the set value even though change may not be
available (the customer may get shortchanged).
When selected, a new screen with a keypad will be displayed. Use this keypad to set the value of money you wish to
accept when no change is available. Setting this to anything other than $0.00 may cause the customer to be shortchanged.
After entering the value, press Accept to save it.

17
Low Change Message
Used to set the lowest amount registered in the coin mechanism before the display shows “USE EXACT CHANGE”
Select Low Change Message to enter lowest value on corresponding line (default setting of $1.00 recommended).
Touch Accept to save the setting.
Touch Back to exit this menu mode.
Credit for Failed Vend
Press Credit for Failed Vend on the keypad to change between the two settings:
Return = In the event of a failed vend, the credit will be returned automatically.
Hold = In the event of a failed vend, the credit will remain on the machine allowing you to purchase another item or
pressing Cancel to return the credit shown.
Allow Consumer Overpay
Select this menu item to toggle Customer Overpay between Off and On.
When Consumer Overpay set to off, the machine will not accept any currency for which it cannot make change, regardless
of Low Change Message Setting or Accept on Low Change Setting.
When Consumer Overpay set to on, based on other settings in the machine the customer would be allowed to make a
purchase even if change is not available. This could result in a potential situation where the consumer gets short changed.
Discount Price
This menu shows your current discount for cash. This only applies to onboard cashless transactions. The Cash Discount
cannot be changed at the machine. The Cash Discount currently can only be set to 10 cents. For Crane cashless, cash
discounts can be changed by device in your portal.
When enabled, Cash Discount applies to all products in the machine. No discount is applied if any part of the transaction
is cashless, even in a mixed tender transaction. Both Cash and Credit prices are shown at bottom of the shopping cart
screen. The prices set in the machine and shown in the consumer and service mode screens are the cash sales prices. In
other words, the cash discount has already been applied.

18
Price Menu –Entire Machine
Select Entire Machine on the display.
A numeric keypad will appear on the screen along
with a window to enter the price.
Use the numeric keypad to enter the price for the
Entire Machine.
Press Accept to save or Cancel to exit without
changing the price
Setting Price by Tray
Select the tray you wish to price, press the down
arrow for additional trays. Use the numeric keypad
to enter the price for the tray. Press Accept to save.
Setting Individual Prices
Page down using the down arrow and select
Individual prices. Select the tray on which you wish
to change a price or prices. Then select the selection you wish to change. Use the numeric keypad to set the price for
that selection. Press Accept to save you changes.
Data Recall
The Data Recall Menu permits the operator/technician to review a variety of
accountability and operational information including:
Non-Resettable Sales Data,
Resettable Sales Data,
Events,
SureVend Corrected Vends and
ID Numbers (boards and peripherals).
The Non-Resettable and Resettable data screens are the same and therefore not
duplicated in this programming guide. There is one additional menu in the Resettable
menu, Clear Data. These menus allow you to reset to zero the resettable data. As a
default, the Resettable Data is also reset each time the machine successfully
transmits a DEX file. The Non-Resettable Data cannot be reset.

19
Cash Totals
When Cash is selected in either Non-Resettable or Resettable menus, a new screen
will display the value and number of cash sales. After viewing the data, press back to
go back to the previous screen, or press Home to go to the main menu.
Cashless Sales Data
When cashless is selected, it will display the value and number of cashless
transactions by vend type including Revalue if applicable.
Bill Sales Data
When Bill is selected, it allows you to view information about bills by denomination,
both accepted and paid out when using a validator or recycler. Also included is the
current value of bills stored in a recycler cassette if applicable.
Data Recall (continued)
Overall Totals
When Overall Totals is selected, a summary of all transactions will be displayed.
This manual suits for next models
2
Table of contents
Other CPI Vending Machine manuals
Popular Vending Machine manuals by other brands

GM VENDING
GM VENDING AVANT M 23 instruction manual

Leer
Leer VM40 Installation, operation and service manual

Crane Merchandising Systems
Crane Merchandising Systems BevMAX 4 Series Service information

Tubz
Tubz Vending Tower manual

COFFEtek
COFFEtek Neo + Operator's guide

Dixie Narco
Dixie Narco SIID Operation and service manual