manuals.online logo
Brands
  1. Home
  2. •
  3. Brands
  4. •
  5. Crestron
  6. •
  7. Gateway
  8. •
  9. Crestron CENI-GWEXER Service manual

Crestron CENI-GWEXER Service manual

CENI-GWEXER
Wireless Gateway
Installation Guide
For optimum performance when installing multiple CENI-GWEXERs near each other:
• Do not place multiple gateways on the same channel.
• Place gateways at least 4.6 meters (15 feet) apart.
For optimum performance when installing a CENI-GWEXER:
• Place gateways at least 4.6 meters (15 feet) from the nearest Wi-Fi®access point.
• Place gateways at least 1.8 meters (6 feet) from the nearest Bluetooth®device.
For more information, refer to the Best Practices for Installation and Setup of Crestron RF
Products Reference Guide (Doc. 6689) at www.crestron.com/manuals.
Make Connections
Make the necessary connections as called out in the illustrations that follow. Apply power
after all connections have been made.
NOTE: When making connections to the CENI-GWEXER, use Crestron power supplies
for Crestron equipment.
NOTE: The antenna must be attached directly to the antenna connector. It can be
extended with an optional ANT-EXT-10 Antenna Extender (sold separately).
Hardware Connections for the CENI-GWEXER
Description
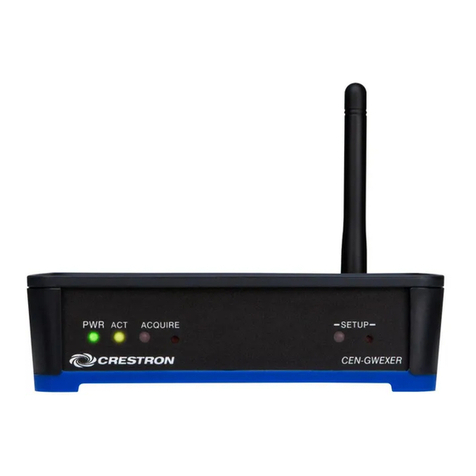
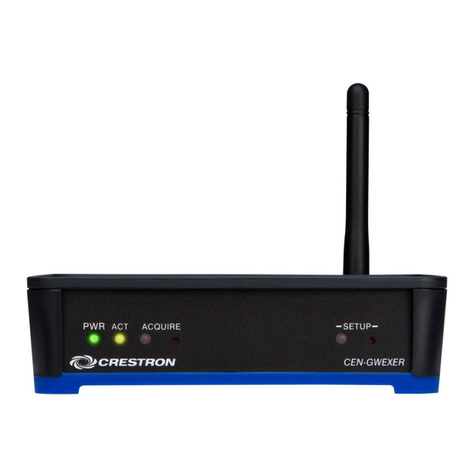
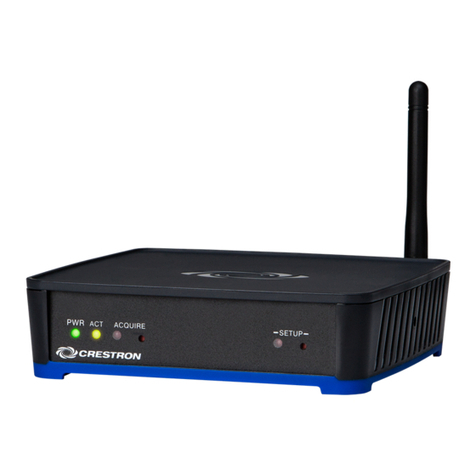
The Crestron®CENI-GWEXER is a 2-way RF wireless transceiver designed for use with
products that use the inNET EX®wireless communications protocol. It is also compatible
with Extended Range (ER) wireless devices. A single CENI-GWEXER gateway enables an
entire wireless network of Crestron remotes, keypads, lighting dimmers, motorized
shades, thermostats, door locks, and other devices to communicate with a Crestron
control system.
Installation
NOTES: Observe the following points:
• This product must be installed and used in accordance with appropriate electrical
codes and regulations.
• This product must be installed by a qualied electrician.
NOTE: Before using the CENI-GWEXER, ensure the device is using the latest rmware.
Check for the latest CENI-GWEXER rmware at www.crestron.com/rmware. Load the
rmware onto the device using Crestron Toolbox™ software.
The CENI-GWEXER can be mounted to a DIN rail or any vertical, at surface. It can also
be placed on any at, level surface. Refer to the illustrations below for DIN rail or any
vertical, at surface mounting examples.
NOTE: Do not install this gateway within 4.6 meters (15 feet) of other inNET EX
gateways, Crestron ER gateways, or Wi-Fi access points.
NOTE: The CENI-GWEXER can also be rack mounted. For rack mount installation, refer
to the RMK-IFE-1U Installation Guide (Doc. 7627) at www.crestron.com/manuals.
DIN Rail Mounting
Additional Resources
Visit the product page on the Crestron website (www.crestron.com)
for additional information and the latest rmware updates. Use a QR
reader application on your mobile device to scan the QR image.
Pin 8 Pin 1
LAN PoE Pins
1. Data Pair 1
2. Data Pair 1
3. Data Pair 2
4. +Vdc
5. +Vdc
6. Data Pair 2
7. -Vdc
8. -Vdc Pin 8 Pin 1
LAN Pins
1. Data Pair 1
2. Data Pair 1
3. Data Pair 2
4. No Connection
5. No Connection
6. Data Pair 2
7. No Connection
8. No Connection
If using a CENI-GWEXER-PWE, perform the following.
1. Attach the supplied ac power cord to the IEC 320 connector on the PoE (Power
over Ethernet) injector.
2. Use a CAT5 cable to connect the LAN port of the PoE injector to the LAN.
3. Use a CAT5 cable to connect the LAN POE port of the PoE injector to the LAN PoE
port of the CENI-GWEXER.
4. Insert the other end of the power cord into an active ac outlet.
NOTE: In the listing of LAN PoE and LAN pins in the following image, arrows denote
internal pin connections.
LAN PoE and LAN Pin Assignments
Vertical Flat Surface Mounting
NOTE: Do not use the included screws to mount the bracket to the bottom of the
CENI-GWEXER if the device will be mounted on a DIN rail. Removing the
CENI-GWEXER from the DIN rail will not be possible.
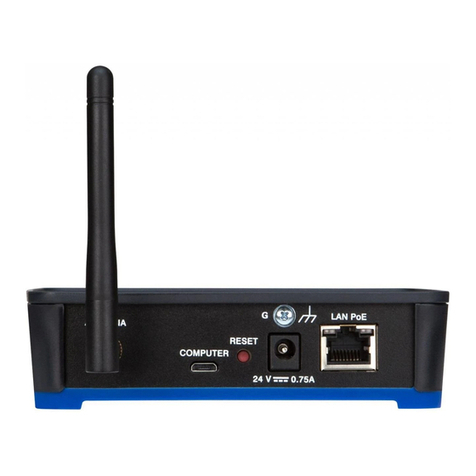
COMPUTER:
To
PC
24 V 0.75A:
From included power
pack (if not using PoE
injector)
LAN POE:
Ethernet to LAN and
PoE input (LAN must
always be connected;
PoE provided only
when using PoE
injector)
ANTENNA:
From included
antenna
This product is Listed to applicable UL®Standards and requirements tested by Underwriters
Laboratories Inc.
Ce produit est homologué selon les normes et les exigences UL applicables par Underwriters
Laboratories Inc.
This unit is for indoor use only. It is not intended for outdoor use.
Cet appareil est réservé à une utilisation en intérieur. Il n'est pas destiné à une utilisation en extérieur.
As of the date of manufacture, the CENI-GWEXER has been tested and found to comply with
specications for CE marking.
The product warranty can be found at www.crestron.com/warranty.
The specic patents that cover Crestron products are listed at patents.crestron.com.
Certain Crestron products contain open source software. For specic information, please visit
www.crestron.com/opensource.
Crestron, the Crestron logo, Crestron Toolbox, inNET EX, and inNET EX logo are either trademarks
or registered trademarks of Crestron Electronics, Inc. in the United States and/or other countries.
Crestron Electronics, Inc. Installation Guide - DOC. 7769C
15 Volvo Drive Rockleigh, NJ 07647 (2043697)
Tel: 888.CRESTRON 05.17
Fax: 201.767.7576 Specications subject to
www.crestron.com change without notice.
Bluetooth is either a trademark or registered trademark of Bluetooth SIG, Inc. in the United States
and/or other countries. UL and the UL logo are either trademarks or registered trademarks of
Underwriters Laboratories, Inc. in the United States and/or other countries. Wi-Fi is either a trademark
or registered trademark of Wi-Fi Alliance in the United States and/or other countries. Other
trademarks, registered trademarks, and trade names may be used in this document to refer to either
the entities claiming the marks and names or their products. Crestron disclaims any proprietary
interest in the marks and names of others. Crestron is not responsible for errors in typography or
photography.
This document was written by the Technical Publications department at Crestron.
©2017 Crestron Electronics, Inc.
Assign the RF Channel
The RF channel of the CENI-GWEXER must be set prior to operation. The CENI-GWEXER
can operate on channels 11 through 26. Crestron recommends using RF channel 15 or 20.
The default RF channel is 15.
For optimum performance when installing a CENI-GWEXER in a Wi-Fi environment, do not
set the RF channel within a Wi-Fi channel band. Refer to the information below when
choosing the RF channel in a Wi-Fi environment.
• Gateway channels 11 through 14 are within the Wi-Fi channel 1 band.
• Gateway channel 15 is adjacent to Wi-Fi channels 1 and 6.
• Gateway channels 16 through 19 are within the Wi-Fi channel 6 band.
• Gateway channel 20 is adjacent to Wi-Fi channels 6 and 11.
• Gateway channels 21 through 24 are within the Wi-Fi channel 11 band.
• Gateway channel 25 is adjacent to Wi-Fi channel 11.
• Gateway channel 26 is neither within nor adjacent to any Wi-Fi band.
NOTE: Crestron’s RF devices can be divided into two categories: inNET EX devices
and Crestron Extended Range (ER) devices. inNET EX devices automatically set their
RF channel assignment to match the gateway’s channel, whereas ER devices must have
their RF channel manually assigned to match the gateway’s channel.
Use Crestron Toolbox to set the CENI-GWEXER’s RF channel. From the “System Info”
window, select Functions > inNET EX Gateway from the menu bar. Refer to the
Crestron Toolbox Help le for details.
Acquire Devices to the Gateway
Crestron inNET EX and ER devices can communicate with a CENI-GWEXER after it has
been acquired by a CENI-GWEXER. A device can be acquired to only one gateway.
Acquire mode can be activated using Crestron Toolbox or the
ACQUIRE
button on the
front panel.
NOTE: Use Crestron Toolbox to set the RF channel before starting the acquire process.
The default RF channel is 15. (ER devices must be congured to match the channel
setting on the gateway.)
NOTE: Acquire mode can be activated approximately 15 seconds after power is
applied to the CENI-GWEXER.
NOTE: In an environment with multiple gateways, only one gateway should be in
Acquire mode at a time.
NOTE: The CENI-GWEXER must be placed in Acquire mode before an inNET EX
device is placed in Acquire mode.
To acquire an inNET EX or ER device via the ACQUIRE button on the CENI-GWEXER,
perform the following procedure:
1. Press ACQUIRE on the CENI-GWEXER to enter Acquire mode. The acquire LED
lights to indicate that the unit is ready to acquire inNET EX and ER devices.
NOTE: Acquire mode automatically deactivates after 1 hour. The timeout period
can be changed from Crestron Toolbox.
2. Bring the inNET EX or ER device within range of the gateway, and place it in
Acquire mode as described in its manual. Once it enters Acquire mode, the device
will be acquired within 2 minutes.
3. Repeat step 2 for each inNET EX or ER device that needs to be acquired.
4. Press ACQUIRE on the CENI-GWEXER to exit Acquire mode. The acquire LED
turns off.
Other Crestron Gateway manuals

Crestron CEN-GW1 User manual

Crestron

Crestron CEN-GW1 User manual

Crestron DM-TX-401-C User manual

Crestron

Crestron DM-TX-401-C User manual

Crestron C2N-IRGW-1G How to use

Crestron

Crestron C2N-IRGW-1G How to use

Crestron C2N-IRGW-F How to use

Crestron

Crestron C2N-IRGW-F How to use

Crestron CEN-GW1 User manual

Crestron

Crestron CEN-GW1 User manual

Crestron Zum ZUMNET-GATEWAY User manual

Crestron

Crestron Zum ZUMNET-GATEWAY User manual

Crestron AM-100 AirMedia User manual

Crestron

Crestron AM-100 AirMedia User manual

Crestron AM-100 AirMedia User manual

Crestron

Crestron AM-100 AirMedia User manual

Crestron AirMedia AM-101 User manual

Crestron

Crestron AirMedia AM-101 User manual

Crestron AirMedia AM-101 User manual

Crestron

Crestron AirMedia AM-101 User manual

Crestron infiNET EX CEN-RFGWX-EX How to use

Crestron

Crestron infiNET EX CEN-RFGWX-EX How to use

Crestron CENI-GWEXER User manual

Crestron

Crestron CENI-GWEXER User manual

Crestron DIN-GWDL User manual

Crestron

Crestron DIN-GWDL User manual

Crestron AM-100 AirMedia Operating and maintenance instructions

Crestron

Crestron AM-100 AirMedia Operating and maintenance instructions

Crestron CEN-ERFGW-POE How to use

Crestron

Crestron CEN-ERFGW-POE How to use

Crestron AirMedia AM-101 Owner's manual

Crestron

Crestron AirMedia AM-101 Owner's manual

Crestron AM-100 AirMedia User manual

Crestron

Crestron AM-100 AirMedia User manual

Crestron CEN-GW1 User manual

Crestron

Crestron CEN-GW1 User manual

Crestron AM-200 Quick reference guide

Crestron

Crestron AM-200 Quick reference guide

Crestron CEN-GWEXER User manual

Crestron

Crestron CEN-GWEXER User manual

Crestron infiNET EX CEN-GWEXER User manual

Crestron

Crestron infiNET EX CEN-GWEXER User manual

Crestron AM-100 AirMedia Quick reference guide

Crestron

Crestron AM-100 AirMedia Quick reference guide

Crestron infiNET Gateway C2N-MNETGW User manual

Crestron

Crestron infiNET Gateway C2N-MNETGW User manual

Crestron AM-100 AirMedia User manual

Crestron

Crestron AM-100 AirMedia User manual

Popular Gateway manuals by other brands

Johnson Controls MAP 1850 quick start guide

Johnson Controls

Johnson Controls MAP 1850 quick start guide

Grandstream Networks GXW-410x user manual

Grandstream Networks

Grandstream Networks GXW-410x user manual

LG BNU-BAC Installation & owner's manual

LG

LG BNU-BAC Installation & owner's manual

Media MediaGate MG-800HD user manual

Media

Media MediaGate MG-800HD user manual

B+B SmartWorx MESR424D quick start guide

B+B SmartWorx

B+B SmartWorx MESR424D quick start guide

AudioCodes MediaPack 5 Series Hardware installation manual

AudioCodes

AudioCodes MediaPack 5 Series Hardware installation manual

NEC i-Series Quick installation guide

NEC

NEC i-Series Quick installation guide

KSB PumpDrive 2 Supplementary Operating Manual

KSB

KSB PumpDrive 2 Supplementary Operating Manual

Emerson Smart Wireless Gateway Reference manual

Emerson

Emerson Smart Wireless Gateway Reference manual

Enterasys ANG-1000 user guide

Enterasys

Enterasys ANG-1000 user guide

Riverbed SteelConnect SDI-130W Hardware installation guide

Riverbed

Riverbed SteelConnect SDI-130W Hardware installation guide

Pepperl+Fuchs FieldConnex Segment Coupler 3 manual

Pepperl+Fuchs

Pepperl+Fuchs FieldConnex Segment Coupler 3 manual

RTA 460ECMM-NNA4 Product user guide

RTA

RTA 460ECMM-NNA4 Product user guide

TANDBERG MPS 800 installation guide

TANDBERG

TANDBERG MPS 800 installation guide

Dinstar DAG2500-48S user manual

Dinstar

Dinstar DAG2500-48S user manual

steute RF RxT SW868-NET-M Mounting and wiring instructions

steute

steute RF RxT SW868-NET-M Mounting and wiring instructions

Huawei Echolife HG8245Q5 quick start

Huawei

Huawei Echolife HG8245Q5 quick start

Comelit 1456 Technical manual

Comelit

Comelit 1456 Technical manual

manuals.online logo
manuals.online logoBrands
  • About & Mission
  • Contact us
  • Privacy Policy
  • Terms and Conditions

Copyright 2025 Manuals.Online. All Rights Reserved.