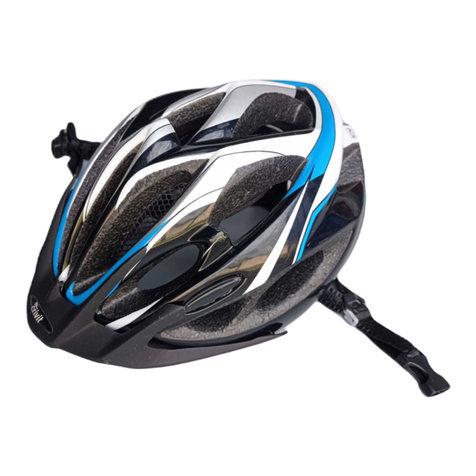
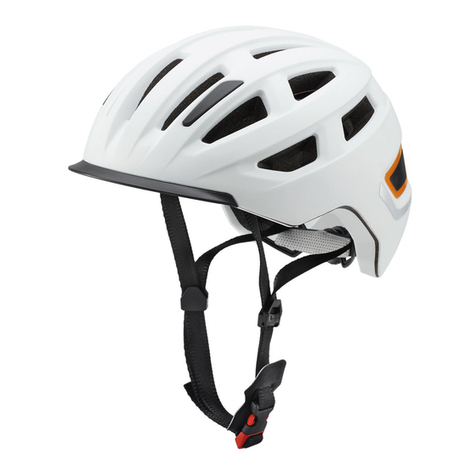
Crivit SP-06 User manual

FAHRRADHELM SP-91/
LED-RÜCKLICHT SP-06
Gebrauchsanleitung
BICYCLE HELMET SP-91/
LED REAR LIGHT SP-06
owner´s manual
CASQUE DE VÉLO SP-91/
FEU ARRIÈRE LED SP-06
Mode d‘emploi
FIETSHELM SP-91/
LED-ACHTERLICHT SP-06
Gebruiksaanwijzing
CASCO PARA BICICLETA
SP-91/ LUZ TRASE RA LED
SP-06
Modo de empleo
CYKLISTICKÁ HELMA SP-
91/ LED zaDní světLo
SP-06
Navod k použiti
CAPACETE DE BICICLETA
SP-91/ LEVOU TAILLIGHT
SP-06
Instruções de serviç
FAHRRADHELM SP-91/ LED-RÜCKLICHT SP-06

DE / AT / CH Gebrauchsanleitung 04 - 09
GB / IE Owner´s Manual 10 - 15
FR / BE Mode d‘emploi 16 - 21
NL / BE Gebruiksaanwijzing 22 - 27
ES Modo de empleo 28 - 33
CZ Navod k použiti 34 - 39
PT Instruções de serviç 40 - 45

A B
E
K
L
J
H I
C
FPress
Press
G
1
2
3
1x 2x 3x
D

4
FAHRRADHELM SP-91
Liebe Kundin, lieber Kunde!
Wir freuen uns, dass Sie sich für eines unserer hochwertigen Produkte entschieden haben,
welche streng nach den aktuell gültigen Sicherheitsnormen hergestellt und zertiziert wurden.
Fahrradhelm SP-91 04
Sicherheitshinweise 05
Benutzerhinweise 05
1. Die richtige Helmposition 05
2. Einstellung des Einhand – Größenverstellsystems 06
3. Einstellung des Gurtverteilers 06
4. Einstellung des Kinnriemens 06
5. Visier 06
6. Reinigung und Pege 07
7. Entsorgung 07
LED-Rücklicht SP-06 07
Sicherheitshinweise 07
Benutzerhinweise 08
1. Vor der ersten Benutzung 08
2. Abnehmen und Aufstecken des Rücklichts 08
3. Funktionen 08
4. Batteriewechsel 08
5. Reinigung und Pege 09
6. Entsorgung 09
Fahrradhelm SP-61Fahrradhelm SP-91

5
Machen Sie sich vor dem ersten Gebrauch mit dem Produkt vertraut. Lesen Sie hierzu
aufmerksam die Bedienungsanleitung und die Sicherheitshinweise. Benutzen Sie das
Produkt nur wie beschrieben und für die angegebenen Einsatzbereiche. Bewahren Sie diese
Anleitung gut auf. Händigen Sie alle Unterlagen bei Weitergabe des Produkts an Dritte
ebenfalls mit aus.
Sicherheitshinweise
• Warnhinweis! Dieser Helm sollte nicht durch Kinder beim Klettern oder anderen
Aktivitäten verwendet werden, wenn ein Risiko besteht, sich zu strangulieren/hängen
zu bleiben, falls sich das Kind mit dem Helm verfängt.
• Ihr Helm wurde speziell zum Schutz beim Radfahren 1, Skateboarden 3,
Rollerskaten 2und Tretrollerfahren 4entwickelt. Er darf nicht für andere Sportarten
oder zum Motorradfahren 5eingesetzt werden.
• Bitte beachten Sie, dass der Helm nur schützen kann, wenn er richtig passt. Probieren
Sie beim Kauf unbedingt verschiedene Größen aus.
• Bitte beachten Sie, dass trotz der richtigen Einstellung ein Helm nicht immer vor allen
Verletzungen schützen kann.
• In regelmäßigen Abständen muss der Helm auf sichtbare Mängel überprüft werden.
• Nach jedem harten Aufprall, Schlag oder tiefem Kratzer muss der Helm ersetzt
werden, da er dadurch seine Schutzwirkung verliert.
• Der Helm sollte auch erstetzt werden, wenn er nicht mehr richtig passt oder spätestens
5 Jahre nach Herstelldatum auch wenn keine Beschädigungen feststellbar sind.
• Eine Veränderung oder Entfernung von Originalteilen des Helmes kann die
Schutzwirkung extrem beeinträchtigen. Der Helm darf nicht verändert werden, um
Zusätze in einer nicht vom Hersteller empfohlenen Weise anzubringen.
• Innenpolster mit lauwarmem Wasser und milder Seife reinigen und anschließend an
der Luft trocknen lassen.
• Hohe Temperaturen, bereits ab 60° C, können den Helm ernsthaft beschädigen.
Unebene Helmoberächen und Bläschenbildung sind Anzeichen einer solchen
Beschädigung. Nicht hinter Glasscheiben z.B. im Auto oder in der Nähe von Heiz-
oder Wärmequellen aufbewahren.
Benutzerhinweise
1. Die richtige Helmposition
• Der Helm muss immer waagrecht auf Ihrem Kopf sitzen (Abb. A).
• Sitzt der Helm zu weit vorne, kann Ihre Sicht beeinträchtigt werden.
Fahrradhelm SP-91
6
Fahrradhelm SP-91
• Sitzt der Helm zu weit hinten, ist Ihre Stirn nicht ausreichend geschützt (Abb. B).
2. Einstellung des Einhand – Größenverstellsystems
Das integrierte Größenverstellsystem (Abb. C) lässt sich mittels eines Drehknopfes stufenlos
am Hinterkopf verstellen:
• kleiner = nach rechts drehen
• größer = nach links drehen
3. Einstellung des Gurtverteilers
• Öffnen Sie den Gurtverteiler (Abb. E).
• Der Gurtverteiler muss so positioniert werden, dass die Riemen straff aber bequem
sitzen. Der Gurtverteiler muss unterhalb des Ohres sitzen, die Riemen dürfen nicht die
Ohren bedecken.
• Schließen Sie den Gurtverteiler (Abb. D).
Ein offener Gurtverteiler kann bei einem Unfall zum Verrutschen des
Helmes führen und somit an Schutzwirkung verlieren!!!
4. Einstellung des Kinnriemens
• Der Kinnriemen (G.3) ist ordnungsgemäß eingestellt, wenn er sowohl komfortabel als
auch fest sitzt und Sie beim Öffnen des Mundes einen leichten Druck verspüren. Der
Verschluss (G.1) darf nicht auf dem Kinn oder dem Kieferknochen auiegen.
• Ist der Kinnriemen (G.3) zu locker, muss er mit Hilfe der Windung (G.2) am
Verschluss (G.1) nachgezogen werden.
• Ist der Kinnriemen (G.3) zu eng, muss er ebenfalls mit Hilfe der Windung (G.2) am
Verschluss (G.1) gelockert werden.
Bitte beachten Sie dabei, dass der Verschluss vor jeder Fahrt
geschlossen werden muss!!! (Abb. F)
Bitte beachten Sie, dass der Helm nur schützen kann, wenn er richtig
passt. Bitte probieren Sie verschiedene Größen und wählen Sie diese,
bei der der Helm komfortabel und fest auf dem Kopf sitzt.
5. Visier
• Um das Visier zu entfernen, ziehen Sie vorsichtig die Stifte am Visier aus den dafür
vorgesehenen Befestigungslöchern der Helmschale (Abb. H).

7
LED-Rücklicht SP-06
Achtung: Die Befestigungslöcher im Helm können sich durch
übermäßige Verwendung weiten. In diesem Fall darf das Visier nicht
mehr verwendet werden.
6. Reinigung und Pege
• Reinigen Sie Ihren Helm nur mit lauwarmem Wasser, milder Seife und einem weichen
Tuch.
• Lassen Sie Ihren Helm nach jedem Gebrauch an der Luft trocknen.
• Innenpolster mit lauwarmem Wasser und milder Seife reinigen und anschließend an
der Luft trocknen lassen.
7. Entsorgung
• Die Entsorgung Ihres Helmes muss über einen zugelassenen Entsorgungsbetrieb oder
über eine kommunale Entsorgungseinrichtung erfolgen.
LED-RÜCKLICHT SP-06
Sicherheitshinweise
• Das LED-Rücklicht ersetzt nicht die von der deutschen StVZO (§ 67) vorgeschriebene
lichttechnische Einrichtung an Fahrrädern.
• Das LED-Rücklicht dient bei sachgemäßer Anwendung der besseren Sichtbarkeit. Das
LED-Rücklicht darf nicht bei Regen verwendet werden, da die Funktionsfähigkeit bei
Nässe nicht gewährleistet ist.
• Bitte verwenden Sie das LED-Rücklicht nur zusammen mit diesem Fahrradhelm und
stecken Sie es immer auf die dafür vorgesehene Halterung auf.
• Das LED-Rücklicht ist nur für den privaten Gebrauch gedacht.
• Bitte beachten Sie, dass das LED-Rücklicht während der Benutzung von Kragen,
Rucksack oder durch Kopfbewegungen verdeckt bzw. nicht sichtbar sein kann.
• Das LED-Rücklicht kann sich durch Hängenbleiben an Jacken, Rucksäcken oder
sonstigen Gegenständen unter Umständen unbemerkt lösen.
• Bitte beachten Sie, dass die Batterie des LED-Rücklichts ausfallen bzw. entleert sein
kann. Kontrollieren Sie daher die Funktionsfähigkeit des Lichts regelmäßig.
• Die Batterien dürfen nicht übermäßiger Wärme wie Sonnenschein, Feuer oder
dergleichen ausgesetzt werden. Bei unsachgemäßem Batteriewechsel besteht
Explosionsgefahr. Ersatz der Batterie nur durch denselben oder gleichwertigen

8
Batterietyp.
• Eltern sollten darauf achten, dass auch Ihr Kind die Funktionsfähigkeit des
LED-Rücklichts regelmäßig kontrolliert.
• Für Kinder unter 4 Jahren ist die Verwendung des LED-Rücklichts nicht geeignet.
• Das LED-Rücklicht ist kein Spielzeug und darf von Kindern nur unter der Aufsicht von
Erwachsenen benutzt werden.
• Der Batteriewechsel darf nur von Erwachsenen durchgeführt werden.
• Sollte die Batterie auslaufen, vermeiden Sie Hautkontakt. Das führt zu
Hautirritationen.
• Ausgelaufene Batterien müssen sofort entsorgt werden.
Benutzerhinweise
1. Vor der ersten Benutzung
Entfernen Sie vor der ersten Benutzung den Sicherheitsstreifen auf der Rückseite des LED-
Rücklichts (Abb. I).
2. Abnehmen und Aufstecken des Rücklichts
• Zum Abnehmen des LED-Rücklichts ziehen Sie das Rücklicht waagerecht aus der
Halterung heraus (Abb. J).
• Zum Aufstecken wird das LED-Rücklicht wieder auf die dafür vorgesehene Halterung
gesteckt.
3. Funktionen
Das LED-Rücklicht verfügt über drei verschiedene Funktionen, die je nach Belieben
angewendet werden können (Abb. K).
• 1x drücken: Dauerlicht
• 2x drücken: Blinklicht
• 3x drücken: Lauicht
• 4x drücken: Licht aus
4. Batteriewechsel
Das LED-Rücklicht ist bereits beim Kauf mit einer Batterie des Typs CR 1620 (3V) ausgestattet.
• Um diese Batterie zu wechseln, öffnen Sie mit einem kleinen Kreuzschlitz-
Schraubenzieher die zwei Schrauben an der Rückseite des Lichts.
• Anschließend heben Sie den Deckel und die Platine ab, tauschen die Batterie und
LED-Rücklicht SP-06

9
LED-Rücklicht SP-06
setzen die Platine und den Deckel wieder auf. Beachten Sie hierbei die richtige
Polung der Batterie (Abb. L).
• Nun befestigen Sie den Deckel wieder mit Hilfe der zwei Schrauben (Abb. L).
• Batterie Typ:
5. Reinigung und Pege
Das Gehäuse des LED-Rücklichts kann mit einem feuchten Tuch gereinigt werden.
6. Entsorgung
Bitte entsorgen Sie entleerte Batterien nicht über den Hausmüll, sondern in dafür vorgesehene
Sammelbehälter.

10
BICYCLE HELMET SP-91
Dear Customer!
We are pleased that you have decided to purchase one of our high-quality products, which
are manufactured and certied in strict adherence to the currently valid safety standards.
Bicycle helmet SP-91
Bicycle helmet SP-91 10
Safety information 11
User information 11
1. The correct helmet position 11
2. Adjusting the single-hand twisting fastener 11
3. Adjusting the strap divider 12
4. Adjusting the chin strap 12
5. Visor 12
6. Cleaning and care 12
7. Disposal 13
LED - Rear light SP-06 13
Safety information 13
User information 14
1. Before the rst use 14
2. Removal and attachment of the tail light 14
3. Functions 14
4. Changing the batteries 14
5. Cleaning and care 14
6. Disposal 15

11
Familiarize yourself with this product before rst use. Carefully read the operating instructions
and the safety information. Use the product only as described and for the indicated
purposes. Keep these instructions. If you give the product to a third party, be sure to include
all the documents with it.
Safety information
• Warning: Do not allow children to wear this helmet while climbing or playing as this
carries a risk of strangulation.
• Your helmet was specially designed for protection during cycling 1,
skateboarding 3, roller-skating 2and riding a scooter 4. It must not be used for
other types of sport or for motorcycling 5.
• Please note that the helmet can only provide protection if it ts correctly. Please
ensure you try out a range of different sizes before buying.
• Please be aware that despite correct adjustment your helmet cannot always protect
you from all injuries.
• The helmet should be checked for visible deciencies at regular intervals.
• The helmet needs to be replaced after any hard impact, blow or deep scratch, as it
thereby loses its protective function.
• The helmet should also be replaced if it does not properly t any longer or, at the
latest, 5 years after the date of manufacture, even if no damage can be observed.
• Any adjustment to or removal of the original parts of the helmet can extremely impair
its protective function. The helmet may not be altered in order to make additions in a
way not recommended by the manufacturer.
• Clean the inner padding with lukewarm water and mild soap and then let it air dry.
• High temperatures, from as low as 60° C, can seriously damage the helmet. Uneven
helmet surfaces and the formation of small blisters are signs of such damage. Do not
store behind panes of glass, e.g. in the car or close to sources of heat or warmth.
User information
1. The correct helmet position
• The helmet must always be levelly horizontal on your head (Fig. A).
• If the helmet is too far forward, it can impair your vision.
• If the helmet is too far back, your forehead is not sufciently protected (Fig. B).
2. Adjusting the single-hand twisting fastener
The integrated size-adjusting system can be adjusted using a turning knob at the back of
Bicycle helmet SP-91

12
one’s head (Fig. C):
• smaller = twist clockwise
• bigger = twist anti-clockwise
3. Adjusting the strap divider
• Open the strap divider (Fig. D).
• The strap divider must be positioned in such a way, that the straps are taut but
comfortable. The strap divider must be below the ear, and the straps must not cover the
ears.
• Close the strap divider (Fig. E).
An open strap divider can lead to slipping of the helmet in the event
of an accident and thus to a loss of protection!!!
4. Adjusting the chin strap
• The chin strap (Fig. G.3) has been adjusted correctly if you feel slight pressure when
you open your mouth.
• If the chin strap (Fig. G.3) is too loose it must be pulled tight using the winding (Fig.
G.2) on the fastener (Fig. G.1).
• If the chin strap (Fig. G.3) is too tight it must be loosened also using the winding (Fig.
G.2) on the fastener (Fig. G.1).
Please note that you must always make sure that the fastener is
closed before you ride !!! (Fig. F)
Please be aware that the helmet can only protect if it ts properly.
Please try out different sizes and choose the one in which the helmet
ts comfortably and sits rmly upon your head.
5. Visor
• Carefully pull out the pins on the visor from the pin holes on the helmet shell to
remove the visor (Fig. H).
Attention: The pin holes on the helmet can expand through excessive
use. In this case, the visor may no longer be used.
6. Cleaning and care
• All chemicals, paints and stickers can seriously impair the protective effect of the
Bicycle helmet SP-91

13
helmet.
• Only clean your helmet with lukewarm water, mild soap and a soft cloth.
• After every use, leave your helmet exposed to the air in order for it to dry.
7. Disposal
• Please contact your local waste disposal company for the disposal of the helmet.
LED-REAR LIGHT SP-06
Safety information
• The LED rear light is not a substitute for the light equipment stipulated by the German
standard StVZO (§ 67).
• When used correctly, the LED rear light gives better visibility. The LED backlight
should not be used during rainy weather. It cannot be guaranteed to work if it gets
wet.
• Please only use the LED rear light together with this cycle helmet and always put it
onto the rotating wheel of the size-adjustment system.
• The LED rear light is only intended for personal use.
• Please make sure that, during use, the LED cannot be covered or obscured by collars,
rucksacks or movements of the head.
• The LED light can under certain circumstances come loose without this being noticed,
if it becomes caught on jackets, rucksacks or other objects.
• Please be aware that the battery of the LED light can fall out or become at.
Therefore, check the light regularly for proper functioning.
• The batteries must not be exposed to excessive heat such as sunshine, re or the
like. In the event that the batteries are incorrectly changed there exists the risk of
explosion. Only replace the batteries with the same or an equivalent battery type.
• Parents should ensure that their child also checks to make sure that the LED backlight
is working on a regular basis.
• The LED rear light is not suitable for use by children under 4 years of age.
• The LED rear light is not a toy and its use by children is only permitted if they are
under the supervision of adults.
• The changing of batteries must only be carried out by adults.
LED-rear light SP-06

14
• If the battery leaks, avoid any contact with the skin as this can lead to skin irritation.
• Leaking batteries must be disposed of immediately.
User information
1. Before the rst use
Take the tail light off the helmet (Fig. J). Before the rst use, remove the safety strips from the
reverse of the LED tail light (Fig. I).
2. Removal and attachment of the tail light
• To remove the rear light, pull the rear light out of the holder (picture J).
• To attach it, the LED rear light must be re-plugged on the holder provided for this
purpose.
3. Functions
The LED rear light has three different functions, each of which can be used as desired (Fig.
K).
• Press x1: continuous light,
• press x2: ashing light,
• press x3: colour chaser,
• press x4: light off.
4. Changing the batteries
The LED tail light comes equipped with a CR 1620 (3V) battery.
• To replace the battery, unlock the screws at the back of the light using a small Phillips
type head screwdriver.
• Subsequently, lift off the lid and the circuit board, exchange the battery and remount
the circuit board and the lid. In doing so, please make sure that the polarity is correct
when installing the new battery (picture L).
• Now, attach the lid again using the four screws (picture L).
• Battery type:
LED-rear light SP-06

15
5. Cleaning and care
The housing of the LED rear light can be cleaned with a damp cloth.
6. Disposal
Please do not dispose of at batteries via the household waste, but instead use the collecting
container intended for this purpose.
LED-rear light SP-06

16
CASQUE DE VÉLO SP-91
Chère cliente, cher client!
Nous nous réjouissons que vous ayez fait le choix d’acheter un de nos produits de grande
qualité, lesquels ont été strictement fabriqués et certiés selon les normes de sécurité
Casque de vélo SP-91
Casque de vélo SP-91 16
Consignes de sécurité 17
Conformément aux disposition 17
1. La bonne position du casque 17
2. Ajustement du système de réglage à une main de la taille 18
3. Reglage des lanieres 18
4. Reglage de la mentonniere 18
5. Visière 18
6. Nettoyage 19
7. Élimination 19
Feu arrière LED SP-06 19
Consignes de sécurité 19
Conformément aux disposition 20
1. Avant la première utilisation 20
2. Retrait et mise en place du feu arrière 20
3. Fonctions 20
4. Changement de la pile 20
5. Nettoyage 21
6. Élimination 21

17
actuellement en vigueur.
Familiarisez-vous au produit avant la première utilisation. Lisez attentivement le mode
d’emploi et les consignes de sécurité. Utilisez le produit uniquement comme décrit et dans les
domaines d’application indiqués. Conservez bien ce mode d’emploi. Remettez également
tous les documents à un tiers lors d’un transfert.
Consignes de sécurité
• Avertissement! Ce casque ne peut pas être utilisé pour les grimpages ou autres
activités, qui présentent un risque d‘étranglement/de pendaison, si l‘enfant
s‘accroche.
• Votre casque a été spécialement conçu pour vous protéger lors de la pratique du
vélo 1, du skateboard 3, des rollers 2 et de la trottinette 4. Il ne doit pas être
utilisé pour d’autres sortes de sport ou pour conduire une moto 5.
• Veuillez noter que le casque ne protège que lorsqu‘il est bien ajusté. Lors de l‘achat,
vous devez impérativement essayer plusieurs tailles.
• Veuillez tenir compte du fait que même si le casque est bien réglé, il ne peut pas
toujours offrir une protection contre toutes les blessures.
• Le casque devrait être contrôlé au niveau des défauts visuels à intervalles réguliers.
• Après chaque impact, choc violent ou chaque griffe profonde, le casque doit être
remplacé car il perd ainsi son pouvoir de protection.
• Le casque doit être remplacé lorsqu’il n’est plus adapté ou au plus tard 5 ans après la
date de fabrication, même s’il ne présente aucun dommage.
• La modication ou le retrait de pièces d‘origine du casque risque de diminuer
considérablement son effet de protection.Le casque ne doit pas subir de modications
telles que l‘ajout de composants d‘une manière qui n‘est pas recommandée par le
fabricant.
• Nettoyer le rembourrage intérieur à l‘eau tiède et au savon doux puis laisser sécher à
l‘air libre.
• De hautes températures, dès 60° C, peuvent endommager sérieusement le casque.
Une surface inégale du casque et la formation de petites bulles sont les signes d’un
tel endommagement. Ne pas placer le casque derrière une vitre, par ex. dans la
voiture ou à proximité d’un foyer ou d’une source de chaleur.
Conformément aux disposition
1. La bonne position du casque
• Le casque doit toujours être placé à l’horizontal sur votre tête (g. A).
Casque de vélo SP-91

18
• Si le casque est placé trop en avant, alors cela peut gêner votre vue.
• Si le casque est placé trop en arrière, alors votre front n’est pas assez protégé (g. B).
2. Ajustement du système de réglage à une main de la taille
Le système de réglage de grandeur intégré se règle à l’aide d’un bouton rotatif à réglage
continu au niveau de l’occiput (g. C) :
• rétrécir = tourner vers la droite
• agrandir = tourner vers la gauche
3. Reglage des lanieres
• Ouvrez l‘attache lanières (g. E).
• L’attache lanières doit être positionnée de telle façon que les lanières sont tendues
mais placées de manières confortable. L’attache lanières doit passée sous l’oreille,
les lanières ne doivent pas recouvrir les oreilles.
• Refermez l’attache lanières (g. D).
Une attache lanières ouverte peut, lors d‘un accident,entraîner le
glissement du casque et ainsi lui enlever tout son effet protecteur !!!
4. Reglage de la mentonniere
• La mentonnière (g. G.3) est correctement réglée si, lorsque vous ouvrez la bouche,
vous sentez une légère pression.
• Si la mentonnière (g. G.3) est trop lâche, elle doit être resserrée à l’aide de la
spire (g. G.2) de la boucle (g. G.1).
• Si la mentonnière (g. G.3) est trop courte, elle doit également être desserrée
à l’aide de la spire(g. G.2) de la boucle (g. G.1).
Veillez à ce que la boucle soit bien fermée avant chaque trajet !!! (g. F)
Veuillez tenir compte du fait que le casque n‘offre une protection que
lorsqu’il est bien adapté à la tête. C’est pourquoi vous devez essayer
plusieurs grandeurs et choisir celle avec laquelle le casque tient le
mieux en place sur la tête et ceci de manière confortable.
5. Visière
• Pour enlever la visière, retirez doucement les chevilles sur la visière, situées dans les
trous de xation prévus à cet effet sur le casque (g. H).
Attention: les trous de xation dans le casque peuvent s’élargir dans
Casque de vélo SP-91

19
le cas d’une utilisation excessive. Dans ce cas, ne plus utiliser la
visière.
6. Nettoyage
• L’effet protecteur du casque peut être endommagé de manière sérieuse par tous les
produits chimiques, peintures ou autocollants.
• Nettoyer votre casque uniquement à l’eau tiède, avec du savon doux et un chiffon
doux.
• Laissez votre casque sécher à l’air libre après chaque utilisation.
7. Élimination
• Veuillez contacter votre entreprise locale de traitement des déchets pour la mise au rebut
de votre casque.
• Indépendamment de la garantie commerciale souscrite, le vendeur reste tenu des
défauts de conformité du bien et des vices rédhibitoires dans les conditions prévues aux
articles L211-4 et suivants du Code de la consommation et aux articles 1641 et suivants
du Code Civil.
FEU ARRIÈRE LED SP-06
Consignes de sécurité
• Le feu arrière ne remplace pas l’éclairage des vélos prévu par le Code de la route
allemand (§67 du StVZO).
• Dans le cas d’une utilisation appropriée, le feu arrière LED permet une meilleure
visibilité. La lumière arrière à LED ne doit pas être utilisée en cas de pluie car son
fonctionnement n‘est pas garanti dans des conditions d‘humidité.
• Le feu arrière LED justement utilisable pour l´emploi privé.
• Veuillez utiliser le feu arrière LED uniquement avec ce casque et placez toujours le feu
arrière sur la molette permettant de régler la taille du casque.
• Assurez-vous qu’aucun col, sac à dos ou mouvement de la tête n’empêche le feu
arrière LED d’être visible.
• Notez que la pile du feu arrière peut tomber en panne ou se vider. Par conséquent,
vériez régulièrement la batterie.
• N’exposez pas les piles à une source de chaleur importante telle que le soleil, le feu
ou autres. Un remplacement inapproprié de la batterie peut provoquer une explosion.
Remplacez la batterie uniquement par une batterie du même type ou d’un type
Feu arrière LED SP-06

20
équivalent.
• Veuillez ne pas jeter la batterie dans la poubelle, mais dans les conteneurs prévus à cet effet.
• Les parents doivent veiller à ce que leur enfant aussi contrôle régulièrement le
fonctionnement de la lumière arrière à LED.
• L’utilisation du feu arrière LED n’est pas adaptée aux enfants de moins de 4 ans.
• Le feu arrière LED n’est pas un jouet. Les enfants peuvent l’utiliser uniquement en
présence des parents.
• Seul un adulte doit remplacer les piles.
• En cas de fuite de la pile, évitez tout contact avec la peau. Risque d‘irritation cutanée.
• Les piles qui fuient doivent être jetées immédiatement.
Conformément aux disposition
1. Avant la première utilisation
Retirez le feu arrière du casque (g. J). Avant la première utilisation, enlevez la bande de
sécurité au dos du feu arrière à LED (g. I).
2. Retrait et mise en place du feu arrière
• Pour démonter la lumière arrière, la tirer pour la sortir du support (Illus. J).
• Pour monter la lumière LED arrière, placez-la dans le support prévu à cet effet.
3. Fonctions
Le feu arrière LED dispose de trois fonctions différentes que vous pouvez utiliser
librement (g.K).
• Appuyer 1 fois : éclairage permanent
• Appuyer 2 fois : clignotement
• Appuyer 3 fois : délement
• Appuyer 4 fois : éclairage éteint.
4. Changement de la pile
Le feu arrière à LED est fourni avec une pile de type CR 1620 (3V).
• Pour changer cette pile, ôtez les vis à l’arrière de la lumière à l’aide d’un petit tournevis
cruciforme.
• Ensuite, retirez le couvercle et la platine, changez la pile et remettez le couvercle et la
platine. Prenez garde à respecter la polarité de la plie (illus. L).
Feu arrière LED SP-06
This manual suits for next models
2
Table of contents
Languages:
Other Crivit Motorcycle Accessories manuals

Crivit
Crivit 78792 User manual

Crivit
Crivit 292227 User manual

Crivit
Crivit EH-1430 User manual

Crivit
Crivit DS-MULTIX400 User manual

Crivit
Crivit 93726 User manual

Crivit
Crivit 306979 User manual

Crivit
Crivit CEB 2000 A1 User manual

Crivit
Crivit 297930 User manual

Crivit
Crivit 93719 User manual

Crivit
Crivit SH-3344 User manual

Crivit
Crivit 292227 User manual

Crivit
Crivit 272278 User manual

Crivit
Crivit SP - 33 User manual

Crivit
Crivit 101538 User manual

Crivit
Crivit SP-11 User manual

Crivit
Crivit 275342 User manual

Crivit
Crivit CASCO JET User manual

Crivit
Crivit 90095 User manual

Crivit
Crivit 284742 User manual

Crivit
Crivit 303613 User manual