manuals.online logo
Brands
  1. Home
  2. •
  3. Brands
  4. •
  5. Crosley
  6. •
  7. Indoor Furnishing
  8. •
  9. Crosley CF100360 User manual

Crosley CF100360 User manual

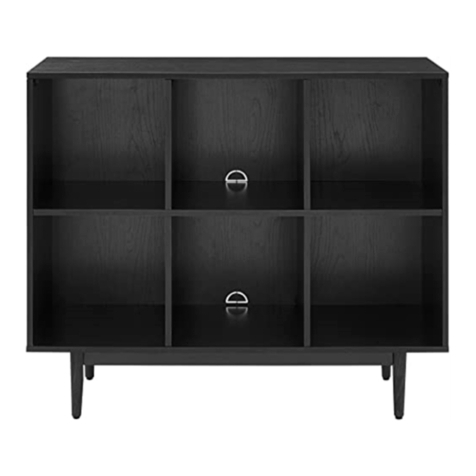
60” Low Profile TV Stand
CF100360
2
Use Only With Bun Feet
Left Panel Right Panel Left Vertical Panel Right Vertical Panel Top Rail
Top Panel Bottom Panel Back Panel Middle Back Panel Adjustable Shelf
Middle Adjustable
Shelf
Left Middle Door
Panel
Right Middle Door
Panel
Left Door Panel Right Door Panel
Long Support Leg Short Support Leg
1 PC 1 PC 1 PC 1 PC 1 PC
1 PC 1 PC 2 PCS 1 PC 2 PCS
1 PC 1 PC 1 PC 1 PC 1 PC
2 PCS 2 PCS
ABCDE
FGHIJ
KLMNO
PQ
3
#1
#10
#2 #3 #4 #5
#9#8
#7#6
#11 #12 #13 #14
Cam Lock
10 PCS
Cam Bolt
10 PCS
Wood Dowel
20 PCS
Screw
4 PCS
Allen Bolt
8 PCS
Spring Washer
8 PCS
Flat Washer
8 PCS
Magnet Double Magnet
2 PCS 1 PC
Round Head Screw
13 PCS
Shelf Holder Knob Round Head Bolt Allen Wrench
12 PCS 4 PCS 4 PCS 1 PC
ADDITIONAL TOOLS (Not Provided)
Note: It is not recommended to use power tools during assembly.
Phillips Head Screwdriver
Note: Wood dowels are intended for alignment. Additional clearance between
wood dowel and pre-drilled hole is intentional for ease of assembly.
4
#2
#2
#2
#2
#2
#2
#2
#2
#2
#2
Insert cam bolts (part #2) into left panel (part A), right panel (part B)
and top panel (part F) using phillips head screwdriver.
NOTE: Do not overtighten cam bolts. Stop tightening once threads
Attach top rail (part E) to left vertical panel (part C) and right vertical
panel (part D) using wood dowels (part #3) and screws (part #4).
#4
#3
X10
F
A&B
E
D
C
X2
X2
#3
#4
#4
#3
on cam bolt are no longer visible.
5
NOTE: Cam locks must rotate full 180°. See pictured insert.
Attach left panel (part A) and right panel (part B) to top rail (part E) using
wood dowels (part #3) and cam locks (part #1).
#1
#3
Attach top panel (part F) to assembled unit (parts A, B, C, D & E) using
wood dowels (part #3), cam locks (part #1), screws (part #4) and phillips
head screwdriver.
#4
#1
#3
X2
X2
E
A
B
#1
#3 #1
#3
X2
X8
X8
F
A
C
D
B
E
#3
#3
#3
#3
#3
#3
#3
#3
#1
#1
#1
#1
#1
#1
#1
#1 #4
#4
6
Carefully turn unit upside down on a soft flat surface, such as carpet, as
shown below. Slide back panels (part H) and middle back panel (part I) into
the grooves of assembled unit (parts A, B, C, D & F).
Attach magnets (part #8) and double magnet (part #9) to top rail (part E) using
round head screws (part #10) and phillips head screwdriver. Attach bottom
panel (part G) to assembled unit (parts A, B, C, D, H & I) using wood dowels
(part #3), allen bolts (part #5), spring washers (part #6), flat washers (part #7)
and allen wrench (part #14). Attach legs using instruction manual and
hardware included inside leg packaging.
#5
#7
#6
#14
#3
#9
#8
#10
H
I
H
B
D
C
F
A
#14
#5
#5
#5
#5
#5
#5
#5
#5
#6
#6
#6
#6
#6
#6
#6
#6
#7
#7
#7
#7 #7
#7
#7
#7
#3
#3
#3
#3
#3
#3
#3
#3
B
I
HD
C
A
H
E
#10
#10 #10
#10
#9
#8
#8
X8
X8
X8
X1
X8
X1
X2
X6
G
7
Carefully turn unit upright. Screw round head screws (part #10) into back
panels (part H) and middle back panel (part I) using phillips head
screwdriver.
Place shelf holders (part #11) into desired position and then slide
adjustable shelves (part J) and middle adjustable shelf (part K) into place.
#10
#11
X7
#10
#10
#10
#10
#10
#10
#10
F
H
I
H
X12
J
K
J
#11 #11
#11
#11
#11
#11
#11
#11
#11
#11
8
Attach knobs (Part #12) to left middle door panel (part L), right middle door
panel (part M), left door panel (part N) and right door panel (part O) using
round head bolts (part #13) and phillips head screwdriver. Attach left middle
door panel (part L), right middle door panel (part M), left door panel (part N)
and right door panel (part O) by placing bottom pin hinge (pre-installed in
door) in the pre-drilled hole of bottom panel (part G). Then depress the top
spring-loaded pin hinge so it can be placed in the pre-drilled hole of top
panel (part F).
NOTE: Be sure top and bottom pin hinges are fully extended to secure
F
G
x4
x4
#13
#13
#12
#13
#12
#12
L&M
N&O
NL
M
O
doors in place.
9
Carefully lay unit down. Attach long support legs (part P) or short support
legs (part Q) to bottom panel (part G) by turning clockwise into the center
pre-drilled holes. Short support legs (part Q) should only be used with Bun
Feet. All other leg styles will use long support legs (part P).
G
Step 11. Carefully turn unit upright.
To support the center of unit it is important to adjust leveler on
support legs once fully assembled and upright. Extend
adjustable leveler until it’s firmly in contact with the floor. If
relocating, adjust leveler as needed until it’s firmly in contact with
the floor in new location.
P
Q
P
Q
NOTE:

Other Crosley Indoor Furnishing manuals
Crosley CO1011A User manual

Crosley

Crosley CO1011A User manual

Crosley CF6012 User manual

Crosley

Crosley CF6012 User manual

Crosley CF2002 User manual

Crosley

Crosley CF2002 User manual

Crosley CF3028 User manual

Crosley

Crosley CF3028 User manual

Crosley Biltmore Outdoor Wicker Arm Chair CO7116-WB User manual

Crosley

Crosley Biltmore Outdoor Wicker Arm Chair CO7116-WB User manual

Crosley CF3001 User manual

Crosley

Crosley CF3001 User manual

Crosley CO1002A User manual

Crosley

Crosley CO1002A User manual

Crosley CF3009-ST User manual

Crosley

Crosley CF3009-ST User manual

Crosley CF91007-604 User manual

Crosley

Crosley CF91007-604 User manual

Crosley CF3029 User manual

Crosley

Crosley CF3029 User manual

Crosley CF2006 User manual

Crosley

Crosley CF2006 User manual

Crosley CF6027 User manual

Crosley

Crosley CF6027 User manual

Crosley CF6028 User manual

Crosley

Crosley CF6028 User manual

Crosley CF4503 User manual

Crosley

Crosley CF4503 User manual

Crosley CO7170 User manual

Crosley

Crosley CO7170 User manual

Crosley AC1052A User manual

Crosley

Crosley AC1052A User manual

Crosley CF4001 User manual

Crosley

Crosley CF4001 User manual

Crosley CF6026 User manual

Crosley

Crosley CF6026 User manual

Crosley Lydia Mirrored Bathroom Wall Cabinet CF7005 User manual

Crosley

Crosley Lydia Mirrored Bathroom Wall Cabinet CF7005 User manual

Crosley Sedona CO600142-BK User manual

Crosley

Crosley Sedona CO600142-BK User manual

Crosley CR7019A User manual

Crosley

Crosley CR7019A User manual

Crosley AC1049A User manual

Crosley

Crosley AC1049A User manual
Crosley CF4202 User manual

Crosley

Crosley CF4202 User manual

Crosley CF91007-504 User manual

Crosley

Crosley CF91007-504 User manual

Popular Indoor Furnishing manuals by other brands

Living Spaces JAXON 77101 owner's manual

Living Spaces

Living Spaces JAXON 77101 owner's manual

Lancaster LANSTVGRY Assembly instructions

Lancaster

Lancaster LANSTVGRY Assembly instructions

Northridge Home Ainsworth 0MX00U5 Assembly manual

Northridge Home

Northridge Home Ainsworth 0MX00U5 Assembly manual

HULALA HOME CHM0510 quick start guide

HULALA HOME

HULALA HOME CHM0510 quick start guide

Otto 4424 Assembly instructions

Otto

Otto 4424 Assembly instructions

Mocka Maya Entertainment Unit Assembly instructions

Mocka

Mocka Maya Entertainment Unit Assembly instructions

Schoolhouse Hamilton Bed 126090 manual

Schoolhouse

Schoolhouse Hamilton Bed 126090 manual

kupper 12020 Assembly instruction

kupper

kupper 12020 Assembly instruction

Symbiote PMD6612 installation instructions

Symbiote

Symbiote PMD6612 installation instructions

modway EEI-6354 Assembly instruction

modway

modway EEI-6354 Assembly instruction

Martin INDIGO Assembly instructions

Martin

Martin INDIGO Assembly instructions

Coaster 101064 Assembly instructions

Coaster

Coaster 101064 Assembly instructions

Next 536582 Assembly instructions

Next

Next 536582 Assembly instructions

GMI BT BENCH Assembly instructions

GMI

GMI BT BENCH Assembly instructions

VonHaus 3024006 Assembly instructions

VonHaus

VonHaus 3024006 Assembly instructions

Home Decorators Collection Harding TH0083 Use and care guide

Home Decorators Collection

Home Decorators Collection Harding TH0083 Use and care guide

Shanty 2 CHIC DIY Turned Leg Bench manual

Shanty 2 CHIC

Shanty 2 CHIC DIY Turned Leg Bench manual

burgbad Accura M1301 Fitting instructions

burgbad

burgbad Accura M1301 Fitting instructions

manuals.online logo
manuals.online logoBrands
  • About & Mission
  • Contact us
  • Privacy Policy
  • Terms and Conditions

Copyright 2025 Manuals.Online. All Rights Reserved.