CrustBuster 4740 User manual
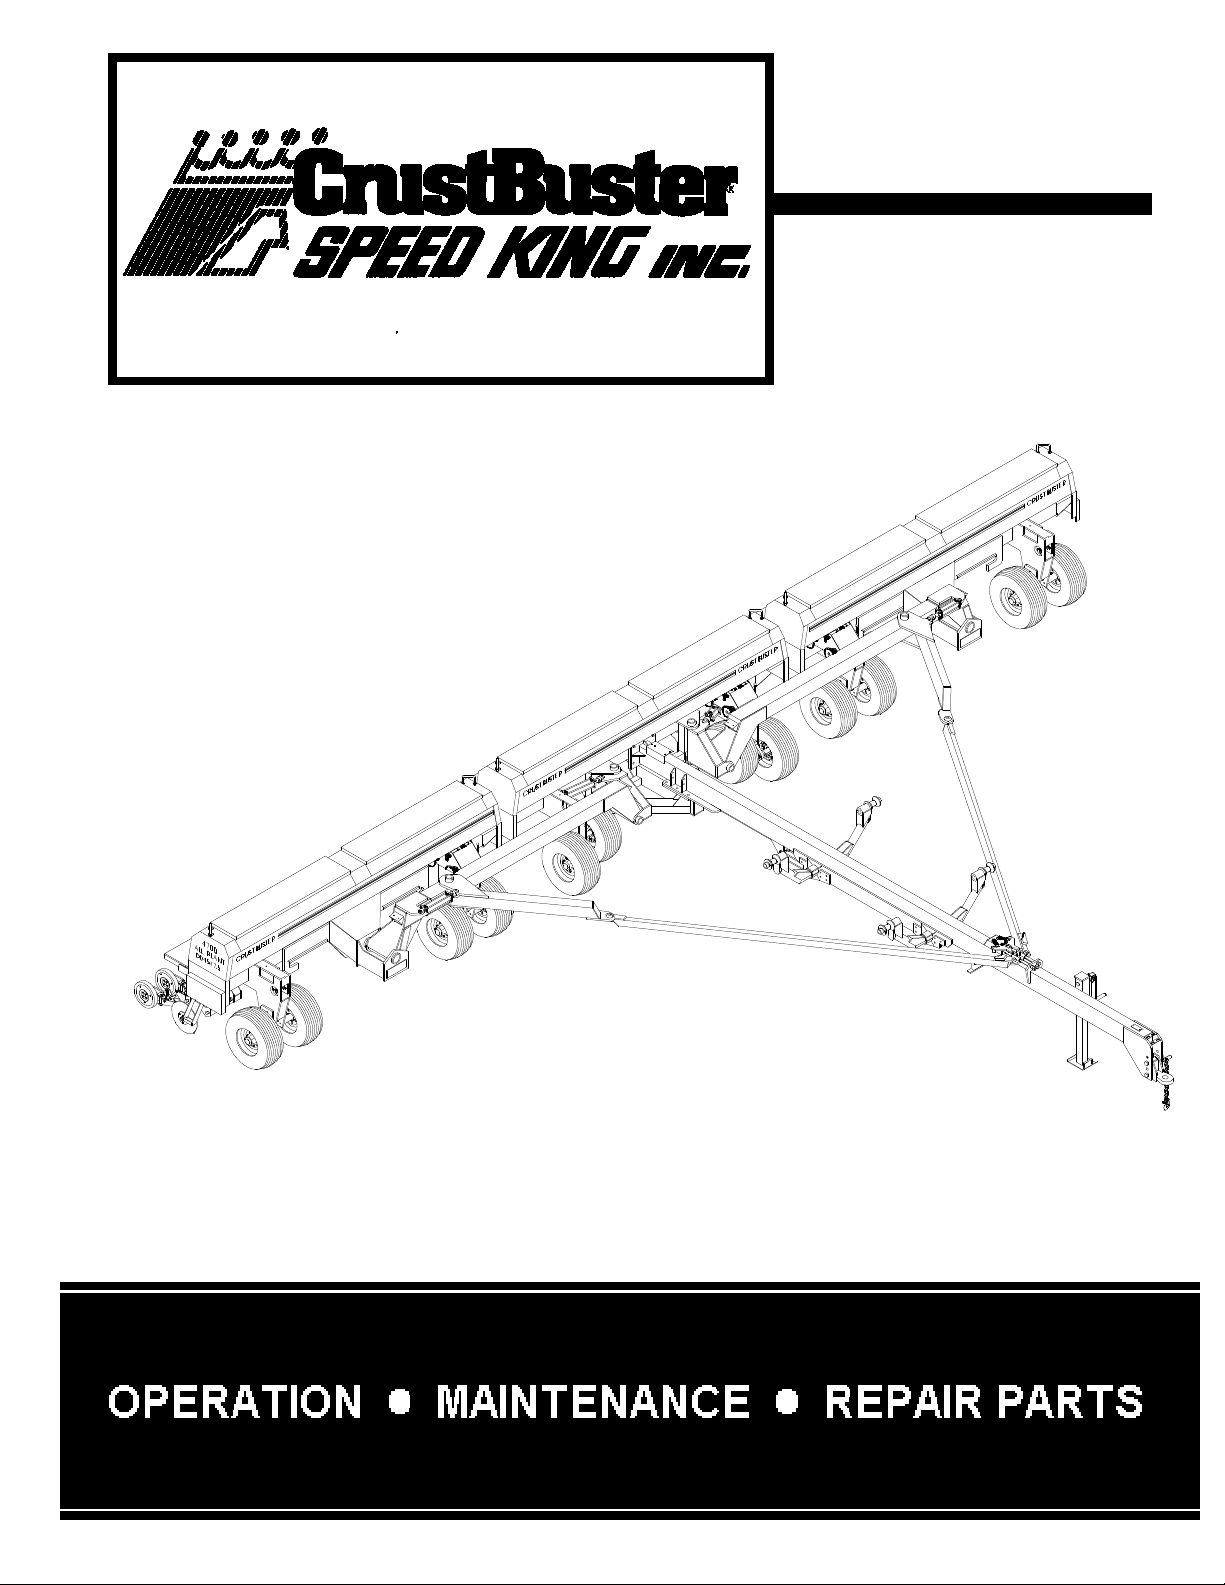
4740 Drill
OWNER'S MANUAL
# 606483 - 2009

Identification
Your CrustBuster® drill is identified by a Serial Number and Model Number.
Record these numbers in the spaces provided in this manual and refer to them
when ordering parts or requesting service.
Serial Number Model Number
Warranty
WARRANTY: In addition to the implied warranties of fitness and of merchantability,
CrustBuster®/Speed King, Inc. warrants new products sold by it to be free from defects in
workmanship and material for a period of 12 months, from the date of delivery to the first user
customer. Warranty on purchased parts (cylinder, blades, bearings, shanks, etc.) will be the
same as that offered by the appropriate manufacturer of these parts.
EXCLUSIONS: No warranty of any kind is made by CrustBuster®/Speed King, Inc. with regard
to new products which have been subject to operation in excess of recommended capacities,
misuse, abuse, negligence, or accident, or have been altered or repaired in any manner not
authorized byCrustBuster®/Speed King, Inc. CrustBuster®/Speed King, Inc. is constantly striving
to improve its products. Changes in design and improvement will be made whenever
CrustBuster®/Speed King, Inc. believes the efficiency of its products will be improved thereby,
but without incurring any obligation to incorporate such improvements in any products which have
been shipped or are in service. No obligation exists for compensation of unauthorized repairs or
modifications without prior approval. And in no event will CrustBuster®/Speed King, Inc. be liable
for consequential damages, such as but not limited to: downtime, delayed or late tillage or
planting, etc.
WARRANTY REGISTRATION: This warranty is not valid unless registered with
CrustBuster®/Speed King, Inc. within 10 days from the date of purchase. It is the sole
responsibility of the selling retail dealer to fill out the registration forms and see that they are
properly filed with CrustBuster®/Speed King, Inc.
WARRANTY PROCEDURE: Should any part fail to conform with this warranty,
CrustBuster®/Speed King, Inc. will repair or replace the part or parts which do not conform. If a
part is defective, take it to your authorized CrustBuster® Farm Equipment Dealer immediately,
along with your warranty registration, and complete the proper forms requesting a warranty
adjustment. Our representative will pick up the part to be returned to the factory for examination.
If the customer (first user) requests that a new part be substituted for the old part, a new part will
be charged to the dealer who will in turn charge the customer. If the part is found by us to be
defective, a credit for the part will be given to the dealer to be passed on to the customer. If the
dealer or customer wishes to repair the part, this will be done only if authorized by
CrustBuster®/Speed King, Inc. This warranty procedure is in addition to all remedies authorized
by law.
CRUSTBUSTER®/SPEED KING, INC.
Box 1438
Dodge City, KS 67801
Specifications are subject to change without notice. ® is a registered trademark of CrustBuster/Speed King, Inc.

1
Table of Contents
Identification and Warranty . . . . . . . . . . . . . . .
. Inside Front Cover
Specifications ........................ 1
Safety ............................ 2-8
TransportingDrill...................... 9
Folding and Unfolding Drill . . . . . . . . . . . . . 10
Field Operating Checklist . . . . . . . . . . . . . . 10
Field Operation:
Operating Speed . . . . . . . . . . . . . . . . 11
Adjustment Procedure . . . . . . . . . . . . 11
LevelingDrill .................... 11
All Plant Drill:
Opener and Toolbar Adjustment . . . . . 11
Setting Down Pressure . . . . . . . . . . . . 12
Weighting ...................... 12
Setting Seed Depth . . . . . . . . . . . 12-13
Minimum Tillage Conditions . . . . . . . . 13
Conventional Field Conditions . . . . . . 13
No-Till Conditions . . . . . . . . . . . . . . . . 13
Min-Till Drill:
Setting Down Pressure . . . . . . . . . . . . 14
Down Pressure Spring . . . . . . . . . . . . 14
Setting Seed Depth . . . . . . . . . . . . . . 14
Presswheel Adjustment and
Tool Bar Rotation . . . . . . . . . . . . . . 15
Lubrication and Service . . . . . . . . . . . . . . 16
Scraper Adjustment . . . . . . . . . . . . . . . . 16
Blade Gap Adjustment . . . . . . . . . . . . . . 17
Tandem Wheel Drive Clutch . . . . . . . . . . 17
Calibration / Drilling Rates . . . . . . . . . . . . . . 18
Sprocket Box Operation . . . . . . . . . . . . . . . 18
Seed Cup Adjustments and Service . . . . . . 19
Sprocket Locations . . . . . . . . . . . . . . . . 20-21
Meter Man Acreage Counter . . . . . . . . . . . . 22
Sprocket Box Adjustment . . . . . . . . . . . . . . 22
Seed Rate Charts . . . . . . . . . . . . . . . . . 23-30
Illustrations and Repair Parts:
Center Drive . . . . . . . . . . . . . . . . . . . 32-33
Wing Drive . . . . . . . . . . . . . . . . . . . . 34-37
Gearbox . . . . . . . . . . . . . . . . . . . . . . 38-41
Clutch Lever Assembly . . . . . . . . . . . 39-41
Center Frame Section . . . . . . . . . . . . . . . 42
Drive End Bracket & Bearing . . . . . . . . . 43
Tandem Axle . . . . . . . . . . . . . . . . . . . . . . 43
Drive Plate w/Hub . . . . . . . . . . . . . . . . . . 44
8 Bolt Hub . . . . . . . . . . . . . . . . . . . . . . . . 44
Center Clutch Assembly . . . . . . . . . . . . . 45
Center Drive Sprocket . . . . . . . . . . . . . . . 45
Throw-out Clutch Half . . . . . . . . . . . . . . . 45
Drive Clutch Sprocket . . . . . . . . . . . . . . . 45
Hitch . . . . . . . . . . . . . . . . . . . . . . . . . . . . 46
3-Point Hitch Option & Pin . . . . . . . . . . . 47
Wing Carrier Adjustment . . . . . . . . . . . . . 47
Wing Frame Sections . . . . . . . . . . . . . . . 48
Clutch Assembly . . . . . . . . . . . . . . . . . . . 49
Spindle & Hub Assembly . . . . . . . . . . . . . 49
6 Bolt Hub . . . . . . . . . . . . . . . . . . . . . . . . 49
Meter Man Acre Counter . . . . . . . . . . . . . 49
Fold and Pull Bar . . . . . . . . . . . . . . . 50-52
Grain Box . . . . . . . . . . . . . . . . . . . . . 54-55
Tool Bars . . . . . . . . . . . . . . . . . . . . . 56-57
Cylinder Depth Control Lock . . . . . . . . . . 57
All Plant Opener Assembly . . . . . . . . 58-59
Min-Till Opener Assembly . . . . . . . . . 60-61
All Plant Opener Blades . . . . . . . . . . . . . 62
Min-Till Opener Blades . . . . . . . . . . . . . . 63
Presswheel Assemblies . . . . . . . . . . 64-67
Feed Tubes . . . . . . . . . . . . . . . . . . . . . . . 68
Hydraulics . . . . . . . . . . . . . . . . . . . . . 69-73
Markers . . . . . . . . . . . . . . . . . . . . . . . 74-80
Lighting System . . . . . . . . . . . . . . . . . . . 81
Shaft & Bin Monitor . . . . . . . . . . . . . . . . . 82
Harrow . . . . . . . . . . . . . . . . . . . . . . . 83-86
Fertilizer . . . . . . . . . . . . . . . . . . . . . 87-102
Troubleshooting . . . . . . . . . . . . . . . . . . 103
Specifications
Size & Number Weight w/ Weight w/
Spacing Openers Min-till Openers All Plant Openers Min. HP
40' x 7½" 63 23,105 lbs. 24,050 lbs. 180
40' x 10" 48 21,222 lbs. 21,912 lbs. 180
40' x 15" 32 20,762 lbs. 21,242 lbs. 180
(Opener offset center)
40' x 15" 31 20,686 lbs. 21,151 lbs. 180

2
BE A SAFE OPERATOR
BY THINKING BEFORE ACTING
AND
BY READING
YOUR OWNER'S MANUAL
Avoid Accidents
Most accidents, whether they occur in
industry, on the farm, at home, or on the
highway, are caused by the failure of some
individual to follow simple and fundamental
safety rules or precautions. For this reason
most accidents can be prevented by recog-
nizing the real cause and doing something
about it before the accident occurs.
———————
Regardless of the care used in the design
and construction of any type of equipment,
there are many conditions that cannot be
completely safeguarded against without
interfering with reasonable accessibility and
efficient operation.
A CAREFUL OPERATOR
is the Best Insurance Against an Accident.
The complete observance of one simple
rule would prevent many thousands
of serious injuries each year.
That rule is:
Never Attempt to
Clean, Oil, or Adjust
A Machine While It Is In Motion.
To Our Customers
The following pages and illustrations are
printed to help supply you with the knowledge
to better operate and service your new
CrustBuster equipment.
We are proud to have you as a customer
and feel you will be proud to be a
CrustBuster owner.
Any piece of equipment needs, and must
have, a certain amount of service and main-
tenance to keep it in top running condition.
We have attempted to cover all the adjust-
ments required to fit most conditions; how-
ever, there may be times when special care
must be taken to fit a condition.
Study this owner's manual carefully and
become acquainted with all the adjustments
and operating procedures before attempting
to operate your new equipment. Remember,
it is a machine and has been designed and
tested to do an efficient job in most operating
conditions and will perform in relation to the
services it receives.
If special attention is required for some
condition, ask your CrustBuster dealer; he
will be glad to help and answer any questions
on operations and service of your new ma-
chine.
TAKE TIME FOR SAFETY
3
Safety
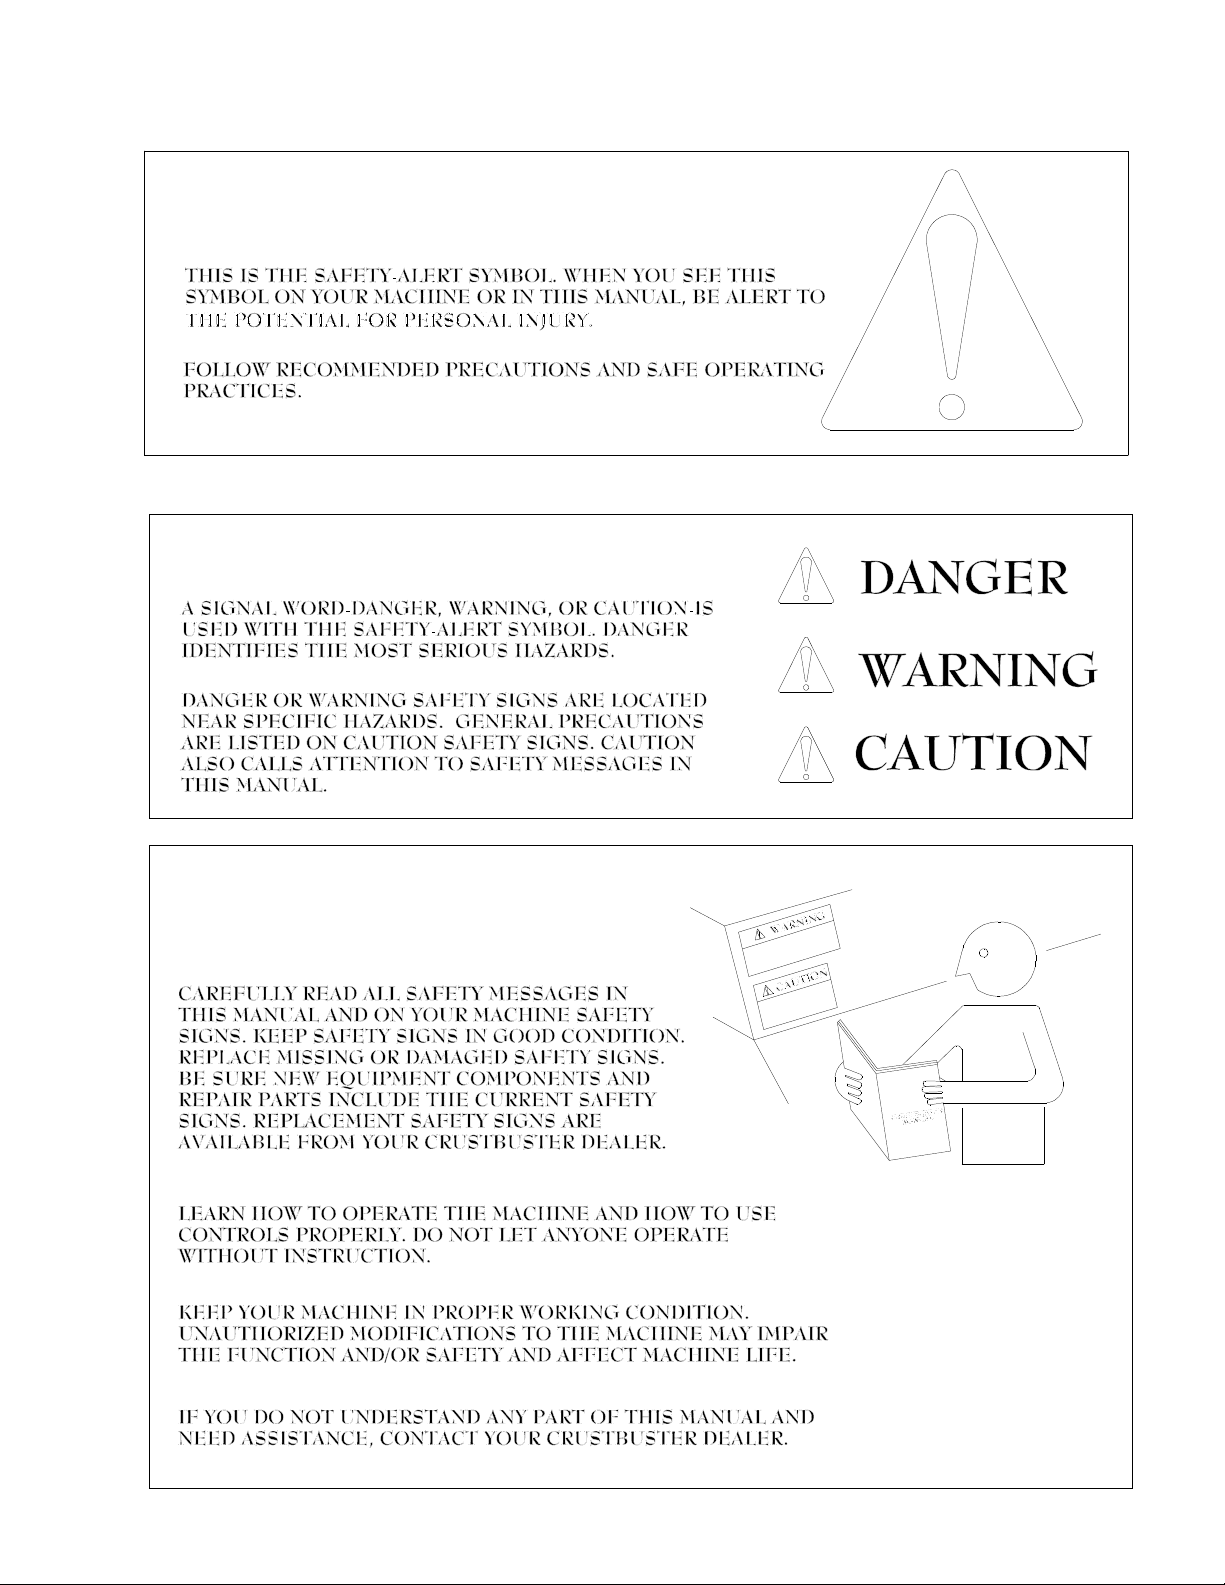
RECOGNIZE SAFETY INFORMATION
UNDERSTAND SIGNAL WORDS
FOLLOW SAFETY INSTRUCTIONS
4
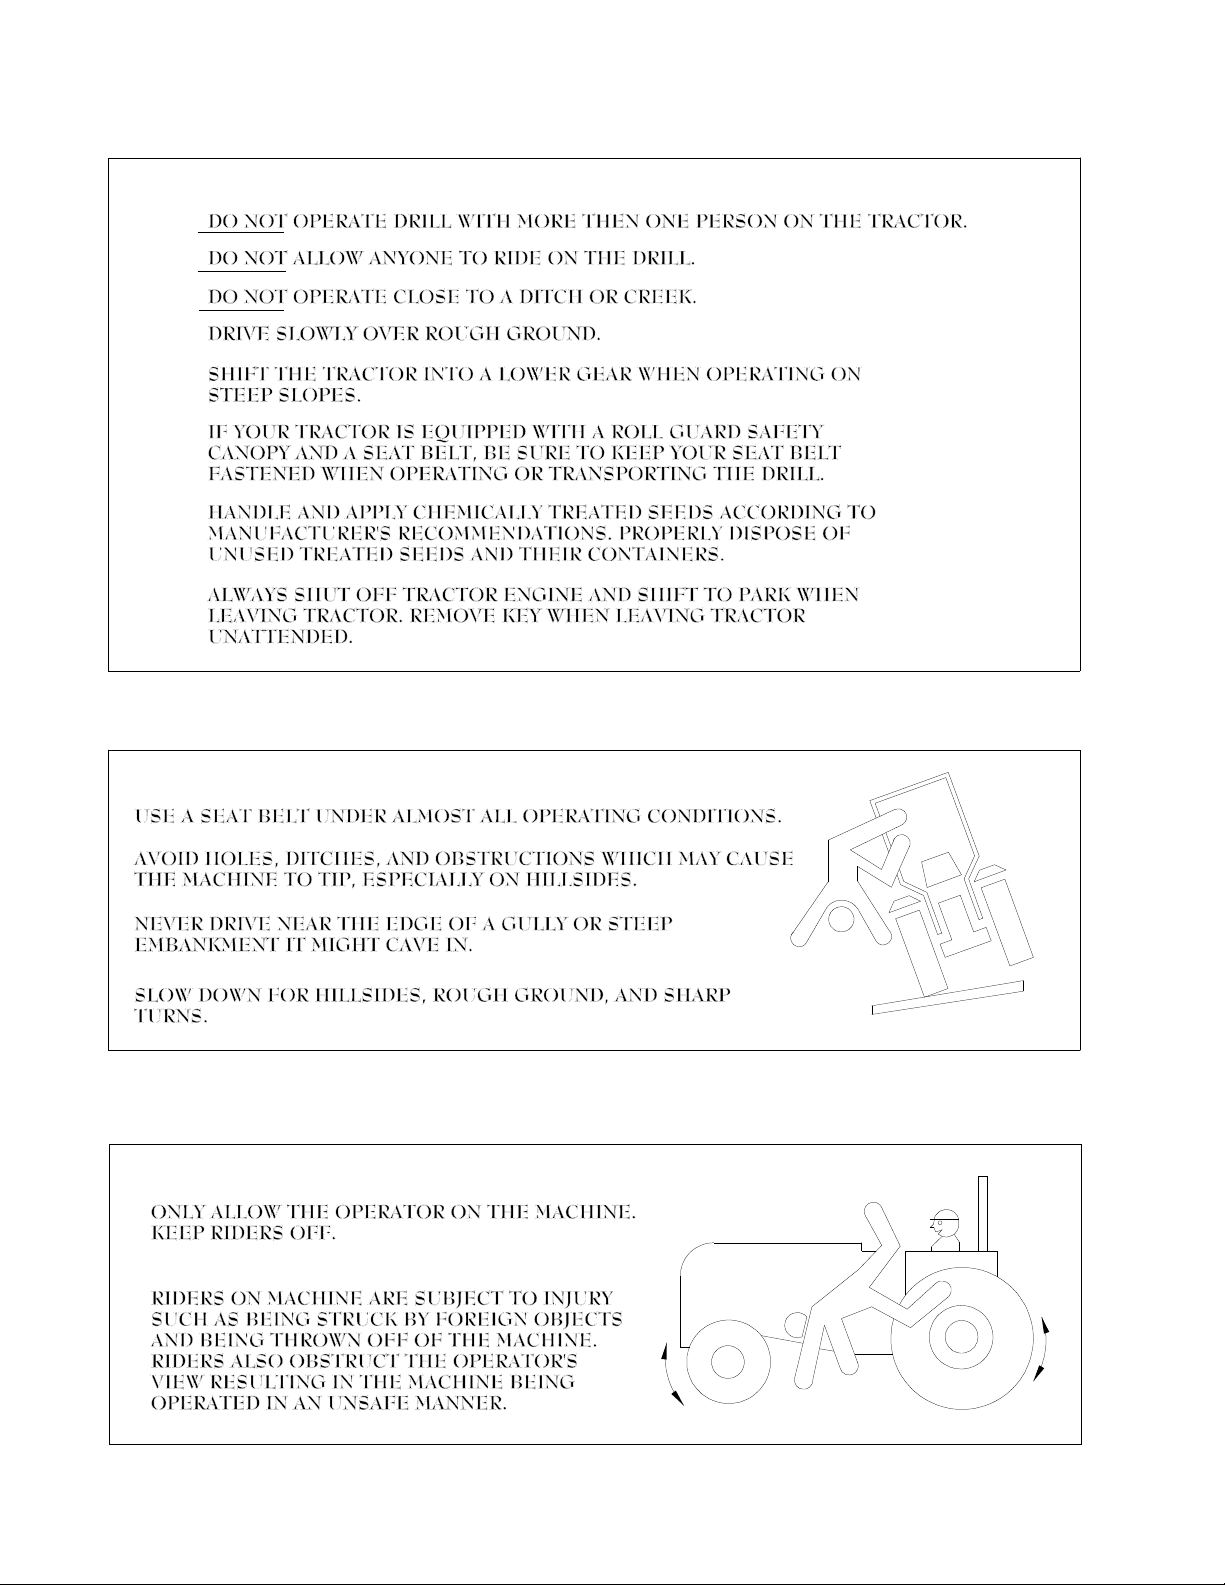
Safety
OPERATE SAFELY
AVOID TIP-OVERS
KEEP RIDERS OFF MACHINE
5
Safety
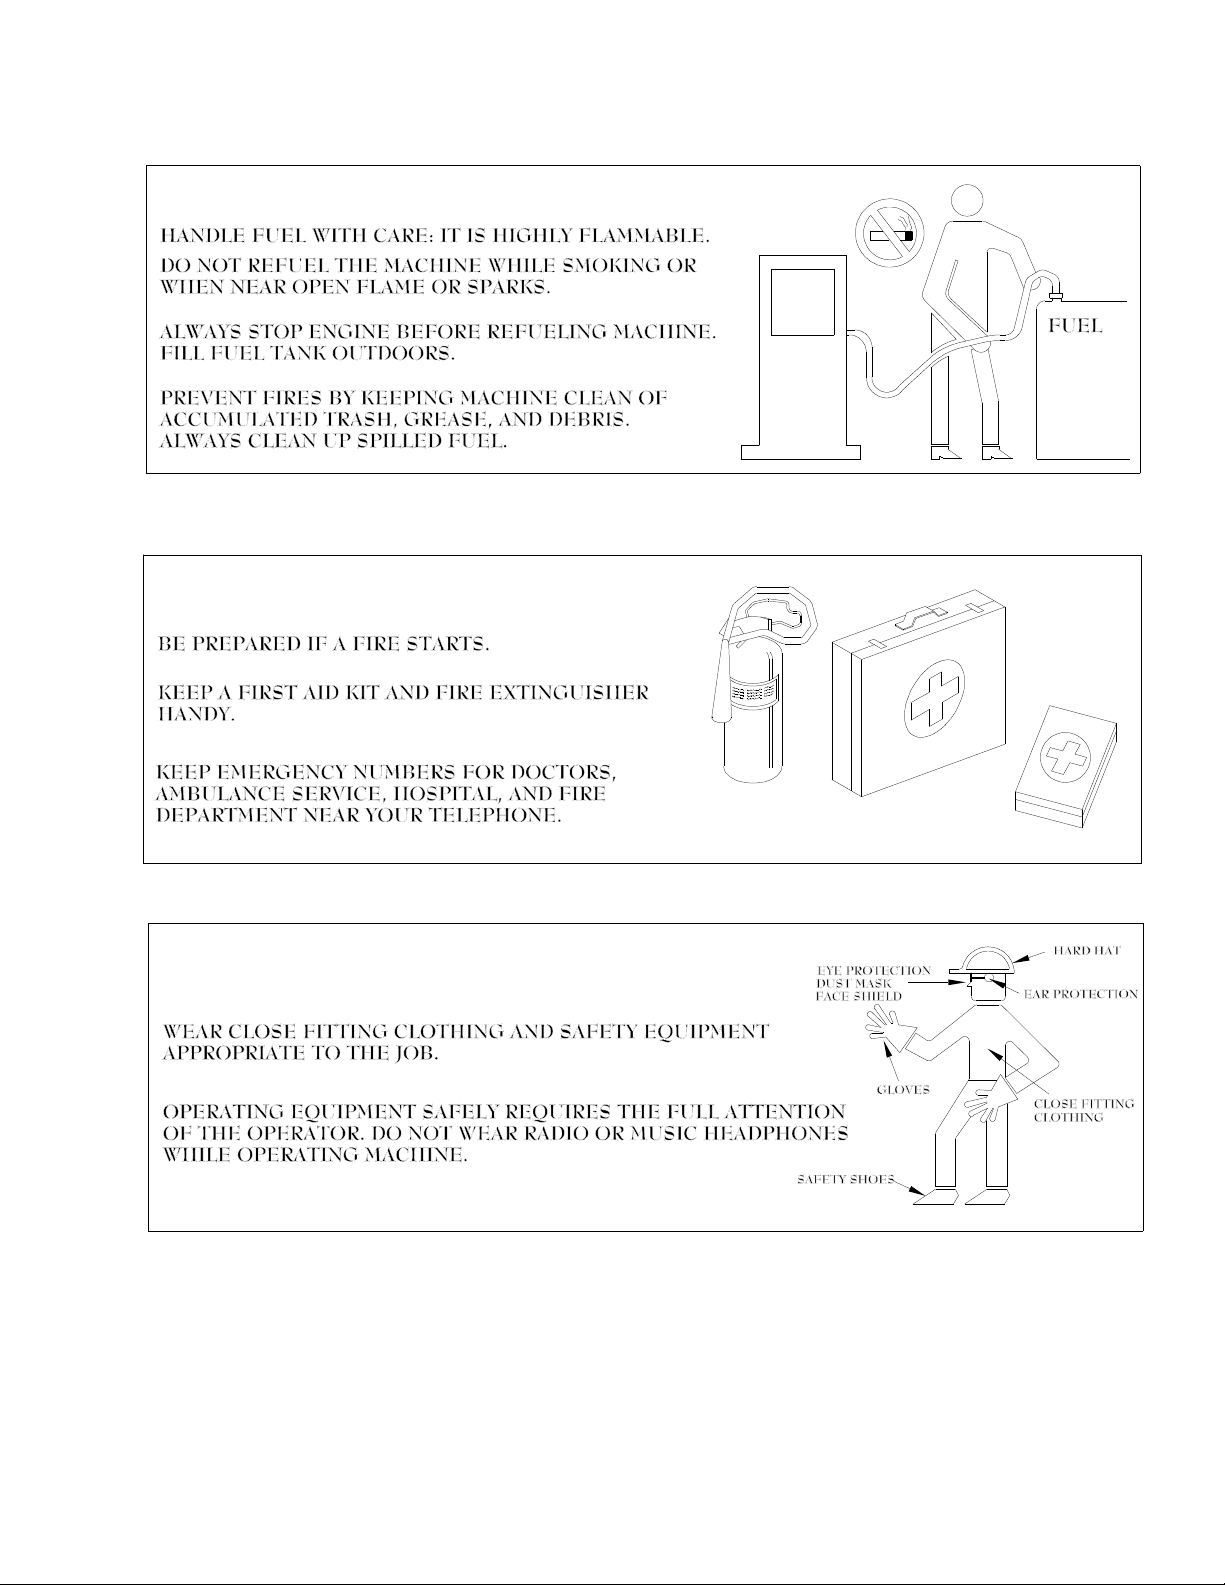
HANDLE FUEL SAFELY - AVOID FIRES
PREPARE FOR EMERGENCIES
WEAR PROTECTIVE CLOTHING
6
Safety
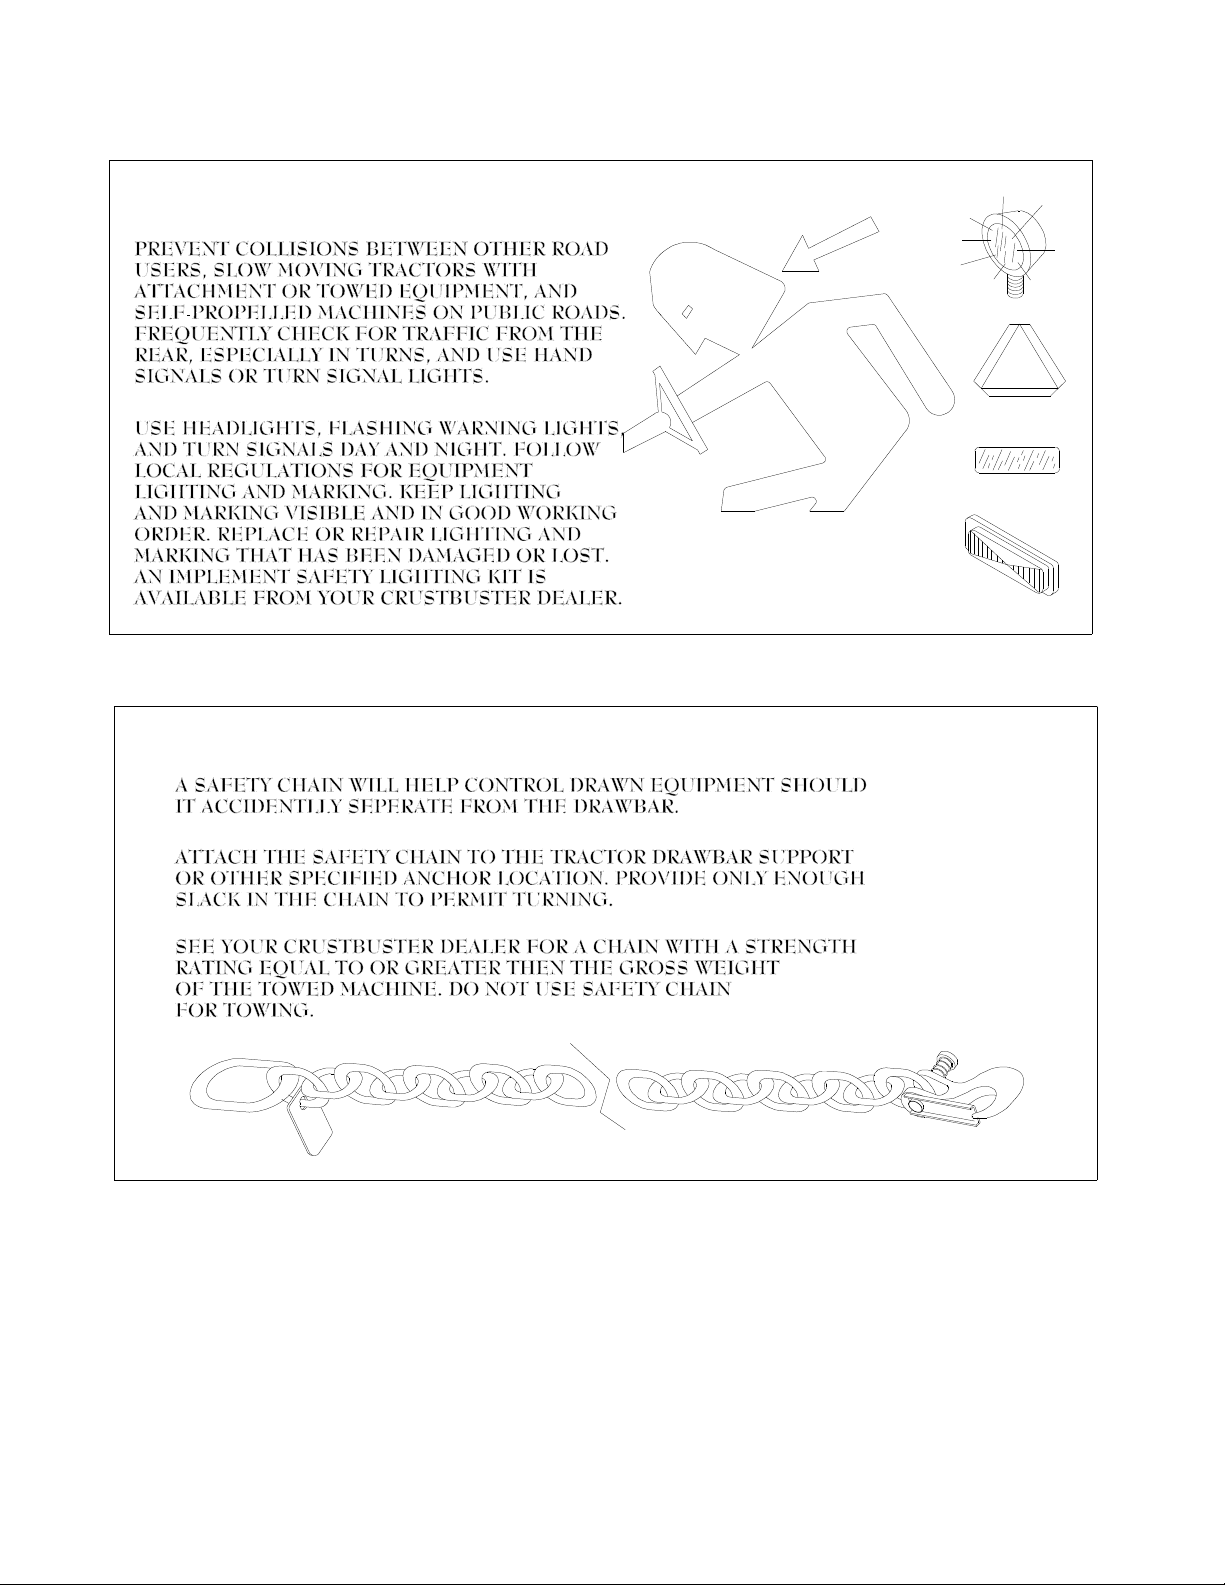
USE SAFETY LIGHTS AND DEVICES
USE A SAFETY CHAIN
7
Safety
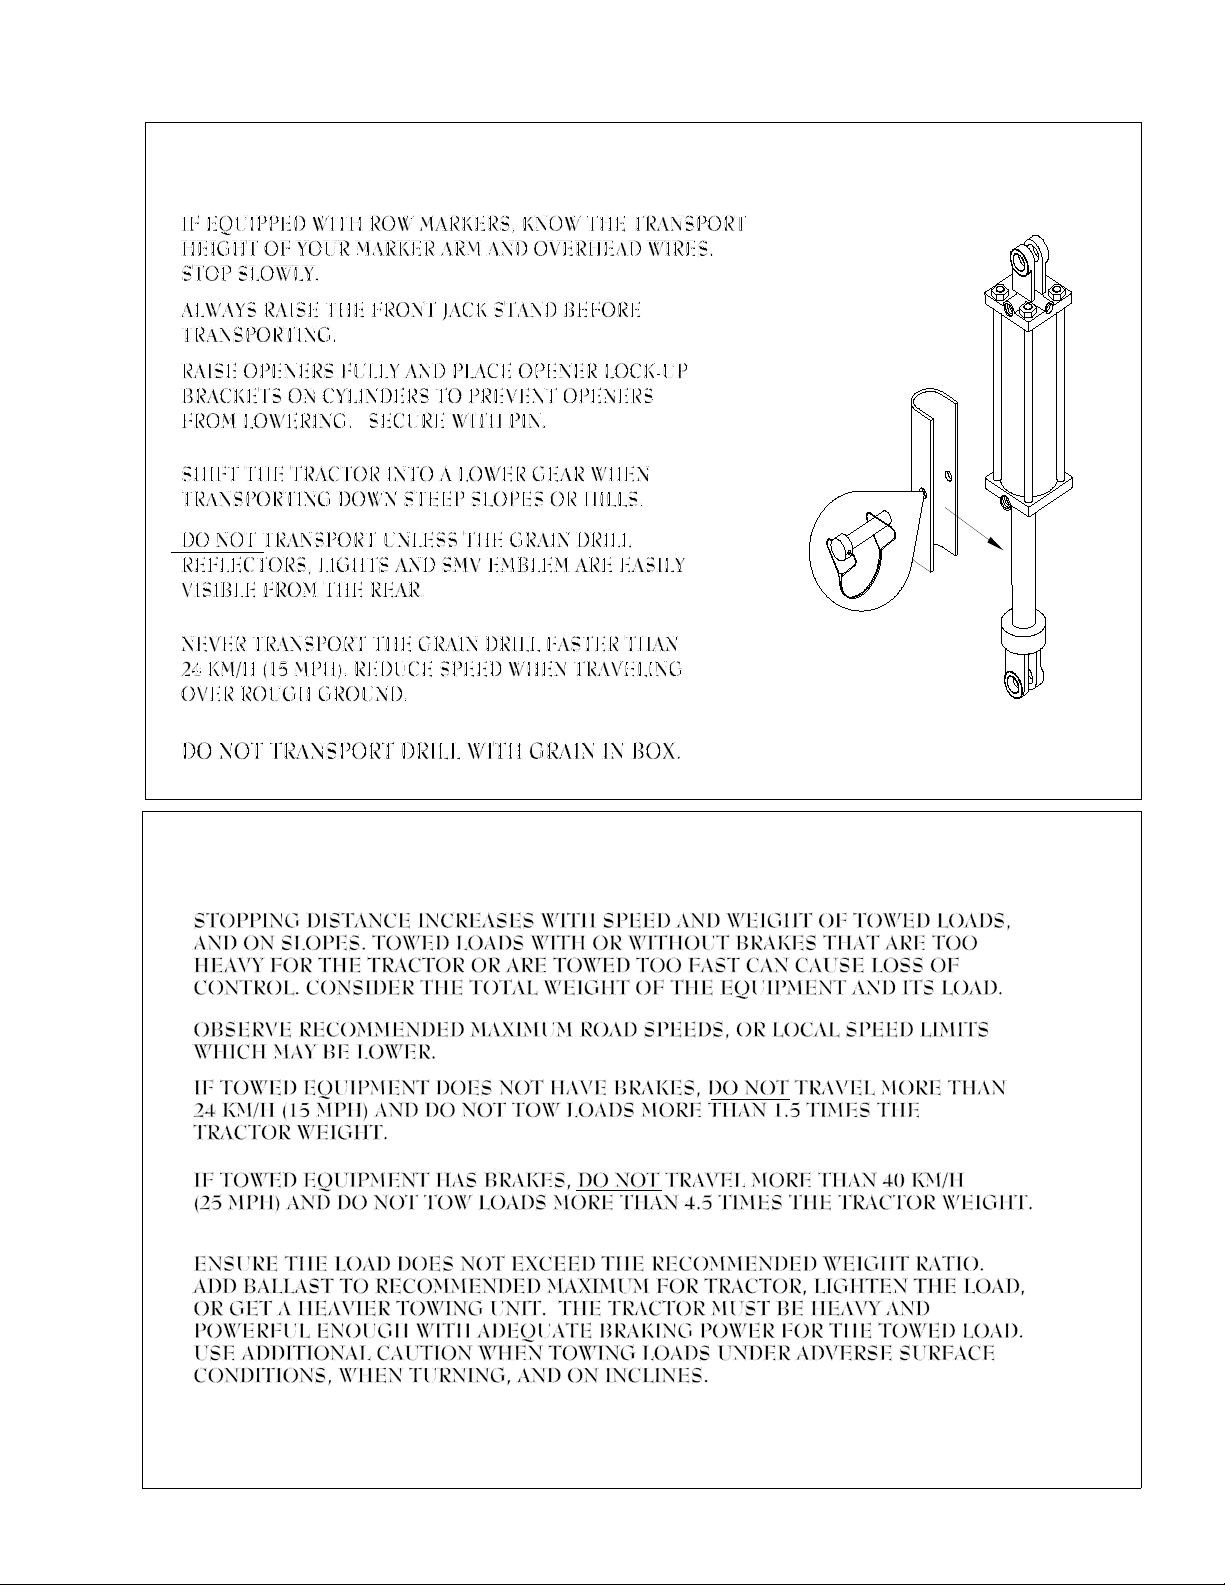
TRANSPORT SAFELY
TOW LOADS SAFELY

8
Safety
PRACTICE SAFE MAINTENANCE
AVOID HIGH-PRESSURE FLUIDS
CHARGE ROW MARKER
HYDRAULIC SYSTEM

9
Before Unfolding and Operating This Equipment ---
Read and understand this owner's manual.
Transport & Safety Instructions
F
When transporting drill, be aware you are towing a 24,000 lb. load with up to 6,550 lb. empty
hitch weight.
Tow width - 16' Tow length - 34'
Take appropriate precautions in stopping, turning, etc. DO NOT EXCEED 15 MPH.
Grain boxes are to be empty in transport to avoid exceeding the capacity of the 4740
drill center towing tires.
Follow tire manufacturer's recommendations regarding inflation for towing.
(Goodyear farm implement tire for highway and agriculture usage)
Mfg stated capacity @ 90 PSI = 4870 lb.
4740 Drill load per tow tire empty boxes = 4387 lb.
4740 Drill load per tow tire full boxes = 5600 lb.
F
Use a minimum hitch pin of 1" with lock nut to towing vehicle. DO NOT use a hairpin or wire
to secure hitch pin. Make sure adequate safety chains are in place.
F
NEVER use an unsecured pin in draw bar.
F
Before transporting, make sure transport locks are in place on the wing carrier arms located
under the hitch and on tool bar lift cylinders.
F
Lug bolts should be checked prior to towing, after 1 mile of transport, within the next 20 miles
and periodically thereafter. Check hubs for excess heating.
F
Make sure center section drive wheel throw-out pin is disengaged when transporting
F
Make sure 3-point linkages are raised completely to clear hitch.
F
If your tractor does not already have a lighting receptacle, install one. Always plug in the drill
lighting system to a correctly wired tractor and USE for transport safety. Wiring should be
extended into tow tractor for turn and stop light.
F
Connect the 7 pin lighting plug to the tractor receptacle and use at all times. Confirm the
correct lights are operating if your tractor is not wired by industry standard code. Standard 7
pin receptacles are available through your dealer, local truck supply stores, and auto parts
facilities.
F
Before operating hydraulics, remove all transport locks or damage to drill will result.
F
Never have more than 391 lbs. per section on the walkboards without drill securely attached
to tractor or towing vehicle.
CAUTION: Your drill weighs more than the towing vehicle. The drill is NOT
equipped with brakes. EXERCISE EXTREME CAUTION ! Maximum
allowable speed - 15 mph.
NEVER ALLOW ANYONE TO RIDE THE DRILL!

10
Fold and Unfold Instructions
F
Folding or unfolding of drill should be done on nearly level ground with the tractor transmission
in neutral.
F
When drill is plumbed with markers, the manual selector valve located at rear and top of hitch
will have to be shifted from marker to fold system.
F
During the fold and unfold operation, be sure to stay clear of pull bar slides located at front top
of hitch.
F
Check that all wing carrier cylinder locks are removed.
F
Lower wings by rotating wing carrier arms down out of hooks on front of wing frames. Be sure
wing carrier arms are clear of wing frames before unfolding. Unfolding is complete when pull
bar slides are pulled back against stop, and locked in place by automatic locks located at front
top of hitch. When folding, automatic locks will release pull bar slides.
F
Be sure wing carrier arms are lowered to clear wing frames when folding.
F
When pull bars come together against bumpers, and rollers on wing carrier arms are centered
under guides on wing frames, drill is completely folded. Wings can now be raised.
F
Be sure rollers are securely in hooks on wing frames.
F
Install cylinder locks on wing carrier lift cylinders.
F
Drill is now ready for transport. USE GOOD JUDGEMENT AND SAFE OPERATING
PROCEDURES WHEN TRANSPORTING.
Field Operating Checklist
____ Remove ALL transport locks.
____ Inflate tires to recommended air pressure.
____ Lubrication as required.
____ Seed shafts turned manually to check for obstructions and improper chain alignment on drive
sprockets.
____ Correct sprocket selection and slot width for seed type and size.
____ Calibration as required for accuracy.
____ Drill adjusted at hitch for level field operation.
____ Cylinder stop set for proper toolbar rotation (Initial setting recommended - 1").
Both cylinders for each bar are set equally to avoid twisting tool bar.
____ Down pressure set for soil conditions.
____ Acre meter reset.
____ Lower drill while moving forward to avoid plugging openers.
____ Check seed depth and adjust accordingly.
____ Allow no riders.
____ After approximately 10 hours, check tool bar bolts, wheel bolts, presswheel swivel bolts, etc..
Make sure they are tight.
Other manuals for 4740
1
Other CrustBuster Farm Equipment manuals

CrustBuster
CrustBuster Speed King Drive Over- Pit User manual

CrustBuster
CrustBuster 3200 User manual

CrustBuster
CrustBuster Speed King Seed Tote 4 Box User manual

CrustBuster
CrustBuster Speed King 10" BeltVeyor User manual

CrustBuster
CrustBuster Seed Tender 160 User manual

CrustBuster
CrustBuster COTTON MODULE BUILDER User manual

CrustBuster
CrustBuster 1325 User manual

CrustBuster
CrustBuster 4740 User manual

CrustBuster
CrustBuster 4000 Series Use and care manual

CrustBuster
CrustBuster DrillMaster User manual


