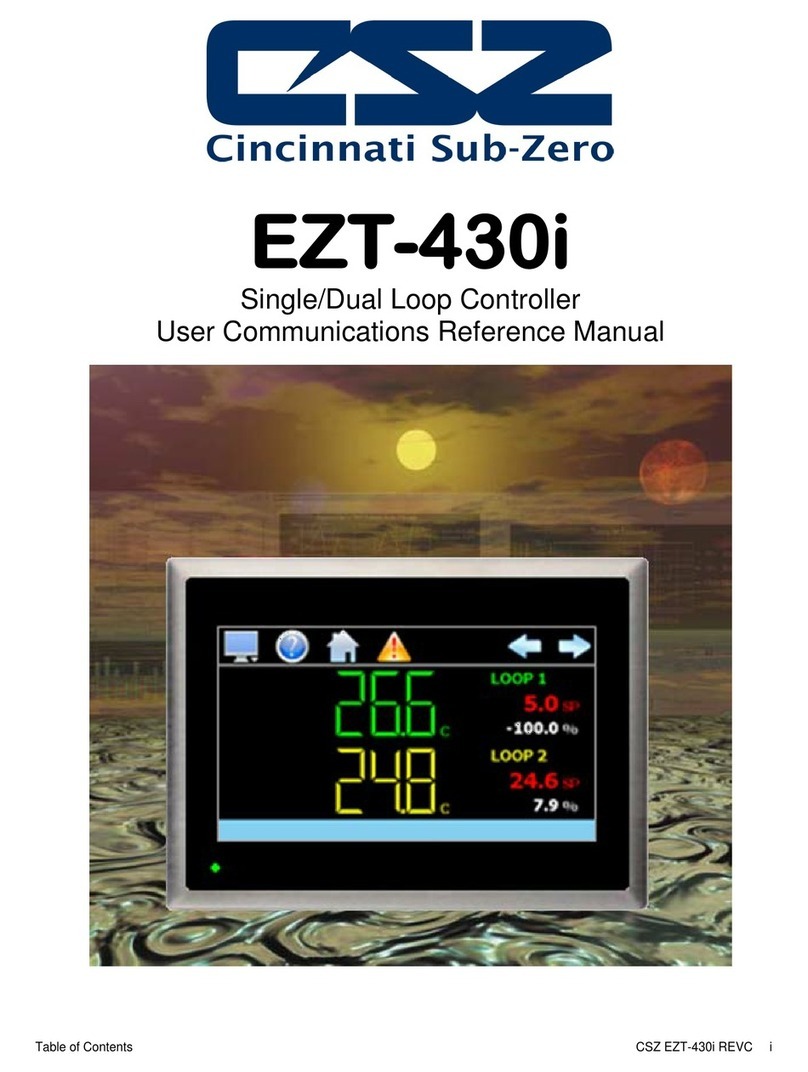
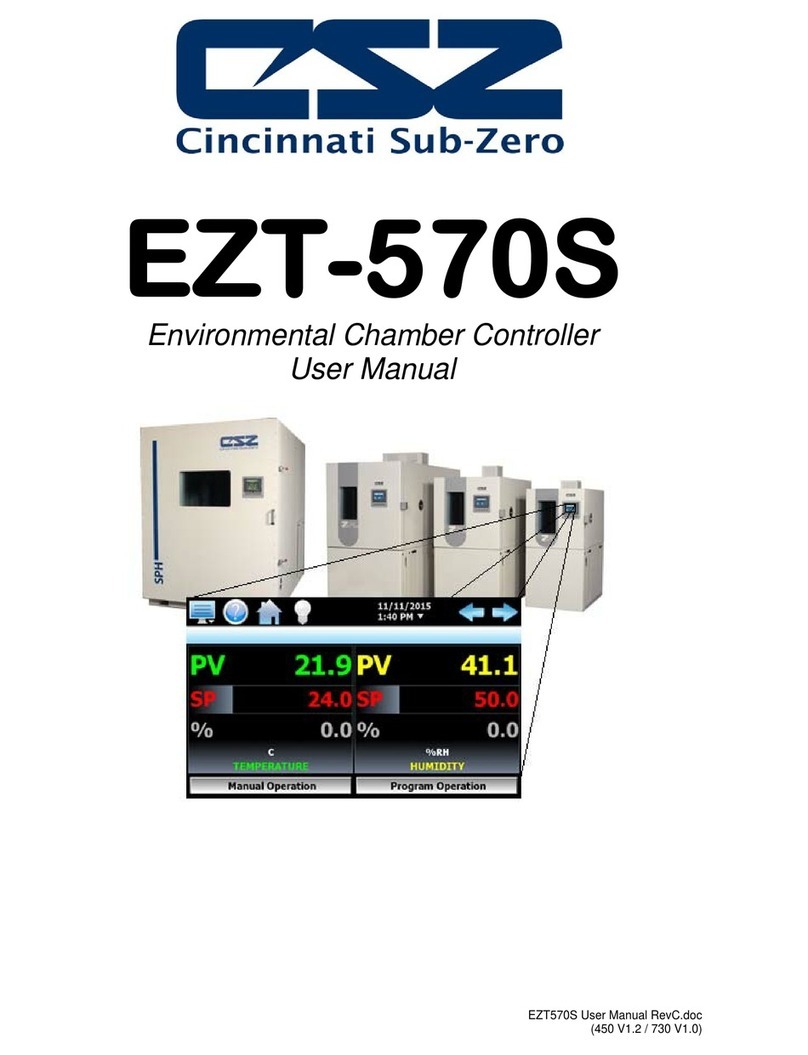
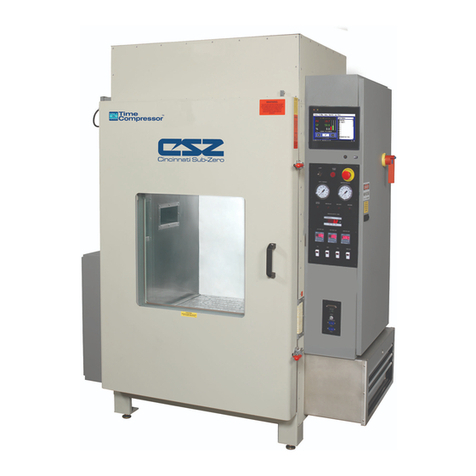
CSZ EZT-430i Instruction sheet

EZT-430i
Single/Dual Loop Controller
Configuration Manual

EZT-430i
CSZ EZT-430i Preface
Safety Information in this Manual
Notes, cautions and warnings appear throughout this book to draw your attention to important operational and
safety information.
A “NOTE” marks a short message to alert you to an important detail.
A “CAUTION” safety alert appears with information that is important for protecting your equipment and
performance.
A “WARNING” safety alert appears with information that is important for protecting you, others and equipment
from damage. Pay very close attention to all warnings that apply to your application.
This symbol (an exclamation point in a triangle) precedes a general CAUTION or WARNING
statement.
This symbol (a lightning bolt in a lightning bolt in a triangle) precedes an electric shock hazard
CAUTION or WARNING safety statement.
Technical Assistance
If you encounter a problem with your EZT-430i controller, review all of your configuration information to verify
that your selections are consistent with your application: inputs; outputs; alarms; limits; etc. If the problem
persists after checking the above, you can get technical assistance by dialing 1 (513) 772-8810 or by faxing
your request to 1 (513) 772-9119, Monday thru Friday, 7:30 a.m. to 5:30 p.m. Eastern Standard Time. You
can also email your request to cszinc@cszinc.com.
An applications engineer will discuss your application with you.
Please have the following information available:
• Complete Model #’s and/or Serial #’s for Component(s) in Question
• Complete Software Version #’s
• All Configuration Information
• All User Manuals
Warranty and return information is on the back cover of this manual.
Your Comments
Your comments or suggestions on this manual are welcome. Please send them to:
Cincinnati Sub Zero, 12011 Mosteller Road, Cincinnati, OH 45241
Telephone: +1 (513) 772-8810 751-5444; fax: +1 (513) 772-9119
cszinc@cszinc.com
The EZT-430i is copyrighted by Cincinnati Sub Zero, © 2012, all rights reserved (www.cszindustrial.com)

EZT-430i
Table of Contents CSZ EZT-430i i
1What is EZT-430i?.....................................................................................................1.1
1.1 Features...............................................................................................................................................1.1
2Configurator Overview .............................................................................................2.1
2.1 Configurator Menu ...............................................................................................................................2.2
3Configuring EZT-430i...................................................................................................1
3.1 Loop Setup..............................................................................................................................................1
3.2 Loop Address Utility................................................................................................................................2
3.3 User Communications.............................................................................................................................3
3.4 Loop Configuration..................................................................................................................................4
3.4.1 Input Sensor Selection .....................................................................................................................4
3.4.2 Input Unit Selection ..........................................................................................................................5
3.4.3 Decimal Point....................................................................................................................................5
3.4.4 Input Low/High Scale........................................................................................................................5
3.4.5 Input Filter.........................................................................................................................................6
3.4.6 Event Input Function.........................................................................................................................6
3.4.7 Low/High Setpoint Limits..................................................................................................................7
3.4.8 Output 1 Function.............................................................................................................................7
3.4.9 Output 1 Failure Transfer .................................................................................................................8
3.4.10 Output 1 ON-OFF Control Hysteresis ..............................................................................................9
3.4.11 Output 1 Cycle Time.........................................................................................................................9
3.4.12 Output 1 Low/High Limit Values .......................................................................................................9
3.4.13 Output 2 Function.............................................................................................................................9
3.4.14 Output 2 Failure Transfer ...............................................................................................................10
3.4.15 Output 2 Low/High Limit Values .....................................................................................................10
3.4.16 Output 3 Function...........................................................................................................................11
3.4.17 Output 3 Failure Transfer ...............................................................................................................11
3.4.18 Output 4 Function...........................................................................................................................11
3.4.19 Output 4 Failure Transfer ...............................................................................................................12
3.4.20 Output 4 Low/High Limit Values .....................................................................................................12
3.4.21 Output 4 Retransmit Low/High Scale .............................................................................................12
3.4.22 Alarm (1-3) Function.......................................................................................................................13
3.4.23 Alarm (1-3) Mode............................................................................................................................14
3.4.24 Alarm (1-3) Indication .....................................................................................................................15
3.4.25 Alarm (1-3) Setpoint .......................................................................................................................15
3.4.26 Alarm (1-3) Hysteresis....................................................................................................................15
3.4.27 Setpoint at Start of Automatic Program..........................................................................................16
3.4.28 Setpoint at End of Automatic Program...........................................................................................16
3.4.29 Power Fail Recovery ......................................................................................................................17
3.4.29.1 Enabling Holdback ...................................................................................................................18
3.5 Calibration.............................................................................................................................................20
3.6 Functions...............................................................................................................................................21
3.7 Startup View..........................................................................................................................................24
3.8 Alarm/Event Tagnames.........................................................................................................................25
3.8.1 Alarm Names..................................................................................................................................25
3.8.2 Event Names..................................................................................................................................25
3.9 Custom Name\Address.........................................................................................................................26


EZT-430i
What is EZT-430i? CSZ EZT-430i 1.1
1 What is EZT-430i?
The EZT-430i system combines all of the features of a loop controller, video/chart recorder and data logging
system into a single/intuitive device. Email, SMS (text messaging), FTP (file transfer protocol for automated
data backup) and remote view/control (Web server/VNC server) are standard with EZT-430i and can be
accessed via LAN/WAN using a PC, tablet or smart phone device.
Future Designs “EZT-430i” provides a 4.3”color touch screen interface with standard “Smart Device” user
interface features for single and dual loop OEM control applications. All loop configuration and runtime user
access is configurable at the device with no PC software required. OEM’s have the ability to configure
runtime features (screen availability, menus, language, etc...) to easily customize the system for their
requirements. These configurations can be imported/exported to any other EZT-430i single/dual loop device
for setup (from scratch) within minutes.
Individual high performance board level PID loop control boards (one for each loop) offer up to four control
outputs each, powerful profiling capabilities with up to three events and full auto tune functionality with high
resolution process inputs.
1.1 Features
Each of the EZT-430i loop control boards provide a single digital input that can be programmed as a
automatic program control input for run, hold or abort, a manual mode or failure transfer control input or a
program advance to next segment control input.
Each of the loop control boards also provide up to four control outputs which can be used as PID control
outputs for heat/cool, direct outputs for controlling external equipment related to the application through
software switches called events, or be programmed to act as system alarm outputs.
EZT-430i can be operated in single set point or automatic program control mode. Program entry is made
easy through the use of copy, paste and delete menu selections. Programs can be copied to the external
USB memory stick and then imported to another EZT-430i controller which eliminates the need to enter
duplicate programs into multiple systems.
Data file analysis tools make looking at historical data a simple task. Any control variable saved to the data
file can be plotted on the historical data chart for any time frame within the data file’s total time range.
The built in Ethernet functionality includes a ‘Web Server’ to provide access to all EZT-430i data (view only), a
VNC interface for remote control and monitoring and an NTS clock, all available via a local Intranet
connection (wired or wireless), or the World Wide Web using standard software like Microsoft’s Internet
Explorer.
EZT-430i provides a rich set of tools for control interaction and process monitoring. Views include single and
dual loop views, charts, alarm, automated program status as well as historical data, alarm log and audit trail
views. The menu driven interface eliminates screen “clutter” by providing an easy to use “Smart Device”
interface for interaction between the user and EZT-430i.
EZT-430i can store more than one year of data on its SD memory card. Data logging can be enabled
manually or automatically during program operation. Data backup is provided with a USB memory stick for
plug and play transfer of files to any PC running Microsoft Windows XP operating systems and via the FTP
back-up utility.
EZT-430i protects system access with 4 level security (user rights based), audit trails that document all user
activity and ensures data integrity by digitally signing all data files and audit trails to meet regulatory
requirements.

EZT-430i
1.2 CSZ EZT-430i What is EZT-430i?
The EZT-430i controller includes the following features:
• Single/Dual loop controller models (automatic program operation included).
• Touch screen, “Smart Device” user interface (UI).
• Video recorder mode for view only applications.
• Email, SMS, FTP, VNC and Web functionality standard.
• Remote View/Control using PC, Tablet or Smartphone.
• Detailed maintenance, alarm monitoring and alarm history.
• User configurable data logging and historical data viewer.
• 4 level security with digitally signed audit trails and data files.
• National time server connectivity with daylight savings.
• Multi-lingual user interface supports over 25 languages.
• 30,000 hour LED display

EZT-430i
Configurator Overview CSZ EZT-430i 2.1
2 Configurator Overview
The EZT-430i configurator is a powerful tool that allows full customization of EZT-430i. It is a program that
allows the OEM or user to set up control system options for the EZT-430i runtime application. The
configurator program will not run at the same time as the main runtime software.
The configurator can be run when the runtime software is exited and the “Exit and run configurator on next
power-up” option is selected. The next time the unit is re-powered the configurator will run.
Control functions of each loop control board can be changed while the OEM or operator is editing the
configuration of EZT-430i through the configurator program, so any equipment being controlled by the outputs
should be placed in an “off” state so that any changes will not cause an unsafe condition or damage to
equipment.
NOTE: Each time the EZT-430i configurator software is exited; the controller runtime software will run after
the unit is re-powered.
The EZT-430i configurator provides the following functionality:
•Set the number of control loops that EZT-430i will use (single/dual).
•Provide control loop configuration settings for input type, output function, set point range, etc.
•Select the type of user communications for Modbus Slave interface.
•‘Splash Screen’ name editing for custom OEM or user requirements.
•Enable/disable options for runtime menu and screen availability.
•Text editing for all system event and alarm output names.

EZT-430i
2.2 CSZ EZT-430i Configurator Overview
2.1 Configurator Menu
The configurator menu is accessed by pressing the “Monitor” icon at the top left of the screen.
The File menu provides the exit function for the configurator.
After selecting this menu item and exiting the configurator, the
controller runtime software will run after the unit is re-powered.
The Setup menu provides access to the primary controller
setup options. These options include
the controller type
(single/dual loop), the loop control board settings, user
communications selection and the loop address utility that can
be used to automatically assign the proper communications
address to an attached loop control board.
The Calibration menu provides access to the input offset
calibration settings for the loop control boards.
The Startup menu provides access to enable and disable EZT-
430i runtime screens/menus and the desired startup view
selection.
The Tagnames menu provides access to the text editing
functions of the configurator which allow the event and alarm
names to be changed to match their use in the system. The
menu also provides access to edit the splash screen
information that is shown when the runtime application starts.

EZT-430i
Configuring CSZ EZT-430i A.1
3 Configuring EZT-430i
IMPORTANT: Once all configuration settings are made, you must select “Exit” from the File menu to exit the
configurator prior to cycling power to EZT-430i. All configuration files are written upon exiting
the configurator. Do not cycle power prior to exiting the configurator or settings will be lost
and EZT-430i will not operate properly when entering the runtime application.
3.1 Loop Setup
The “Loop Setup” screen is accessed from the Setup menu. It provides the control type selection and entries
for setting the loop names and display units.
The Control Type selection sets the number of loop control boards that will be attached to EZT-430i, one
(single loop) or two (dual loop). When the EZT-430i runtime application is started, EZT-430i will automatically
configure all loop view displays, charts and available data log point selections based on the control type
selection and individual loop setup.
The Loop Name fields are used to enter a specific name for each control loop, up to 11 characters in length.
This name will be used throughout the EZT-430i runtime application and can be used to provide a more
detailed description as to the function of the loop in the application. Default tag names are LOOP 1 and
LOOP 2.
The Units fields are used to enter the engineering units for the loop with up to four characters maximum.
This value is shown on the single and dual view loop screens in the EZT-430i runtime application. When the
loop input type selection is set for temperature, the field will be fixed at either “C” or “F” based on the units
selection for the loop under loop setup. If the loop input type is set for a linear input type (0-10V or 4-20mA
for example), the engineering units can be edited and changed to the required units for the measured process
value.

EZT-430i
A.2 CSZ EZT-430i Configuring
3.2 Loop Address Utility
In order for EZT-430i to properly communicate with each of the loop control boards, they must be configured
for the proper communications address. The factory default communication settings of the loop control
boards are set for a communications address of one, which correspond to the proper settings for loop 1. For
a single loop EZT-430i control system, no further settings are required. Simply connect the communications
wiring between the control board and the EZT-430i interface, and the system is ready to go.
For a dual loop EZT-430i control system, one of the control boards must be set for address two which
corresponds with loop 2 of EZT-430i. If a display module is not available to connect to the loop control board
in order to set its address, the Loop Address Utility can be used. It is accessed from the Setup menu.
In order to use the utility, only one loop control board can be connected to EZT-430i at a time. Since the
default address of all control boards are 1, if more than one was connected, they would both respond to the
same command which would cause them both to be set to a different address. If both loop control boards are
connected, disconnect the communications wiring from the loop control board that you DO NOT want to set
the address on. An alternative is to remove power from the loop control board rather than disconnecting the
communications wiring.
With only one loop control board powered on or connected to EZT-430i via the communications link, press the
“Assign to Loop” button for the loop that you want to assign the control board to. The utility will begin
scanning for the loop control board and set its address to the proper address once found. If the utility fails to
set the address, check the wiring to insure it is properly connected. If the loop control board has been
previously used for another application, it may be possible that the address or other communications settings
have been changed, which prevent the utility from working. In this case, a display module must be connected
to the loop control board to set the proper communications settings:
Address: 1 or 2 (for loop 1 or loop 2)
Baud rate: 9600
Parity: Even
IMPORTANT: The loop input number corresponds to the communications address that must be set in the
loop control board for EZT-430i to access it properly. If the communications address is not
set properly in the loop control, EZT-430i will not be able to communicate with it, or may
communicate with the wrong loop control and assign the incorrect set points and control
parameters to it.

EZT-430i
Configuring CSZ EZT-430i A.3
3.3 User Communications
The Modbus slave interface of EZT-430i can be set to operate in one of two modes. The default setting is to
provide the standard user interface for use with CSZ’s Envision software. This selection assigns values to the
Modbus slave register table in the proper positions to allow communications between EnVision and EZT-430i.
The second selection configures the Modbus slave interface to simulate the communications interface for a
“Watlow F4S/D” controller. This selection assigns EZT-430i control values to the corresponding register
addresses of a Watlow F4S/D controller allowing limited compatibility with Watlow’s WatView software. This
provides current users of the F4 controller and WatView software a control option for the replacement for
aging F4 controllers while keeping the common software interface without the need for training on the use of
different software.
IMPORTANT: The Watlow F4S/D interface is limited to basic set point adjustment, event output control;
profile operation and single profile download using WatView’s profile editor. Attempting
unsupported functions may cause errors in the operation of WatView software and require it
to be restarted.
See the EZT-430i Cincinnati User Communications Reference Manual for details on the use
of the Modbus slave interface including communications settings, register addresses and
their associated values as well as the functionality of the selected interface type.

EZT-430i
A.4 CSZ EZT-430i Configuring
3.4 Loop Configuration
The Loop 1 and Loop 2 Configuration screens are accessed from the Setup menu. The screens provide all
settings related to the setup of the loop control boards. The up and down scroll (arrow) buttons allow the user
to scroll through the list of configuration items for the loop. The list also supports touch-flow, so the user can
simply touch the list and drag their finger up or down to scroll through the list items.
To change the setting for an item, select it from the list by touching it, and press the “Edit” button. If the entry
is a simple numeric value, the number entry pad will be shown to allow the user to enter a new value. If the
item has multiple selections available, a list of individual selections for the item will be shown that the user can
then select from.
3.4.1 Input Sensor Selection
The Input Sensor Selection is used to select the type of sensor that will be connected to the loop control
board. The input type can be a temperature input (thermocouple or RTD) or a linear input type (Vdc or mA).
NOTE: The loop control board is ordered with either a standard input for thermocouples and RTD’s, a
voltage input or a milliamp input. The selected input type must be set to match the type of input
supplied on the loop control board or the unit will not operate correctly.

EZT-430i
Configuring CSZ EZT-430i A.5
The input type selections are mutually exclusive, i.e., selecting one input will turn all other selections off.
Once the desired input type has been selected, press the “Done” button to set the input type for the loop
control board and return to the main Loop Setup screen.
3.4.2 Input Unit Selection
The Input Unit Selection is used to select the temperature units for temperature input types (thermocouple or
RTD). If the selected input type is a linear input (Vdc or mA), the unit selection will default to process allowing
user entry for engineering units for the loop on the Loop Setup screen.
The input unit selections are mutually exclusive, i.e., selecting one will turn off the other. Once the desired
temperature units have been selected, press the “Done” button to set the input units for the loop control board
and return to the main Loop Setup screen.
3.4.3 Decimal Point
The decimal point entry allows the input precision to be adjusted between 0 and 1 decimal digits for
temperature input types, between 0 and 2 for a 0-60mV input and from 0 to 3 for Vdc and mA input types.
IMPORTANT:Once the loop control board has been configured with a specific decimal point, changing the
decimal point will require the loop control board to be reconfigured in order to maintain
previous control settings. Automatic programs, alarm set points, set point limits, input
low/high scale, etc., DO NOT automatically scale. An entry of 100.0 becomes 1000 when
changing the decimal point to zero (not 100), and must be re-entered to set the proper value.
3.4.4 Input Low/High Scale
The input low and high scale values are used to set the input range for linear input types (Vdc or mA). The
entries are not available for temperature input types since they utilize a fixed range based on the sensor type.
The input low scale value can be set from -32768 up to the high scale value minus 50. The high scale value
can be set from the low scale value plus 50 up to 32767.
NOTE: The minimum and maximum scale values are limited by the decimal point selection.For a decimal
of 0, the values are -32768 and 32767 respectively. For one decimal point, the values are -3276.8
and 3276.7. For two decimal digits, the values are -327.68 and 327.67 and for three decimal digits
the values are -32.768 and 37.767.

EZT-430i
A.6 CSZ EZT-430i Configuring
3.4.5 Input Filter
The Input Filter Selection is used to select the time constant to be used for filtering the process input.
The time constant selections are mutually exclusive, i.e., selecting one will turn off the others. Once the
desired filter constant has been selected, press the “Done” button to set the input filter for the loop control
board and return to the main Loop Setup screen.
3.4.6 Event Input Function
The Event Input Function is used to select the desired mode of operation for the digital input of the loop
control board. The event input selections are mutually exclusive, i.e., selecting one will turn off the others.
Once the desired function has been selected, press the “Done” button to set the event input function for the
loop control board and return to the main Loop Setup screen.
IMPORTANT:If EZT-430i is set for dual loop operation, both loop control boards must be set to the same
function and both inputs must be wired to the same control switch if automatic ramp/soak
programs are to be used. If the input operation for both loop control boards is not identical,
program operation of one loop may continue while the other may be terminated due to the
input function selected.If program operation is not desired and will be disabled, then the
event input functions do not have to match.

EZT-430i
Configuring CSZ EZT-430i A.7
The Automatic program run function is a single-shot action that will start the currently loaded program when
the event input is activated.
The Automatic program hold function will put the currently running program into hold when the event input
is activated. The program will resume operation and return to the run mode when the input is deactivated.
The Automatic program abort function is a single-shot action that will abort the currently running program.
Note that the abort function does not work if the program is in hold. The program must be running in order for
the abort function to work.
The Manual mode function puts the loop control board into manual output mode when the input is activated.
This stops all PID control action allowing the user to manually enter a fixed percentage of output. The loop
control will return to normal PID control action when the input is deactivated.
The Failure transfer function puts the loop control outputs into failure transfer mode when the input is
activated. The output will then go to the percent output value set for failure transfer. The loop control outputs
will return to normal PID control when the input is deactivated.
The Automatic program advance next segment function is a single-shot action that will advance the
currently running program by one step each time the event input is activated.
The Automatic program run/hold function is a combination of the automatic program run and program hold
functions. Upon first activation of the input, the currently loaded program will be started if not already running.
Deactivating the input will then cause the program to go into hold. The input must then be reactivated in order
for the program to resume operation.
NOTE: EZT-430i does not support the P41/B42 event input functions of “Off Mode” and “PID2 Select”.
These selections are not available through the EZT-430i configuration.
3.4.7 Low/High Setpoint Limits
The low and high set point limits are used to set the OEM minimum and maximum allowed set points that can
be entered for the loop control. The minimum and maximum set point range is equal to the input range for the
configured input type.
NOTE: The runtime application provides additional user low and high set point limits.These can be
adjusted to further limit the allowable set point range within the band set by the OEM low and high
set point limits.
3.4.8 Output 1 Function
The Output 1 Function is used to set the mode of operation for the primary control output of the loop control
board. The output can be set for heating or cooling on/off control, time proportioning or linear control. The
output selections are mutually exclusive, i.e., selecting one will turn off the others. Once the desired function
has been selected, press the “Done” button to set the output function for the loop control board and return to
the main Loop Setup screen.
NOTE: The output function must be set to match the type of output ordered on the loop control board.
Relay, triac and SSR output types are used for on/off and time proportioning control. The isolated
Vdc and mA output types are used for linear control.

EZT-430i
A.8 CSZ EZT-430i Configuring
The Heating on-off control function will turn on the output when the process value is below set point. When
the process value rises above the set point plus the on-off control hysteresis, the output will turn off.
The Heating time proportioning function uses the PID settings to cycle the output on and off according to
the percentage of heating required using the cycle time configured for output 1. For example, if the
percentage of output is 50% and the cycle time is 18 seconds, the output will repeat on/off cycles of 9
seconds each. If the output was only 25%, the output would be on for 4.5 seconds and off for 13.5 seconds
of the 18 second cycle time.
The Heating linear control function uses the PID settings to vary the Vdc or mA output from the minimum to
the maximum range of the output as a direct percentage of the heating output.
The Cooling on-off control function will turn on the output when the process value is above set point. When
the process value falls below the set point minus the on-off control hysteresis, the output will turn off.
The Cooling time proportioning function uses the PID settings to cycle the output on and off according to
the percentage of cooling required using the cycle time configured for output 1. For example, if the
percentage of output is 50% and the cycle time is 6 seconds, the output will repeat on/off cycles of 3 seconds
each. If the output was only 25%, the output would be on for 0.75 seconds and off for 5.25 seconds of the 6
second cycle time.
The Cooling linear control function uses the PID settings to vary the Vdc or mA output from the minimum to
the maximum range of the output as a direct percentage of the cooling output.
3.4.9 Output 1 Failure Transfer
The output 1 failure transfer setting is used to set the value the output should go to if there is an input failure,
i.e., sensor break. The output can be set for bumpless (-1) operation or a fixed percentage of output (from 0
to 100%) if proportioning or linear control is selected fro the output function. When failure transfer is set to
bumpless, the output will remain at its previous percentage of output until the input condition is corrected.
Note that this should not be used for extended periods of time as a runaway condition could occur if separate
limit devices are not installed to insure safe limits of operation by turning off the system should a limit be
exceeded.
If the output function is set for on-off control, the failure transfer can be set to have the output turn on (1) or
turn off (0) when a sensor break occurs.

EZT-430i
Configuring CSZ EZT-430i A.9
3.4.10 Output 1 ON-OFF Control Hysteresis
The output 1 on-off control hysteresis can be set when the output 1 function is set for heating or cooling on-off
control. It is used to eliminate rapid cycling of the control output by applying a safe-sided dead band to the
control output. When the control set point is exceeded, the output will turn on. The output will not turn off
until the process rises above (for heating) or falls below (for cooling) the set point by the hysteresis value.
The hysteresis can be set from a minimum of 0.1 to a maximum of 50.0 for units of degrees Centigrade and to
a maximum of 90.0 for units of degrees Fahrenheit and process units.
3.4.11 Output 1 Cycle Time
The output 1 cycle time can be set when the output 1 function is set for heating or cooling proportioning
control. The cycle time can be adjusted from 0.1 to 90.0 seconds. For cycle times less than 18 seconds, it is
highly recommended that the loop control board be ordered with the triac or SSR drive output for output 1 to
extend the life of the control output.
3.4.12 Output 1 Low/High Limit Values
The output low and high limit values can be set when the output 1 function is set for heating or cooling time
proportioning or linear control. They are used to set the minimum and maximum percentage of output that the
output will control to with a default of 0% for the low and 100% for the high. By raising the low limit or
reducing the high limit, the output will not exceed the output value regardless of the percent output required
by the PID values.
For example, raising the low limit to 5% with the output set for heating proportioning control, even if the
process value is over set point and the PID values are calling for a 0% output, the output will continue to cycle
on and off at 5% heating.
3.4.13 Output 2 Function
The Output 2 Function is used to set the mode of operation for the secondary control output of the loop
control board.
NOTE: The output function must be set to match the type of output ordered on the loop control board.
Relay, triac and SSR output types are used for proportioning control, alarm or event outputs. The
isolated Vdc and mA output types are used for linear control.

EZT-430i
A.10 CSZ EZT-430i Configuring
The output can be set for cooling time proportioning or linear control, as an alarm or an event. The output
selections are mutually exclusive, i.e., selecting one will turn off the others. Once the desired function has
been selected, press the “Done” button to set the output function for the loop control board and return to the
main Loop Setup screen.
The Cooling time proportioning function uses the PID settings to cycle the output on and off according to
the percentage of cooling required using the cycle time configured for output 1. For example, if the
percentage of output is 50% and the cycle time is 6 seconds, the output will repeat on/off cycles of 3 seconds
each. If the output was only 25%, the output would be on for 0.75 seconds and off for 5.25 seconds of the 6
second cycle time.
The Cooling linear control function uses the PID settings to vary the Vdc or mA output from the minimum to
the maximum range of the output as a direct percentage of the cooling output.
The Alarm output function activates the Alarm 1 configuration settings for assigning the type of alarm logic to
apply to output 2. When the alarm condition is active, the output will turn on.
The Reverse alarm output function activates the Alarm 1 configuration settings for assigning the type of
alarm logic to apply to output 2. The output will be normally “on” when this function is selected. When the
alarm condition is active, the output will turn off.
The Event output function allows the output to be turned on and off via an automatic program or manually
through the EZT-430i interface to act as a “soft” switch to turn system components on and off.
The DC power supply output function must be selected when the output type ordered for the loop control
board output 2 is a transmitter power supply.
3.4.14 Output 2 Failure Transfer
The output 2 failure transfer setting is used to set the value the output should go to if there is an input failure,
i.e., sensor break. The output can be set for bumpless (-1) operation or a fixed percentage of output (from 0
to 100%) if proportioning or linear control is selected for the output function. When failure transfer is set to
bumpless, the output will remain at its previous percentage of output until the input condition is corrected.
Note that this should not be used for extended periods of time as a runaway condition could occur if separate
limit devices are not installed to insure safe limits of operation by turning off the system should a limit be
exceeded.
If the output function is set as an alarm or event output, the failure transfer can be set to have the output turn
on (1) or turn off (0) when a sensor break occurs.
3.4.15 Output 2 Low/High Limit Values
The output low and high limit values can be set when the output 2 function is set for cooling time proportioning
or linear control. They are used to set the minimum and maximum percentage of output that the output will
control to with a default of 0% for the low and 100% for the high. By raising the low limit or reducing the high
limit, the output will not exceed the output value regardless of the percent output required by the PID values.
For example, by reducing the high limit to 80%, even if the process value is over set point and the PID values
are calling for 100% cooling, the output will only produce an 80% cooling output.

EZT-430i
Configuring CSZ EZT-430i A.11
3.4.16 Output 3 Function
The Output 3 Function selection allows the OEM to configure the loop control board output as an alarm or an
event. The output selections are mutually exclusive, i.e., selecting one will turn off the others. Once the
desired function has been selected, press the “Done” button to set the output function and return to the main
Loop Setup screen.
The Alarm output function activates the Alarm 2 configuration settings for assigning the type of alarm logic to
apply to output 3. When the alarm condition is active, the output will turn on.
The Reverse alarm output function activates the Alarm 2 configuration settings for assigning the type of
alarm logic to apply to output 3. The output will be normally “on” when this function is selected. When the
alarm condition is active, the output will turn off.
The Event output function allows the output to be turned on and off via an automatic program or manually
through the EZT-430i interface to act as a “soft” switch to turn system components on and off.
The DC power supply output function must be selected when the output type ordered for the loop control
board output 3 is a transmitter power supply.
3.4.17 Output 3 Failure Transfer
The output 3 failure transfer setting is used to set whether the output should be on (1) or off (0) when there is
an input failure, i.e., sensor break.
3.4.18 Output 4 Function
The Output 4 Function selection allows the OEM to configure the loop control board output as an alarm, event
or retransmit output. The output selections are mutually exclusive, i.e., selecting one will turn off the others.
Once the desired function has been selected, press the “Done” button to set the output function and return to
the main Loop Setup screen.
NOTE: The output function must be set to match the type of output ordered on the loop control board.
Relay, triac and SSR output types are used for alarm or event outputs. The retransmission Vdc and
mA output types are used for process value or set point retransmit.

EZT-430i
A.12 CSZ EZT-430i Configuring
The Alarm output function activates the Alarm 3 configuration settings for assigning the type of alarm logic to
apply to output 4. When the alarm condition is active, the output will turn on.
The Reverse alarm output function activates the Alarm 3 configuration settings for assigning the type of
alarm logic to apply to output 4. The output will be normally “on” when this function is selected. When the
alarm condition is active, the output will turn off.
The Event output function allows the output to be turned on and off via an automatic program or manually
through the EZT-430i interface to act as a “soft” switch to turn system components on and off.
The Retransmit process value and Retransmit setpoint value functions allow the loop control board output
to retransmit the current input value or set point to remote devices such as a chart recorder.
The DC power supply output function must be selected when the output type ordered for the loop control
board output 4 is a transmitter power supply.
3.4.19 Output 4 Failure Transfer
If the output function is set as an alarm or event output, the failure transfer can be set to have the output turn
on (1) or turn off (0) when a sensor break occurs.
3.4.20 Output 4 Low/High Limit Values
The output low and high limit values can be set when the output 4 function is set for retransmit process or
setpoint value. They are used to set the minimum and maximum percentage of the output range for the
installed output type. For example, the standard range of the mA output is 0-20mA. In order to use the
output as a 4-20mA output, the low limit value would need to be set to 20% (20% of 20ma = 4ma).
For the voltage output, the default range is 0-10Vdc. In order to achieve a 1-5Vdc output, the low limit would
have to be set to 10% (10% of 10Vdc is 1Vdc). The high limit would then have to be set to 50% in order cut
the output span in half to get a maximum output of 5Vdc.
3.4.21 Output 4 Retransmit Low/High Scale
The output retransmit low and high scale can be set when the output 4 function is set for retransmit process
or setpoint value. They are used to set the retransmit range of the output. The low scale value corresponds
with the output low limit value and the high scale value corresponds with the output high limit value.
Other manuals for EZT-430i
2
Table of contents
Other CSZ Controllers manuals