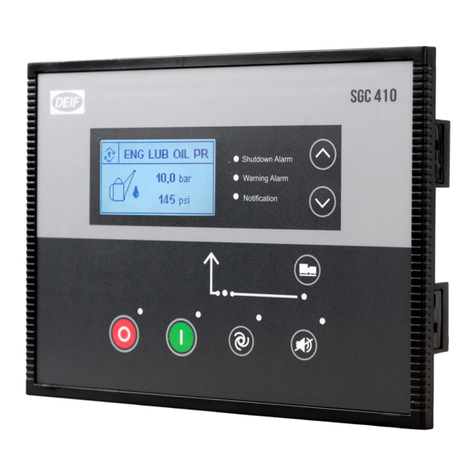
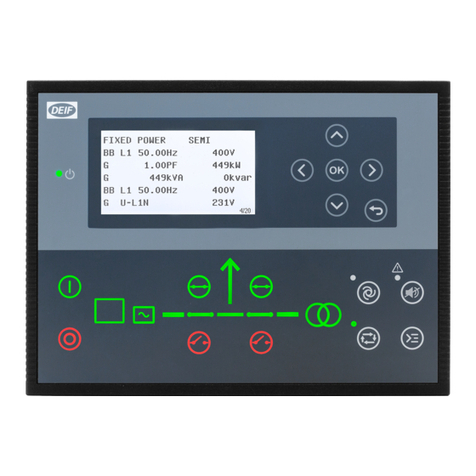
Deif SGC 420 Mk II User manual

SGC 420 Mk II
Single Genset Controller
User manual
4189341360A

1. Introduction
1.1 About...................................................................................................................................................................................................................................................5
1.1.1 Function overview ..............................................................................................................................................................................................................5
1.2 About the User manual........................................................................................................................................................................................................... 6
1.2.1 General purpose..................................................................................................................................................................................................................6
1.2.2 Software version................................................................................................................................................................................................................6
1.3 Warnings and safety.................................................................................................................................................................................................................6
1.4 Legal information........................................................................................................................................................................................................................7
2. Installation
2.1 Dimensions.....................................................................................................................................................................................................................................8
2.2 Tools and materials.................................................................................................................................................................................................................. 8
2.3 Mounting.........................................................................................................................................................................................................................................9
2.4 Terminals......................................................................................................................................................................................................................................10
3. Wiring
3.1 Typical wiring..............................................................................................................................................................................................................................13
3.2 Wiring guidelines - best practice for grounding..................................................................................................................................................14
3.3 AC connections........................................................................................................................................................................................................................15
3.3.1 I4 current..............................................................................................................................................................................................................................17
3.3.2 Current transformer ground...........................................................................................................................................................................17
3.3.3 Voltage measurement fuses.....................................................................................................................................................................................17
3.3.4 Analogue inputs...............................................................................................................................................................................................................18
3.4 DC connections.......................................................................................................................................................................................................................20
3.4.1 Digital inputs......................................................................................................................................................................................................................20
3.4.2 Digital outputs..................................................................................................................................................................................................................21
3.4.3 Power supply and start...............................................................................................................................................................................................21
3.5 Communications.....................................................................................................................................................................................................................22
3.5.1 CAN bus engine communication............................................................................................................................................................................ 22
3.5.2 Modbus ..............................................................................................................................................................................................................22
4. Smart Connect Mk II software
4.1 Download the smart connect software .................................................................................................................................................................... 24
4.2 USB connection.......................................................................................................................................................................................................................24
4.3 Smart connect interface....................................................................................................................................................................................................24
4.3.1 Top toolbar......................................................................................................................................................................................................................... 24
4.3.2 Left menu............................................................................................................................................................................................................................27
5. Display and menus
5.1 Display, buttons, and LEDs................................................................................................................................................................................................ 28
5.2 Mode and menu selection.................................................................................................................................................................................................29
5.3 Display settings.......................................................................................................................................................................................................................29
5.3.1 Display...................................................................................................................................................................................................................................29
5.3.2 Power save function.....................................................................................................................................................................................................29
5.3.3 Deep sleep.........................................................................................................................................................................................................................30
5.4 Monitoring menu.................................................................................................................................................................................................................... 30
5.4.1 Load histogram.................................................................................................................................................................................................................31
5.5 Configuration menu...............................................................................................................................................................................................................31
5.5.1 Auto exit config mode.................................................................................................................................................................................................. 32
5.6 Parameter list............................................................................................................................................................................................................................32
User manual 4189341360A EN Page 2 of 99

5.6.1 Module.................................................................................................................................................................................................................................. 32
5.6.2 Digital inputs.....................................................................................................................................................................................................................35
5.6.3 Digital outputs..................................................................................................................................................................................................................35
5.6.4 Analogue inputs..............................................................................................................................................................................................................35
5.6.5 Engine...................................................................................................................................................................................................................................36
5.6.6 Timers...................................................................................................................................................................................................................................42
5.6.7 Generator............................................................................................................................................................................................................................43
5.6.8 Mains.....................................................................................................................................................................................................................................48
5.6.9 ECU Configuration.........................................................................................................................................................................................................49
5.6.10 Maintenance....................................................................................................................................................................................................................51
5.6.11 Reset counters................................................................................................................................................................................................................51
5.6.12 Password ID.....................................................................................................................................................................................................................52
6. Modes and applications
6.1 Running mode............................................................................................................................................................................................................................53
6.2 AUTO mode................................................................................................................................................................................................................................53
6.2.1 Island......................................................................................................................................................................................................................................53
6.2.2 Engine drive......................................................................................................................................................................................................................54
6.2.3 Automatic mains failure ...............................................................................................................................................................................54
6.2.4 Site battery monitoring...............................................................................................................................................................................................56
6.2.5 Cyclic mode.......................................................................................................................................................................................................................58
6.2.6 Remote start/stop .........................................................................................................................................................................................................61
6.2.7 Auto exercise....................................................................................................................................................................................................................62
6.3 Manual mode.............................................................................................................................................................................................................................63
6.4 Test mode................................................................................................................................................................................................................................... 64
6.5 Deep sleep..................................................................................................................................................................................................................................64
7. General functions
7.1 Passwords.....................................................................................................................................................................................................................................65
7.2 AC measurement systems................................................................................................................................................................................................ 65
7.3 Nominal settings......................................................................................................................................................................................................................66
7.3.1 Default nominal settings..............................................................................................................................................................................................66
7.3.2 Alternative nominal settings.....................................................................................................................................................................................66
7.4 Breakers........................................................................................................................................................................................................................................67
7.4.1 Breaker types.....................................................................................................................................................................................................................67
7.4.2 Breaker spring load timer...........................................................................................................................................................................................67
7.5 Load calculations.................................................................................................................................................................................................................... 68
7.6 Alarms............................................................................................................................................................................................................................................68
7.7 M-Logic..........................................................................................................................................................................................................................................72
7.7.1 Analogue comparator.....................................................................................................................................................................................................72
7.8 Language......................................................................................................................................................................................................................................73
7.8.1 Language pack..................................................................................................................................................................................................................73
7.8.2 Smart connect language.............................................................................................................................................................................................73
8. Engine functions
8.1 Engine sequences...................................................................................................................................................................................................................75
8.2 Engine start functions......................................................................................................................................................................................................... 75
8.2.1 Start sequence.................................................................................................................................................................................................................75
8.3 Engine stop functions..........................................................................................................................................................................................................78
8.3.1 Stop sequence..................................................................................................................................................................................................................78
User manual 4189341360A EN Page 3 of 99

8.3.2 Stop sequence flowchart...........................................................................................................................................................................................79
8.4 Idle mode.....................................................................................................................................................................................................................................80
8.5 Coolant temperature control............................................................................................................................................................................................81
8.6 Engine pre-heater..................................................................................................................................................................................................................83
8.7 Other functions........................................................................................................................................................................................................................84
8.7.1 Maintenance timer..........................................................................................................................................................................................................84
8.7.2 Keyswitch............................................................................................................................................................................................................................84
9. Modbus
9.1 About...............................................................................................................................................................................................................................................86
9.2 Connection details.................................................................................................................................................................................................................86
9.3 RS-485 communication settings..................................................................................................................................................................................86
10. CAN bus engine communication
10.1 Overview.....................................................................................................................................................................................................................................87
10.1.1 About.....................................................................................................................................................................................................................................87
10.1.2 Supported engines.......................................................................................................................................................................................................87
10.1.3 Show engine values in the display......................................................................................................................................................................88
10.2 Configuration of the engine communication settings.................................................................................................................................. 88
10.3 Generic J1939........................................................................................................................................................................................................................90
11. Inputs and outputs
11.1 Digital inputs.............................................................................................................................................................................................................................92
11.2 Digital outputs.........................................................................................................................................................................................................................93
12. Troubleshooting
User manual 4189341360A EN Page 4 of 99

1. Introduction
1.1 About
The SGC 420 Mk II controller has all the functions needed to protect and control a genset, a genset breaker, and a mains
breaker. The values and alarms are shown on the LCD display screen, and operators can easily control the system from the
display.
You can use the SGC 420 Mk II to monitor the site battery and significantly reduce your fuel consumption. The controller
can also monitor shelter temperature, engine and alternator parameters, and the true RMS voltage and current.
Use the Smart Connect Mk II software to configure parameters, log data, add custom sensor curves, and supervise live
data. is also available from the software, which allows you to create functions using pre-defined events and
outputs. The analogue comparator can be used to create custom alarms and logic functions.
1.1.1 Function overview
This is an overview of the most important functions.
Monitoring
Use the SGC controller to monitor the site battery and the shelter temperature. The controller can also monitor the mains,
and engine and alternator parameters.
Inputs and outputs
• Configurable analogue inputs
• Differential input for site battery voltage
• Digital switch inputs
• DG alternator input
• Mains voltage input
• Input for fuel reference selection
• Digital outputs
Communication
• for Modbus communication
• CAN bus engine communication
• USB interface to PC
Operation modes
The SGC controller can operate in AUTO mode, manual mode, and test mode.
In AUTO mode, you can select these functions:
• Island
• Site battery monitoring
• Automatic mains failure
• Cyclic mode
• Remote start/stop
• Auto exercise
• Engine drive
Display and language functions
• Backlit display
• Supports many languages, including English, Spanish, and Chinese
User manual 4189341360A EN Page 5 of 99

• Configure and customise the controller display language, and the software language
• 2-level password protection
M-Logic
• Simple logic configuration tool
• Selectable input and output events
1.2 About the User manual
1.2.1 General purpose
This document includes important instructions that should be followed during installation and maintenance of the controller.
Only approved personnel can do the installation and maintenance work. The work must comply with all applicable state and
local electrical codes. Efficient and safe operation of the controller is only possible if equipment operation and configuration
is correct, and maintenance is completed.
1.2.2 Software version
The information in this document relates to software version:
Software Version
SGC Application software 13
1.3 Warnings and safety
Symbols for hazard statements
WARNING
This shows potentially dangerous situations.
If the guidelines are not followed, these situations could result in death, serious personal injury, and equipment
damage or destruction.
CAUTION
This shows low level risk situation.
If the guidelines are not followed, these situations could result in minor or moderate injury.
Symbols for general notes
NOTE This shows general information.
More information
This shows where you can find more information.
Safety during installation and operation
Installing and operating the equipment may require work with dangerous currents and voltages. The installation must only
be carried out by authorised personnel who understand the risks involved in working with electrical equipment.
User manual 4189341360A EN Page 6 of 99

DANGER!
Hazardous live currents and voltages
Do not touch any terminals, especially the AC measurement inputs and the relay terminals. Touching the
terminals could lead to injury or death.
Current transformer danger
DANGER!
Electrical shock and arc flash
Risk of burns and electrical shock from high voltage.
Short all current transformer secondaries before breaking any current transformer connections to the controller.
Factory settings
The controller is delivered pre-programmed from the factory with a set of default settings. These settings are based on
typical values and may not be correct for your system. You must therefore check all parameters before using the controller.
Electrostatic discharge
Electrostatic discharge can damage the controller terminals. You must protect the terminals from electrostatic discharge
during the installation. When the controller is installed and connected, these precautions are no longer necessary.
1.4 Legal information
Warranty
NOTICE
Warranty
The controller is not to be opened by unauthorised personnel. If opened anyway, the warranty will be lost.
Disclaimer
DEIF A/S reserves the right to change any of the contents of this document without prior notice.
The English version of this document always contains the most recent and up-to-date information about the product. DEIF
does not take responsibility for the accuracy of translations, and translations might not be updated at the same time as the
English document. If there is a discrepancy, the English version prevails.
Copyright
© Copyright DEIF A/S. All rights reserved.
User manual 4189341360A EN Page 7 of 99

2. Installation
2.1 Dimensions
Dimensions
Dimensions
Length: 233.0 mm in)
Height: 173.0 mm in)
Depth: 38.5 mm in)
Panel cut-out
Length: 219.0 mm in)
Height: 158.0 mm in)
Tolerance: ± 0.3 mm in)
2.2 Tools and materials
Tools required for mounting
Tool Used for
Safety equipment Personal protection, according to local standards and
requirements
Screwdriver, PH2 or 5 mm flat Tighten the fixing screw clamps, torque 0.15 N·m lb-in)
Wire stripper, pliers and cutters Prepare wiring and trim cable ties
User manual 4189341360A EN Page 8 of 99

NOTICE
Too much torque damages the screw clamps and/or controller housing
Do not use power tools during the installation.
Materials required for mounting and wiring
Materials Used for
Four screw clamps Mounting the controller in the front panel
Wires and connectors Wiring third party equipment to the controller terminals
Cable ties Securing wiring
2.3 Mounting
The controller is designed for mounting in the front panel.
Panel cutout:
• Length: 219 mm in)
• Height: 150 in) mm
• Tolerance: ± 0.3 mm in)
1. Insert the controller in the panel.
2. Insert the screw clamps:
*Click*
3.b.1 3.b.4
3.b.2 3.b.3
3. Tighten the screw clamps to 0.19 Nm. Do not tighten the clamps to more than 0.19 Nm.
User manual 4189341360A EN Page 9 of 99

2.4 Terminals
Terminal Text Description
1 GND Power ground
2 BATT + Power supply positive
3 DIG OUT A DC output - A A rating)
4 DIG OUT B DC output - B A rating)
5 DIG OUT C DC output - C A rating)
6 DIG OUT D DC output - D A rating)
7 DIG OUT E DC output - E A rating)
8 DIG OUT F DC output - F A rating)
9 DIG OUT G DC output - G A rating)
10 CHG ALT Input for charging alternator control
11 Al 1 Ω) / DI J Analogue input from list of sensors/digital input J
12 Al 2 Ω) / DI K Analogue input from list of sensors/digital input K
13 Al 3 Ω) / DI L Analogue input from list of sensors/digital input L
14 Al 4 Ω) / DI M Analogue input from list of sensors/digital input M
15 Al 5 Ω) / DI N Analogue input from list of sensors/Digital input N
16 SENSOR COMMON Sensor common point
17 RESERVED -
18 RESERVED -
19 RESERVED -
20 RESERVED -
21 Al 6 (mA / / DI O Analogue input from list of sensors/digital input O
22 MPU Input from engine speed sensor (inductive)
User manual 4189341360A EN Page 10 of 99

Terminal Text Description
23 Al 7 (mA / / DI P Analogue input from list of sensors/Digital input P
24 BTS BATTERY ± 60 V DC Input 1 from site battery
25 BTS BATTERY ± 60 V DC Input 2 from site battery
26 RESERVED -
27 RESERVED -
28 RESERVED -
29 RESERVED -
30 RS 485 GND GND
31 RS 485 A A
32 RS 485 B B
33 DIG IN A Input from switch A
34 DIG IN B Input from switch B
35 DIG IN C Input from switch C
36 DIG IN D Input from switch D
37 DIG IN E Input from switch E
38 DIG IN F Input from switch F
39 DIG IN G Input from switch G
40 DIG IN H Input from switch H
41 DIG IN I Input from switch I
42 Current CT 1 S1 CT input 1 from phase L1 (-/1A or
43 Current CT 1 S2 CT input 2 from phase L1 (-/1A or
44 Current CT 2 S1 CT input 1 from phase L2 (-/1A or
45 Current CT 2 S2 CT input 2 from phase L2 (-/1A or
46 Current CT 3 S1 CT input 1 from phase L3 (-/1A or
47 Current CT 3 S2 CT input 2 from phase L3 (-/1A or
48 Current CT 4 S1 CT input 1 from earth leakage (-/1A or
49 Current CT 4 S2 CT input 2 from earth leakage (-/1A or
50 Mains Voltage, CAT III, N Voltage input from mains neutral V /
V
51 Mains Voltage, CAT III, L3 Voltage input from mains phase L3 V /
V
52 Mains Voltage, CAT III, L2 Voltage input from mains phase L2 V /
V
53 Mains Voltage, CAT III, L1 Voltage input from mains phase L1 V /
V
54 Genset Voltage, CAT III, N Voltage input from genset neutral V /
V
55 Genset Voltage, CAT III, L3 Voltage input from genset phase L3 V /
V
56 Genset Voltage, CAT III, L2 Voltage input from genset phase L2 V /
V
User manual 4189341360A EN Page 11 of 99

Terminal Text Description
57 Genset Voltage, CAT III, L1 Voltage input from genset phase L1 V /
V
58 CAN L CAN Low
59 CAN H CAN High
60 Reserved -
61 Reserved -
User manual 4189341360A EN Page 12 of 99

3. Wiring
3.1 Typical wiring
NOTE The S2 terminals are internally short.
NOTE The wiring diagram is an example. Use the wiring diagram for the application during installation.
Fuses
• 2 A DC max. time-delay fuse/MCB, c-curve
• F4, 2 A AC max. time-delay fuse/MCB, c-curve.
Relays
• Protect the breaker relays for the genset and mains against 4 kV surges as described in the IEC standard.
• Protect relay cards used with the controller against reverse battery voltages.
Communication
Communication ports for CAN (terminals 58 and and (terminals 31 and have built-in 120 Ω termination
resistors.
Digital outputs
If a digital output is connected to a relay, the relay must include freewheeling diodes.
User manual 4189341360A EN Page 13 of 99

3.2 Wiring guidelines - best practice for grounding
It is important to follow these wiring guidelines to get:
• Reliable readings from the sensors.
• Precise measurement of AC voltage and current.
• Best protection from lightning and other earth faults.
Example: Typical grounding setup
1. Terminal 16 (sensor common point) must be connected to a solidly grounded point on the engine, for example the
engine frame. The potential difference to terminal 1 must be less than V.
2. Do not connect the starter motor relay and the stop solenoid directly to the output terminals on the controller. You can
configure each output as run coil and crank.
3. Connect the shield to the engine ECU as described by the engine manufacturer.
4. Current transformers.
5. Power supply (terminal must be connected to (in this example, the engine).
6. Connect the digital inputs to ground to active the negative switching.
7. The 4th current is placed on the line from the generator output PE.
8. Connect PE of the generator directly to the plant earth. This prevents short circuits and high energy transients from the
grid side to cause severe damage to the system.
User manual 4189341360A EN Page 14 of 99

3.3 AC connections
Three-phase application (4 wires)
G
L1
L1
Three-phase application (3 wires)
G
L1
L1
NOTE When three-phase distribution systems are used, the neutral line is only necessary if it is a three-phase +
neutral system. If the distribution system is a three-phase system without neutral, then do not connect the
terminals 50 and 54.
Two-phase application L1/L2 (3 wires)
G
L1
L1
User manual 4189341360A EN Page 15 of 99

Two-phase application L1/L3 (3 wires)
G
Single-phase application (2 wires)
G
54
55
56
57
50
51
52
53
Split phase application L1/L2 (3 wires)
G
L1
L1
User manual 4189341360A EN Page 16 of 99

Split phase application L1/L3 (3 wires)
G
NOTE F4, 2 A AC max. fuse/MCB, c-curve
3.3.1 I4 current
The L4 terminals can be used to measure AC current.
Earth current
44
45
46
47
48
49
L1
L2
L3
N
L4 (s1)
L4 (s2)
L1
L2
L3
N
42
43
G
P2
P1
s2
s1
3.3.2 Current transformer (CT) ground
Use one of these methods for the CT ground connections:
1. The S2 terminals are not grounded. The controller detects the current accurately.
2. The S2 terminals are grounded at the GND terminal (terminal
3. The S2 terminals are grounded but not at the GND terminal. This means that the battery ground terminal) and the
CT ground are not the same. The maximum allowable offset between the two ground connections is V.
NOTE Use the recommended phase sequence when you connect the current transformer
3.3.3 Voltage measurement fuses
If the wires/cables must be protected with fuses, use max. 2 A time-delay fuses, dependent on the wires/cables to be
protected.
User manual 4189341360A EN Page 17 of 99

3.3.4 Analogue inputs
Analogue input
All sensors must be connected to the Engine GND.
Analogue tacho input (MPU)
The magnetic pickup is an inductive sensor installed on the engine flywheel, and used to detect the engine speed.
The output of the MPU is a sine-wave signal.
User manual 4189341360A EN Page 18 of 99

Resistive sensor inputs
Wiring for the sensor common point for analogue inputs 1 to 5 (terminals 11 to
You must connect the terminal 16 to a solidly sound point on the engine, for example the engine frame. This point on
the engine block is the common reference point for all analogue sensors. Do not share the cable used for this connection
with other electrical connections.
Wiring for analogue input 2 (terminal when the input is used as a fuel level sensor.
User manual 4189341360A EN Page 19 of 99

Analogue inputs used as digital inputs
Analogue inputs can be used as digital inputs when wired as shown.
Settings:
• Polarity: Close to activate
• SW state: Not activated
• Logic status: Low
3.4 DC connections
3.4.1 Digital inputs
When wiring is more than 10 m, a 4007 diode must be connected on each input.
User manual 4189341360A EN Page 20 of 99
Table of contents
Other Deif Controllers manuals
Deif
Deif CGC 400 User manual

Deif
Deif AGC-4 User manual
Deif
Deif GPC-3 Hydro User manual
Deif
Deif ASC-4 Instruction Manual
Deif
Deif Multi-line 2 User manual
Deif
Deif CGC 200 Installation and operation manual

Deif
Deif AWC 500 Quick start guide
Deif
Deif AGC 200 Series User manual
Deif
Deif GC-1F User manual

Deif
Deif GPC-3 Hydro User manual

