manuals.online logo
Brands
  1. Home
  2. •
  3. Brands
  4. •
  5. CUES
  6. •
  7. Analytical Instrument
  8. •
  9. CUES K2 Instruction Manual

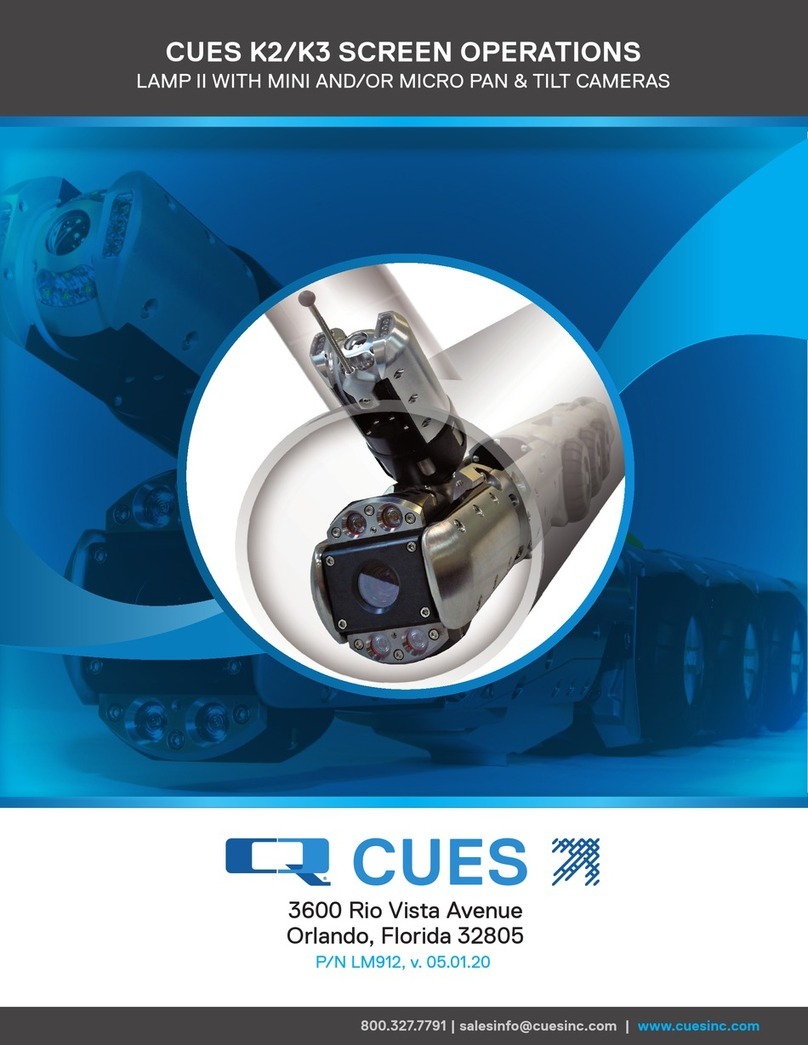
CUES K2 Instruction Manual

CUES 3600 Rio Vista Avenue Orlando, FL 32805 •p 407.849.0190 • f 407.425.1569 •www.cuesinc.com
P/N CK912 - v051020
CUES K/K SCREEN OPERATIONS: HELP MENU
Instructions for using the K2/K3 system are included in the HELP menu, which is accessible by pressing the F1
button at any time. The K2/K3 HELP system includes all of the information in Chapter 2 of the printed user manual.
KEYS FOR ALL SCREENS
KEYS FOR ALL SET UP SCREENS KEYS FOR RUN-TIME SCREEN
KEYS FOR RUN-TIME SCREEN
========== CUES HELP INDEX ==========
1. KEYS: ALL SCREENS?
ALL SET UP SCREENS?
RUN-TIME SCREEN1?
RUN-TIME SCREEN2?
RUN_TIME SCREEN3?
FREE-FORMAT SCREEN?
FREE FORMAT RUN-TIME SCREEN?
TEST CONTROLLER HELP SCREEN?
LAMPII HELP SCREEN?
GXP HELP SCREEN?
2. FIELD ENTRY HELP SCREEN?
<ENTER> to all screens
STATUS LINE - displays the action to be
performed in each eld.
Press F1 at any time to
access the HELP screen.
CUES HELP INDEX
===== CUES KEYS FOR ALL SCREENS =====
<F1> ------------- TO HELP INDEX SCREEN
<CTRL><F2> ------- CLEAR COMMENT FIELDS
<CTRL><F4> ------- CLEAR FREE FORMAT SCN
<CTRL><F5> ------- CLEAR INSP. SETUP SCN
<CTRL><F6> ------- CLEAR ALARM
<CTRL><F7> ------- TOGGLE MUTE/UNMUTE
<CTRL><F10> ------ DEFAULT COMMENT SET
<CTRL><ALT><t> --- DISABLE/ENABLE TITLER
<CTRL><ALT><s> --- DISABLE/ENABLE STATUS
<CTL><ALT><UPARROW> SPEAKER VOLUME UP
<CTL><ALT><DNARROW> SPEAKER VOLUME DOWN
<CTRL><ALT><+>---- LOG SCREEN
<ESCAPE> previous screen
== CUES KEYS FOR ALL SET UP SCREENS =
<ENTER> - SELECT ACTION/HILIGHT NEXT FLD
<UPARROW> --- PREV SELECTION/FIELD
<DOWNARROW> - NEXT SELECTION/FIELD
<LEFTARROW> - MOVE CURSOR LEFT
<RIGHTARROW> MOVE CURSOR RIGHT
<DELETE> ---- DELETE AT CURSOR
<BACKSPACE> - DELETE LEFT OF CURSOR
<CTRL><DELETE> - CLEAR ENTRY
<TAB> ------- HIGHLIGHT NEXT FIELD
<SHIFT><TAB> HIGHLIGHT PREVIOUS FIELD
<SPACEBAR> -- TOGGLE TWO SELECTIONS
<CTL><ALT><INSERT> - RESTORE SCREEN
<INSERT> - TOGGLE OVERWRITE/INSERT
<ESCAPE> previous screen
=== CUES KEYS FOR RUN-TIME SCREEN1 ==
<SHIFT><F1> ---- TOGGLE COMMENTS ON/OFF
<SHIFT><F2> ---- TOGGLE OBSERVATN ON/OFF
<SHIFT><F3> ---- TOGGLE INCLINE ON/OFF
<SHIFT><F4> ---- TOGGLE ARROW ON/OFF
<SHIFT><F5> ---- TOGGLE TITLE ON/OFF
<SHIFT><F6> ---- TOGGLE DATE ON/OFF
<SHIFT><F7> ---- TOGGLE TIME ON/OFF
<SHIFT><F8> ---- TOGGLE MANHOLES ON/OFF
<SHIFT><F9> ---- TOGGLE PRESSURE ON/OFF
<SHIFT><F10> --- TOGGLE DISTANCE ON/OFF
<F11> ---------- TOGGLE TRANS SPD ON/OFF
<CTRL><F11> ---- TOGGLE DIRECTION ON/OFF
<CTRL><F12> ---- TOGGLE LENGTH ON/OFF
ARROW-LF/RT ---- MOVE FIELDS/ARROW LF/RT
ARROW-UP/DN ---- MOVE FIELDS/ARROW UP/DN
<ESCAPE> previous menu
=== CUES KEYS FOR RUN-TIME SCREEN2 ==
<F1> --- TO/FROM HELP SCREENS
<F2> --- TO/FROM EQUIPMENT CONFIGURATION
<F3> --- TO/FROM FREE-FORMAT SCREEN
<F4> --- TO/FROM FREE-FORMAT W/RUN SCRN
<F5> --- TO/FROM INSPECTION SETUP SCREEN
<F6> --- To/FROM DISPLAY SETUP SCREEN
<F7> --- TO/FROM DIAGNOSTICS MENU SCREEN
<F8> --- TO/FROM REMINDER SETUP SCREEN
<F9> --- TO/FROM COMMENT DEFINITION SCRN
<F10> -- TO CONFIGURE REELS SCREEN
<CTRL><i>- ZERO INCLINATION
<CTRL><p>- ZERO PRESSURE
<CTRL>-<d>/<z>- PRESET/ZERO DISTANCE
<SHIFT><HOME> HOME FIELDS
<SHIFT><INSERT>TOGGLE ALL FIELDS ON/OFF
<ESCAPE> previous menu
KEYS FOR RUN-TIME SCREEN
=== CUES KEYS FOR RUN-TIME SCREEN3 ==
<CTRL><f> ----- TOGGLE FONT RENDERINGS
There are two ways to input observations
either <ENTER> and
use arrow keys to see stored comment elds,
or input a code
and it will display the comment. After
either,<ENTER>will save
the observation. These work for FreeFormat
w/RunTime also.
<ENTER> -------- TO ENTER COMMENTS MODE
ARROW UP/DN - DISP. PREV/NEXT COMMENT
<ENTER> ----- SAVE THIS COMMENT
<A-Z> ---------- INPUT CODE/GET COMMENT
<ENTER> ----- SAVE THIS COMMENT
<ESCAPE> previous menu
CUES 3600 Rio Vista Avenue Orlando, FL 32805 •p 407.849.0190 • f 407.425.1569 •www.cuesinc.com
P/N CK912 - v051020
CUES K/K SCREEN OPERATIONS: HELP MENU
Instructions for using the K2/K3 system are included in the HELP menu, which is accessible by pressing the F1
button at any time. The K2/K3 HELP system includes all of the information in Chapter 2 of the printed user manual.
KEYS FOR FREE-FORMAT SCREEN
== CUES KEYS FOR FREE-FORMAT SCREEN =
<ENTER> ----- CARRIAGE RETURN/LINE FEED
<UPARROW> --- MOVE CURSOR UP
<DOWNARROW> - MOVE CURSOR DOWN
<LEFTARROW> - MOVE CURSOR LEFT
<RIGHTARROW> MOVE CURSOR RIGHT
<DELETE> ---- DELETE SELECTION AT CURSOR
<BACKSPACE> - DELETE LEFT OF CURSOR
<TAB> ------- SPACE TO NEXT TAB STOP
<CTRL><b> --- BEGIN TEXT BLOCK SELECTION
<CTRL><c> --- COPY SELECTED TEXT BLOCK
<CTRL><x> --- CUT SELECTED TEXT BLOCK
<CTRL><v> --- PASTE SAVED TEXT BLOCK
<CTRL><f> --- TOGGLE FONT RENDERINGS
<ESCAPE> previous menu
KEYS FOR FREE-FORMAT WITH RUN SCREEN
=== CUES FREE FORMAT W/RUN SCREEN ===
<CTRL><f> ---- TOGGLE FONT RENDERINGS
<UPARROW> ---- MOVE RUN-TIME GROUP UP
<DOWNARROW> -- MOVE RUN-TIME GROUP DOWN
<LEFTARROW> -- MOVE RUN-TIME GROUP LEFT
<RIGHTARROW> - MOVE RUN-TIME GROUP RIGHT
<SHIFT><F2> -- TOGGLE OBSERVATION ON/OFF
<SHIFT><F4> -- TOGGLE ARROW ON/OFF
<ESCAPE> previous menu
CUES TEST CONTROLLER HELP
===== CUES TEST CONTROLLER HELP =====
The following hot keys are only valid
on the Test Controller screen.
<CTRL><ALT><j>- SAVE XPORT JOYSTICK OFFS
• Press <CTRL><ALT><j> to save the values
 ofthegamepadtransporteranalogscks.The
 negavesofthesevalueswillthenbeaddedto
 allgamepadtransporteranalogsckvaluesunl
 thenextpowercycleofthesystem.Thisfeature
 istobeusedonlyifthegamepad’sanalogscks
 areexhibing‘creep’,wherebywhenatrest,there
 valuesarenotcloseenoughtozero.
CUES GXP HELP
=========== CUES GXP HELP ===========
<CTRL><f> ------ TOGGLE FONT RENDERINGS
<ALT><CTRL><g> - TO/FROM EQUIPM CONFGRTN
<F1> --- HELP
<ESC> --- MAIN MENU
• Press<CTRL><f>tocyclethroughthefont 
 renderings.Therearefourselecons:EBW,
 HBW,WWB,BBW.Thethreeleersare  
 abbreviaonsforthebackgroundcolor,outline
 colorandcharactercolorusedforthetext 
 thatisoverlaidonthevideodisplay.Erefersto 
 external,meaningthatthevideoispassedthrough
 (transparent).Wreferstowhite,Breferstoblack 
 andHreferstohalf-tone.
• Press <ALT><CTRL><g> to move to/from the
 EquipmentConguraonscreen.
• Press<F1>todisplaytheGXPHelpscreen.
• Press<ESC>tomovetothemainmenu.
CUES LAMP II HELP
=========== CUES LAMPII HELP ===========
The following hot keys are only valid
when the LAMPII Transporter/Camera are
being used.
<ALT><F10> ----- TOGGLE LATERAL DISTANCE
<ALT><CTRL><v> - TOGGLE VIEW MAIN/LAMPII
<ALT><d> ------- PRESET LATERAL DISTANCE
<ALT><z> ------- ZERO LATERAL DISTANCE
The following only work with the Micro
Pan & Tilt
<SHUTTER>+<DPAD +/-> Raise/Lower oods
<IRIS>+<DPAD +/-> Raise/Lower spots
<ESCAPE> previous menu
CUES CUTTER HELP
========= CUES KEYS FOR CUTTER ========
Left joystick vert : UP/DN CUT
Right joystick horz : CCW/CW CUT
Right joystick vert:FWD/REV CUT DRV
IRIS+DPAD +/- : Raise/lower UP/DN CUT
SHUTTR+DPAD +/- : Raise/lower CCW CUT
FOCUS+DPAD +/- : Raise/lower FWD/REV CUT
LIGHTS+DPAD +/- :Raise/lower ood lgts
LIGHTS+DPAD 0/1 : Raise/lower spot lgts
DIAGNOSTICS+DPAD +/- : Pan up/down
ZOOM+DPAD +/- Focus near/far
Right joystick button : Pan home
VIEW : Toggle camera view
LIFT : Toggle btwen cut/drive on FWD/REV
F11 : Toggle display of cut speed %
<ESCAPE> previous menu
CUES 3600 Rio Vista Avenue Orlando, FL 32805 •p 407.849.0190 • f 407.425.1569 •www.cuesinc.com
P/N CK912 - v051020
CUES LOGITECH GAME PAD FUNCTIONS
COLOR CODES
BLACK -
Works in standard mainline mode.
RED - works when using a
CURRAHEE CUTTER.
PRESS TO TOGGLE BETWEEN CUTTER
CAMERA AND DRIVE CAMERA
TURNS THE FUNCTION ON
TURNS THE FUNCTION OFF
MINUS BUTTON - USE SIMULTANEOUSLY
WITH DIFFERENT BUTTONS TO PERFORM
VARIOUS FUNCTIONS
PLUS BUTTON - USE SIMULTANEOUSLY
WITH DIFFERENT BUTTONS TO PERFORM
VARIOUS FUNCTIONS
PRESS IN COMBINATION WITH THE DPAD + TO RAISE THE CAMERA LIFT
PRESS IN COMBINATION WITH THE DPAD - TO LOWER THE CAMERA LIFT
PRESS IN COMBINATION WITH THE DPAD 1 TO SAVE THE CRUISE
CONTROL VOLTAGES
PRESS TO TOGGLE BETWEEN DRIVING AND CUTTING MODE
USE THE JOYSTICK TO MOVE THE TRANSPORTER.
PRESS TO STOP THE TRANSPORTER.
UP/DOWN MOVEMENT WILL CONTROL
THE UP/DOWN CUTTER.
UP/DOWN MOVEMENT WILL
CONTROL THE FORWARD/REVERSE CUTTER/
DRIVE. LEFT/RIGHT MOVEMENT WILL CONTROL
THE COUNTERCLOCKWISE/CLOCKWISE CUTTER.
CURRAHEE CUTTER
CUES 3600 Rio Vista Avenue Orlando, FL 32805 •p 407.849.0190 • f 407.425.1569 •www.cuesinc.com
P/N CK912 - v051020
CUES LOGITECH GAME PAD FUNCTIONS
COLOR CODES
BLACK -
Works in standard mainline mode.
RED - works when using a
CURRAHEE CUTTER.
USE THE JOYSTICK TO MOVE THE CAMERA.
PRESS TO MOVE THE CAMERA TO THE
HOME POSITION.
CURRAHEE CUTTER
CURRAHEE CUTTER: WHEN COMBINED
WITH THE DPAD ‘+’ OR ’‘ INCREASE/
DECREASE THE UP/DOWN CUTTING
SPEED WHEN IN CUTTING MODE.
CURRAHEE CUTTER: WHEN COMBINED
WITH THE DPAD ‘+’ OR ‘’ INCREASE/
DECREASE THE CCW/CW CUTTING
SPEED WHEN IN CUTTING MODE.
WHEN MOVING THE JOYSTICKS, NO VOLTAGE WILL BE APPLIED UNTIL THE OPERATOR HAS
MOVED THE JOYSTICK APPROXIMATELY 20% AWAY FROM THE CENTER. THIS MAKES IT SO
THAT THE TRANSPORTER DOESN’T HAVE ANY VOLTAGE APPLIED UNTIL THE OPERATOR
ACTUALLY WANTS TO MOVE THE TRANSPORTER.
CURRAHEE CUTTER: WHEN
COMBINED WITH THE DPAD ‘+’ OR
‘‘ ADJUST THE CAMERA’S FOCUS
NEAR/FAR.
CURRAHEE CUTTER: WHEN
COMBINED WITH THE
DPAD ‘+’ OR ‘’ INCREASE/
DECREASE THE FWD/REV
CUTTING SPEED WHEN IN
CUTTING MODE
CUES 3600 Rio Vista Avenue Orlando, FL 32805 •p 407.849.0190 • f 407.425.1569 •www.cuesinc.com
P/N CK912 - v051020
WHILE PRESSING THE LIGHTS BUTTON,
SIMULTANEOUSLY PRESS THE ‘+’ or ‘-‘
BUTTON ON THE DPAD TO RAISE OR
LOWER THE FLOOD LIGHTS.
WHILE PRESSING THE LIGHTS BUTTON,
SIMULTANEOUSLY PRESS THE ‘I’ or ‘0‘
BUTTON ON THE DPAD TO RAISE OR
LOWER THE SPOT LIGHTS.
PRESS TO DISPLAY THE INTERNAL DIAGNOSTICS SYSTEM.
CURRAHEE CUTTER: WHEN COMBINED WITH DPAD ‘0’
AND THE IRIS BUTTON, TOGGLE THE AIR ON/OFF. WHEN
COMBINED WITH DPAD ‘1’ AND THE IRIS BUTTON, TOGGLE
THE WATER ON/OFF.
CURRAHEE CUTTER: WHEN COMBINED WITH DPAD ‘+/‘,
PAN UP/DOWN.
COLOR CODES
BLACK -
Works in standard mainline mode.
RED - works when using a
CURRAHEE CUTTER.
CUES LOGITECH GAME PAD FUNCTIONS
CURRAHEE CUTTER
WHILE PRESSING THE LIGHTS BUTTON,
SIMULTANEOUSLY PRESS THE PLUS OR
MINUS BUTTON TO ILLUMINATE THE
EXTERNAL LIGHTS BRIGHTER OR DIMMER
PRESS THE LIGHTS AND ON / OFF
BUTTONS TO TURN THE INTERNAL LIGHTS
ON/OFF
WHILE PRESSING THE REEL BUTTON, SIMULTANEOUSLY PRESS THE PLUS OR MINUS
BUTTON TO MOVE THE REEL FASTER / SLOWER SPEED
PRESS THE REEL AND “ON” BUTTONS SIMULTANEOUSLY FOR PAYOUT MODE
PRESS THE REEL AND “OFF” BUTTONS SIMULTANEOUSLY FOR RETRIEVE MODE
PRESS IN COMBINATION WITH THE DPAD 1 TO TURN CRUISE CONTROL ON
PRESS IN COMBINATION WITH THE DPAD 0 TO TURN CRUISE CONTROL OFF
PRESS IN COMBINATTION WITH THE DPAD + TO RAISE THE CRUISE CONTROL VOLTAGE
PRESS IN COMBINATION WITH THE DPAD - TO LOWER THE CRUISE CONTROL VOLTAGE
CUES 3600 Rio Vista Avenue Orlando, FL 32805 •p 407.849.0190 • f 407.425.1569 •www.cuesinc.com
P/N CK912 - v051020
2
XBOX  CONTROLLER FUNCTIONS
The Xbox 360 Controller functions are identical to those of the Logitech Gamepad, aside from the exceptions shown below.
1
2
. ‘GUIDE’ button: To turn the controller on, press and hold down this button until the ring of LEDs around it begin
ashing. The ashing will stop, and the LED in the top-left quadrant will remain lit when the controller is connected
to the system.
. The two‘CONNECT’ buttons (one on the wireless receiver and one on the controller): To connect the controller to
the system,perform the following steps.NOTE: This is only necessary if the ring of LEDs around the ‘GUIDE’
button are ashing continuously.
a. Make sure that the wireless receiver is plugged into a USB port on the K/K and its LED is lit.
b. Press and hold down the ‘CONNECT’ button on the wireless receiver until its LED begins ashing.
c. Press and hold down the ‘CONNECT’ button on the controller until the ring of LEDs around the ‘GUIDE’
button start spinning. The controller is connected to the system when the LEDs stop spinning, ash a few
times, and the one in the top-left quadrant remains lit.
Several wired and wireless controllers will work with the system and may be available in a critical situation from a local electronics
vendor, such as a Radio Shack, Best Buy or Walmart. However, only controllers purchased through CUES will have labels and
are guaranteed to have been tested with the system.
The controllers that will work with the K/K:
• Wired Logitech Dual-Action
• Wired Logitech RumblePad 
• Wired Microsoft Xbox 
• Wireless Logitech RumblePad 
• Wireless Microsoft Xbox 
Note that this also gives the priority that controllers are given, in the event that more than one is connected to the K/K at
a time. (It’s common for customers to have both a wireless and a wired controller available. If the batteries go dead on the
wireless, the wired controller can still control the transporter, camera and lights). The system will read the highest priority
controller if more than one is connected at a time. Every two seconds the system detects if any controller has been connected
or disconnected and determines which controller should be read from.
• LogitechWirelessF710
• LogitechWiredF310

This manual suits for next models

1

Other CUES Analytical Instrument manuals

CUES PICS Manual

CUES

CUES PICS Manual

CUES K2 Instruction Manual

CUES

CUES K2 Instruction Manual

CUES Solid FX User manual

CUES

CUES Solid FX User manual

CUES QZ III User manual

CUES

CUES QZ III User manual

CUES flexitrax C550c User manual

CUES

CUES flexitrax C550c User manual

Popular Analytical Instrument manuals by other brands

GE Mentor Visual iQ user manual

GE

GE Mentor Visual iQ user manual

Teledyne GB300 quick start guide

Teledyne

Teledyne GB300 quick start guide

DeWalt DW055E user manual

DeWalt

DeWalt DW055E user manual

ANALOX O2 Portable user manual

ANALOX

ANALOX O2 Portable user manual

Idis DV-3100 quick guide

Idis

Idis DV-3100 quick guide

Hanna Instruments HI 84430 instruction manual

Hanna Instruments

Hanna Instruments HI 84430 instruction manual

Gradient Lens Hawkeye Pro MicroFlex quick start guide

Gradient Lens

Gradient Lens Hawkeye Pro MicroFlex quick start guide

Klang Klangfinder HS8+ operating instructions

Klang

Klang Klangfinder HS8+ operating instructions

Ferret SWEEPS CFWF50S Quick Start Guide and FAQs

Ferret

Ferret SWEEPS CFWF50S Quick Start Guide and FAQs

Trico FM-6 user manual

Trico

Trico FM-6 user manual

Snap-On BK6500 user manual

Snap-On

Snap-On BK6500 user manual

Leica DISTO D810 touch manual

Leica

Leica DISTO D810 touch manual

Omron F300 installation manual

Omron

Omron F300 installation manual

Leica DISTO E7500 manual

Leica

Leica DISTO E7500 manual

Agilent Technologies 89410A Installation and Verification

Agilent Technologies

Agilent Technologies 89410A Installation and Verification

Fort Visio Prime operating instructions

Fort

Fort Visio Prime operating instructions

Vigor Equipment V7500/2 operating instructions

Vigor Equipment

Vigor Equipment V7500/2 operating instructions

Sanyipace 9300D user manual

Sanyipace

Sanyipace 9300D user manual

manuals.online logo
manuals.online logoBrands
  • About & Mission
  • Contact us
  • Privacy Policy
  • Terms and Conditions

Copyright 2025 Manuals.Online. All Rights Reserved.